
When searching for energy-efficient replacements for older halogen spotlights, cabinet lights, or decorative fixtures, you will frequently encounter the term “2-pin” or “2p light bulbs” on product packaging and retail listings. This terminology simply describes a bulb that connects to its electrical socket using two metal prongs rather than a traditional screw thread.
While the concept is straightforward, finding a direct replacement requires careful attention because “2-pin” is not a single, universal size. Sockets vary by pin thickness, spacing, and operating voltage. Installing the wrong type can damage your fixture, trigger electrical faults, or result in a bulb that physically cannot fit into the socket. Understanding these differences is the first step toward a successful lighting upgrade.
Understanding 2p Light Bulbs and What '2-Pin' Actually Means
In the lighting industry, 2p light bulbs are technically classified as bi-pin bases. The two metal prongs extending from the bottom of the bulb serve a dual purpose: they secure the bulb mechanically within the socket and establish the electrical contact necessary to complete the circuit. This design is highly efficient for compact fixtures where a bulky screw base would take up too much space.
Products mentioned in this guide
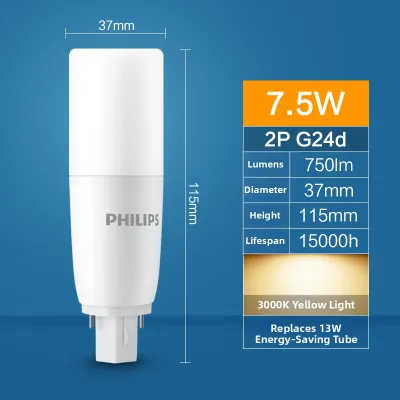
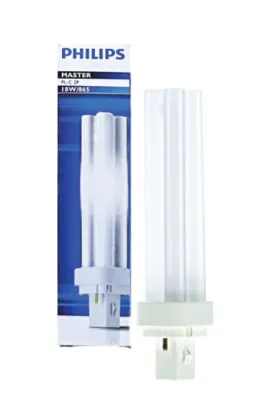
Prices are valid at publication and may change. Please refer to the product page for the latest price.
Bi-pin bases generally fall into two physical categories based on how they secure into the socket. The first category consists of straight, needle-like pins that slide directly into the socket with a simple push-in motion. The second category features thicker pins with wider, button-like tips at the ends. These require a twist-and-lock motion to secure them safely in place, preventing the bulb from vibrating loose over time.
Because pin spacing and shape differ significantly across various light fixtures, you cannot rely on visual estimation alone. A difference of just one millimeter in pin spacing means a bulb will not fit into your fixture. Identifying the precise bi-pin sub-type is essential before purchasing any replacement LED bulb.
Common 2-Pin Base Types and Their Applications
To simplify identification, manufacturers use standardized codes established by international lighting bodies. The letter “G” in these codes historically pointed to the glass material used in early bulb bases, but today it simply denotes a pin-style base. The number that follows the letter indicates the exact distance between the centers of the two pins, measured in millimeters.

Low Voltage Push-In Bases (G4, GY6.35)
Small decorative fixtures and accent lighting often utilize low-voltage push-in bases, with the G4 and GY6.35 being the most common.
- G4 Bases: These feature very thin, needle-like pins spaced exactly 4 millimeters apart. They are highly compact and typically found in small halogen capsules.
- GY6.35 Bases: These look similar to G4 bases but have slightly thicker pins spaced 6.35 millimeters apart.
Because of their small size, these bulbs almost always operate on a low-voltage system, typically 12V. They cannot be connected directly to Singapore’s standard 230V mains electricity without a step-down transformer. You will commonly find these bases in under-cabinet kitchen lighting, compact desk lamps, decorative chandeliers, and low-voltage landscape path lights.
Mains Voltage Push-In and Twist-Lock Bases (G9, GU10)
For fixtures that connect directly to your home’s standard electrical supply without an intermediary transformer, mains-voltage bases are used.
- G9 Bases: These feature flat, looped metal pins or solid flat metal tabs spaced 9 millimeters apart. Unlike low-voltage options, G9 bulbs run directly on 230V mains power. They are widely used in compact wall sconces, modern ceiling flush mounts, and decorative vanity lighting.
- GU10 Bases: These are highly recognizable by their thick, stubby pins with enlarged, rounded tips spaced 10 millimeters apart. The "U" in the code indicates that the bulb features a physical shape that helps support heat dissipation. GU10 bulbs use a twist-and-lock mechanism, requiring you to insert the pins into the socket slots and twist clockwise to lock the bulb. These operate on direct 230V mains power and are the standard choice for recessed ceiling downlights, track lighting, and directional spotlights.
How to Check if a 2-Pin LED Bulb Fits Your Fixture
Upgrading to LED technology requires verifying physical and electrical compatibility to ensure safe operation. Follow this step-by-step checklist before purchasing your new bulbs.
- Isolate the Power: Before touching or removing any bulb, turn off the power switch. For maximum safety, isolate the circuit at your home's main distribution board or consumer unit. Allow the old bulb to cool down completely to avoid painful burns.
- Measure the Pin Spacing: Carefully remove the existing bulb. Using a precise ruler or a digital caliper, measure the distance from the exact center of one pin to the center of the other pin in millimeters. A measurement of 4mm indicates a G4, 9mm indicates a G9, and 10mm indicates a GU10.
- Verify the Voltage: Check the printed text on the old bulb or look for a specification label inside the fixture housing. If the label states "12V", you must purchase a 12V LED bulb. If it states "220V-240V" or "230V", you require a mains-voltage bulb. Connecting a low-voltage 12V bulb directly to a 230V mains socket will destroy the bulb instantly and can cause an electrical short circuit.
- Check the Transformer Load: If your fixture is a low-voltage 12V system, it relies on an electronic or magnetic transformer hidden behind the ceiling or inside the fixture. Older halogen-specific transformers often have a minimum wattage load requirement (for example, 20W to 60W). Because a highly efficient 2-pin LED bulb might only draw 2W to 4W, a single LED bulb may not meet this minimum threshold. This can cause the bulb to flicker, buzz, or fail to light up entirely. Check the label on your transformer; if the minimum load is too high, you may need a qualified electrician to replace it with a dedicated LED driver.
- Account for Space Constraints: Halogen bulbs are incredibly compact because they do not require complex internal electronics. LED bulbs, however, must house an internal driver circuit and physical heat-sinking components. Consequently, an LED replacement bulb can sometimes be slightly longer or wider than the original halogen capsule. Measure the depth and diameter of your fixture's housing cavity to ensure the new LED bulb will fit comfortably and allow any protective glass covers to close securely.
Understanding Wattage Equivalents and Light Output
When transitioning from older halogen bulbs to modern LEDs, you must shift your focus from wattage to lumens. Wattage measures the amount of electrical power a bulb consumes, whereas lumens (lm) measure the actual volume of visible light produced. Because LEDs consume a fraction of the power used by halogens, comparing wattage ratings directly will lead you to purchase a bulb that is far too dim or too bright.
To find the correct brightness level, look for the lumen rating on the packaging of the new LED bulb and match it to your existing setup:
- 150 to 200 Lumens: This matches a standard 20W halogen bulb, commonly used for soft ambient lighting or under-cabinet task lighting.
- 300 to 400 Lumens: This matches a 35W halogen bulb, suitable for standard track lights and decorative wall fixtures.
- 450 to 600 Lumens: This matches a 50W halogen spotlight, typically used in recessed ceiling downlights where bright, focused light is required.
While the actual power draw of an LED bulb is well below the safety limits of your fixture, you should still verify that the fixture’s maximum rated wattage is not exceeded. This rating is typically printed on a safety sticker inside the socket housing.
Additionally, consider the color temperature, which is measured in Kelvin (K). For residential spaces in Singapore, a warm white light (2700K to 3000K) is ideal for creating a cozy atmosphere in bedrooms and living rooms. A cool white light (4000K) provides excellent clarity for kitchens and study areas, while daylight (6000K to 6500K) is best suited for utility rooms or highly focused work environments.
Frequently Asked Questions (FAQ)
Can I replace a halogen 2-pin bulb with an LED directly?
Yes, physical direct replacement is possible for many fixtures, but electrical compatibility must be verified first. For mains-voltage G9 and GU10 fixtures, you can generally swap the bulbs directly, provided the physical dimensions fit and your dimmer switches are compatible with LEDs. For low-voltage G4 and GY6.35 fixtures, you must ensure that your existing transformer does not have a minimum wattage load requirement that exceeds the low power draw of the new LED bulb.
Why does my new 2-pin LED bulb flicker?
Flickering is almost always caused by an electrical mismatch. In low-voltage systems, it typically occurs because the low-wattage LED bulb does not draw enough power to meet the minimum load requirement of an older halogen transformer. In mains-voltage systems, flickering is usually caused by using a non-dimmable LED bulb on a dimmer circuit, or using an older dimmer switch designed for high-wattage incandescent bulbs. To resolve this, verify that your components are rated for LED use or consult a professional electrician.
Community discussion
Share your experience or ask a question. Comments are reviewed before publication.