
For a standard Singapore HDB flat with a structural ceiling height of 2.6 metres, selecting the correct recessed lighting requires balancing physical spatial limits with visual comfort. The ideal setup for general ambient lighting is an adjustable downlight with a shallow recess depth of 50mm to 70mm, paired with a wide beam angle of 60 degrees. For accent lighting or wall-washing, a narrower beam angle of 24 to 36 degrees works best. Properly specifying these dimensions ensures your living space remains bright, open, and free from uncomfortable glare without compromising your false ceiling structure.
The 2.6m HDB Ceiling Constraint: How False Ceilings Affect Lighting
Standard Housing & Development Board (HDB) flats in Singapore are typically constructed with a floor-to-ceiling structural height of approximately 2.6 metres. When you opt to install a false ceiling (or drop ceiling) to conceal electrical wiring, air-conditioning pipes, or smart home controllers, this clearance is reduced further. A typical false ceiling requires a drop of 75mm to 150mm, leaving a net living space clearance of only 2.45 to 2.52 metres. This limited vertical clearance forms the primary constraint for all subsequent interior lighting decisions.
Low ceilings have a significant psychological and visual impact on how spacious a room feels. Installing bulky, protruding surface-mounted fixtures or overly large recessed lights can make the ceiling plane feel lower, creating a cramped and oppressive atmosphere. If the light fixtures are poorly specified, they can draw unnecessary attention to the physical limits of the room rather than enhancing the overall design.
Products mentioned in this guide
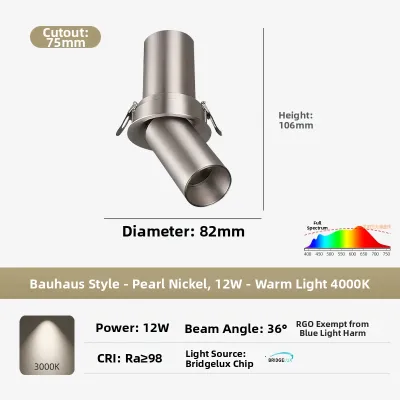
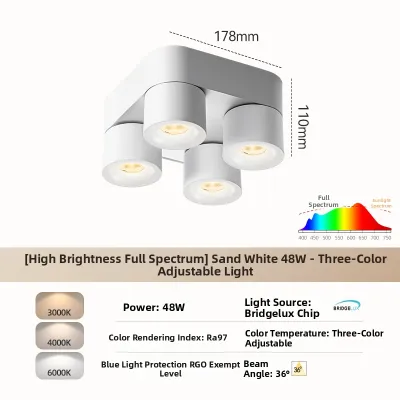
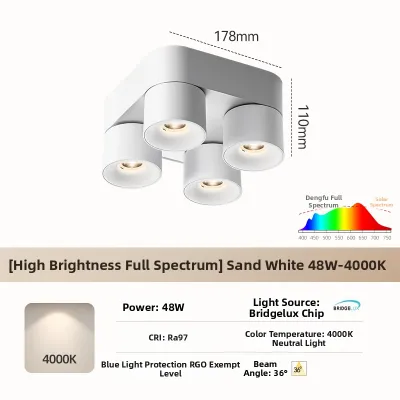
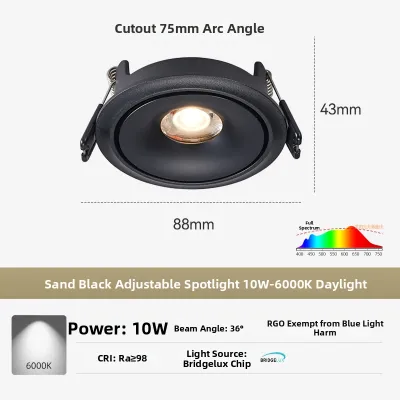
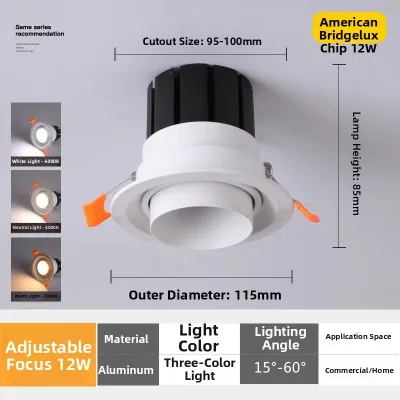
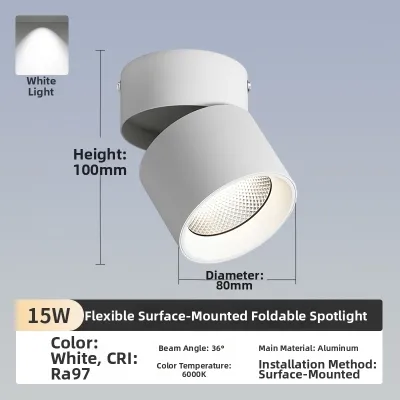
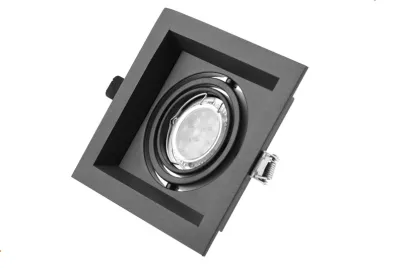
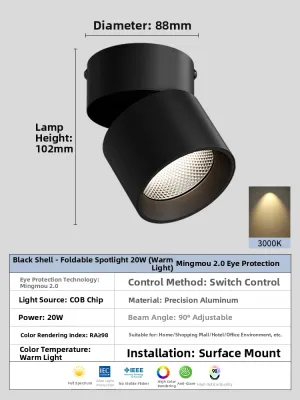
Prices are valid at publication and may change. Please refer to the product page for the latest price.
The core challenge in a 2.6m HDB flat is balancing the need for high-quality, functional illumination with the physical restrictions of a shallow ceiling void. You must select fixtures that fit securely within the limited space above the plasterboard while ensuring the light output does not cause visual discomfort. This makes the physical dimensions, beam spreads, and positioning of your adjustable downlight fixtures critical factors in your renovation planning.
Matching Recess Depth and Trim Size to Your Ceiling Void
To achieve a seamless, flush look on a low ceiling, the physical dimensions of the adjustable downlight must be carefully matched to the available space inside the false ceiling cavity. Selecting the wrong housing depth can lead to installation failures, structural damage to the ceiling, or serious safety hazards.

Measuring Your False Ceiling Void Depth
Before purchasing any adjustable downlight fixtures, you must accurately measure the available void depth, which is the vertical distance between the underside of the concrete slab and the top of the false ceiling plasterboard. This measurement is best taken at multiple points across the room, as concrete slabs can have slight level variations.
During your measurements, you must identify and account for any internal obstructions hidden within the void. These typically include metal framing studs (C-channels), electrical conduits, water screed pipes (in wet areas), and air-conditioning copper pipes or drain lines. If a downlight housing collides with these elements, it cannot be installed flush, and attempting to force it can damage critical home infrastructure.
Furthermore, you must check the manufacturer’s specified minimum clearance for heat dissipation. Even energy-efficient LED downlights generate heat at the rear heat sink and driver. Most manufacturers recommend maintaining a minimum clearance of 10mm to 20mm of free air space above and around the fixture. Neglecting this clearance can trap heat, leading to premature LED chip degradation, driver failure, or in extreme cases, fire hazards within the ceiling cavity.
Choosing Low-Profile Housings and Trims
For shallow ceiling voids typical of HDB flats, low-profile or ultra-thin adjustable downlight housings are highly recommended. These specialized fixtures feature an integrated heat sink design that keeps the total height of the unit under 50mm to 60mm. This compact form factor allows them to fit comfortably within a modest 75mm false ceiling drop while still preserving the required safety clearance for heat dissipation.
Trim size is another critical aesthetic and structural consideration. For a 2.6m ceiling, smaller and more unobtrusive trims—such as those with an aperture diameter of 50mm to 75mm (approximately 2 to 3 inches)—are ideal. Minimalist bezel or trimless (bezel-less) designs help reduce visual clutter on the ceiling plane. When the trim blends seamlessly into the plasterboard, the ceiling appears cleaner, which visually maximizes the height of the room.
Finally, you must cross-reference the product’s specified cut-out hole diameter with the structural limits of your false ceiling board. Cutting excessively large holes can weaken the plasterboard, especially if the cut-outs are placed too close to the metal supporting frame. Always ensure that the spacing of your downlights allows the plasterboard to retain its structural integrity over time.
Selecting Beam Angles to Maximize Space and Prevent Glare
The beam angle of an adjustable downlight dictates how light is distributed throughout your room. At a height of 2.6 metres, the distance the light travels before hitting surfaces is short, meaning the optical characteristics of your fixtures will have an immediate impact on comfort and spatial perception.
Wide vs. Narrow Beam Spreads for 2.6m Heights
Wide beam angles, typically defined as 60 degrees or broader, distribute light over a larger surface area. In a low-ceiling HDB room, wide beams are highly suitable for general ambient lighting. Because the light spreads quickly, the cones of light from adjacent fixtures overlap smoothly, creating an even wash of illumination across the living space. This minimizes harsh, high-contrast spotlight pools on the floor and helps the entire room feel bright and open.
Conversely, narrow beam angles ranging from 24 to 36 degrees concentrate light into a tight, intense cone. These are best reserved for accent lighting, such as highlighting a textured feature wall, a piece of artwork, or a dining table. The high-intensity beam draws focus to specific design elements, adding depth and visual interest to the interior.
Using narrow beam angles for general ambient illumination in a low-ceiling room is a common mistake. Because the light does not spread sufficiently before reaching floor level, it creates a “swiss cheese” effect on the ceiling—bright, isolated circular pools of light on the floor separated by dark, gloomy gaps. This high contrast makes the ceiling feel lower and the room feel significantly more confined.
Adjusting Gimbal Angles Without Causing Discomfort
Adjustable downlights feature a rotating inner ring, known as a gimbal, which allows you to tilt the light source to direct illumination exactly where it is needed. Most residential gimbals offer a tilt capacity of 15 to 30 degrees. This adjustability is incredibly useful, but it must be managed carefully in a low-ceiling environment.
To maintain visual comfort, you must follow a strict safety and comfort rule: never tilt an adjustable downlight to an angle where the bare LED chip is directly visible from standard sitting or standing eye levels. Because a 2.6m ceiling brings the light source closer to your horizontal field of vision, direct exposure to the LED chip will cause intense discomfort glare and eye strain.
Instead of angling downlights directly into the center of the room, use the “wall-washing” technique. By tilting the gimbal toward vertical surfaces like walls or built-in cabinetry, you bounce the light off these surfaces. Bouncing light off vertical planes creates a soft, indirect glow that visually pushes the walls outward and upward, creating a powerful illusion of height and spaciousness.
Strategic Placement to Make Low Ceilings Feel Higher
How you arrange your adjustable downlights across the ceiling plane is just as important as the specifications of the fixtures themselves. A strategic layout can make a compact HDB flat feel remarkably airy.
- Avoid Overhead Seating Placement: Avoid positioning adjustable downlights directly above primary seating or lounging areas, such as the center of a sofa, a study desk chair, or the head of a bed. When you look up or lean back, these fixtures will shine directly into your eyes, causing glare. Instead, offset the fixtures to the sides or front of these zones.
- Utilize Perimeter Placement: Position your adjustable downlights closer to the walls, typically at a distance of 40cm to 60cm, depending on the specific product's beam spread. This allows the light to wash down the walls elegantly, highlighting textures and eliminating dark corners that visually shrink the room.
- Implement Layered Lighting: Do not rely solely on recessed ceiling downlights for all your illumination needs. Layer your lighting by combining downlights with localized task and accent lighting, such as floor lamps, table lamps, or under-cabinet LED strips. Drawing the eye to lower levels of the room reduces your reliance on overhead fixtures and adds a sense of depth.
Electrical Safety and Installation Boundaries for HDB Flats
Working with electrical installations in Singapore HDB flats requires strict adherence to safety standards and local regulations to prevent electrical hazards, short circuits, or voiding your home insurance.
Before undertaking any inspection, maintenance, or installation work, the mandatory first step is to isolate the power supply by turning off the main circuit breaker at your home’s distribution board (DB box). Never rely solely on wall switches to cut power, as some circuits may still carry live voltage.
When purchasing adjustable downlights, you must verify that the fixtures are compatible with Singapore’s standard residential voltage of 230V AC at 50Hz. Ensure that all products carry the relevant safety certifications, such as the Safety Mark issued by Enterprise Singapore. This mark indicates that the product has been tested and certified safe for use in Singapore households.
It is crucial to understand the boundaries of do-it-yourself (DIY) work versus professional requirements. While swapping a compatible, existing bulb or trim on a plug-and-play fixture is low-risk, more complex tasks are strictly regulated. Cutting new holes in plasterboard, running new fixed electrical wiring, modifying the false ceiling structure, or installing new circuit breakers must be performed by a Licensed Electrical Worker (LEW). This ensures compliance with HDB guidelines and Singapore Standard SS 638.
Finally, if you plan to dim your adjustable downlights, you must verify the compatibility of the LED driver with your existing wall dimmer switches. Mismatched components can lead to persistent flickering, annoying buzzing sounds, or permanent electrical damage to both the dimmer and the LED driver. Always consult your LEW or the fixture manufacturer to ensure seamless dimming performance.
Frequently Asked Questions (FAQ)
Can I install adjustable downlights without a false ceiling?
Traditional recessed adjustable downlights cannot be installed directly into a concrete ceiling because they require a physical void to house the fixture body and electrical connections. If you do not have a false ceiling, you cannot use recessed fixtures. However, you can achieve similar directional lighting flexibility by opting for surface-mounted adjustable spotlights, track lighting systems, or surface-mounted downlight cylinders. These alternatives mount directly to the concrete slab and allow you to tilt and aim the light without needing a ceiling cavity.
What color temperature works best for low HDB ceilings?
Selecting the right color temperature is a conditional choice based on the function of the room and your personal aesthetic preferences. Warmer light tones, such as 2700K to 3000K, create a cozy, intimate, and relaxing environment, making them ideal for living rooms and bedrooms. Cooler light tones, such as 4000K (cool white), make a space feel brighter, crisper, and more alert. Utilizing cooler tones in task-oriented zones like kitchens, bathrooms, or study areas can help a low ceiling feel slightly more open and functional.
Community discussion
Share your experience or ask a question. Comments are reviewed before publication.