
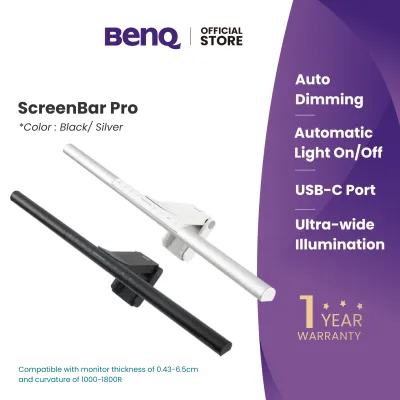
The BenQ ScreenBar pioneered the monitor light bar category, offering premium asymmetric lighting and auto-dimming, but modern alternatives now provide competitive features at lower price points. Determining the best value depends entirely on your specific desk constraints, monitor curvature, and budget. While premium models command a higher price tag, budget-friendly alternatives have flooded the market, promising similar eye-strain relief and space-saving designs. This guide breaks down the core differences in illumination, build quality, and pricing to help you decide whether the premium investment is justified for your setup or if a cost-effective alternative will serve you just as well.
Core Differences in Illumination and Desk Space
The primary purpose of a monitor light bar is to illuminate your workspace without casting light directly onto your screen, which causes distracting glare. Premium brands achieve this through highly engineered asymmetric optical designs. An asymmetric light path projects light at a precise angle, cutting off sharply before it hits the reflective surface of your display. To verify glare-free claims on your specific monitor, you can perform a simple visual check once the unit is mounted. Turn on the light bar in a dark room and look at the screen from your normal viewing angle; if you see a hazy reflection or a bright band of light on the glass, the optical cutoff is symmetric rather than asymmetric, or the mounting angle needs adjustment.
Monitor shape plays a critical role in how light is distributed across your desk. Standard straight light bars work exceptionally well on flat screens because the linear light path matches the flat plane of the display. However, if you use a curved monitor, a straight light bar can cause the outer edges of the light beam to clip the curved corners of the screen, creating localized glare. For curved displays, you must verify if the light bar has an adjustable mounting angle or if the manufacturer offers a dedicated curved model with a matching physical arc to keep the light path clear of the screen surface.
Products mentioned in this guide
![[New] BenQ ScreenBar Halo 2 | Monitor Light | Wireless Control | Auto Dimming & Auto On/Off | Back Light | Desk Lamp | 3 Light Modes](https://img.lazcdn.com/g/p/211971ad48cee8d2ae23ecdd1ce726cd.jpg_400x400q80.jpg_.webp)
Prices are valid at publication and may change. Please refer to the product page for the latest price.
Mounting mechanisms vary significantly between premium and budget brands, directly impacting how securely the light bar sits on your monitor. Many premium models utilize a heavy gravity-pivot counterweight system that rests gently on top of the monitor bezel without applying physical pressure to the screen panel itself. Budget alternatives often rely on spring-loaded clamps, which can exert continuous pressure on the edges of your display. Before purchasing, measure your monitor’s thickness and inspect the bezel width. If you have a modern bezel-less monitor, a clamp that extends too far forward can pinch the active display area, potentially causing screen damage or blocking critical on-screen elements.
Desk space footprint and cable management are also key differentiators. A well-designed light bar frees up valuable desk real estate by replacing a traditional desk lamp base, which is particularly beneficial for compact workspaces in Singapore apartments. Premium models typically feature streamlined cable routing, with the power cable plugging directly into the back of the mounting clip to keep it hidden from view. Budget models may have less integrated cable paths, resulting in visible wires dangling down the front or sides of your monitor. Additionally, you should check the power requirements of the light bar; most require a stable 5V USB power source, and plugging them into an underpowered USB port on an older monitor can lead to flickering or reduced brightness.
Build Quality, Controls, and Smart Features
The materials used in construction dictate both the longevity and the aesthetic appeal of a monitor light bar. Premium options almost exclusively feature high-grade aluminum alloys for the main light tube and mounting bracket, providing excellent heat dissipation and structural rigidity. In contrast, budget-friendly alternatives often rely heavily on lightweight plastics, which can warp over time under the heat generated by the LEDs or feel flimsy when adjusted. To assess build stability, check the weight distribution of the unit; a light bar should feel balanced when held, with the counterweight heavy enough to prevent the bar from shifting when you adjust your monitor’s tilt.

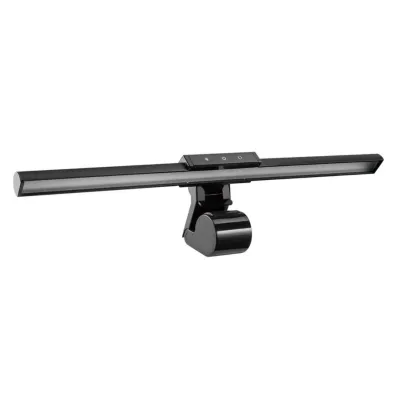
Control interfaces represent another major point of comparison between price tiers. Premium models frequently include a wireless external controller, often referred to as a dial or puck, which sits on your desk and allows you to adjust brightness and color temperature with a physical turn. This keeps your desk clean and eliminates the need to reach up to the top of your monitor to make adjustments. Mid-range and budget models typically opt for touch-sensitive panels or physical buttons integrated directly onto the light bar itself. While touch panels are highly reliable and eliminate desk clutter, they require you to physically touch the light bar, which can occasionally shift its alignment or leave fingerprints on the casing.
Smart features, particularly ambient light sensors for auto-dimming, are highly marketed but vary in execution. Premium light bars use sensitive, calibrated ambient light sensors that continuously monitor the surrounding room lighting and automatically adjust the light bar’s output to maintain a recommended 500-lux workspace brightness. To test the responsiveness of an auto-dimming sensor, place the light bar in a room with changing light conditions, such as near a window during sunset, or manually shade the sensor with your hand. A high-quality sensor will smoothly transition between brightness levels without sudden, jarring steps or constant flickering, whereas lower-end sensors may struggle to find a stable brightness level in mixed-lighting environments.
Price-to-Value Breakdown: Is the Premium Worth It?
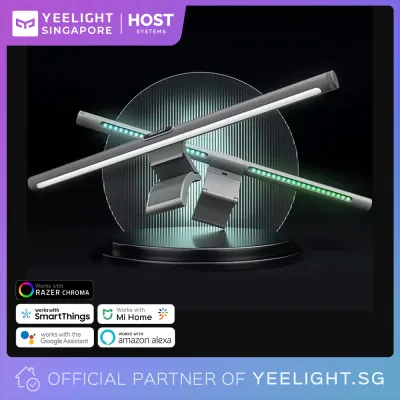
When evaluating monitor light bars in the Singapore market, products generally fall into three distinct price tiers. The premium tier, led by the BenQ ScreenBar series, typically sits above S$150, offering advanced optical engineering, wireless controllers, and highly accurate auto-dimming sensors. The mid-range tier ranges from approximately S$60 to S$150, where you can find solid aluminum construction and touch controls, though often without wireless dials or patented asymmetric optics. The budget tier consists of options below S$60, which are widely available on online marketplaces and primarily feature plastic builds, basic inline cable controls, and simpler symmetric light paths.
The premium price tag is largely driven by patented optical designs and advanced control hardware. If your daily routine involves long hours of color-critical work, professional writing, or detailed tasks under varying ambient light, the precise glare-free optics and automatic brightness adjustments of a premium model can significantly reduce eye strain, making the investment highly practical. The wireless desktop dial also adds genuine ergonomic value by keeping controls within arm’s reach, reducing physical strain over long work sessions.
However, for casual users, students, or those who primarily use their computers in consistently lit rooms, a mid-range alternative often delivers the best balance of utility and cost. If you do not require automatic dimming and are comfortable adjusting the brightness manually via touch controls, a mid-range light bar with a sturdy aluminum frame and a decent asymmetric light path will provide 90% of the practical benefits at a fraction of the cost. The key is to avoid the absolute cheapest budget models that lack proper asymmetric optics, as a poorly designed light path that reflects off your screen will ultimately cause more eye strain than a standard desk lamp.
How to Choose the Right Monitor Light Bar for Your Setup
To select the ideal light bar for your workspace, you should follow a structured decision framework based on your physical setup and daily habits. Choose the BenQ ScreenBar if you prioritize a completely glare-free experience on a standard flat monitor, require highly accurate auto-dimming to handle changing natural light throughout the day, and prefer the convenience of a wireless desktop controller. This premium option is best suited for professionals who view their desk setup as a long-term investment in ergonomic comfort.
Conversely, you should look toward mid-range or budget-friendly alternatives if you are working with a curved monitor that requires a specialized curved light bar, or if your monitor has an ultra-thin bezel that cannot accommodate a heavy gravity-style clamp. If your budget is tight, a reputable mid-range model with manual touch controls and a verified asymmetric light path will serve you well, provided you are willing to make manual adjustments as room lighting changes.
Before making any purchase, perform three essential physical checks on your current monitor setup. First, check the top bezel of your monitor; if you have an external webcam mounted there, verify whether the light bar’s mounting clip will block the camera lens or if you will need a dedicated webcam adapter. Second, inspect the back of your monitor for any steep curves, protrusions, or ventilation ports that might prevent a gravity counterweight from resting securely. Finally, verify the power output of your intended USB source; ensure your monitor or USB hub can deliver the exact voltage and amperage specified by the light bar manufacturer to guarantee stable, flicker-free operation.
Frequently Asked Questions (FAQ)
Do monitor light bars work on curved monitors?
Standard straight light bars can be used on curved monitors, but they often cause glare at the outer edges of the screen where the display curves forward into the light path. If you have a curved screen, it is highly recommended to look for light bars specifically designed with a curved profile or those that feature adjustable mounting brackets. These specialized designs allow you to angle the light beam further forward, ensuring the screen remains entirely glare-free.
Can a monitor light bar block my webcam?
Yes, a monitor light bar can physically interfere with an external webcam. Because both devices are designed to sit on the top center of your monitor bezel, the light bar’s mounting clamp or the light tube itself may block the webcam’s lens or prevent it from mounting securely. To avoid this, measure your webcam’s mounting depth and check if the light bar manufacturer offers a webcam top-mount accessory, or consider offsetting your webcam slightly to one side.
Community discussion
Share your experience or ask a question. Comments are reviewed before publication.