
Selecting the right ceiling lights for a standard Housing & Development Board (HDB) flat requires a careful balance between aesthetics, light distribution, and physical clearance. With a standard slab-to-slab height of 2.6 meters, these homes present unique spatial challenges. Installing the wrong fixtures can make rooms feel cramped, dark, or visually cluttered.
To optimize a 2.6m HDB ceiling, the most effective choices are ultra-slim LED flush mounts, surface-mounted track lights, and strategic recessed downlights. These options maximize headroom, ensure a safe clearance of at least 2.1m to 2.2m in high-traffic zones, and distribute light evenly to create an airy, open atmosphere. By understanding how different fixture profiles interact with low ceilings, you can design a bright, welcoming home without sacrificing precious vertical space.
Navigating the 2.6m HDB Ceiling: Why Vertical Space Dictates Your Lighting
While the official structural height of a standard modern HDB flat is 2.6 meters from concrete slab to concrete slab, the actual usable floor-to-ceiling height is almost always lower. Once you account for floor screeding, self-leveling compounds, and finishes like thick homogeneous tiles, luxury vinyl tiles (LVT), or engineered timber, you often lose 3cm to 5cm of vertical space. If you are renovating a resale flat with uneven surfaces or installing sub-floor insulation, the finished ceiling height can easily drop to 2.55m or even 2.5m.
Products mentioned in this guide
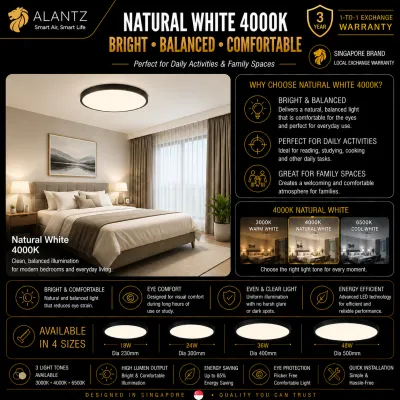
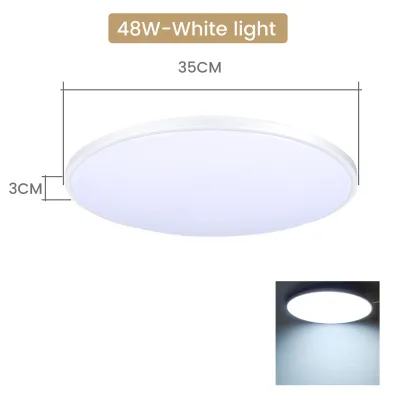
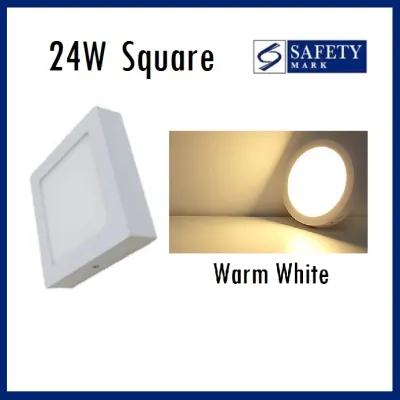
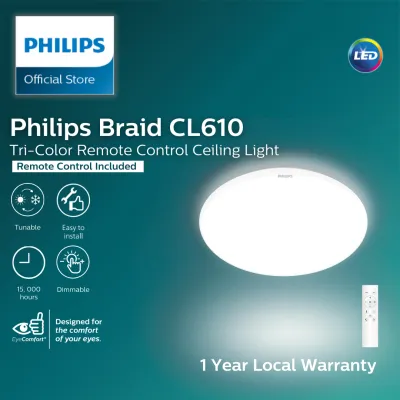
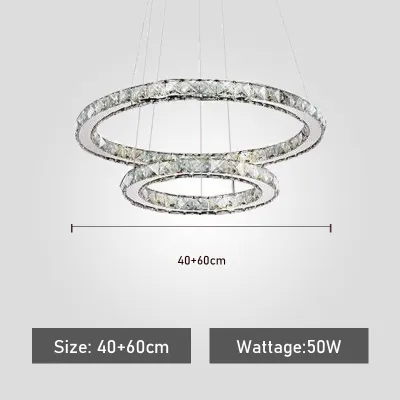
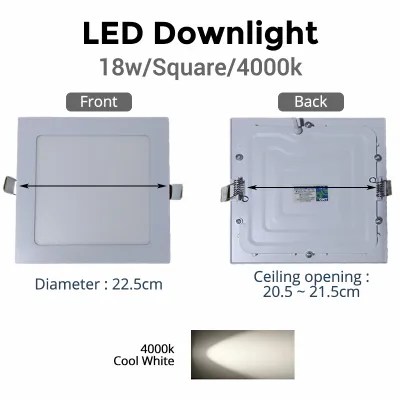
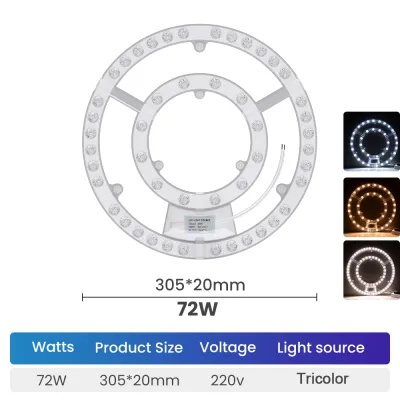
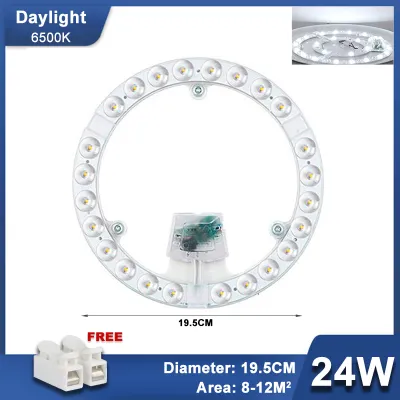
Prices are valid at publication and may change. Please refer to the product page for the latest price.
This restricted height makes the concept of “visual weight” incredibly important when planning your lighting layout. Heavy, dark, or deeply protruding fixtures draw the eye downward, creating a strong sense of visual gravity that makes the ceiling feel lower than it actually is. When a large fixture dominates the upper third of a room, it casts prominent shadows across the ceiling plane, making the entire space feel enclosed and cave-like.
Physical safety and comfort also dictate strict height limits for any hanging elements. As a general rule of thumb, you must maintain a minimum clearance of 2.1m to 2.2m from the finished floor to the lowest point of any light fixture in active walkways. This clearance prevents taller occupants and guests from feeling a sense of obstruction, and it eliminates the risk of accidentally hitting a fixture when carrying items, changing bedsheets, or stretching.
Therefore, the core objective when lighting a 2.6m HDB flat is to maximize ambient light spread while minimizing physical protrusion. The ideal fixtures are those that sit tight against the ceiling surface or sit entirely within it, directing light outward and downward while keeping the physical profile of the luminaire as unobtrusive as possible.
The Best Ceiling Lights for Optimizing 2.6m HDB Spaces
To achieve a bright, open interior within a 2.6m height limit, you must select fixtures designed specifically for low-clearance environments. Three primary lighting configurations excel in these spaces, each offering distinct design and functional advantages.

Flush Mount Lights
Flush mount ceiling lights are designed to sit directly against the ceiling surface with no gap between the fixture housing and the plaster. This zero-drop profile makes them the most practical and space-efficient choice for low-clearance areas where maintaining maximum headroom is the absolute priority.
Modern LED flush mount panels have revolutionized this category, offering ultra-slim profiles that range from just 1.5cm to 3cm in thickness. These minimalist panels provide a clean, architectural look that almost mimics the appearance of a recessed skylight. Traditional decorative flush mounts, which feature glass or acrylic domes wrapped in metallic or wooden frames, generally protrude 10cm to 15cm from the ceiling. While slightly thicker, they still remain well within safe clearance limits.
These fixtures are highly recommended for high-traffic HDB areas such as narrow entrance foyers, central hallways, kitchens, and standard bedrooms. By keeping the light source completely flat against the ceiling, you ensure that walkways remain entirely unobstructed while flooding the room with wide, even ambient light.
Recessed and Track Lighting
Recessed downlights and surface-mounted track lights offer excellent low-profile alternatives to traditional central fixtures, allowing you to customize light placement to suit your furniture layout.
Recessed downlights sit completely flush with the ceiling surface, eliminating visual clutter and leaving the overhead plane entirely clean. However, installing recessed lights in an HDB flat requires a false ceiling to house the fixture bodies, drivers, and electrical wiring. A standard false ceiling consumes about 10cm to 15cm of vertical space, reducing your overall ceiling height to roughly 2.45m. While this is a common design choice, it can make small rooms feel slightly more enclosed if not paired with bright wall finishes and strategic uplighting.
To preserve the full 2.6m height of your concrete slab, surface-mounted track lights are an outstanding alternative. These systems feature a slim metal track (typically only 1.5cm to 2cm deep) mounted directly to the concrete ceiling, with adjustable spotlight heads attached. Magnetic track systems are particularly popular in modern Singaporean homes due to their ultra-thin profiles and the ability to easily click, slide, and swap different light modules. Choosing surface-mounted tracks gives you the directional flexibility of recessed lighting without sacrificing a single centimeter of ceiling height to a false ceiling.
Semi-Flush Mount Lights
Semi-flush mount lights occupy the middle ground between flush fixtures and hanging pendants, featuring a very short stem or collar that suspends the light body slightly below the ceiling plane.
To use semi-flush mounts safely in a 2.6m HDB flat, you must observe strict drop-length limits. It is highly recommended to keep the total drop of the fixture—measured from the ceiling to the absolute lowest point of the glass or frame—under 30cm to 40cm. This ensures that even with a slightly raised floor finish, the bottom of the light remains at least 2.15m above the ground, preserving safe clearance for walking underneath.
Because of their slight drop, semi-flush mounts should be placed in designated “protected zones” where foot traffic does not naturally pass directly below the fixture. Ideal placement zones include centering the light directly over a dining table, positioning it over a bed, or hanging it above a kitchen island or coffee table. In these areas, furniture naturally prevents people from walking directly under the light, eliminating any risk of head-strikes.
From a design perspective, semi-flush mounts offer a unique spatial benefit. The small gap between the fixture and the ceiling allows light to escape upward as well as downward. This upward light bounce (uplighting) illuminates the ceiling surface, softening harsh shadows and visually stretching the room upward. This simple optical effect makes the ceiling feel higher and the entire space feel more expansive than it would with a completely sealed flush mount.
Styles to Avoid or Use with Extreme Caution
When decorating a low-ceiling HDB flat, certain lighting styles should be avoided entirely, or used only under highly controlled conditions, to prevent physical hazards and visual claustrophobia.
High-risk styles include multi-tier crystal chandeliers, long-cord industrial pendants, and oversized drum shades with deep profiles. These fixtures create a phenomenon known as “visual gravity.” Because they are heavy, detailed, and hang low, they instantly capture the eye, forcing the gaze downward and constantly reminding occupants of the low ceiling. A large, dangling chandelier in a 2.6m living room can make the entire room feel like it is collapsing inward.
Beyond the negative visual impact, low-hanging fixtures present real physical hazards. Standard tasks like folding a fitted sheet, lifting a toddler, or carrying a vacuum cleaner can easily result in an accidental collision with a dangling light. Glass shades can shatter, and exposed bulbs can cause burns or electrical hazards if struck.
If you love the look of pendant lights, the only acceptable exception is to use them strictly as localized task lighting over fixed furniture. When hanging a pendant over a dining table or a kitchen island, ensure the bottom of the fixture sits between 75cm and 90cm above the tabletop surface. This height keeps the fixture low enough to focus light beautifully on the dining area, yet high enough to remain safely out of the way when people stand up or sit down.
Key Sizing and Brightness Specifications
Choosing the right technical specifications is just as important as selecting the style of your ceiling lights. Incorrect sizing or poor light quality can ruin the comfort of an otherwise beautiful room.
- Diameter and Proportion: To keep your lighting in scale with typical HDB room sizes, use a simple sizing framework. For compact bedrooms (around 9 to 12 square meters), choose a fixture with a diameter between 30cm and 40cm. For larger living areas (15 to 25 square meters), a diameter of 50cm to 60cm is appropriate. Avoid oversized fixtures; a massive 80cm wide light in a small HDB bedroom will look incredibly cramped, even if it is ultra-thin.
- Brightness (Lumens) vs. Wattage: Because low-profile flush mounts sit close to the ceiling, they lack the space to bounce light off the ceiling to create ambient glow. Therefore, they must feature high lumen output and wide beam angles (ideally 120 degrees or wider) to distribute light evenly across the room. Do not rely on wattage to measure brightness, as LED efficiency varies. Instead, look at the actual lumen rating. A standard HDB bedroom typically requires 1,500 to 2,000 lumens of total light, while a living room zone requires 3,000 to 4,000 lumens, which can be split across multiple light sources.
- Color Temperature (Kelvin): The color of your light significantly affects spatial perception. Cool white light (4000K) is highly recommended for task areas like kitchens and study rooms, as it makes spaces feel crisp, clean, and visually open. Warm white light (3000K) is perfect for bedrooms and living areas to create a cozy, relaxing atmosphere. However, warm light can make a space feel smaller if it is too dim; always ensure your warm lighting is layered properly. Many modern LED ceiling lights feature three-tone drivers, allowing you to toggle between 3000K, 4000K, and 6500K using your wall switch to suit different times of day.
- Glare Control: Because your eyes will be physically closer to the light source in a 2.6m room, glare is a major concern. Avoid fixtures with exposed LED chips or clear glass covers. Instead, select ceiling lights equipped with high-quality PMMA (acrylic) diffusers or frosted glass lenses. These materials scatter the light softly, preventing harsh hotspots and eye strain when you look upward from a sofa or bed.
- Common Sizing Errors: The most common mistake is purchasing a fixture that is too deep (exceeding 15cm in thickness), which immediately cuts into your headroom. Another common error is choosing a single, small central light source that is too dim, leaving dark corners that visually shrink the room. It is always better to use a slightly wider, thinner fixture that spreads light across a larger area.
Room-by-Room Lighting Strategy for HDB Flats
To get the most out of your 2.6m ceiling, implement a tailored room-by-room lighting plan that addresses the specific functional needs of each area in your HDB flat.
Living Room
Avoid relying on a single, ultra-bright central flush mount, which can create flat, harsh lighting and leave the corners of your living room in shadow. Instead, create a layered lighting scheme. Combine a very slim central LED flush mount (less than 5cm thick) with perimeter track lighting or surface-mounted spotlights directed toward your walls. This setup washes the walls with light, drawing the eye outward and making the living room feel significantly wider and taller.
Bedrooms
In HDB bedrooms, comfort is the primary goal. Install ultra-slim flush-mounted LED panels that feature smooth dimming capabilities. This allows you to lower the light levels in the evening to prepare for sleep. Ensure the fixture has a high-quality frosted diffuser so that when you are lying in bed looking directly at the ceiling, you are not blinded by glare. Avoid hanging any pendants directly over the bed, as they can feel oppressive when you are lying down.
Kitchen and Bathrooms
Kitchens and bathrooms are high-moisture zones that require specialized fixtures. Always select ceiling lights with an Ingress Protection (IP) rating of at least IP44 for bathrooms to protect the internal electronics from steam and water splashes. In both rooms, keep the light profiles as flush as possible. This ensures the fixtures do not interfere with tall overhead kitchen cabinets or the swing of glass shower screens, while providing bright, clear light for cooking and grooming.
Installation and Safety Considerations
Installing ceiling lights on HDB concrete ceilings requires specific tools and strict adherence to safety protocols to ensure a secure, long-lasting mount.
Because HDB ceilings are made of dense, reinforced structural concrete, a standard hand drill will not suffice. You must use a rotary hammer drill equipped with high-quality masonry drill bits to create clean holes for mounting. Always use heavy-duty nylon wall plugs (rawlplugs) or metal expansion anchors to secure the mounting bracket. Before drilling, use a stud finder with a cable detection mode to ensure you do not accidentally drill into embedded electrical conduits or structural rebar.
Before purchasing any new light fixture, verify the weight limit of the existing ceiling hook or electrical junction box. Heavy fixtures, such as large glass semi-flush mounts, require robust anchorage. If you are replacing a lightweight plastic dome with a heavier metal-framed LED panel, ensure the mounting bracket is screwed directly into the concrete slab rather than relying on a plastic conduit box.
Electrical safety must always be your top priority. Before starting any installation, isolate the power at your home’s main distribution board (DB box) by turning off the circuit breaker for the lighting loop. Verify that the power is completely off using a reliable voltage tester at the wire ends. Always connect the green-and-yellow earth wire to the fixture’s grounding terminal to prevent electrical shocks. For complex installations—such as installing new track lighting, running new electrical points, or constructing a false ceiling—always engage a licensed electrical worker (LEW) or a qualified professional to ensure compliance with Singapore’s SS 638 electrical standards.
Frequently Asked Questions (FAQ)
Can I install a false ceiling in my HDB flat to use recessed lights?
Yes, you can install a false ceiling in an HDB flat, but you must plan carefully for the loss of height. A standard false ceiling requires a drop of 10cm to 15cm to accommodate the recessed downlight housings, LED drivers, and electrical wiring. In a 2.6m flat, this will reduce your finished ceiling height to between 2.45m and 2.5m.
To avoid a cramped, claustrophobic feel, avoid installing a flat false ceiling across the entire room. Instead, opt for partial false ceilings, such as an L-box or U-box design along the perimeter of the room. This allows you to install recessed downlights or hidden LED strip lights for cove lighting around the edges, while keeping the center of the room at its full 2.6m height. Additionally, ensure your renovation contractor complies with all HDB renovation guidelines, which strictly prohibit any hacking of the structural concrete slab.
How do I clean flush mount ceiling lights without taking them down?
Regular maintenance keeps your flush mount lights bright and prevents dust buildup from reducing light output. For routine cleaning, use an extendable microfiber duster or a vacuum cleaner equipped with a soft brush attachment to gently sweep away dust, cobwebs, and loose dirt from around the edges of the fixture.
For a deeper clean to remove grease or insect spots, start by switching off the main power at the DB box and waiting at least 15 minutes for the light and driver to cool down completely. Set up a stable step ladder on a flat surface. Dampen a clean microfiber cloth with a mixture of warm water and a few drops of mild, diluted dishwashing liquid—ensure the cloth is damp, not dripping wet. Gently wipe down the acrylic or glass diffuser and the outer frame. Finally, dry the fixture thoroughly with a dry, lint-free cloth before restoring the power. Never spray cleaning liquids directly onto the fixture, as moisture can seep into the electrical housing and cause a short circuit.
Community discussion
Share your experience or ask a question. Comments are reviewed before publication.