
Selecting the perfect ceiling light configuration is a critical decision when renovating a Singapore HDB flat or condominium. Among the various options, downlights have become the standard for modern homeowners seeking a clean, minimalist aesthetic. Unlike traditional central fixtures that disperse light indiscriminately, downlights provide targeted, directional illumination that can be layered to suit the specific functional and emotional needs of each room. Understanding how to navigate technical specifications, spatial limitations, and room-specific requirements is key to achieving a beautifully lit home that feels both spacious and welcoming.
Achieving the perfect balance of light across your home requires a tailored approach for each space. Different rooms serve distinct purposes; a downlight that works beautifully in your kitchen could make your bedroom feel cold and uninviting. This quick guide summarizes the primary lighting goals, recommended color temperatures, and key technical features for the main areas of a typical Singaporean home.
Quick Room-by-Room Downlight Guide
| Room | Primary Lighting Goal | Recommended Color Temperature | Key Technical Feature |
|---|---|---|---|
| Living & Dining | Ambient flexibility & social comfort | 3000K (Warm White) to 4000K (Neutral White) | Dimmable or smart controls with wide beam angles |
| Bedrooms | Relaxation & glare-free comfort | 2700K to 3000K (Warm White) | Deep-recessed "dark light" housing |
| Kitchens | High-visibility task safety | 4000K (Neutral White) | High Color Rendering Index (CRI 90+) |
| Bathrooms | Moisture resistance & grooming clarity | 3000K (Warm White) to 4000K (Neutral White) | IP44 or IP65 rating with dedicated vanity lights |
By understanding these baseline requirements, you can ensure that each ceiling light you purchase is optimized for its designated environment. This targeted approach prevents common issues such as visual fatigue in work areas or excessive glare in spaces meant for relaxation.
Products mentioned in this guide
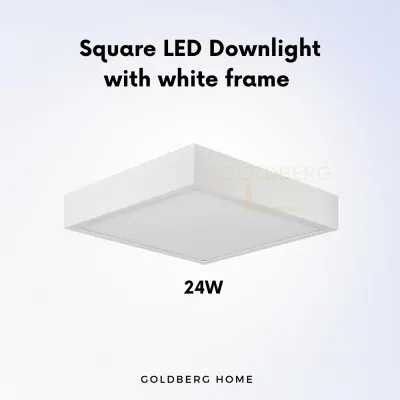
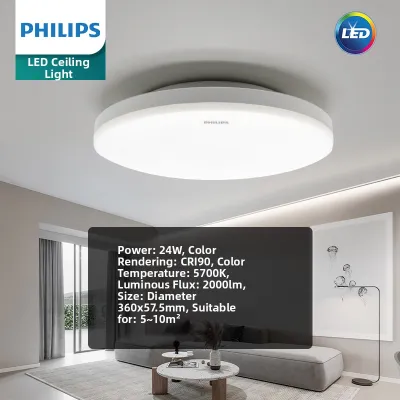
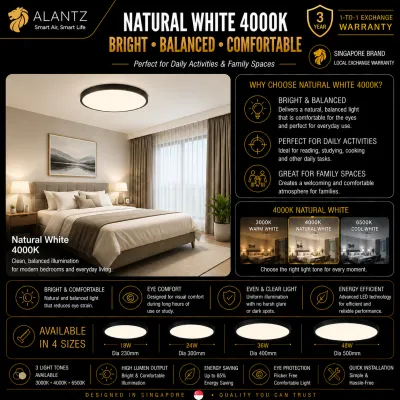
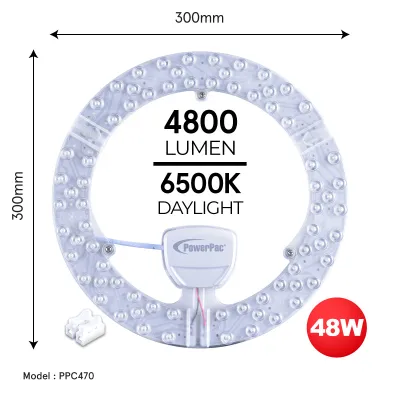
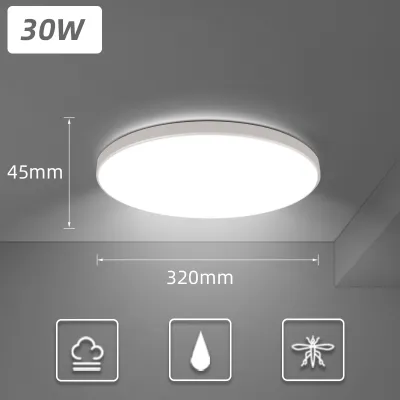
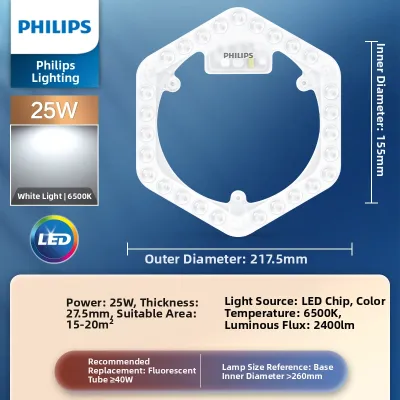
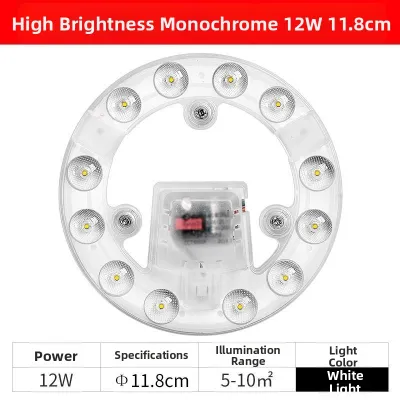
Prices are valid at publication and may change. Please refer to the product page for the latest price.
Essential Ceiling Light and Downlight Specs to Check Before Buying
Before purchasing any fixtures, you must verify several critical technical specifications to ensure compatibility with your home’s electrical system and ceiling structure. Making assumptions about sizes or electrical requirements often leads to costly installation delays or safety hazards.

Cut-out Size vs. Outer Diameter: A common mistake during renovations is confusing the cut-out size of a downlight with its outer diameter. The cut-out size is the precise diameter of the hole that must be cut into the false ceiling gypsum board to accommodate the fixture’s housing. The outer diameter includes the decorative trim or bezel that sits flush against the finished ceiling surface. If you are retrofitting existing false ceilings, you must measure the actual diameter of the existing hole after removing the old fixture. Modifying an existing false ceiling to accommodate a larger or smaller cut-out size is highly labor-intensive and expensive.
Voltage and Electrical Compatibility: Singapore’s electrical grid operates on a standard 230V/50Hz mains supply. When shopping for downlights, you will encounter two main electrical configurations: mains-voltage (230V) integrated LED downlights and low-voltage (typically 12V or 24V) fixtures. Mains-voltage integrated units connect directly to your home’s electrical wiring and feature built-in drivers, making them straightforward to install. Low-voltage fixtures require an external transformer or driver to step down the voltage. While integrated 230V fixtures are popular for their simplicity, separate driver systems allow you to replace a failed driver without discarding the entire light fixture.
Color Temperature and CRI: Color temperature, measured in Kelvin (K), dictates the color appearance of the light. Lower Kelvin numbers (2700K to 3000K) produce a warm, yellowish glow that mimics traditional incandescent bulbs, creating a cozy and relaxing atmosphere. Higher Kelvin numbers (4000K to 6000K) emit a cool, bluish-white light that promotes alertness and clarity. Alongside color temperature, you must consider the Color Rendering Index (CRI), which measures how accurately a light source reveals the true colors of objects compared to natural sunlight. For residential spaces, always select downlights with a CRI of 90 or above (CRI 90+). Low-CRI lighting can make your home’s interior decor, paint colors, and food look dull or gray.
Beam Angles: The beam angle of a downlight determines how wide the light spreads from the fixture. Wide beam angles, typically 60 degrees or greater, distribute light over a broad area, making them highly suitable for general ambient illumination in living rooms and corridors. Narrow beam angles, usually under 40 degrees, concentrate the light into a focused beam. These narrower angles are ideal for accent lighting, allowing you to highlight specific architectural features, artwork, or dining tables without spilling light onto surrounding surfaces.
Living and Dining Areas: Layering Light for Comfort
The living and dining areas are the social heart of any Singaporean home, serving multiple functions throughout the day. From hosting dinner parties to enjoying quiet movie nights, these spaces require a highly flexible lighting design that can adapt to different moods and activities.
The Layering Strategy: Relying solely on a grid of downlights as your primary ceiling light source can result in a flat, institutional aesthetic often referred to as the “runway” effect. This occurs when light is cast straight down, leaving the upper walls and corners in shadow. To avoid this, you should design a layered lighting scheme. Combine downlights with cove lighting (which bounces light off the ceiling for soft, indirect illumination), pendant lights over the dining table, and floor lamps in reading corners. This approach adds depth, eliminates harsh shadows, and allows you to adjust the intensity of the light depending on the time of day.
Color Temperature Consistency: For open-plan living and dining layouts common in modern HDB flats and condominiums, maintaining visual continuity is essential. It is highly recommended to use a consistent color temperature between 3000K (warm white) and 4000K (neutral white) across these connected spaces. Mixing a cool white downlight in the dining area with a warm yellow downlight in the living room creates a jarring visual contrast that can cause eye strain and disrupt the flow of your interior design.
Dimming and Smart Controls: To maximize the utility of your living space, opt for dimmable downlights or smart lighting systems. Dimming allows you to transition seamlessly from bright, functional lighting for cleaning or reading to soft, low-level illumination for entertaining or watching television. However, when selecting dimmable LEDs, you must ensure that your dimmer switches are compatible with LED technology. Older dimmer switches designed for incandescent bulbs are typically leading-edge dimmers, which can cause modern LEDs to flicker, buzz, or fail prematurely. Ensure your electrician installs compatible trailing-edge dimmers or opt for smart downlights that handle dimming digitally.
Spacing and Placement: To achieve even illumination without dark spots, space your downlights approximately 1.5 to 2 meters apart, depending on your ceiling height. As a general rule, keep downlights at least 60 centimeters away from walls. Placing them too close to a flat wall creates sharp, semi-circular pools of light known as scalloping, which can look messy. However, if you have a textured feature wall—such as brick, stone, or fluted panels—you can intentionally position adjustable downlights closer to the wall to highlight its texture.
Bedrooms: Relaxing, Glare-Free Illumination
Bedrooms are personal sanctuaries dedicated to rest and recovery. Because you spend a significant amount of time lying down in bed looking up at the ceiling, the lighting design in this room must prioritize visual comfort and the elimination of harsh glare.
Anti-Glare Designs: Standard flat-faced downlights can be incredibly uncomfortable in a bedroom because the exposed LED chip shines directly into your eyes when you are lying down. To prevent this, look for deep-recessed downlights, often marketed as “dark light” or anti-glare fixtures. In these designs, the light source is positioned deep within the housing, and the inner baffle is designed to absorb stray light. This ensures that the physical light source remains hidden from view unless you are standing directly beneath it, providing soft, comfortable illumination.
Color Temperature for Sleep: To support your body’s natural circadian rhythm, select warm color temperatures between 2700K and 3000K for bedroom downlights. Warmer light contains significantly less blue light, which is known to suppress the production of melatonin, the hormone responsible for sleep. By avoiding cool white light in the evening, you can create a relaxing environment that signals to your brain that it is time to wind down.
Strategic Placement: Strategic layout is crucial in a bedroom. Avoid placing downlights directly over the bed, headboard, or pillow areas. Instead, position them around the perimeter of the room. Place fixtures in front of your wardrobe to illuminate your clothing when dressing, or position them near the foot of the bed or along walkways to provide safe navigation at night without shining light directly onto your face while you rest.
Kitchens: Bright and Accurate Task Lighting
The kitchen is a high-activity work environment where safety, cleanliness, and precision are paramount. Unlike the bedroom, where soft lighting is preferred, the kitchen requires bright, focused task lighting to ensure you can chop, cook, and clean safely.
Task Lighting Focus: Kitchen activities require a higher level of brightness, or lux, than other areas of the home. Your downlights must deliver sufficient lumen output to illuminate countertops, sinks, and cooking ranges clearly. This prevents accidents and ensures that food preparation surfaces are thoroughly clean.
Color Temperature and CRI: A neutral white color temperature of 4000K is highly recommended for kitchens. This crisp, clean light enhances focus and makes details highly visible. Furthermore, a high Color Rendering Index (CRI 90+) is absolutely critical in the kitchen. When preparing meals, you need to see the true colors of ingredients to judge the freshness of meat, the ripeness of vegetables, and the progress of your cooking. Low-CRI lighting can make fresh food look unappealing and make it difficult to spot subtle color changes during cooking.
Shadow Prevention: A common layout mistake in kitchen lighting is placing downlights directly behind where you stand while working at the counter. This causes your head and body to block the light, casting a deep shadow over your cutting board or stove. To avoid this, downlights should be installed directly above the front edge of your countertops, typically about 30 to 40 centimeters away from the wall or upper cabinets. This ensures that the light falls directly onto your workspace without obstruction.
Bathrooms: Moisture-Resistant and Safe Fixtures
Bathrooms present unique challenges due to high humidity, steam, and the direct presence of water. Electrical safety and durability must be your top priorities when selecting downlights for this space.
Understanding IP Ratings: Any downlight installed in a bathroom must have an appropriate Ingress Protection (IP) rating, which indicates its resistance to dust and moisture. The second digit of the IP rating is the most critical for bathrooms as it measures liquid resistance. For general bathroom ceilings outside the immediate vicinity of the shower or bathtub, a minimum rating of IP44 is required. This ensures the fixture is protected against splashing water and high humidity. For downlights installed directly inside a shower cubicle or directly above a bathtub, you must use fixtures rated IP65 or higher. These units are completely sealed against water jets and heavy steam, preventing moisture from causing electrical shorts or corrosion.
Placement Strategy: Never install standard, non-IP-rated downlights in a bathroom, even if they are placed far from the shower. Steam rises and condenses on the ceiling, creating droplets that can easily seep into unsealed fixtures. This leads to rapid corrosion of internal components, flickering, and premature failure of the LED driver.
Mirror and Vanity Lighting: While downlights are excellent for general bathroom illumination, relying solely on overhead downlights above the vanity mirror is a mistake. Overhead light casts harsh shadows under your eyes, nose, and chin, making tasks like shaving, applying makeup, or styling hair difficult. To achieve balanced, shadow-free lighting, supplement your bathroom downlights with dedicated vanity lighting, such as wall sconces mounted on either side of the mirror or an integrated LED mirror light positioned at eye level.
Installation Rules and False Ceiling Constraints
Proper installation is just as important as selecting the right fixtures. In Singapore, residential ceiling structures and strict electrical regulations dictate how downlights must be installed and maintained.
False Ceiling Clearance and Heat Dissipation: Most downlights in Singapore HDBs and condos are recessed into false ceilings made of gypsum board suspended from metal frames. Although LEDs are highly energy-efficient, they still generate heat, which is concentrated at the back of the fixture via a metal heat sink. To prevent overheating, ensure there is adequate clearance—typically at least 50mm to 100mm of empty space—above the downlight housing within the false ceiling. Never cover LED drivers or downlight housings with thermal or acoustic insulation, as this traps heat, leading to rapid lumen degradation, color shifting, and premature driver failure.
Electrical Safety and Regulations: In Singapore, installing or altering fixed electrical wiring—including the installation of ceiling lights and downlights—must be performed by an Energy Market Authority (EMA) licensed electrical worker. DIY electrical work on 230V mains voltage is illegal and carries extreme risks of electrical shock, electrocution, and electrical fires. Before any installation, maintenance, or inspection of your ceiling lights, the mains power supply must be completely isolated at the main distribution board (DB box). Always follow the manufacturer’s installation instructions and verify that the fixtures carry recognized safety certifications, such as the Singapore Safety Mark.
Retrofitting Older Fixtures: If you are upgrading an older home that currently uses low-voltage halogen downlights (such as MR16 bulbs), you will likely have existing magnetic or electronic transformers hidden inside the false ceiling. When switching to modern integrated LED downlights, these old transformers must be bypassed or completely removed by your electrician. Attempting to run modern 230V LED downlights through an old halogen transformer will destroy the new fixtures immediately. If you choose to use 12V LED replacement bulbs instead, you must replace the old halogen transformers with dedicated, constant-voltage LED drivers to prevent severe flickering and ensure stable operation.
Frequently Asked Questions (FAQ)
Can I install downlights in an HDB without a false ceiling?
Yes, you can install downlights in an HDB flat without a false ceiling. Traditional recessed downlights require a ceiling cavity to hide the body of the fixture and the electrical wiring. If you have concrete ceilings and prefer not to install a false ceiling—which reduces your room’s height by about 10 to 15 centimeters—you can opt for surface-mounted downlights. These fixtures feature decorative cylindrical or box-shaped housings that mount directly onto the concrete slab, keeping the wiring neatly enclosed within the fixture. Alternatively, track lighting systems are an excellent ceiling light solution that offers similar directional lighting flexibility and can be installed directly onto concrete ceilings without structural modifications.
How many downlights do I need per room?
The number of downlights you need depends on the room’s square footage, the height of your ceiling, and the lumen output of the specific fixtures you choose. For a standard Singapore HDB flat with a ceiling height of approximately 2.6 meters, a common rule of thumb is to space downlights 1.5 to 2 meters apart. For a typical living room of 15 to 20 square meters, this translates to roughly six to eight downlights to achieve balanced, even illumination. However, you should calculate your lighting needs based on the room’s function: kitchens and work areas require higher light levels (around 300 to 400 lumens per square meter), while bedrooms and living areas require lower levels (around 100 to 150 lumens per square meter) supplemented by accent lighting.
Do I need to replace the transformer when switching to LED downlights?
Yes, if you are upgrading from an older low-voltage (12V) halogen downlight system, you will need to address the existing transformers. Older halogen transformers are designed for high-wattage loads and are generally incompatible with low-wattage LED technology. If you are retrofitting your ceilings with modern mains-voltage (230V) integrated LED downlights, your electrician must completely remove or bypass the old transformers, connecting the new fixtures directly to your home’s mains power. If you are replacing halogen bulbs with 12V LED bulbs, you must swap the old halogen transformers for dedicated LED drivers to avoid rapid flickering, buzzing, or premature failure of the new bulbs. Always have a licensed electrician assess your wiring before purchasing new components.
Community discussion
Share your experience or ask a question. Comments are reviewed before publication.