
Selecting the right downlight for a Singapore Board (HDB) flat requires a careful balance between modern aesthetics and physical structural limits. With a standard structural ceiling height of 2.6 meters, standard recessed fixtures can easily compromise precious headroom if the false ceiling drop is too deep. To maintain an open, airy living space while achieving clean, focused illumination, homeowners must look to specific low-profile downlight types.
For most 2.6m HDB ceilings, the most practical solutions are ultra-slim recessed LED downlights—which require a minimal cavity depth of only 30mm to 50mm—or surface-mounted downlights, which require 0mm of ceiling cavity. By understanding how to match fixture depths, plan smart layouts, and respect structural boundaries, you can successfully illuminate your home without creating a cramped or oppressive overhead environment.
Understanding HDB Ceiling Constraints and Headroom Limits
Standard HDB flats built in Singapore typically feature a structural floor-to-ceiling height of approximately 2.6 meters. While this height is perfectly functional for daily living, it leaves very little vertical margin when planning overhead renovations. Introducing a traditional false ceiling to house standard recessed lighting can significantly alter the spatial dynamics of your home.
Products mentioned in this guide
![[Climate Voucher] PHILIPS 3 Color Meson LED Downlight 5.5W 9W 13W 17W Tri Tone Scene Switch for False Ceiling Local Warranty](https://img.lazcdn.com/g/p/4f25f6fa6bf4fcf754b08b97b4102da3.jpg_400x400q80.jpg_.webp)
Prices are valid at publication and may change. Please refer to the product page for the latest price.
To accommodate standard recessed downlights, a false ceiling must typically drop by 100mm to 150mm. This substantial drop reduces the clear headroom to 2.45 meters or less. Such a reduction can make standard rooms feel noticeably smaller and more restrictive, particularly when installing ceiling fans or when taller family members move through the space.
An excessively dropped ceiling also risks creating a visually heavy, oppressive overhead plane. Low ceilings tend to trap shadows and make rooms feel closed-in if the lighting is not carefully planned. Therefore, minimizing the vertical footprint of your ceiling modifications is essential to preserving both physical comfort and the visual expansiveness of your interior.
Best Downlight Profiles for Low-Ceiling HDB Flats
To navigate the tight vertical limits of a 2.6m ceiling, you must choose a downlight profile that matches your renovation scope. Whether you are building a partial false ceiling, a full false ceiling, or keeping the original concrete slab exposed, specific fixture designs are engineered to maximize your vertical space.

Ultra-Slim Recessed Downlights
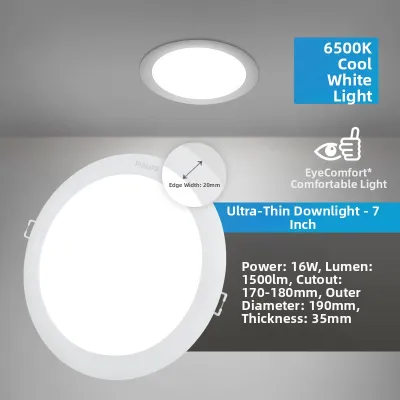
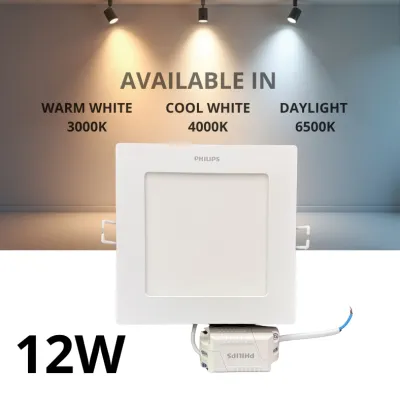
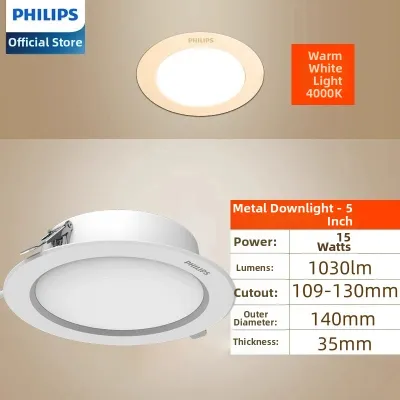
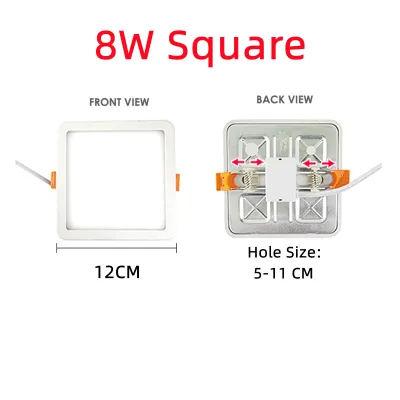
Ultra-slim recessed downlights are the premier choice for homeowners who want a completely flush, minimalist ceiling line but cannot afford a deep false ceiling drop. These specialized fixtures are engineered to fit into incredibly tight ceiling cavities, often requiring as little as 30mm to 50mm of clearance behind the plasterboard.
Many of these low-profile fixtures utilize edge-lit LED technology. In an edge-lit configuration, the LEDs are mounted along the inner frame of the fixture, directing light sideways into a specialized light guide plate that diffuses it downward. This design allows the physical housing of the downlight to be exceptionally thin—frequently under 20mm in thickness. Other models use highly integrated direct-lit arrays paired with compact, low-profile aluminum heat sinks to keep the overall height to a minimum.
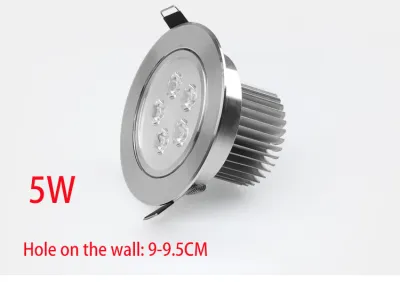
While these ultra-slim designs solve the headroom problem, they introduce specific thermal trade-offs. Because heat naturally rises and accumulates in the shallow cavity between the plasterboard and the concrete slab, efficient heat dissipation is critical. When sourcing these fixtures, prioritize models with high-quality aluminum casings and integrated heat sinks. You must also verify the manufacturer’s specified minimum cavity depth and ensure there is a clear air gap of at least 10mm to 20mm above the fixture to prevent heat buildup, which can degrade the LED driver and reduce the lifespan of the light.
Surface-Mounted Downlights
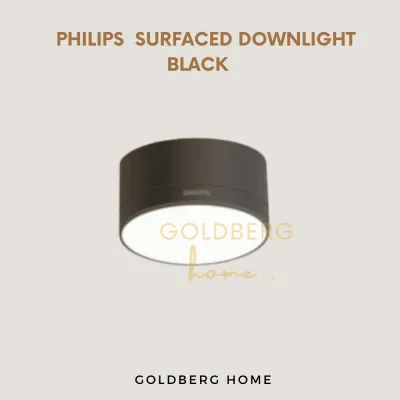
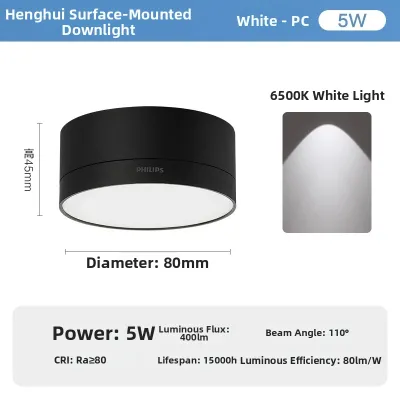
When preserving every single millimeter of your 2.6m ceiling height is the absolute priority, surface-mounted downlights offer an exceptional alternative. These fixtures bypass the need for a false ceiling entirely by mounting directly onto the concrete ceiling slab or existing plaster surface, requiring zero cavity depth.
Because the entire body of a surface-mounted downlight is visible, the fixture itself becomes a subtle architectural element. Modern designs feature clean, minimalist cylindrical or cubical housings, typically finished in matte black, architectural white, or brushed metal. These compact profiles blend seamlessly into contemporary, industrial, or Scandinavian-themed HDB interiors without adding visual clutter.
Choosing surface-mounted fixtures also eliminates the material, labor, and time costs associated with constructing a plasterboard false ceiling. They provide the same clean, directional illumination as recessed options while keeping your overhead space completely open. When selecting these fixtures, look for low-profile housings—ideally between 50mm and 80mm in height—to ensure they do not protrude too far down into your living space.
How to Match Downlight Depth and Cut-Out Specifications
Sourcing downlights that fit your ceiling plan requires a precise understanding of the technical measurements listed on product specification sheets. Misinterpreting these dimensions can lead to costly installation delays or fixtures that cannot physically fit into the constructed ceiling.
When reviewing a downlight spec sheet, you must distinguish between three critical dimensions:
- Visible Trim Size: The overall outer diameter or width of the fixture face that sits visible on the ceiling surface.
- Cut-Out Size: The precise diameter of the hole that must be cut into the plasterboard false ceiling for the fixture body to pass through.
- Housing Depth: The total vertical height of the fixture, measuring from the front face to the topmost point of the heat sink or cable entry.
For a successful recessed installation, the housing depth must be strictly less than the available cavity depth of your false ceiling. If your contractor is constructing a shallow 50mm ceiling drop, a downlight with a 45mm housing depth is technically compatible, but it leaves almost no room for the electrical connections. In such tight configurations, look for fixtures that utilize an external driver (transformer) rather than an integrated one. An external driver can be tucked neatly to the side of the cut-out cavity, keeping the space directly above the hot LED heat sink clear.
Thermal safety must always be a primary consideration. LED downlights generate localized heat at the diode junction. If this heat cannot escape, the phosphor coating on the LED will degrade rapidly, leading to color shifting and premature driver failure. Never cover recessed downlights with thermal insulation unless the fixture is explicitly certified as IC-rated (Insulation Contact).
Additionally, plan your cut-out locations to avoid structural obstacles. While you are cutting into plasterboard rather than concrete, the concrete slab directly behind it may feature structural beams, thickened slab zones, or embedded electrical conduits that limit where cables can be routed. Always cross-reference your fixture dimensions and driver placements with your contractor’s ceiling plan before cutting any holes.
Lighting Layouts That Maximize Perceived Ceiling Height
With a standard 2.6m ceiling, smart spatial design and strategic lighting layouts can visually expand your home, making the rooms feel taller and more open than their physical dimensions suggest.
One highly effective technique is the implementation of a partial false ceiling, such as an L-box or a perimeter drop. Instead of dropping the entire ceiling across the room, a shallow false ceiling channel is constructed only along the outer edges of the space. This perimeter zone is used to house ultra-slim recessed downlights, run electrical wiring, and conceal curtain tracks. Meanwhile, the center of the room remains at its maximum structural height of 2.6 meters, preserving the feeling of volume and airiness.
Another powerful design strategy is wall-washing. By positioning your downlights closer to the walls—typically between 300mm and 450mm away—and directing the light beams downward along the vertical surfaces, you highlight the walls rather than the floor. This vertical illumination draws the eye upward and outward, emphasizing the room’s boundaries and creating a strong illusion of height and lateral space.
Your choice of beam angle and color temperature also directly influences spatial perception. For low ceilings, wide beam angles of 60 degrees or more are highly recommended. Wide beams distribute light more evenly across the living plane, avoiding the harsh, high-contrast pools of light and deep shadows that can make a room feel cave-like. For general living areas in Singapore, a neutral white (4000K) or warm white (3000K) color temperature provides a clean, inviting atmosphere. Pairing these lights with dimmable drivers allows you to adjust light levels throughout the day, minimizing visual clutter and harsh glare on your ceiling.
Installation Safety and HDB Structural Boundaries
Modifying any ceiling structure in Singapore requires strict adherence to safety regulations and HDB renovation guidelines. Because HDB flats are built using robust structural concrete, there are clear boundaries on what can and cannot be modified.
Under no circumstances should you ever hack, drill deep holes, or cut chases into structural concrete beams, columns, or prestressed slabs to recess a lighting fixture. Hacking structural concrete compromises the structural integrity of the entire building block and is strictly prohibited by HDB. Recessed downlights must only be installed within a lightweight, non-structural plasterboard false ceiling built below the concrete slab.
If you opt for surface-mounted downlights, they must be securely anchored to the concrete ceiling using appropriate masonry plugs and screws. When drilling mounting holes, your contractor must use shallow depths to avoid damaging any concealed electrical conduits embedded within the concrete slab.
All electrical works—including running new wiring, mounting fixtures, and connecting drivers—must be performed by a Licensed Electrical Worker (LEW) registered with the Energy Market Authority (EMA). Before any installation or maintenance begins, ensure that the mains power is completely isolated at the main distribution board (DB box). Verify that all selected downlights, drivers, and dimmers are rated for Singapore’s standard household voltage of 220V-240V AC and carry the safety certification (such as the local Safety Mark) to guarantee safe, long-term operation.
Frequently Asked Questions (FAQ)
Can I install recessed downlights without building a false ceiling?
No, you cannot install traditional recessed downlights directly into a solid concrete HDB ceiling slab. Hacking or drilling deep cavities into structural concrete to recess a fixture is strictly prohibited due to safety and structural integrity concerns. If you want a clean, minimalist aesthetic without building a false ceiling, you should opt for ultra-slim surface-mounted downlights or low-profile track lighting systems. These fixtures mount directly onto the concrete surface and offer a modern, unobtrusive look without reducing your headroom.
How much ceiling depth is lost when installing standard downlights?
Installing standard recessed downlights typically requires a false ceiling drop of 100mm to 150mm to accommodate the tall physical housing of the fixture and ensure safe heat dissipation. However, if you select specialized ultra-slim LED downlights, you can minimize this loss significantly, requiring a ceiling drop of only 40mm to 50mm. To determine the exact clearance needed for your home, always measure the specific housing depth of your chosen fixture, add the manufacturer’s recommended air gap (usually 10mm to 20mm), and coordinate closely with your interior designer or contractor.
Community discussion
Share your experience or ask a question. Comments are reviewed before publication.