
Installing LED light strips can instantly elevate the ambiance of a room, highlight architectural features, or provide essential task lighting under kitchen cabinets. However, the longevity and performance of your lighting setup depend heavily on how the strips are secured. If you rely solely on the factory-applied adhesive backing, you may eventually find your light strips sagging, peeling, or failing entirely due to heat, humidity, or surface texture. Choosing the correct led light strip holder is the most critical decision for ensuring a permanent, safe, and visually appealing installation.
To select the ideal mounting hardware, you must evaluate your specific mounting surface, the environmental conditions of the room, and the thermal output of the light strips. Smooth, non-porous indoor surfaces like glass or finished metal are highly receptive to adhesive-based holders. Conversely, high-heat areas, rough drywall, and outdoor installations demand mechanical or structural support. Matching the holder type to these variables prevents premature system failure and ensures your lighting remains secure over years of operation.
Here is a rapid-match summary to guide your initial selection:
Products mentioned in this guide
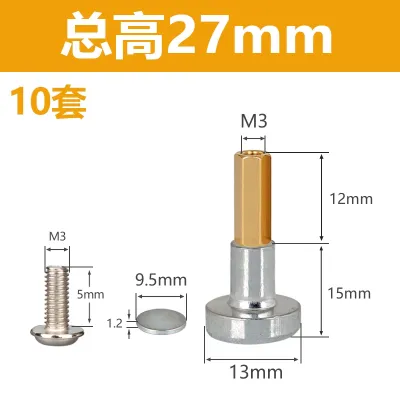
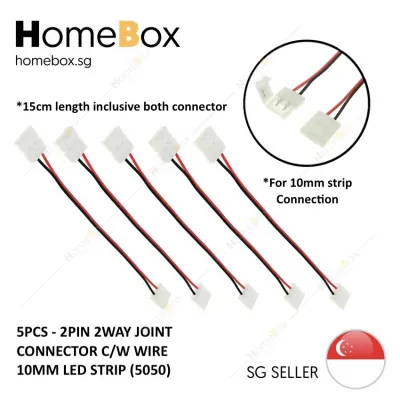
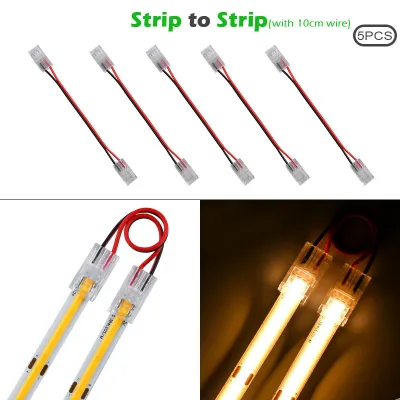
Prices are valid at publication and may change. Please refer to the product page for the latest price.
- Smooth Indoor Surfaces (Glass, Finished Wood, Metal, Glossy Tile): Adhesive clips offer a quick, low-profile, and drill-free mounting solution.
- High-Heat or High-Visibility Areas (Under Cabinets, Recessed Ceiling Grooves, Long Drywall Runs): Aluminum channels provide structural alignment, excellent heat dissipation, and a professional, diffused aesthetic.
- Damp, Outdoor, or Uneven Surfaces (Bathrooms, Balconies, Brick, Stucco): Silicone mounts secured with mechanical screws offer the flexibility and weather resistance needed to withstand moisture and temperature swings.
Adhesive Clips: Best for Smooth, Indoor Surfaces
Adhesive clips are a popular, user-friendly choice for securing light strips without drilling holes. These holders feature a small plastic or metal bracket that clamps over the LED strip, backed by a double-sided adhesive pad. They are designed to supplement the strip’s built-in adhesive, providing targeted strain relief and preventing the ends or corners of the strip from peeling away over time.
Ideal Surfaces for Adhesive Mounting
Adhesive-based holders rely on maximum surface contact to form a secure molecular bond. They perform exceptionally well on high-surface-energy materials that are flat, clean, and non-porous. Excellent candidates include architectural glass, smooth painted wood, anodized aluminum, glossy ceramic tiles, and finished medium-density fiberboard (MDF). When applied to these surfaces, high-quality adhesives can support the lightweight profile of standard LED strips indefinitely.
Limitations and Common Failure Points
Adhesive clips will rapidly fail if applied to textured, dusty, or highly porous surfaces. Textured plaster, brick, concrete, and popcorn ceilings do not allow the adhesive pad to make full contact, leading to localized stress and eventual peeling. Furthermore, high ambient heat or moisture will degrade the adhesive polymer. In areas like kitchens where cooking grease accumulates, or in tropical climates with high relative humidity, standard adhesive pads will lose their tackiness and slide off the wall.
Critical Buying Checks
When purchasing adhesive clips, inspect the quality of the pre-applied tape. Opt for clips utilizing reputable, heavy-duty acrylic foam tapes (such as 3M VHB) rather than generic, thin rubber-based adhesives. You must also verify that the internal width of the clip matches the width of your LED strip. Standard strips are typically 8mm, 10mm, or 12mm wide; buying a clip that is too narrow will pinch and damage the delicate copper circuitry, while a clip that is too wide will allow the strip to slip and sag.
Step-by-Step Application Tips
To achieve a permanent bond, surface preparation is non-negotiable. Begin by wiping the mounting surface thoroughly with a lint-free cloth saturated with 70% or 90% isopropyl alcohol to remove dust, skin oils, and manufacturing residues. Allow the surface to dry completely. Peel the protective backing from the clip, position it carefully, and press down firmly for at least 30 seconds. For optimal results, allow the adhesive to cure for 24 to 72 hours before threading the LED strip through or applying any hanging weight.
Aluminum Channels: Best for Heat Management and Clean Lines
Aluminum channels, also known as LED profiles or extrusions, represent the gold standard for premium lighting installations. These rigid metal tracks house the LED strip inside a protective U-shaped channel, which is then sealed with a snap-in plastic diffuser cover. This setup transforms a raw, dotted light strip into a continuous, sleek light fixture that blends seamlessly into modern interiors.

Ideal Surfaces and Aesthetic Integration
Aluminum channels are ideal for flat, rigid surfaces where a highly polished, architectural look is desired. They are commonly installed under kitchen cabinets, inside wardrobes, along recessed ceiling grooves, and on long, straight stretches of drywall. Because the aluminum track is perfectly straight, it eliminates the natural snaking and warping that can occur when installing flexible strips directly to a wall, ensuring perfectly clean lines of light.
Thermal Conductivity and Lifespan Extension
Beyond aesthetics, the primary engineering benefit of aluminum channels is thermal management. LEDs generate localized heat at their semiconductor junctions. High-density strips, such as those with 120 or more diodes per meter, or high-power COB (Chip-on-Board) strips, can run surprisingly hot. If this heat is not dissipated, it accelerates phosphor degradation, leading to color shifting, dimming, and premature diode failure. Aluminum possesses high thermal conductivity, acting as an effective heat sink that draws warmth away from the circuit board and radiates it into the surrounding air, significantly extending the lifespan of your investment.
Diffuser Performance and Visual Preferences
The plastic cover of an aluminum channel serves as an optical diffuser. Frosted or milky diffusers scatter the light, blending the individual LED dots into a single, uniform glow. This is particularly important on reflective surfaces like polished stone countertops, where raw LED reflections can create distracting glare. While a frosted cover slightly reduces overall lumen output, it creates a highly desirable, premium aesthetic. If maximum brightness is your priority and the light source is completely hidden from direct view, a clear diffuser cover can be used to protect the strip from dust without altering the light output.
Limitations and Installation Requirements
The rigidity of aluminum channels means they cannot bend around tight curves or conform to uneven surfaces. Navigating 90-degree corners requires precise miter cuts or specialized plastic corner connectors. Installation is also more labor-intensive than using simple clips, typically requiring you to screw mounting brackets into the substrate or use heavy-duty mounting adhesive. Ensure you have the appropriate tools, such as a hacksaw or a miter saw equipped with a non-ferrous metal cutting blade, to cut the tracks to your desired lengths.
Buying Checks for Dimensions and Materials
Before purchasing, measure both the external and internal dimensions of the channel. The internal width must be slightly wider than your LED strip (including any waterproof silicone coating) to prevent binding. Ensure the channel depth is sufficient; shallow channels require very high-density LED strips to achieve a spotless look, whereas deeper channels naturally diffuse the light better. Finally, verify that the diffuser cover is made of UV-stabilized polycarbonate (PC) rather than cheap acrylic (PMMA), as acrylic can become brittle and turn yellow when exposed to heat and light over time.
Silicone Mounts: Best for Damp, Outdoor, or Uneven Areas
Silicone mounting brackets are flexible, semi-translucent holders designed to be secured with mechanical screws. They are engineered specifically to withstand harsh environments where adhesives fail and rigid metal tracks are impractical. These brackets wrap over the top of the light strip, providing a secure, physical clamp that holds the strip firmly against the mounting surface.
Ideal Surfaces and Environmental Resilience
Silicone mounts are the premier choice for challenging outdoor and high-humidity environments. They excel on rough, uneven, or porous surfaces such as outdoor eaves, brickwork, concrete patio walls, stucco, and bathroom perimeters. Because silicone is highly flexible, these brackets conform easily to curved surfaces, structural columns, or irregular architectural details, making them incredibly versatile for creative lighting layouts.
Material Advantages and Structural Security
Silicone is an exceptionally stable elastomer that resists degradation from ultraviolet (UV) radiation, ozone, and extreme temperature fluctuations. Unlike rigid plastics, silicone will not crack, yellow, or become brittle when exposed to direct sunlight or rain. Furthermore, because these holders are secured with stainless steel screws, they provide a positive mechanical lock. This ensures that even if the mounting surface becomes wet, dusty, or hot, the light strip cannot sag or fall, offering peace of mind for elevated or hard-to-reach installations.
Limitations and Architectural Trade-Offs
The primary drawback of silicone mounts is the installation effort. Because they rely on screws, you must drill holes into your mounting surface. This makes them less suitable for renters or for application on delicate, easily cracked surfaces like glass or high-end porcelain tiles. Additionally, because the brackets sit on top of the strip at regular intervals, the mounting hardware is visible. This can disrupt the clean, continuous look of the light strip if it is installed in a direct line of sight.
Buying Checks for Outdoor Durability
When selecting silicone mounts, ensure they are rated as UV-resistant to prevent degradation from sun exposure. Verify that the screw holes are reinforced or thick enough to prevent the screw head from tearing through the soft silicone under tension. Most importantly, check the physical clearance height of the bracket; waterproof LED strips (rated IP65, IP67, or IP68) are significantly thicker than standard indoor strips due to their protective silicone sleeves, and they require specialized, deep-profile silicone brackets to fit securely without crushing the casing.
Quick Comparison: LED Strip Holders by Surface and Need
Choosing the right holder involves balancing ease of installation against durability and aesthetic requirements. The table below summarizes the physical properties, ideal environments, and installation characteristics of each holder type to help you make an informed decision.
| Holder Type | Best Surfaces | Installation Method | Heat Dissipation | Best For |
|---|---|---|---|---|
| Adhesive Clips | Glass, metal, glossy tiles, finished wood | Peel-and-stick adhesive backing | Low (relies entirely on the substrate) | Low-profile, drill-free indoor installations |
| Aluminum Channels | Drywall, under cabinets, recessed ceiling channels | Mounting screws or heavy-duty tape | Excellent (acts as an active metal heat sink) | Professional, spotless aesthetics and high-power strips |
| Silicone Mounts | Brick, concrete, stucco, outdoor wood, bathrooms | Mechanical screws and wall plugs | Moderate (allows airflow around the strip) | Wet, outdoor, curved, or highly textured surfaces |
Surface Preparation and Installation Safety
No matter which led light strip holder you select, a successful installation requires careful preparation and strict adherence to safety protocols. Neglecting these steps can lead to structural damage, electrical hazards, or system failures.
Comprehensive Surface Preparation
Before mounting any hardware, ensure the surface is structurally sound and free of contaminants. Remove all loose paint, dust, plaster crumbles, and grease. If you are mounting to masonry or concrete, brush the surface with a stiff wire brush to remove efflorescence and loose debris. For adhesive applications, always perform a quick adhesion test on a small, inconspicuous area. This step ensures that the adhesive bond is stronger than the paint-to-wall bond, preventing the weight of the strip from pulling the paint right off the drywall.
Electrical Safety and System Integration
Always prioritize electrical safety when working with lighting components. Before cutting, soldering, or mounting your LED strips, isolate the power supply by unplugging the transformer or switching off the corresponding circuit breaker at your main distribution board. Verify that your LED strip’s operating voltage (typically 12V or 24V DC) matches your power supply’s output rating. Ensure all power adapters carry recognized electrical safety certifications (such as the Safety Mark in Singapore) to guard against short circuits, overcurrent, and thermal runaway.
Thermal Safety and Combustible Materials
High-power LED strips can generate surface temperatures exceeding 60°C during prolonged operation. Mounting these high-wattage strips directly onto combustible materials—such as raw pine, wallpaper, or low-melting-point plastics—presents a serious fire hazard. If your LED strip consumes more than 10 to 14 watts per meter, you must mount it inside an aluminum channel or onto a non-combustible metal backing plate to act as a heat barrier and thermal radiator.
Defining Professional Boundaries
While installing LED strip holders is generally a straightforward DIY task, you must recognize when to stop and call a professional. If your project involves fixed electrical wiring (such as hardwiring a transformer into a mains 220-240V circuit), working at extreme heights, or drilling into walls where hidden electrical conduits or water pipes might reside, consult a licensed electrical worker or a professional handyman. Drilling blindly into concrete walls can damage structural reinforcement bars or puncture hidden services, resulting in costly repairs and severe safety hazards.
Frequently Asked Questions (FAQ)
Can I use adhesive clips on textured or popcorn ceilings?
No, adhesive clips should not be used on textured or popcorn ceilings. The irregular surface profile prevents the flat adhesive pad from making sufficient contact, resulting in a very weak bond that will fail under the weight of the light strip. For textured ceilings, you should use mechanical silicone mounts secured with screws and appropriate drywall anchors, or mount the light strip inside rigid aluminum channels screwed directly into the ceiling joists.
Do aluminum channels reduce the brightness of LED strips?
Yes, aluminum channels with diffuser covers will reduce the overall light output, but the trade-off is usually worth it. A frosted or milky diffuser cover typically reduces brightness by 20% to 40% depending on its density, but it eliminates harsh glare and individual diode hot spots to create a smooth, continuous beam of light. Clear diffuser covers protect the strip from dust and moisture without reducing brightness, but they do not diffuse the individual light points.
How do I remove adhesive clips without damaging the paint?
To remove adhesive clips safely, use a hairdryer on a medium-heat setting to warm the clip for 30 to 60 seconds. The heat softens the adhesive polymer, reducing its grip. Next, take a piece of dental floss or thin fishing line, slide it behind the clip, and use a gentle sawing motion to cut through the foam tape. Once the clip is removed, clean any remaining adhesive residue from the wall using a mild, paint-safe citrus-based solvent or rubbing alcohol, wiping gently to avoid tearing the drywall paper.
Community discussion
Share your experience or ask a question. Comments are reviewed before publication.