
Using a candle warmer lamp is an efficient, flame-free way to enjoy home fragrances, but achieving the perfect scent throw depends on matching the right wax type and candle design to your lamp’s specifications. Not all scented candles behave the same way under top-down halogen heat. To get a clean, even melt pool that releases the full depth of a fragrance, you must consider the wax’s melting point, the physical geometry of the candle jar, and the electrical output of your warmer bulb.
How Different Wax Types React to Top-Down Heat
Soy wax is a highly popular choice for candle warmer lamps due to its relatively low melting point, typically ranging between 49°C and 54°C. Because the wax is naturally soft, the heat from a standard 35-watt or 50-watt halogen bulb liquefies the top layer quickly. This rapid melting allows the volatile fragrance oils suspended in the soy wax to disperse efficiently into the room, creating a robust scent throw without requiring excessive energy.
Coconut wax blends offer an even lower melting point, often sitting between 38°C and 45°C. This makes coconut wax exceptionally soft and highly reactive to top-down heating. Under a warmer lamp, coconut wax liquefies almost instantly, providing an outstanding cold and hot scent throw. It is one of the most compatible wax types for low-wattage or dimmable warmer lamps, as it does not require intense heat to pool completely.
Products mentioned in this guide
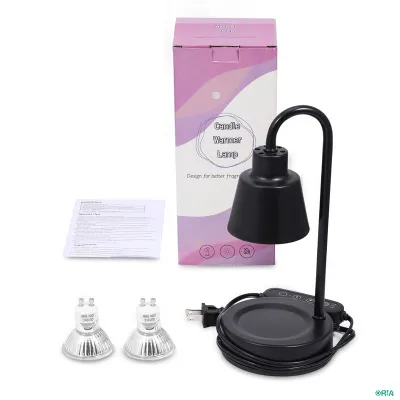
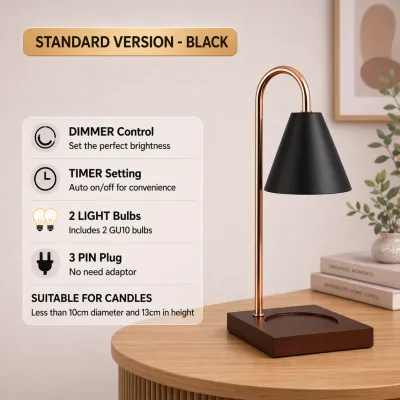
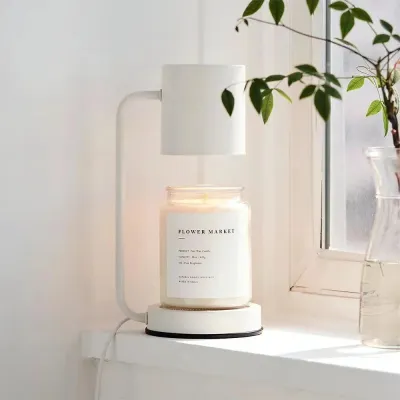
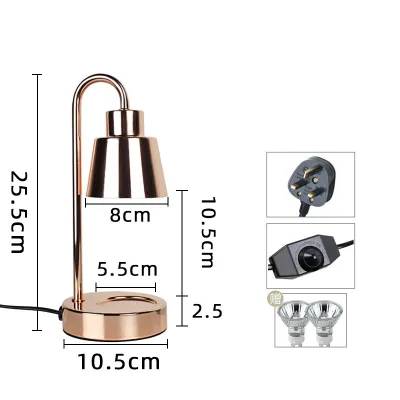
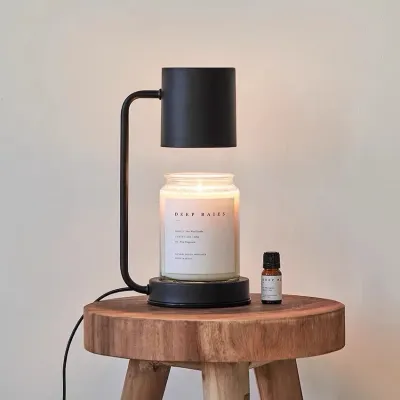
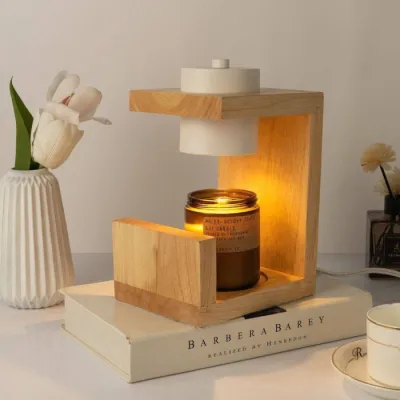
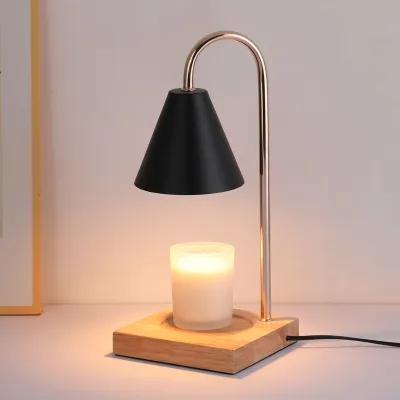
Prices are valid at publication and may change. Please refer to the product page for the latest price.
Paraffin wax behaves differently depending on its density and formulation. While soft, low-density paraffin melts easily, high-grade or dense paraffin waxes used in larger commercial candles often have a higher melting point, sometimes reaching up to 68°C. These denser formulations require sustained, high-intensity heat to form a complete melt pool. If your warmer lamp’s bulb is too weak, a dense paraffin candle may suffer from tunneling, where only the center melts while the outer edges remain solid.
Beeswax is the densest option, with a high melting point of 62°C to 64°C. Pure beeswax candles are generally not recommended for standard candle warmer lamps because they resist melting under typical halogen bulbs. If you wish to warm a beeswax blend, you will need a high-wattage bulb—at least 50 watts—and a lamp that allows you to adjust the height to bring the heat source closer to the wax surface.
Before placing any candle under a warmer, always inspect the manufacturer’s label on the packaging. Check for the specific wax composition and look for any care instructions or warnings regarding heating. If a brand explicitly advises against using their product with warmers or indicates a low thermal threshold, always defer to those instructions to prevent safety hazards or damage to the candle.
Choosing Candle Brands and Jar Shapes for Even Melting
When selecting candles for a candle warmer lamp, physical jar design and geometry are often more critical than brand prestige. A premium, expensive candle can perform poorly under a warmer if its jar shape is incompatible, whereas a modest, locally produced candle can distribute scent beautifully if the container is shaped correctly. Understanding how top-down heat radiates is key to choosing the right vessel.

The halogen bulb of a warmer lamp projects heat downward in a cone shape. To achieve an even melt pool, the surface area of the wax must align with this heat pattern. Wide-mouth, shallow jars—such as classic three-wick jars or broad ceramic vessels—are ideal. The wide opening allows the heat cone to cover the entire top layer of wax simultaneously, ensuring the wax melts evenly to the edges of the container and releases the fragrance uniformly.
Conversely, tall, narrow containers, such as deep cylinder jars or traditional apothecary bottles, present distinct challenges. In these vessels, the bulb can only melt the top few centimeters of wax. As the wax level recedes, the tall glass walls of the jar block the radiating heat, preventing the lower layers of wax from melting. This traps the remaining fragrance oils in solid wax at the bottom of the jar, rendering the rest of the candle unusable under a warmer.
Many premium, artisanal, and local candle brands perform exceptionally well under warmer lamps because they utilize soft soy or coconut wax blends housed in wide, amber glass jars or flat ceramic pots. When shopping for candles to pair with your lamp, look for brands that offer wax blend transparency and use containers with straight or outward-flaring walls. Avoid jars that taper sharply inward at the top; a restricted opening concentrates heat on the glass rim, which can cause thermal shock and increase the risk of the glass cracking.
Matching Candle Dimensions and Bulb Wattage to Your Lamp
Ensuring physical and electrical compatibility between your candle and the warmer lamp is essential for both performance and home safety. Before purchasing a candle, measure its height and diameter against the physical clearance of your lamp. The clearance is the vertical distance between the base plate and the bottom of the halogen bulb. To prevent overheating, there should always be a safety gap of at least 3 to 5 centimeters between the rim of the candle jar and the bulb cover.
The relationship between bulb wattage and candle size directly dictates how effectively the wax melts. Most candle warmer lamps utilize GU10 halogen bulbs, which are typically rated at either 35 watts or 50 watts. A 35-watt bulb is best suited for smaller, single-wick candles with a jar diameter of 7 centimeters or less. This wattage provides gentle, controlled heat, preventing soft soy or coconut waxes from overheating and burning off their fragrance oils too quickly. A 50-watt bulb is necessary for larger, multi-wick candles or jars with a diameter exceeding 7 centimeters. The higher wattage provides the thermal energy required to melt dense waxes completely to the edge of the jar, ensuring a full melt pool.
Electrical safety is a crucial consideration, particularly when sourcing appliances. In Singapore, the standard domestic electrical supply operates at 230V and 50Hz, utilizing Type G three-pin plugs. When buying a candle warmer lamp, always verify that the device is rated specifically for 230V. Importing a 110V lamp designed for other regions without using a proper step-down transformer is an electrical hazard that can destroy the bulb instantly or cause a short circuit. Look for lamps that carry local electrical safety certifications, such as the Safety Mark, to ensure the internal wiring, switches, and plug meet national safety standards.
Finally, inspect the physical build of the lamp. The base must be constructed from a heavy, stable material such as solid marble, thick ceramic, or weighted metal. Large candle jars filled with melted wax are heavy; a flimsy or lightweight lamp base increases the risk of accidental tipping, which can cause severe wax spills, property damage, or burns.
Safe Setup and Usage Sequence for Warmer Lamps
To maximize the lifespan of your candles and ensure safe operation, follow a structured sequence when setting up and using your candle warmer lamp.
- Step 1: Choose a Safe Location: Place the lamp on a flat, stable, and heat-resistant surface, such as marble, stone, or treated hardwood. Keep the setup away from window curtains, loose papers, and direct drafts. In Singapore's air-conditioned indoor environments, strong drafts from air conditioning vents or ceiling fans can cool the surface of the candle, disrupting the heat distribution and preventing a proper melt pool from forming.
- Step 2: Center the Candle: Position the candle jar centrally on the lamp's base plate. Ensure the jar sits completely flat within any designated indentation on the base. Centering the candle guarantees that the top-down heat from the halogen bulb is distributed evenly across the entire wax surface, preventing uneven melting.
- Step 3: Adjust the Heat Settings: Plug the lamp into a certified wall outlet and turn it on. If your lamp features a built-in dimmer switch or an adjustable height mechanism, start on a medium setting. This allows the wax to warm up gradually, preserving the delicate top notes of the fragrance. You can increase the heat once the melting process begins.
- Step 4: Monitor the Melt Pool: Monitor the initial melt pool formation during the first hour of operation. Check that the wax is melting evenly toward the edges of the jar. If you notice the wax is only melting directly under the bulb and leaving a hard ring around the glass, slightly increase the dimmer setting or lower the lamp height if your model allows it.
- Step 5: Power Down and Cool: When you are finished, turn off the lamp and unplug it from the wall. Allow the melted wax pool to cool and solidify completely before moving the candle, cleaning the base, or adjusting the lamp. Moving a jar filled with hot, liquefied wax can lead to spills, skin burns, or ruined furniture.
Pairing Restrictions and What to Avoid
While candle warmer lamps are a safer alternative to open flames, they still generate significant thermal energy. Maintaining strict safety boundaries is essential to prevent accidents.
Avoid using candles that contain dried flowers, herbs, crystals, glitter, or wooden wicks under a warmer lamp. Although these decorative elements are safe when cold, the concentrated heat of a halogen bulb can cause dried organic materials to char, smoke, or ignite. Wooden wicks can also scorch or release unpleasant odors under intense top-down heat, ruining the candle’s fragrance profile.
Only use candles housed in high-quality, heat-resistant glass, ceramic, or thick metal tins. Never place candles in plastic containers, paper-wrapped jars, or cheap decorative tins under a warmer. The heat from a 50-watt halogen bulb can easily melt plastic or ignite paper wraps, creating a severe fire hazard.
Do not use candle jars that are too tall for your lamp. If the rim of the jar, the wax surface, or an unclipped wick comes into direct contact with or sits within 2 centimeters of the halogen bulb, it can cause the glass to shatter due to extreme thermal stress, or ignite the wick. Always trim wicks to approximately 6 millimeters before placing the candle under the lamp.
Never leave an active candle warmer lamp unattended. Keep the entire setup on a high, stable surface strictly out of reach of children and pets to prevent accidental contact with the hot bulb or the liquefied wax pool.
Frequently Asked Questions (FAQ)
Can I use a candle warmer lamp with any glass jar?
No, you should only use jars specifically designed for candles. Standard candle jars are manufactured from tempered or thermal-shock-resistant glass to withstand high temperatures. Extremely thin glass, drinking glasses, vintage mason jars, cracked containers, or decorative glass vases should never be placed under a warmer lamp. The concentrated heat from a halogen bulb can cause non-tempered or damaged glass to crack or shatter, spilling hot wax.
Why is my candle melting but not releasing any fragrance?
If your candle is melting but has no scent throw, the bulb wattage may be too low to vaporize the fragrance oils, or the candle may be too far from the bulb. Additionally, over time, the top layer of wax under a warmer lamp will lose its scent because the fragrance oils eventually evaporate completely while the wax remains. To resolve this, carefully pour off or siphon the top layer of scentless, melted wax into a heat-safe waste container to expose a fresh, fragrance-rich layer of wax underneath.
How do I clean the wax if it spills on the warmer lamp?
If wax spills on your lamp, first unplug the appliance and let it cool completely. Once the spilled wax has solidified, use a plastic scraper, a silicone spatula, or the edge of an old credit card to gently pop the hardened wax off the surface. Wipe away any remaining residue with a soft, dry microfiber cloth. Avoid using abrasive scouring pads, steel wool, or liquid chemical cleaners, as these can scratch the finish or damage the lamp’s electrical components.
Community discussion
Share your experience or ask a question. Comments are reviewed before publication.