
To make a small room feel significantly larger and brighter, the best wall mirror stickers are rigid acrylic panels with a thickness of 1mm to 3mm, arranged in strategic layouts like large rectangular grids or expansive geometric patterns. Unlike heavy, traditional glass mirrors that require drilling and heavy-duty wall anchors, lightweight adhesive mirror stickers offer a renter-friendly, highly flexible alternative. When selected and placed correctly, these reflective accents bounce ambient light deep into cramped areas, visually dissolving rigid wall boundaries and doubling the perceived depth of a room.
In compact living environments, such as Singapore’s HDB flats and modern apartments, maximizing square footage is a constant design challenge. Narrow entryways, tight bedrooms, and windowless corridors can easily feel claustrophobic. Wall mirror stickers address this issue by acting as “visual windows” that trick the brain into perceiving space beyond the actual wall surface. However, achieving this space-amplifying effect requires more than just buying the first adhesive mirror product you find online. Success depends on understanding material science, choosing the right shapes for your specific layout, and mastering the art of strategic placement.
Core Criteria for Choosing Space-Enhancing Mirror Stickers
The primary mechanism behind the space-expanding magic of a mirror is light redirection. When natural or artificial light strikes a highly reflective surface, it bounces back into the room at the same angle it arrived, illuminating dark corners and making the entire volume feel more open. A high-quality wall mirror sticker must mimic the optical clarity of silvered glass to create a convincing illusion of depth. If the reflection is dull, cloudy, or distorted, the human eye immediately registers the surface as a flat, cheap plastic sheet, completely breaking the spatial illusion and making the room feel cluttered rather than spacious.
Products mentioned in this guide
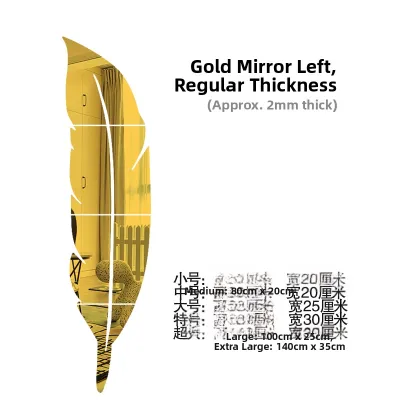
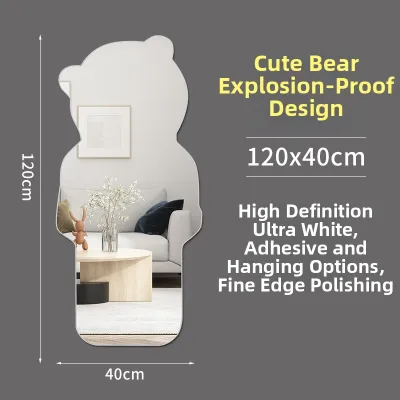
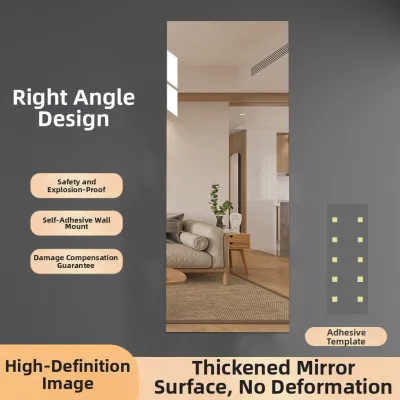
![SG [ READY STOCK ] HD Acrylic soft mirror attached to wall self-adhesive full body dressing mirror non perforated](https://img.lazcdn.com/g/p/10f5a09c2f952c5c8f6fe9a8d334827a.jpg_400x400q80.jpg_.webp)
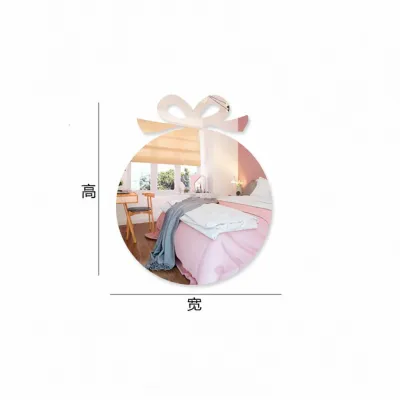

Prices are valid at publication and may change. Please refer to the product page for the latest price.
To prevent this, the single most critical factor to evaluate is the material thickness. The market is flooded with ultra-thin polyethylene terephthalate (PET) film stickers, which are often sold in rolls or very thin sheets (under 0.5mm). While incredibly cheap, PET films are highly flexible and conform to every microscopic imperfection, bump, or texture on your wall. This results in a severe “funhouse” effect, where reflections warp, bend, and stretch as you walk past. This constant visual distortion is not only visually unappealing but can also cause mild disorientation in small spaces. For a true, glass-like reflection, you should opt for rigid acrylic (polymethyl methacrylate or PMMA) mirror sheets that are at least 1mm to 3mm thick. Rigid acrylic holds its flat shape much better, masking minor wall unevenness and providing a crisp, sharp reflection.
Beyond thickness, look closely at the quality of the reflective backing and the edge finishing. Premium wall mirror stickers feature a vacuum-metallized aluminum or silver coating on the rear side of the acrylic sheet, protected by a tough, multi-layer paint backing. This prevents the reflective layer from scratching or oxidizing over time, which can cause dark spots or peeling edges. Additionally, laser-cut edges with a slight bevel or a polished finish are highly desirable. Smooth, clean edges allow individual mirror tiles to be mounted flush against one another, creating a seamless, continuous reflective surface that looks like a custom-installed, high-end glass mirror.
Best Wall Mirror Sticker Styles for Small Rooms
Selecting the right style of wall mirror sticker is a balancing act between aesthetic preferences and the specific architectural limitations of your room. Different shapes and configurations serve distinct spatial purposes, whether you want to mimic a grand window, soften rigid corners, or draw the eye upward to create height.

Large Rectangular and Square Panels
Large, continuous rectangular or square mirror panels are the ultimate choice for creating the illusion of a “false window” or an open doorway. By reflecting a massive, uninterrupted portion of the room, these panels effectively double the visual space of a wall, making a cramped bedroom or a narrow dining alcove feel twice its actual size.
When tiling rectangular or square mirror stickers together, aim for individual tile dimensions of at least 30cm by 30cm or 40cm by 40cm. Arranging these in a clean four-by-four or three-by-three grid creates a sophisticated, paneled look that closely resembles high-end architectural glass installations. This configuration is particularly effective on the main accent wall of a small living room or directly behind a bed’s headboard, where it introduces a sense of symmetry and grandeur.
The main challenge with large panels lies in the application process. Because of their size, even a minor misalignment during installation can throw off the entire grid, leaving unsightly gaps or overlapping edges. Furthermore, large sheets are highly susceptible to trapping air bubbles underneath the adhesive backing. If your walls have even slight bowing or uneven plastering, large rigid panels may struggle to adhere flatly across their entire surface, which can lead to localized corner lifting or minor optical warping.
Hexagonal and Honeycomb Clusters
For homeowners and renters who want to blend spatial expansion with modern artistic flair, modular hexagonal and honeycomb mirror stickers are an exceptional option. These interlocking geometric shapes allow you to build a customized, fluid reflective installation that can expand or contract to fit any wall size.
The magic of the honeycomb pattern lies in the subtle gaps or grout lines between the individual tiles. Rather than presenting a single, overwhelming sheet of reflection, the hexagonal grid breaks up the reflected image into structured, repeating segments. This geometric rhythm tricks the brain into perceiving a deeper, more complex architectural layer on the wall, visually pushing the wall surface backward. To maximize this effect, you can install a dense cluster in the center of the wall and allow the pieces to “fade out” or scatter organically toward the edges, which blurs the rigid boundaries of the room and makes the wall feel less confining.
Another major benefit of modular hexagonal stickers is their incredible adaptability. Because you can place each tile individually, you can easily design around existing wall obstacles such as light switches, electrical outlets, wall-mounted air conditioning units, or awkward structural columns. If you live in a compact apartment with irregular layouts, honeycomb clusters provide the flexibility to inject light and depth into tight nooks that could never accommodate a traditional, rigid rectangular mirror.
Geometric and Asymmetric Mosaics
If your room suffers from awkward architectural features, such as low sloping ceilings, narrow entryways, or offset walls, geometric and asymmetric mirror mosaics can be used to redirect visual flow. This style utilizes varied shapes—such as triangles, diamonds, or slender chevron strips—arranged in dynamic, non-traditional patterns.
Asymmetric arrangements work by breaking up the rigid vertical and horizontal lines that define a small room. By drawing the eye diagonally or upward along a cascading path of reflective shapes, these mosaics distract from the physical limitations of the floor area. For example, arranging diamond-shaped mirror stickers in a vertical, climbing vine pattern on a narrow entryway wall guides the viewer’s gaze toward the ceiling, creating an immediate sensation of height and openness the moment someone steps through the front door.
When using geometric mosaics, the key is to maintain a sense of visual balance to prevent the wall from looking chaotic or cluttered. Because these designs feature multiple small pieces and numerous intersecting lines, they can easily become visually noisy if overdone. It is best to limit asymmetric mosaics to dedicated focal points, such as the space above a low-profile console table, a vanity, or a minimalist sideboard. Keep the surrounding decor simple, allowing the clean lines of the geometric mirrors to capture and scatter light without competing with busy wallpaper or heavy artwork.
Strategic Placement Guide for Maximum Space Amplification
Even the highest-quality mirror sticker will fail to expand your room if it is placed in a visual dead zone. To achieve true space amplification, you must position your mirrors where they can actively interact with the room’s light sources and architectural lines.
- Opposite Windows: One of the most effective techniques is to place your mirror stickers directly across from, or adjacent to, a primary window. This positioning allows the mirrors to capture incoming natural sunlight and bounce it deep into the darker recesses of the room. Not only does this double the amount of natural light in the space, but it also reflects the outdoor view—whether it is a lush garden, a city skyline, or open sky—effectively creating a second "window" that visually connects the indoors with the outside world.
- Narrow Hallways and Corridors: Hallways in compact homes often feel like dark, uninviting tunnels. To widen a narrow corridor, apply a horizontal band of mirror stickers along one of the side walls at eye level. This horizontal stretch breaks up the long, oppressive wall surface and makes the hallway feel wider. Alternatively, placing a large mirror sticker installation at the very end of a dead-end hallway extends the perceived length of the corridor, making it feel as though the passage continues indefinitely.
- Low Ceilings: If your ceilings feel low and heavy, you can use verticality to your advantage. Arrange slender, vertical rectangular mirror strips or tall, climbing geometric patterns from the baseboard or the top of low furniture all the way up to the ceiling line. This vertical emphasis forces the eye to travel upward, tricking the brain into perceiving a much higher ceiling and a loftier, more airy atmosphere.
- Clutter Management: While mirrors are excellent at doubling space, they also double whatever they reflect. Before finalizing your placement, sit or stand in the areas where you spend the most time and look at what will be reflected in the mirror stickers. If a mirror is positioned directly opposite an open wardrobe, a busy utility shelf, or a cluttered desk, it will replicate that visual noise, making the small room feel twice as cramped and chaotic. Always aim to reflect clean, minimalist surfaces, soft indoor plants, or open pathways to maintain a serene, spacious feel.
Buying and Application Checks to Protect Your Walls
Because wall mirror stickers rely on adhesives, installing them requires careful planning to ensure they stay securely on the wall while protecting your underlying paint or wallpaper from damage—a crucial consideration for renters who want to secure their rental deposits.
- Adhesive Verification: Before purchasing, verify the type of adhesive backing supplied with the mirror stickers. Some products come with heavy-duty, permanent double-sided foam tape designed for outdoor or industrial use. While this ensures the mirrors will never fall, it will almost certainly rip off chunks of drywall or plaster when you attempt to remove them. If you are renting or plan to change your decor in the future, look for products specified with "removable" or "renter-friendly" pressure-sensitive adhesives. If the mirrors come with permanent tape, consider replacing it with high-quality, removable mounting strips designed specifically for damage-free hanging. Always check compatibility with your specific wall paint, as some highly matte, chalky, or silicone-based "easy-clean" paints can repel adhesives, causing stickers to fall unexpectedly.
- Surface Preparation: The longevity and optical quality of your mirror stickers depend entirely on the cleanliness and smoothness of the wall. Before applying a single tile, thoroughly clean the wall surface with a dry or slightly damp microfiber cloth to remove all dust, grease, and loose paint particles. If using a damp cloth, allow the wall to dry completely for at least 24 hours. Avoid applying mirror stickers to textured walls, such as stucco, rough plaster, or heavily textured wallpaper. Not only will the uneven surface prevent the adhesive from making full contact—leading to peeling—but it will also cause the rigid acrylic to bend slightly, turning your beautiful mirror into a distorted funhouse reflection.
- Application Technique: When you are ready to install, work slowly and methodically. Use a level and a pencil to lightly mark your alignment guidelines directly on the wall. When applying each mirror tile, peel off the adhesive backing paper and press the tile gently against the wall, starting from the center and working your way outward to the edges. Use a soft, clean microfiber cloth or a plastic squeegee wrapped in a soft cloth to apply firm, even pressure across the entire surface. This forces out any trapped air bubbles and ensures a strong, uniform bond. Crucially, do not remove the thin, clear protective film on the front face of the mirror until the entire installation is complete. This protective layer shields the delicate acrylic surface from accidental scratches, fingerprints, and scuffs during the handling and installation process.
- Safe Removal: When the time comes to remove the mirror stickers, never attempt to rip or pry them off the wall dry, as this will inevitably tear the paint or damage the plaster underneath. Instead, use a hairdryer on a low-to-medium heat setting to gently warm the surface of the mirror sticker for 30 to 60 seconds. The heat will soften the underlying adhesive, making it pliable and significantly reducing its grip. Once warmed, slowly and gently slide a thin, flexible plastic putty knife or a piece of dental floss behind the mirror tile to slice through the softened adhesive. Slowly peel the tile away from the wall at a sharp angle. Any remaining adhesive residue on the wall can usually be rolled off with your fingers or cleaned with a mild, paint-safe adhesive remover.
Frequently Asked Questions (FAQ)
Do acrylic mirror stickers distort reflections?
Yes, acrylic mirror stickers can distort reflections if they are not selected or installed correctly. Because acrylic is inherently more flexible than traditional glass, any unevenness on the underlying wall surface will cause the acrylic sheet to bend slightly. Even a microscopic bump or a speck of dust behind the sticker can warp the material, resulting in a distorted, wavy reflection. To minimize this distortion, always choose thicker acrylic sheets (ideally 1mm to 3mm) rather than paper-thin PET films. Additionally, ensure that your wall is perfectly smooth, clean, and flat before installation. For absolute optical clarity over long distances, traditional glass mirrors remain superior, but high-quality, thick acrylic stickers applied to a pristine, flat wall will provide an exceptionally clear, distortion-free reflection up close.
Can I use wall mirror stickers in a humid bathroom?
Using standard wall mirror stickers in a highly humid bathroom is generally not recommended unless the product is specifically rated for wet environments. Singapore’s tropical climate, combined with the hot steam from daily showers, creates a challenging environment for standard adhesives. Over time, constant moisture and temperature fluctuations will penetrate behind the mirror tiles, breaking down the adhesive bond and causing the stickers to peel, warp, or fall off the wall. Furthermore, prolonged exposure to moisture can seep into the edges of lower-quality mirror backings, causing the reflective silver coating to oxidize and develop unsightly black spots. If you wish to use mirror stickers in a bathroom, ensure the walls are completely dry during installation, select a product with a moisture-resistant backing, and reinforce the installation with a high-quality, waterproof double-sided mounting tape designed specifically for bathrooms and humid zones.
Community discussion
Share your experience or ask a question. Comments are reviewed before publication.