
Selecting the right led square downlight for a standard 2.6m HDB ceiling requires a careful balance between functional brightness and visual comfort. Because low ceilings bring the light source closer to eye level, poorly planned fixtures can easily cause harsh glare, create distracting shadows, or make living spaces feel cramped. Evaluating optical design, physical dimensions, and layout strategies is far more critical than simply choosing the highest wattage available. By focusing on how light behaves in a compact vertical space, you can achieve a bright, open, and visually comfortable home.
This guide outlines the essential technical specifications, anti-glare features, and spacing frameworks needed to evaluate square downlights for your flat. Whether you are renovating a new Build-To-Order (BTO) flat or upgrading an existing resale unit, understanding these parameters will help you make an informed decision without relying on unverified product claims.
Understanding Lighting Constraints in 2.6m HDB Ceilings
A ceiling height of 2.6 meters is standard across most modern HDB flats, and this physical boundary directly dictates how light distributes throughout a room. In a low-ceiling environment, light has less vertical distance to spread before it hits floors, furniture, and occupants. If you install fixtures with narrow beam angles, the light will pool in intense, localized spots on the floor, leaving the upper walls and corners in shadow. This high-contrast environment can make a room feel smaller and more cave-like than it actually is.
Products mentioned in this guide
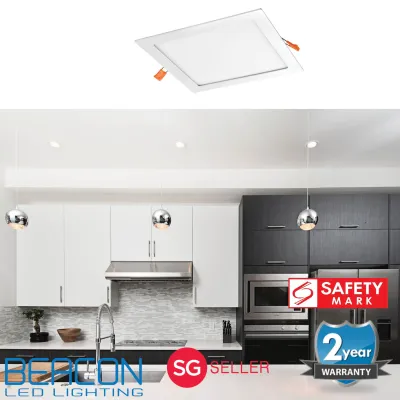
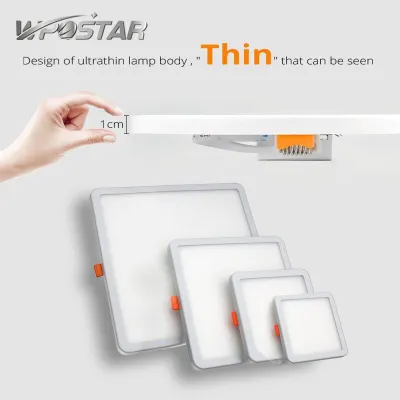
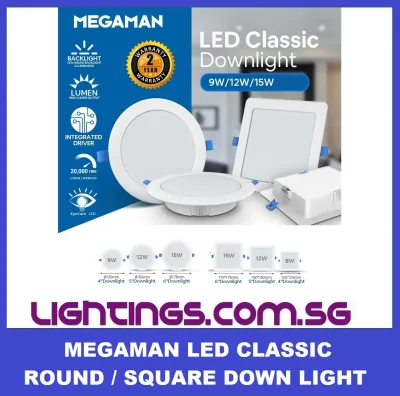
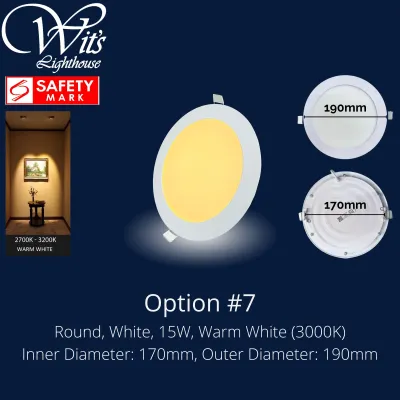
![[BUY 2 FREE 1] DFS LED Recessed Downlight With Safety Mark Driver/Downlight Square/ Round 6W 9W 12W 18W](https://img.lazcdn.com/g/p/1bbba251513d2f446d42ef7aed2d1fe8.jpg_400x400q80.jpg_.webp)
Prices are valid at publication and may change. Please refer to the product page for the latest price.
Square downlights introduce a distinct geometric aesthetic that differs significantly from traditional round fixtures. The straight lines and sharp corners of a square downlight align naturally with the structural beams, walls, and rectangular layouts of standard HDB floor plans. However, this linear design also means that any misalignment during installation is highly visible. Furthermore, the visual weight of a square fixture is slightly higher than a round one of the same width, meaning a surface-mounted square light can appear more prominent and potentially lower the perceived ceiling height if not chosen carefully.
Over-illumination is a common pitfall in HDB flats when homeowners attempt to compensate for a lack of natural light. Installing too many high-wattage fixtures in a 2.6m space creates a harsh, sterile environment reminiscent of an office rather than a cozy home. The key to preserving a sense of spaciousness is to distribute light evenly across both horizontal and vertical surfaces. By illuminating the walls gently, you draw the eye outward, which visually expands the room and mitigates the cramped feeling often associated with lower ceilings.
Essential Specifications for Comfortable Illumination
When shopping for an led square downlight, matching the lumen output and wattage to your specific room size is the first step toward a comfortable layout. Wattage simply measures energy consumption, whereas lumens indicate the actual amount of light emitted. For a 2.6m ceiling, high-wattage fixtures are rarely necessary. Instead, look for low-wattage, high-efficiency fixtures that deliver moderate lumen packages. Relying on manufacturer labels to verify the lumen-to-wattage ratio ensures you do not accidentally over-illuminate a small bedroom or study.

Color temperature is a conditional preference that should be tailored to the specific function of each HDB zone. Warm White (2700K to 3000K) is highly suited for bedrooms and living rooms, where a relaxing, cozy atmosphere is preferred. Cool White (4000K) offers a neutral, balanced light that enhances focus, making it ideal for study areas, home offices, and kitchens. Daylight (6000K to 6500K) is best reserved for utility yards or specific task areas where high-contrast visibility is required, though some homeowners prefer it for bathrooms to mimic natural outdoor light.
The Color Rendering Index (CRI) is another critical specification to check on product packaging before purchasing. CRI measures how accurately a light source reveals the true colors of objects, materials, and skin tones compared to natural sunlight. For residential spaces, a CRI rating of 90 or higher is recommended, particularly in dining areas, kitchens, and vanity spaces. Choosing fixtures with high color rendering ensures that your interior decor, furniture, and food look vibrant and true to life, preventing the washed-out appearance caused by low-quality LED chips.
Finally, always verify the electrical compatibility of the downlight with your home’s infrastructure. This includes checking the voltage rating (which must match the standard 230V system), the base or interface type, and whether the fixture is compatible with dimming methods if you plan to install dimmer switches. Many LED downlights require specific trailing-edge or leading-edge dimmers, and using incompatible components can lead to annoying flickering, buzzing, or premature driver failure.
Glare Control and Optical Design Features
In a 2.6m ceiling, glare control is paramount because the light source sits closer to your natural line of sight. Direct glare occurs when you can see the bright LED chip or emitter directly from a normal standing or sitting position. To prevent this visual discomfort, look for deep-recessed square downlights. These fixtures set the light source back several centimeters into the housing, using an inner bezel or trim to shield the emitter from view at wider angles, ensuring you only see the illuminated surface rather than the harsh light source itself.
The Unified Glare Rating (UGR) is an international scale used to measure the psychological glare of lighting installations in indoor environments. While UGR is more commonly calculated for commercial spaces, many high-quality residential downlights now list a UGR value on their specification sheets. For living rooms and study areas, aiming for fixtures with a UGR of less than 19 can significantly reduce eye strain and fatigue during extended periods of use. If a fixture does not list a UGR, look closely at its physical design to see if it incorporates anti-glare baffles or dark-light reflectors.
Beam angle selection plays a major role in how light is directed and whether it creates harsh shadows. For general ambient lighting in a low-ceiling HDB flat, a medium-to-wide beam angle between 60 and 90 degrees is generally preferred. This wide spread allows the light cones from adjacent fixtures to overlap smoothly, creating a seamless blanket of light. Narrow beam angles (under 40 degrees) should be used selectively, such as highlighting a piece of art or a dining table, as using them for general lighting in a 2.6m space will result in harsh wall-washing shadows and a highly uneven floor pattern.
The choice between frosted diffusers and clear lenses with reflectors depends on your aesthetic preference and glare tolerance. Frosted diffusers scatter light in all directions, providing a soft, uniform glow that is highly effective at minimizing shadows, making them a safe choice for general illumination in kitchens and bathrooms. However, they can sometimes look like flat, bright squares on the ceiling. Reflector-based square downlights with clear lenses offer more precise beam control and a more architectural look, but they must be deeply recessed to prevent the exposed reflector from bouncing harsh light into your eyes.
Layout and Spacing Strategies for HDB Floor Plans
Planning a successful lighting layout for an HDB flat requires calculating the optimal spacing between your square downlights. Because a 2.6m ceiling limits the natural spread of light, placing fixtures too far apart will create dark patches, while placing them too close together will waste energy and cause over-illumination. A reliable starting point is to space your downlights approximately 1.0 to 1.2 meters apart. This spacing ensures that the light cones overlap at a height of about 0.8 meters above the floor, which is the standard height for tables, countertops, and desks.
The distance between the downlights and your walls is equally important for maintaining a balanced visual weight. Placing square downlights too close to a wall—typically less than 30 centimeters—can project intense, sharp-edged light shapes known as scallops onto the wall surface. While this can sometimes be used as a decorative wall-washing effect, it also highlights minor plastering imperfections common in concrete walls. Keeping a distance of 45 to 60 centimeters from the wall ensures a softer, more diffused transition that gently illuminates the perimeter of the room.
Different rooms within an HDB flat require customized layout densities and zoning. In open-concept living and dining areas, avoid a rigid grid pattern that treats the entire space uniformly. Instead, zone your lighting by placing fixtures on separate switches or dimming circuits. For example, you might have a dedicated zone of four low-lumen square downlights over the living room seating area, and a separate zone over the dining table. In kitchens, prioritize task lighting by aligning downlights directly over the edge of the countertops to prevent your body from casting shadows on your prep areas.
Bathrooms and corridors require a more streamlined approach. For narrow corridors, a single row of square downlights spaced evenly along the centerline provides a clean, directional path. In bathrooms, where space is limited and moisture is present, a minimalist layout of two well-placed downlights—one near the vanity mirror and one over the shower area—is often sufficient. Ensure that any layout plan accounts for structural obstructions like ceiling beams or air conditioning ducting, which can disrupt your planned spacing.
Installation Clearances and Electrical Safety Checks
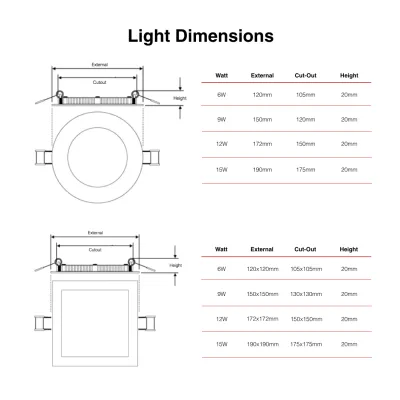
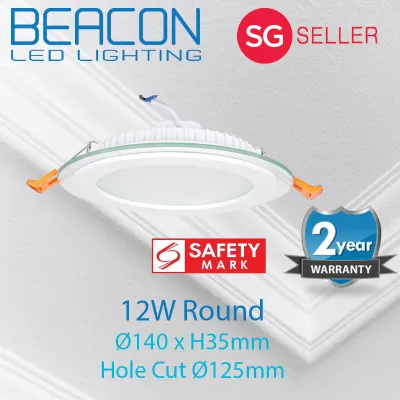
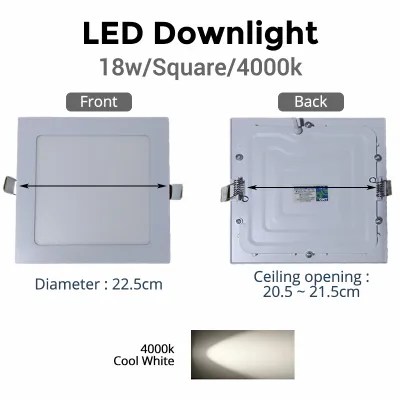
Before purchasing any recessed led square downlight, you must verify the physical clearances available within your false ceiling. Unlike round downlights, which only require a simple circular hole saw, square downlights require a precise square cut-out. You must measure the existing cut-out dimensions or plan the new cuts carefully, as even a minor error can leave gaps that the fixture’s outer flange cannot cover. Additionally, check the depth of the ceiling cavity; recessed fixtures require a minimum clearance—often between 50mm and 100mm—to accommodate the fixture body and allow heat to dissipate safely.
Heat dissipation is a critical factor in the lifespan and safety of LED fixtures. Although LEDs are highly efficient, their drivers and chips still generate heat that must escape. If a fixture is installed in a tight cavity with no airflow, or if it is covered by ceiling insulation, heat will build up rapidly, leading to color shifting, dimming, or complete driver failure. Always refer to the manufacturer’s installation instructions regarding minimum clearance distances from structural elements and insulation materials to ensure safe operation.
Electrical safety and certification are non-negotiable when installing new lighting systems. Ensure that any downlight and external driver you purchase carry recognized electrical safety certifications, such as the local Safety Mark, which indicates the product has been tested and approved for standard electrical systems. Verify that the total wattage of your planned fixtures does not exceed the limit of your existing lighting circuit, and ensure that the driver matches the specific voltage and current requirements of the LED chips.
While replacing an existing, identical downlight can sometimes be a straightforward task, major installations require professional expertise. For any work involving fixed wiring, creating new ceiling cut-outs, modifying structural false ceilings, or installing fixtures in damp environments like bathrooms, you must isolate the power at the main distribution board and consult a licensed electrician. Working at height and handling electrical wiring carry inherent risks, and professional installation ensures your home remains safe, compliant, and properly insured.
Frequently Asked Questions (FAQ)
Can I replace existing round downlights with square ones without patching the ceiling?
Replacing existing round downlights with square ones usually requires some level of ceiling patching and plastering. Because a round cut-out does not have the corners required to accommodate a square fixture of the same nominal size, you cannot simply slide a square downlight into a round hole. If you attempt to use a larger square fixture to cover the round hole, the corners of the square may not align with the circular edges, often leaving visible gaps or exposing the raw edges of the gypsum board.
To achieve a clean, professional finish, you will typically need to have a contractor patch the existing round holes with plasterboard, apply joint compound, sand the surface smooth, and cut new, precise square openings. Alternatively, some manufacturers offer specialized adapter plates or retrofitting frames designed to bridge the gap between round holes and square fixtures, though these will remain visible on the ceiling surface. For most homeowners, budgeting for minor plastering and repainting is the best way to ensure a seamless transition to the square aesthetic.
Do square LED downlights require special maintenance or cleaning routines?
Square LED downlights do not require complex maintenance, but their geometric design does make them slightly more prone to dust accumulation than round fixtures. Dust and fine airborne particles tend to settle in the sharp corners and along the flat edges of the square trim and diffuser. Over time, this dust buildup can slightly reduce the light output and alter the appearance of the fixture.
To clean your square downlights safely, always turn off the power at the wall switch and allow the fixtures to cool completely to avoid thermal shock or electrical hazards. Use a dry, lint-free microfiber cloth to gently wipe away dust from the outer trim and the diffuser surface. Avoid using harsh chemical cleaners, abrasive pads, or excessive moisture, as these can scratch the frosted diffuser, damage the anti-glare coatings, or seep into the housing and damage the internal electronics. A simple, regular dusting routine is all that is needed to keep your fixtures looking clean and performing efficiently.

Community discussion
Share your experience or ask a question. Comments are reviewed before publication.