
For a standard Singapore HDB flat with a 2.6m ceiling height, the optimal configuration for general ambient lighting using Philips LED downlights is a wattage of 5W to 9W (producing roughly 350 to 650 lumens per fixture) paired with a wide beam angle of 90° to 120°. For targeted task lighting or accentuating specific features, a lower wattage of 3W to 5W with a narrower beam angle of 24° to 40° prevents harsh glare while delivering focused illumination. Since 2.6m is a relatively low ceiling height, selecting the right combination of light spread and intensity is critical to avoid creating a harsh “spotlight” effect or leaving dark, unlit corners.
Achieving the perfect balance of illumination in an HDB flat requires understanding how spatial limitations interact with light physics. Because the distance between your ceiling and the floor is compact, light fixtures do not have much vertical space to disperse their output. Choosing the wrong specifications can quickly turn a cozy living room into a sterile, over-lit environment or a shadowy, cave-like space.
How Ceiling Height Dictates Wattage and Beam Angle Choices
A standard 2.6m HDB ceiling height significantly limits the distance light can travel before hitting the floor, furniture, or your eyes. When downlights are installed in low ceilings, the light cones overlap much sooner than they would in high-ceilinged commercial properties. If you install high-wattage downlights (such as 12W or 15W) in a 2.6m ceiling, the concentrated light intensity will bounce off floors and polished surfaces, creating uncomfortable visual glare and eye strain.
Products mentioned in this guide
![[Climate Voucher] PHILIPS 3 Color Meson LED Downlight 5.5W 9W 13W 17W Tri Tone Scene Switch for False Ceiling Local Warranty](https://img.lazcdn.com/g/p/4f25f6fa6bf4fcf754b08b97b4102da3.jpg_400x400q80.jpg_.webp)
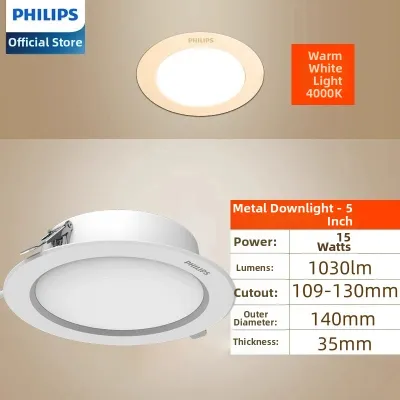
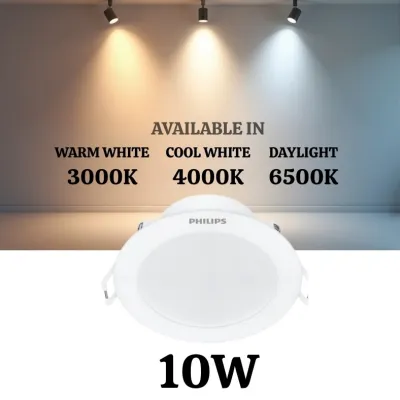
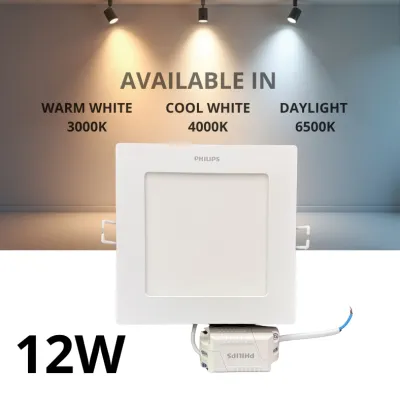
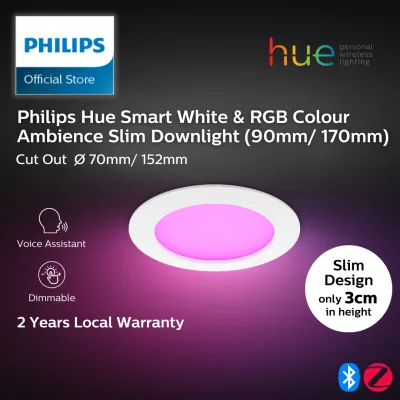
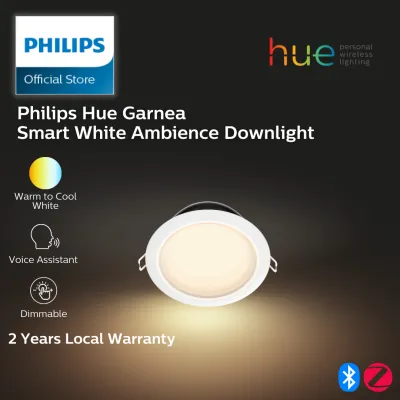
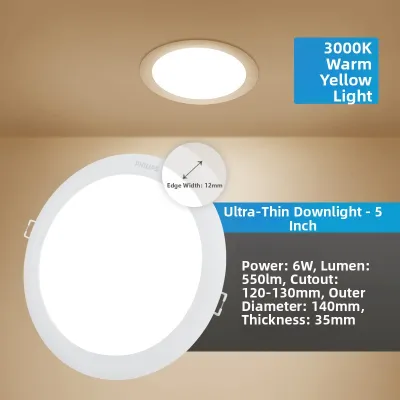
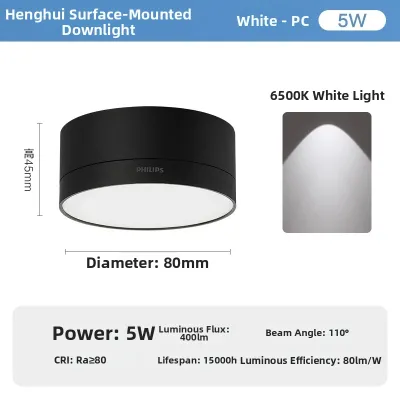
Prices are valid at publication and may change. Please refer to the product page for the latest price.
To manage this spatial constraint, you must understand the relationship between beam angles and light distribution. Wide beam angles, typically ranging from 60° to 120°, spread light outward in a broad, shallow cone. This makes them ideal for general ambient washing, as the overlapping beams create a soft, uniform blanket of light across the room. Conversely, narrow beam angles of 15° to 30° project a tight, intense column of light, which is best reserved for accentuating artwork, architectural details, or specific task areas.
Balancing wattage and beam angle is the key to comfortable residential lighting. For general living areas, pairing a lower wattage (like 7W) with a wide beam angle (such as 100° or 120°) ensures the room is sufficiently bright without any single spot feeling overwhelmingly intense. Targeted narrow beams should be used sparingly and positioned carefully so they do not intersect with regular sitting or standing eye levels.
When shopping for Philips LED downlights, always check the product packaging or official manufacturer specifications for the actual lumen output and beam angle rather than relying solely on wattage. LED technology has evolved rapidly, and different product lines—such as Philips Meson, Marcasite, or Pomeron—exhibit varying levels of luminous efficacy. A newer 7W LED might produce the same brightness (lumens) as an older 9W model, making the lumen rating a more accurate measure of light output.
Room-by-Room Lighting Strategies for Standard HDB Layouts
Every room in a standard HDB flat serves a distinct purpose, meaning your lighting specifications should adapt to the functional needs of each zone. Implementing a single downlight specification across the entire flat often leads to spaces that are either too bright for relaxation or too dim for practical tasks.

Living and Dining Areas
The living room is a multi-purpose space where family members gather to relax, watch television, and entertain guests. To create an inviting, diffused ambient wash, select Philips LED downlights with a wide beam angle of 100° to 120° and a moderate wattage of 7W or 9W. This setup ensures that light is distributed evenly across the floor plan, eliminating harsh shadows in seating areas.
To avoid overpowering the living room, keep the ambient downlights at a moderate intensity and supplement them with secondary light sources like floor lamps or warm LED strip lights in cove ceilings. In the dining area, you can introduce contrast by placing narrow-beam downlights (around 36°) directly over the dining table. This creates a focused pool of light that highlights the food and dining setup, but care must be taken to position these fixtures so they do not cast direct glare into the eyes of seated family members.
Bedrooms and Study Spaces
Bedrooms require a relaxing, low-glare environment that supports healthy sleep cycles. For these private quarters, opt for lower-wattage Philips downlights (5W to 7W) and select warm color temperatures (such as 2700K or 3000K) to promote a restful atmosphere. Keep in mind that perceived color temperature is a matter of personal preference, but warmer tones are generally more conducive to winding down at night.
Avoid placing downlights directly above the bed or headboard area. Looking directly up into a ceiling light while lying down causes immediate discomfort, regardless of how low the wattage is. Instead, position the downlights along the perimeter of the room or near wardrobes. For study zones or vanity desks within the bedroom, combine low-output ambient downlights with dedicated task lighting, such as a directional desk lamp, to provide high-visibility illumination exactly where you need it.
Kitchens and Utility Zones
Kitchens and utility yards are task-heavy environments where high visibility is essential for safety and efficiency. To minimize shadows while preparing food, choose slightly higher wattage Philips downlights (9W) with wide beam angles (100° to 120°). A cooler color temperature, such as cool white (4000K) or daylight (6500K), can also help improve focus and clarity during food preparation.
Proper placement is critical in a kitchen layout. Always position the downlights in front of your upper cabinets—directly over the edge of the countertop—rather than behind your standing position. If the lights are placed behind you, your body will cast a shadow over the cutting board and stove, making food preparation difficult and unsafe. Additionally, for downlights installed near kitchen sinks or inside bathrooms, verify their Ingress Protection (IP) rating. Fixtures in damp zones should ideally have a moisture-resistant rating, such as IP44, to protect the internal electronics from steam and water splashes.
Calculating Downlight Spacing for Even Illumination
To achieve uniform light distribution on a 2.6m ceiling, you must plan the physical layout and spacing of your downlights carefully. Relying on guesswork often results in a “spotlight” effect—where bright pools of light are separated by dark, gloomy patches—or a “cave” effect, where the ceiling itself remains completely dark while the floor is harshly lit.
As a general rule of thumb for a 2.6m ceiling height, downlights with a wide beam angle (90° to 120°) should be spaced approximately 1.0m to 1.2m apart. This spacing allows the wide cones of light to overlap at a comfortable height above the floor, creating a seamless blanket of illumination. If you choose fixtures with narrower beam angles, you will need to space them closer together to prevent dark gaps between the light cones.
Perimeter spacing is equally important for a balanced look. Keep your downlights at least 30cm to 45cm away from the walls. Placing them too close to a wall can project intense, semi-circular light patterns (known as “scalloping”) down the wall surface, which can highlight minor plastering or paint imperfections on your HDB walls. Keeping them at the recommended distance creates a soft, elegant wall-wash effect that gently brightens the boundaries of the room.
Avoid planning a rigid, symmetrical grid layout that ignores your actual furniture placement. Instead, zone your ceiling based on how you intend to use the space. For example, group your downlights onto separate switches so you can turn off the lights directly above the television screen while keeping the walkway lights on.
Finally, before finalizing your layout, coordinate with your renovation contractor to account for physical ceiling obstacles. HDB flats often feature structural concrete beams, air-conditioning trunking, and electrical conduits concealed behind false ceilings. Ensure your planned downlight positions do not clash with these elements, and verify that your false ceiling has sufficient depth to accommodate the selected fixtures.
Verifying Cut-Out Sizes and Electrical Safety for HDB Ceilings
Before purchasing your Philips LED downlights, you must complete a pre-purchase checklist to ensure the fixtures will physically fit your ceiling and comply with local safety regulations. Mismatching physical dimensions or ignoring electrical standards can lead to costly delays and safety hazards.
First, measure the exact diameter of the existing ceiling cut-outs if you are replacing older fixtures. Philips downlights are manufactured in standard cut-out sizes, typically ranging from 90mm (approx. 3.5 inches) to 150mm (approx. 6 inches). Do not confuse the outer trim (bezel) diameter of the downlight with the actual cut-out size required to fit the housing into the ceiling hole.
Next, verify the depth of your false ceiling cavity. Recessed downlights require a minimum clearance depth behind the plasterboard to accommodate the housing, integrated driver, and heat sink. Ensure there is at least 10mm to 20mm of empty breathing space above the top of the downlight to allow heat to dissipate safely away from the concrete slab. If your false ceiling cavity is extremely shallow, look for ultra-thin Philips downlight models (such as the Marcasite series) designed specifically for tight spaces.
| Philips Downlight Series | Typical Cut-Out Sizes | Profile Depth | Best Suited For |
|---|---|---|---|
| Philips Meson | 80mm – 150mm | Standard | General ambient lighting, budget-friendly |
| Philips Marcasite | 100mm – 175mm | Ultra-thin (under 30mm) | Shallow false ceilings, tight ceiling cavities |
| Philips Pomeron | 70mm – 90mm | Deep recessed | Adjustable accent lighting, sloped angles |
Electrical safety must be your top priority during installation. In Singapore, always look for the Singapore Safety Mark on the product packaging or official product listings. This mark indicates that the electrical driver and fixture have been tested and certified safe for use with Singapore’s domestic electrical grid (230V, 50Hz).
Always isolate the power supply at the main distribution board (DB box) before attempting to inspect, clean, or replace any light fixture. If your project involves installing completely new wiring, adding new switches, or modifying the fixed electrical circuits of your home, Singapore law requires that the work be performed by a Licensed Electrical Worker (LEW) or a qualified professional electrician. Do not attempt to alter fixed wiring yourself.
Common Specification Mistakes to Avoid in HDB Flats
- Selecting excessive wattage: Installing 12W or higher downlights in a 2.6m ceiling is a common mistake that leads to a sterile, over-lit environment. Stick to 5W to 9W fixtures to keep the light comfortable and glare-free.
- Ignoring the beam angle: Buying narrow-beam spotlights (e.g., 24° to 36°) for general ambient lighting results in a disjointed layout with harsh pools of light on the floor and dark, shadowy corners on the ceiling.
- Mismatching the cut-out size: Purchasing downlights without verifying your ceiling's existing hole dimensions can lead to loose, sagging fixtures or require expensive plasterboard patch-up work.
- Overlooking the Color Rendering Index (CRI): Choosing low-CRI LEDs can make your home furnishings, paint colors, and food look dull, grey, or unnatural. Ensure your selected Philips downlights have a CRI of 80 or higher (ideally 90) for vibrant, accurate color rendering.
- Neglecting dimming compatibility: Assuming all LED downlights are dimmable can damage your fixtures. If you plan to use a dimmer switch, you must verify that both the specific Philips downlight model and your wall dimmer switch are explicitly certified as compatible.
Frequently Asked Questions (FAQ)
Can I use adjustable gimbal downlights with a 2.6m ceiling?
Yes, adjustable gimbal downlights (such as the Philips Pomeron series) can be used effectively on a 2.6m HDB ceiling to highlight artwork, bookshelves, or specific architectural features. However, because the ceiling is relatively low, you should avoid tilting the light source at extreme angles. Tilting the fixture more than 15 to 20 degrees can direct the beam straight into the eye level of standing or seated family members, creating uncomfortable direct glare. Keep the tilt subtle and ensure the beam is directed toward a solid wall or object rather than open living spaces.
Do I need a licensed electrical worker for downlight installation in Singapore?
For a simple, like-for-like replacement of an existing downlight—where you are unplugging an old fixture from a pre-installed ceiling socket or terminal block and plugging in an identical new one—a competent homeowner can safely perform the swap, provided the main power supply is fully isolated at the DB box. However, if your installation requires running new electrical wires, cutting new holes in the ceiling, adding new wall switches, or making any modifications to the fixed electrical wiring of your HDB flat, you must hire a Licensed Electrical Worker (LEW) or a qualified professional electrician to ensure compliance with local electrical safety regulations.

Community discussion
Share your experience or ask a question. Comments are reviewed before publication.