
In the context of modern urban living, space is one of the most highly valued commodities in Singapore. With the average size of newly launched Housing & Development Board (HDB) Built-To-Order (BTO) flats and private condominiums design-optimized for efficiency, homeowners and renters alike are constantly seeking creative ways to maximize their living environments. Standard three-room and four-room flats often feature compact layouts where narrow entryways, tight dining alcoves, and dimly lit corridors can feel somewhat restrictive. While traditional glass mirrors are the classic solution for visually doubling a room’s footprint, their substantial weight, high cost, and the necessity of drilling into concrete walls present significant hurdles—especially for tenants bound by strict tenancy agreements or homeowners wishing to avoid permanent wall damage.
Sticker mirrors, primarily crafted from lightweight acrylic or polycarbonate sheets, have emerged as a highly practical, versatile, and damage-free alternative. These adhesive-backed reflective panels offer an accessible DIY solution to bounce ambient light, introduce depth, and create the illusion of a much larger space without the structural risks of heavy glass installations. However, navigating the vast array of options available on online marketplaces and local decor stores requires a clear understanding of material properties, adhesive performance, and strategic placement. Selecting the right product is not merely a matter of aesthetics; it is a balance of structural thickness, backing quality, and wall compatibility that determines whether your home gains a sophisticated architectural feature or a distorted, bubbling surface.
Understanding Sticker Mirrors: Acrylic Realities and Space Illusions
To make an informed purchase, you must first understand the physical composition of sticker mirrors and how they differ from traditional glass. Unlike standard household mirrors, which consist of silvered float glass, sticker mirrors are typically manufactured from thermoplastic polymers, most commonly polymethyl methacrylate (PMMA), widely known as acrylic. A highly reflective vacuum-metallised layer is applied to the back of the acrylic sheet, which is then sealed with a protective backing paint and paired with an adhesive layer. This construction makes the mirrors exceptionally lightweight, highly shatterproof, and easy to cut into various geometric shapes, making them inherently safer for households with young children or pets.
Products mentioned in this guide
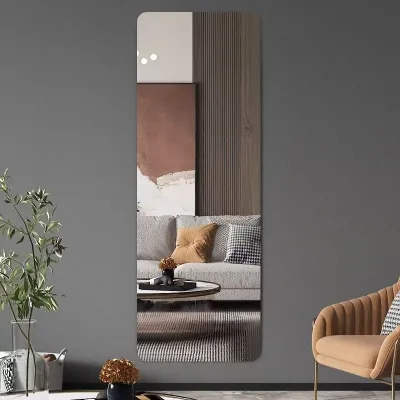
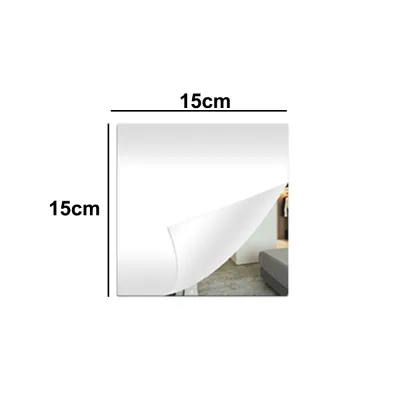
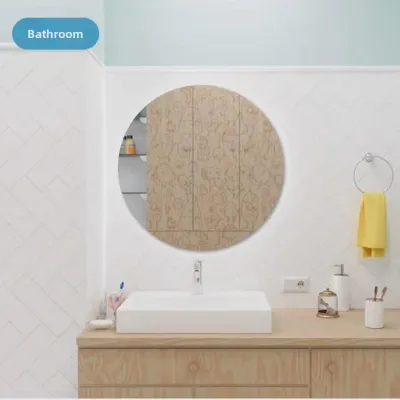
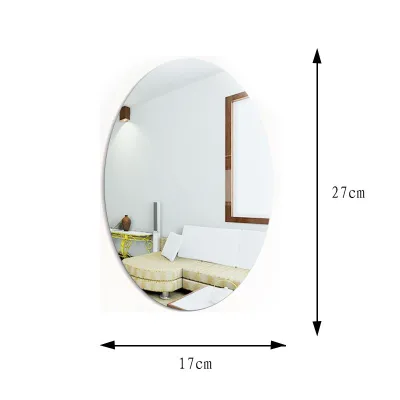
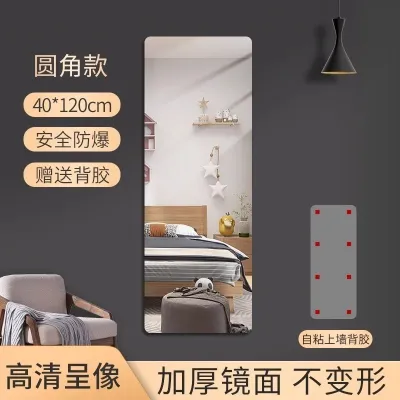
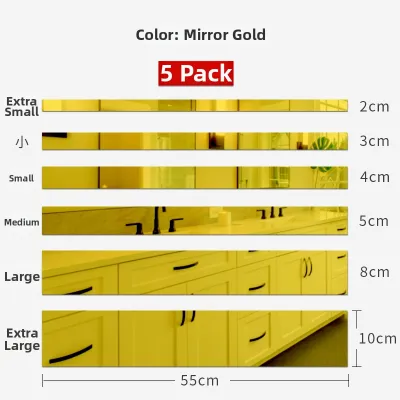
Prices are valid at publication and may change. Please refer to the product page for the latest price.
The visual illusion of space expansion relies on the mirror’s ability to mimic the depth-perception cues of the human eye. By reflecting the opposite side of a room and capturing natural light, a well-placed mirror tricks the brain into perceiving a continuous space beyond the physical boundary of the wall. However, because acrylic is a flexible polymer rather than a rigid mineral glass, it does not possess the absolute flatness of float glass. Under even minor physical stress, thermal expansion, or wall surface irregularities, acrylic will bend slightly. This bending alters the angle of reflection, resulting in a distorted, wavy image often referred to as the “funhouse mirror” effect.
Consequently, distinguishing between different product formats is crucial for achieving a premium interior aesthetic. Flexible mirror films, which are sold in thin rolls and applied like contact paper, are highly susceptible to severe warping because they conform to every microscopic bump on the underlying wall. In contrast, rigid acrylic mirror stickers and tiles are manufactured as solid, flat sheets. These rigid panels possess the necessary structural integrity to bridge minor wall imperfections, providing a much flatter, cleaner, and more convincing reflection that genuinely enhances the perceived volume of a compact room.
Core Criteria for Evaluating Sticker Mirror Brands
When sourcing sticker mirrors from online marketplaces or local home decor retailers, relying on marketing descriptions can be misleading. To identify high-quality brands that will deliver a lasting, undistorted reflection, you should evaluate products based on several technical specifications.

Material Quality and Thickness
The thickness of the acrylic sheet is the single most critical factor determining reflection quality. Ultra-thin mirror stickers, typically measuring 1mm or less, are highly flexible and will inevitably warp when applied to standard plaster or concrete walls. For a flat, undistorted reflection, look for brands that offer a minimum thickness of 2mm, with 3mm being the premium standard for larger panels. Thicker acrylic sheets possess greater inherent rigidity, allowing them to remain flat even when the underlying wall surface is not perfectly level. This thickness also ensures that the mirror does not bend under the tension of its own adhesive backing.
Adhesive Strength and Wall Safety
The adhesive backing of a sticker mirror must balance two competing requirements: it must hold the lightweight panel securely to prevent it from falling, yet it should not cause catastrophic damage to your wall paint upon removal. Lower-grade options often utilize thin, aggressive double-sided tape that cures into a hard, brittle bond, which can tear away layers of plaster and emulsion paint when peeled. Reputable brands typically employ high-density polyethylene (PE) foam tape or specialized acrylic-based adhesives. Foam tape is particularly advantageous because its compressible core absorbs minor wall textures, ensuring a more uniform contact area while decoupling the rigid mirror from the micro-textures of the wall, further reducing optical distortion. Always consult the manufacturer instructions regarding paint compatibility before application.
Edge Finishing and Seams
If you plan to arrange multiple mirror tiles to cover a larger wall area, the quality of the edge finishing becomes paramount. Budget-tier mirror stickers are often stamped or rough-cut, leaving jagged, sharp, or slightly raised edges that prevent tiles from sitting flush against one another. This results in highly visible, misaligned seams that disrupt the continuity of the reflection. Premium brands utilize precision laser-cutting technologies to ensure perfectly straight, clean edges. Some high-end options also feature subtle beveled edges, which catch the light elegantly and help mask minor alignment errors during DIY installation, creating an intentional, paneled design rather than an accidental gap.
Protective Film Clarity
During manufacturing, shipping, and installation, the soft surface of acrylic is highly vulnerable to scratching. Reliable brands protect their products with a high-quality, low-tack polyethylene (PE) protective film on the front reflective surface. This film should remain intact throughout the entire installation process and only be peeled away as the final step. A superior protective film will peel off smoothly in one continuous sheet without leaving any sticky adhesive residue behind. Lower-quality protective films can leave a stubborn, cloudy film that attracts airborne dust and requires aggressive cleaning, which risks scratching the newly installed mirror.
Recommended Sticker Mirror Specifications for Compact Layouts
Selecting the appropriate mirror format depends heavily on your specific room layout, lighting conditions, and design objectives. Different shapes and configurations excel in different functional roles within a compact home.
Large Format Sheets vs. Geometric Tiles
Large rectangular or square sheets (such as 30cm by 30cm or 40cm by 60cm panels) are highly effective at simulating structural architectural elements. They are ideal for mounting on flat, stable surfaces such as sliding wardrobe doors, flush cabinet fronts, or the flat panels of an HDB household shelter door. Because they present a continuous reflective surface, they offer the most convincing illusion of extended depth. On the other hand, geometric tiles—such as hexagons, octagons, or smaller square grids—are perfect for creating dynamic, decorative feature walls. These modular systems are highly forgiving; if a single tile is damaged or misaligned, it can be easily replaced without disturbing the entire installation, making them a highly flexible option for creative layouts.
Frameless vs. Beveled Edge
Frameless, straight-cut mirror stickers are designed to be mounted tightly together to mimic a single, seamless sheet of glass. However, achieving a perfect seamless look requires an exceptionally flat wall and meticulous installation. If your wall has slight undulations, a beveled edge specification is highly recommended. The angled edges of beveled tiles create a distinct, repeating pattern that embraces the joints between tiles as a design feature. This paneled look is highly popular in modern luxury interiors and effectively hides minor alignment discrepancies of a millimeter or two, which would otherwise be highly distracting on a frameless grid.
Clear/Silver vs. Tinted Acrylic
The color of the reflective backing significantly influences both the brightness and the mood of a room. Clear silver mirrors are the standard choice for maximizing light reflection. They reflect approximately 85% to 90% of visible light, making them indispensable for dark, windowless corridors, compact entryways, or deep living rooms that receive limited natural sunlight. Conversely, tinted acrylic mirrors—available in sophisticated bronze, smoky grey, or rose gold finishes—are primarily decorative. While they still provide a sense of depth, their darker backing absorbs more light, reducing overall brightness. Tinted options are best utilized as accent feature walls in well-lit dining areas or bedrooms, where they add a warm, moody, and upscale aesthetic without overwhelming the space.
To help you choose the ideal configuration for your home, consider this comparison of common specifications:
| Mirror Format | Best Use Cases | Visual Space-Expanding Effect | Installation Difficulty | Recommended Thickness |
|---|---|---|---|---|
| Large Rectangular Sheets | Wardrobe doors, flat cabinet panels, bomb shelter doors | High (creates a continuous, seamless illusion of depth) | Medium (requires precise leveling and flat surfaces) | 2mm to 3mm |
| Hexagonal Tiles | Living room feature walls, dining area backdrops | Moderate (adds decorative texture while bouncing light) | Easy (modular layout hides minor wall imperfections) | 1.5mm to 2mm |
| Square Grid Tiles | Entryway foyers, corridor walls, behind console tables | High (mimics classic paneled glass mirror walls) | Medium (requires consistent spacing and alignment) | 2mm to 3mm |
| Flexible Mirror Film | DIY crafts, small cabinet interiors, temporary accents | Low (prone to warping and distortion over large areas) | Hard (extremely prone to bubbling and creasing) | Under 1mm |
Strategic Placement to Maximize Visual Impact in HDBs and Condos
To truly unlock the space-expanding potential of sticker mirrors, their placement must be carefully planned in relation to your flat’s layout, natural light sources, and foot traffic patterns. Strategic positioning can transform a cramped, dark corner into a bright, airy focal point.
Opposite Windows and Light Sources
One of the most effective ways to brighten a deep HDB living room or a windowless dining alcove is to place sticker mirrors directly opposite or perpendicular to a primary light source, such as a balcony sliding glass door or a large window. By catching the incoming natural daylight and bouncing it deep into the interior, the mirrors effectively double the perceived illumination. This not only makes the space feel larger but also reduces the reliance on artificial lighting during the day.
Narrow Corridors and Foyers
The entryways of many Singaporean flats and the long corridors leading to bedrooms are notoriously narrow and dark. Installing a series of vertical mirror panels or a grid of square tiles along the longest continuous wall of these passages can visually widen the corridor, breaking up the “tunnel” effect. This placement also provides a highly convenient, last-minute reflection check before you step out of the door.
Behind Dining Tables or Consoles
In compact dining zones, placing a grid of beveled mirror stickers directly behind the dining table simulates the presence of an adjacent room, instantly making the dining area feel twice as spacious. Similarly, mounting mirror stickers on the wall behind a shallow entryway console table adds structural depth, preventing the furniture piece from looking like it is crowding a tight hallway.
Areas to Avoid
While sticker mirrors are highly versatile, certain environments will compromise their performance and longevity. You should strictly avoid installing adhesive-backed acrylic mirrors in high-moisture zones, such as inside bathrooms or directly adjacent to kitchen stoves. The persistent humidity, steam, and temperature fluctuations in these areas will rapidly degrade the adhesive backing, causing the mirrors to peel, warp, or fall. Furthermore, moisture can seep behind the protective backing paint, leading to oxidation of the reflective layer, which manifests as unsightly black spots. Additionally, avoid applying sticker mirrors to highly textured walls, rough concrete surfaces, or walls with peeling paint, as these uneven substrates will cause severe optical distortion and prevent proper adhesion.
Installation, Safe Removal, and Maintenance Boundaries
Achieving a professional-looking DIY installation and ensuring the long-term clarity of your sticker mirrors requires adherence to specific preparation, application, and maintenance protocols. Because acrylic is a sensitive material, handling it correctly is essential to avoid damage to both the product and your property.
Wall Preparation
Before applying any adhesive, the target wall surface must be meticulously prepared. Begin by wiping the wall with a dry microfiber cloth to remove all dust, lint, and loose particles. If the wall has grease or dirt buildup, clean it with a slightly damp cloth and a mild detergent, then allow it to dry completely for at least 24 hours. Moisture trapped behind the adhesive will cause premature failure. It is also vital to check the structural integrity of the wall paint. Run your hand across the dry paint; if a chalky residue transfers to your skin, the paint is degrading, and the adhesive tape may fail to bond securely, or it may pull the weak paint layer off the wall entirely.
Application Technique
To ensure a perfectly straight installation, always use a spirit level or a laser level to project a precise horizontal and vertical guide line onto the wall. Do not rely on baseboards or ceiling lines, as these are rarely perfectly level in residential buildings. Apply the high-density foam tape to the back of the acrylic mirror in a structured grid pattern, leaving small gaps between tape segments to allow trapped air to escape during mounting. Carefully align the mirror with your guide lines, then press firmly against the wall, applying even pressure from the center of the panel outwards for at least 30 seconds. To prevent accidental scratches, keep the front protective PE film on the mirror throughout this process, only peeling it off once all panels are securely mounted.
Safe Removal Protocol
If you are living in a rental property or plan to redecorate, removing the sticker mirrors safely without damaging the underlying wall paint is a primary concern. Never attempt to pry or rip the rigid acrylic panels directly off the wall, as this will almost certainly tear the drywall paper or plaster. Instead, use a handheld hairdryer on a low-to-medium heat setting to gently warm the surface of the mirror. This heat softens the adhesive backing. Once the adhesive is pliable, slide a length of dental floss, fishing line, or a thin plastic scraper behind the mirror, using a sawing motion to cut through the softened foam tape. Any remaining adhesive residue on the wall can be gently rolled off with your fingers or treated with a mild, paint-safe adhesive remover, which should first be tested on an inconspicuous area of the wall.
Cleaning and Scratch Prevention
Acrylic is significantly softer than glass and is highly susceptible to fine scratches and clouding if cleaned incorrectly. You must never use rough paper towels, polyester sponges, or abrasive scrubbing pads to clean your sticker mirrors. Instead, use only clean, ultra-soft microfiber cloths. For routine cleaning, a simple mixture of lukewarm water and a single drop of mild dishwashing liquid is highly effective. Avoid using standard commercial glass cleaners containing ammonia or alcohol, as these harsh chemicals can cause chemical stress-cracking, known as crazing, which permanently ruins the clarity of the acrylic. Wipe the surface gently in straight, linear motions rather than circular rubbing, which can trap microscopic dust particles and buff them into the surface as fine scratches.
Frequently Asked Questions (FAQ)
Can sticker mirrors be used in bathrooms or high-humidity areas?
No, sticker mirrors are generally not recommended for bathrooms or other high-humidity environments. The persistent moisture, steam, and temperature changes in a bathroom will quickly break down the adhesive backing, causing the panels to shift, warp, or detach from the wall entirely. Furthermore, moisture can penetrate the protective backing of the acrylic sheet, leading to oxidation of the reflective silvering layer, which results in permanent dark spots and cloudiness. For high-humidity areas, it is highly recommended to use traditional glass mirrors that are mechanically mounted with rust-resistant brackets and properly sealed around the edges to prevent moisture ingress.
Do acrylic mirror stickers look exactly like real glass mirrors?
While high-quality, thick acrylic mirror stickers (2mm to 3mm) provide an exceptionally clear and bright reflection from a close-to-moderate distance, they do not look exactly like real glass mirrors under all conditions. Acrylic is a flexible material, meaning it is susceptible to minor micro-warping that glass does not experience. From a distance of several meters, you may notice a slight wave or minor distortion in the reflection, especially if the underlying wall is not perfectly flat. Glass mirrors remain the gold standard for absolute optical precision, but acrylic sticker mirrors offer an outstanding, lightweight, and shatterproof alternative that delivers highly convincing visual depth for general home decor and space-expanding purposes.
How do I fix a warped or bubbling sticker mirror after installation?
If a flexible mirror film has bubbled, you can sometimes release the trapped air by gently pricking the bubble with a fine needle and smoothing the film down with a squeegee. However, for rigid acrylic mirror stickers, warping is almost always caused by an uneven wall surface or uneven adhesive application behind the panel. To resolve this, you will need to carefully remove the warped panel using the hairdryer and dental floss method. Inspect the wall surface for any bumps, plaster runs, or debris, and sand them flat if necessary. Reapply fresh, high-density foam tape to the back of the mirror—ensuring the tape is distributed evenly to bridge any minor wall recess—and remount the panel carefully.
Community discussion
Share your experience or ask a question. Comments are reviewed before publication.