
Selecting the right ceiling light for a standard 2.6-meter Housing & Development Board (HDB) flat requires balancing illumination with vertical clearance. To prevent a cramped atmosphere and ensure safety, the ideal fixture thickness should generally remain under 10 centimeters, with ultra-slim profiles under 5 centimeters being a highly effective choice. Keeping the fixture close to the ceiling preserves the necessary headroom for daily activities while ensuring even light distribution across your living spaces.
Why Ceiling Height Dictates Your Light Fixture Profile
A standard ceiling height of 2.6 meters leaves limited vertical clearance once you account for furniture, doors, and human height. Installing a fixture that drops too low reduces the physical volume of the room, making the ceiling feel lower than it actually is. This visual weight can create an oppressive atmosphere, especially in high-traffic areas like living rooms and corridors.
To maintain a comfortable and safe living environment, a minimum headroom clearance of 2.3 meters from the floor to the bottom of the light fixture is highly recommended. This clearance ensures that tall occupants and guests can walk freely without the risk of bumping into the light. It also provides a safe buffer during daily activities, such as changing bedsheets or lifting items overhead.
Products mentioned in this guide
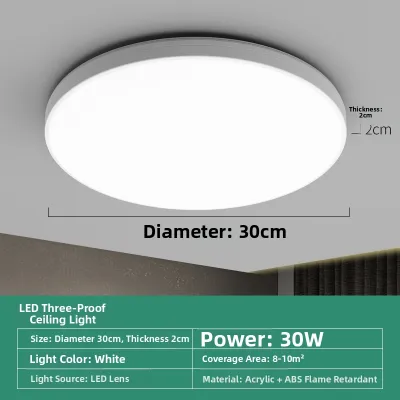
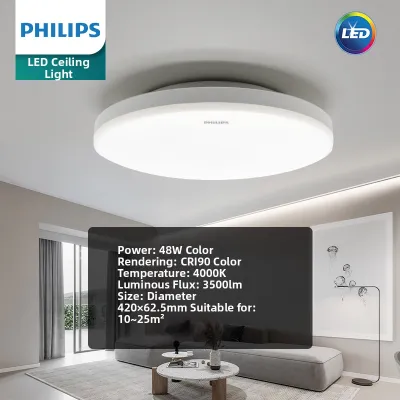
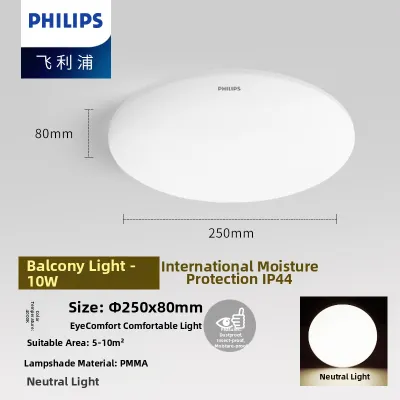
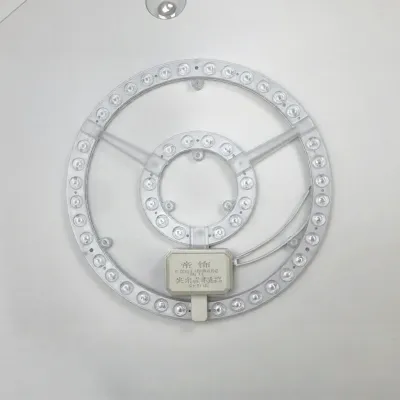

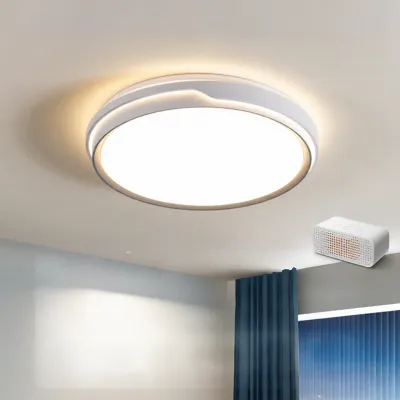
![[Local Seller] LED Ceiling Surface Mounted Downlight LED Panel Light Square Round](https://img.lazcdn.com/g/ff/kf/Sdd11b528478549189cb70a967ccae3d2t.jpg_400x400q80.jpg_.webp)
Prices are valid at publication and may change. Please refer to the product page for the latest price.
The proximity of the light source to the ceiling also significantly alters how light spreads throughout the room. When a fixture sits tight against a 2.6-meter ceiling, the light has less distance to disperse before hitting walls and floors. Choosing fixtures with wider beam angles helps mitigate this limitation, preventing harsh, localized hot spots directly beneath the light while avoiding dark, unlit corners.
Evaluating Ceiling Light Profiles for 2.6m Ceilings
Navigating the options for low-ceiling properties involves comparing different profiles to find a balance between functional clearance and aesthetic appeal. The primary choices for these spaces include ultra-slim surface-mounted panels and low-profile semi-flush fixtures. Each option offers distinct advantages depending on the specific room layout and your design preferences.

While ultra-slim panels offer the maximum possible headroom, they can sometimes look highly utilitarian or minimalist. On the other hand, semi-flush mounts introduce a decorative element by dropping slightly below the ceiling line, though they require careful measurement to avoid encroaching on walking space. Selecting the right profile involves assessing the primary function of each room and the existing ceiling structure.
Flush-Mount and Ultra-Slim LED Panels
Ultra-slim LED panels and flush-mount fixtures sit directly against the concrete ceiling, making them the most space-efficient option for HDB flats. With profiles often measuring between 1.5 to 3 centimeters in thickness, these fixtures virtually blend into the ceiling plane. This seamless integration creates an illusion of height, making compact rooms feel significantly more open and airy.
Before purchasing an ultra-slim panel, it is essential to verify the wiring space requirements inside the fixture’s base or the ceiling junction box. Because these panels are incredibly thin, they offer very little internal cavity space to house electrical wiring connectors and LED drivers. Ensuring your ceiling box has sufficient depth to accommodate these components is crucial for a flush, secure installation.
Additionally, pay close attention to the light diffusion characteristics indicated on the product packaging. High-quality ultra-slim panels feature edge-to-edge diffusion lenses that distribute light evenly across the entire surface of the fixture. This design prevents the harsh, directional shadows often associated with poorly diffused point-source LEDs, resulting in a softer and more comfortable ambient glow.
Semi-Flush Mount Fixtures
Semi-flush mount fixtures feature a small stem or bracket that creates a gap between the ceiling and the light shade, typically dropping between 10 to 15 centimeters. This profile is highly suitable for dining areas or bedrooms where the fixture is positioned over furniture rather than direct walking paths. It allows homeowners to introduce decorative textures and materials without the extreme drop of a traditional pendant.
The physical gap between the ceiling and the fixture canopy serves an important optical function by allowing light to bounce upward. This indirect illumination reflects off the ceiling surface, softening the overall light quality and visually lifting the ceiling. This upward glow can make a 2.6-meter ceiling feel taller and more expansive than a completely downward-facing flush light would.
When selecting a semi-flush fixture, always calculate the total drop height by measuring from the ceiling to the lowest point of the shade. Compare this measurement against the height of the tallest household member to guarantee adequate clearance. Furthermore, ensure the fixture’s physical footprint does not interfere with the path of ceiling fan blades, which are common in tropical climates.
Measuring Your Space and Checking Installation Constraints
A successful installation relies on precise physical measurements and a clear understanding of your flat’s structural limits. Begin by measuring the diameter and depth of your existing ceiling junction box. The canopy or base plate of your new ceiling light must be wide enough to cover this opening completely, ensuring a clean visual finish and preventing dust or moisture from entering the ceiling cavity.
HDB flats often feature structural concrete beams and concealed conduits that restrict where you can drill and mount fixtures. Never drill directly into structural beams without professional guidance, as this can compromise structural integrity or damage hidden electrical wiring. If you have a false ceiling installed, verify its weight-bearing capacity; heavy fixtures require specialized anchors or direct mounting to the concrete slab above.
Physical obstructions within the room must also be factored into your placement strategy. Map out the swing radius of all nearby bedroom doors, tall wardrobe cabinets, and ceiling fans to prevent collisions. A light fixture that is too thick or poorly positioned can easily block a cabinet door from opening fully or, worse, end up in the path of a spinning fan blade.
For any installation involving fixed electrical wiring, safety must be your top priority. Always isolate the power at the main distribution board before attempting to handle any wiring. If the mounting plate of your new fixture does not align with the existing ceiling box, or if you are unsure about the load limits and wiring configurations, consult a qualified, licensed electrician to complete the installation safely.
Common Sizing and Placement Mistakes in HDB Flats
One of the most frequent errors in HDB lighting design is selecting a fixture with an oversized diameter. While a large light might seem appealing in a showroom, it can quickly overwhelm a compact living room or bedroom. An excessively wide fixture draws the eye upward and emphasizes the physical boundaries of the room, making the entire space feel smaller and more crowded.
Another common mistake is attempting to hang long pendant lights or elaborate chandeliers in main walkways under a 2.6-meter ceiling. Unless these fixtures are anchored directly over a dining table or a coffee table where foot traffic is non-existent, they pose a constant physical hazard. Walkways must remain entirely clear of low-hanging obstacles to maintain safety and flow.
Homeowners also frequently overlook the visual thickness of the fixture’s mounting base and canopy. A light shade might appear slim, but a thick, bulky mounting bracket can add several unnecessary centimeters to the overall drop. Always review the complete technical drawing of the fixture to confirm the total distance it will protrude from the ceiling surface.
Lastly, do not rely solely on wattage when evaluating low-profile fixtures. Modern LED technology delivers varying levels of brightness per watt, so you should compare the lumen output and beam angle listed on the product specifications. A low-profile light with a narrow beam angle will create a spotlight effect, leaving the rest of your room in shadow, whereas a wide beam angle ensures balanced illumination.
Frequently Asked Questions (FAQ)
Can I install a recessed downlight instead of a surface-mounted ceiling light?
Recessed downlights cannot be installed directly into the standard concrete ceilings of HDB flats because you cannot cut cavities into the structural concrete slab. To use recessed lighting, you must first install a false ceiling, which typically lowers the overall ceiling height by 10 to 15 centimeters. Ensure the remaining headroom is acceptable and that there is sufficient depth within the false ceiling cavity for heat dissipation and driver housing before proceeding. Always consult a professional installer and check HDB renovation guidelines before making structural modifications.
How do I choose the right color temperature for a low ceiling?
Color temperature significantly influences the perceived height and atmosphere of a room with a 2.6-meter ceiling. Cooler color temperatures, such as cool white or daylight, can make a space feel more open, bright, and expansive, making them ideal for kitchens and study areas. Warmer tones create a cozy, intimate environment but can sometimes make a low ceiling feel slightly closer; these are well-suited for bedrooms and living areas where relaxation is the priority. When purchasing, check the Color Rendering Index (CRI) on the product label, aiming for a CRI of 80 or higher to ensure colors appear natural and vibrant under your chosen light.

Community discussion
Share your experience or ask a question. Comments are reviewed before publication.