
Designing a functional and visually appealing dining area in an HDB flat requires working within a standard ceiling height of 2.6 meters. At this height, selecting the right dining light ceiling fixture is a balancing act between maintaining comfortable headroom and providing focused illumination. While flush mount and semi-flush mount fixtures offer the safest clearance for general walking paths, pendant lights remain viable options if they are positioned directly over the dining table. By understanding how to calculate drop lengths and evaluate fixture profiles, you can create an inviting dining ambiance without making the space feel cramped.
Understanding Clearance and Headroom in 2.6m Dining Spaces
To plan your dining room lighting, distinguish between active walking paths and the stationary zone directly above your table. In high-traffic walkways, any ceiling fixture must remain high enough to prevent head contact. A standard clearance of 2.0 to 2.1 meters from the floor to the bottom of the fixture is recommended for walkways. With a 2.6-meter ceiling, this leaves a 50 to 60-centimeter drop, favoring low-profile flush or semi-flush designs.
Always measure the vertical distance from the finished floor surface—not the bare concrete slab—to the ceiling. Thick vinyl flooring, engineered wood, raised platforms, or heavy rugs can reduce your actual ceiling height by several centimeters. This reduction impacts how low a hanging light can safely sit, making precise measurements essential before purchasing.
Products mentioned in this guide
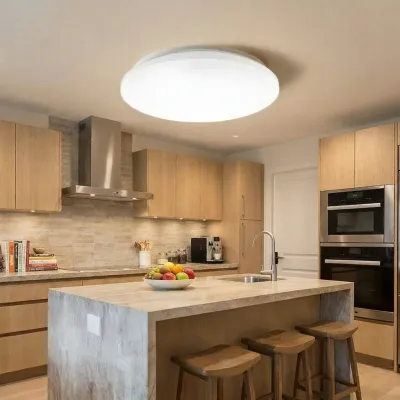
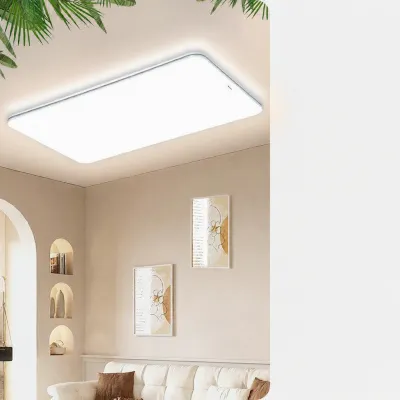
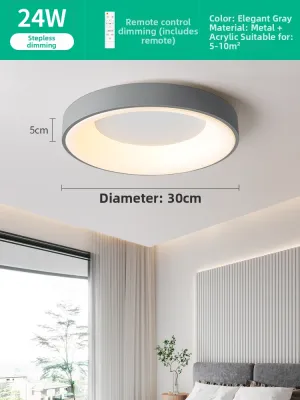
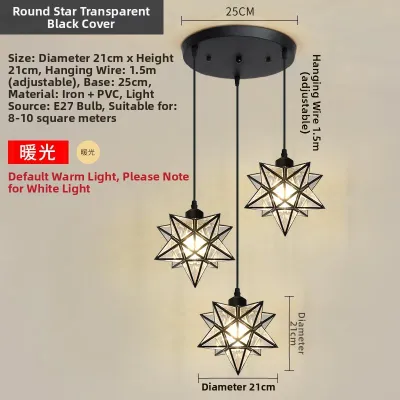
Prices are valid at publication and may change. Please refer to the product page for the latest price.
The relationship between table height and the ceiling dictates the maximum allowable drop. Most standard dining tables stand 74 to 76 centimeters tall. Positioning a fixture directly over a table eliminates the risk of head contact, allowing the light to hang lower for an intimate atmosphere. However, the fixture must still sit high enough to avoid blocking sightlines or causing glare. This typically leaves around 1.8 meters of open space between the tabletop and a 2.6-meter ceiling.
Evaluating Ceiling Light Styles for Low Ceilings
Choosing a dining light ceiling fixture for a 2.6-meter ceiling involves a direct trade-off between spatial clearance and light distribution. Low-profile fixtures keep the ceiling plane clear and open, but they tend to scatter light broadly across the room rather than focusing it on your meals. Conversely, hanging fixtures bring the light source closer to the table for excellent task lighting, but they can visually crowd a low room if they are too bulky.

To maintain a balanced aesthetic, you must evaluate both the physical dimensions and the visual weight of any potential fixture. Visual weight refers to how heavy or dominant an object appears in a space; for instance, a dark, solid metal fixture will feel much more intrusive in a 2.6-meter room than a delicate glass or open-frame design of the same size. Selecting fixtures with slim profiles, light colors, or transparent materials helps preserve an airy, spacious feel in your dining area.
Flush Mount and Semi-Flush Mount Lights
Flush mount fixtures sit directly against the ceiling, making them the most practical choice for maximizing vertical clearance in multi-purpose dining spaces. Because they do not hang down, these lights allow complete freedom of movement around the dining table, which is particularly beneficial if your dining area doubles as a study or a main thoroughfare. Modern flush mounts often feature slim profiles of under 10 centimeters, ensuring they remain entirely out of the way of daily household activities.
To prevent these close-to-ceiling fixtures from casting harsh shadows or creating a sterile environment, look for designs with high-quality diffusers. Acrylic, frosted glass, or fabric diffusers help soften the light output, spreading it evenly across the dining table and reducing glare. This even distribution mimics natural ambient light, making the dining experience more comfortable for family members and guests.
Semi-flush mount lights offer a compelling middle ground, suspending the light source just 10 to 20 centimeters below the ceiling. This slight gap allows light to reflect off the ceiling surface as well as shine downward, creating a softer, more layered lighting effect known as uplighting. A semi-flush fixture provides the decorative presence of a hanging light without encroaching on the critical headroom needed in a 2.6-meter room.
Pendant Lights and Chandeliers
Pendant lights and chandeliers can serve as stunning focal points in a dining room, provided they are strictly confined to the zone directly above the dining table. Placing a hanging fixture over a designated seating area ensures that no one will walk directly beneath it, removing the standard 2.1-meter clearance restriction. This spatial separation allows you to enjoy the design appeal of a pendant light even within the constraints of a 2.6-meter ceiling.
When selecting a pendant or chandelier, scale and visual weight are critical to preventing the fixture from overwhelming the room. A massive, multi-tiered chandelier will make a 2.6-meter ceiling feel lower and more oppressive. Instead, opt for linear pendants, single minimalist domes, or multi-light fixtures with slender profiles that complement the length of your table without blocking sightlines across the room.
To ensure a perfect fit, prioritize fixtures that feature adjustable suspension systems, such as customizable cords, rods, or chains. Avoid fixtures with rigid, non-adjustable downrods unless you have verified that the fixed length matches your calculated requirements exactly. Adjustable cords allow you to fine-tune the height of the light during installation, accommodating the specific dimensions of your table and seating.
Calculating the Right Drop Length for Dining Pendants
Determining the ideal hanging height for a dining pendant involves a straightforward calculation based on your specific room dimensions. To find the maximum allowable drop length, subtract both the table height and the required clearance gap from your total ceiling height. For a standard dining setup, the bottom of the light fixture should generally sit between 75 and 90 centimeters above the tabletop.
For example, with a 2.6-meter (260 cm) ceiling, a standard 75 cm table, and a preferred gap of 85 cm above the table, the calculation is:
260 cm (ceiling height) – 75 cm (table height) – 85 cm (clearance gap) = 100 cm (maximum drop length)
This means your fixture, including its canopy, cord, and shade, should have a total drop length of 100 centimeters from the ceiling.
You should adjust this gap within the 75 to 90-centimeter range based on the physical size of the fixture and the height of your family members. A larger, more solid pendant may need to be hung slightly higher (closer to 90 centimeters above the table) to prevent it from blocking views or feeling too close to diners’ faces. Conversely, a small, delicate glass pendant can be hung slightly lower to create a more intimate pool of light over the table.
Spatial planning also depends on the shape of your dining table. For a round or square table, a single central pendant or a compact semi-flush mount works beautifully to anchor the space. For longer rectangular or oval tables, a single small fixture may leave the ends of the table in shadow. In this case, consider installing a linear suspension light or hanging two smaller, matching pendants spaced evenly along the length of the table to ensure uniform light coverage.
Key Specifications to Check Before Buying
Before purchasing any dining light ceiling fixture, you must verify its electrical and physical compatibility with your home’s infrastructure. Check that the fixture’s voltage rating matches the standard local residential supply. Additionally, confirm the bulb base type (such as E27 or GU10) and ensure the maximum wattage limit of the fixture is compatible with your existing ceiling junction box and wiring capacity.
The physical dimensions and weight of the fixture must also be carefully matched to your ceiling’s structural capacity. Heavy glass or metal chandeliers require robust mounting hardware and a junction box rated to support their weight. Always check the manufacturer’s specifications for the fixture’s weight and compare it to the load limits of your ceiling structure before proceeding with an installation.
Finally, review the dimming capabilities and color temperature options of the fixture or its compatible bulbs. A dining space benefits greatly from adjustable lighting, allowing you to transition from bright, functional task lighting for homework or meal prep to a warm, dim glow for evening dinners. Opting for warm white bulbs (typically between 2700K and 3000K) with dimming compatibility helps create a cozy, inviting atmosphere without harsh glare.
Installation Safety and Professional Boundaries
Working with electrical fixtures carries inherent risks, making safety the absolute priority during any installation or replacement process. Before inspecting, cleaning, or changing a ceiling light, you must turn off the main power supply at your home’s distribution board (DB box) or circuit breaker. Never rely solely on the wall switch to isolate the power, as the wiring behind the switch may still carry live current.
Modifying fixed electrical wiring, altering ceiling structures, or mounting heavy fixtures presents significant safety hazards if performed without proper training. Attempting to run new wires, relocate junction boxes, or install heavy fixtures on plasterboard or false ceilings without adequate structural support can lead to electrical failures, short circuits, or structural collapses.
For these reasons, any work that goes beyond a simple, direct replacement of an existing fixture should be handled by a qualified professional. If your installation requires mounting a new junction box, reinforcing the ceiling to support a heavy chandelier, or installing complex smart dimming switches, always hire a licensed electrician. This ensures that the installation complies with local safety standards and protects your home from electrical hazards.
Frequently Asked Questions (FAQ)
Can I use a recessed light instead of a ceiling fixture in an HDB dining room?
Standard HDB ceilings are constructed from solid concrete slabs, which makes it physically impossible to install traditional recessed downlights directly into the ceiling structure. To use recessed lighting, you would need to install a gypsum false ceiling, which typically lowers the overall room height by 10 to 15 centimeters. In a room that is already 2.6 meters high, this reduction can make the space feel noticeably lower. If you prefer a clean, recessed look without losing ceiling height, surface-mounted downlights, low-profile track lighting, or ultra-slim flush mounts are excellent alternatives that mount directly to the concrete surface.
How do I clean a semi-flush mount light without taking it down?
Routine maintenance of a semi-flush mount light can be done safely without removing the fixture from the ceiling. Use an extendable microfiber duster or a dry microfiber cloth to gently wipe away dust and cobwebs from the exterior of the shade and the mounting canopy. For safety, always perform this task while standing on a stable, secure step-ladder rather than balancing on a dining chair. Ensure the light has been turned off and the bulbs have cooled completely before cleaning, and avoid applying heavy physical pressure to the fixture to prevent damaging the mounting brackets or loosening the electrical connections.
Community discussion
Share your experience or ask a question. Comments are reviewed before publication.