
Selecting the right LED controller is the deciding factor between a flawless, atmospheric lighting system and a frustrating setup plagued by flickering, mismatched colors, or unused features. Whether you are installing subtle cove lighting in a modern living room or setting up functional under-cabinet task lights, the controller serves as the brain of your entire lighting system. Choosing among standard dimmers, RGB color controllers, and smart wireless units requires a clear understanding of your lighting goals, your physical installation constraints, and the electrical specifications of your light sources.
By matching the controller to your specific light strips and daily habits, you can avoid common installation pitfalls and ensure your lighting operates safely and efficiently. This guide breaks down the core differences, practical comparison dimensions, and critical safety checks to help you identify the exact controller type your home setup requires.
Quick Answer: Which LED Controller Do You Actually Need?
To determine which LED controller matches your project, you must first define your primary lighting goal and identify the physical characteristics of your light source. There is no single universal winner; instead, the ideal choice depends on a conditional decision framework based on functionality, interface preference, and ecosystem integration.
Products mentioned in this guide
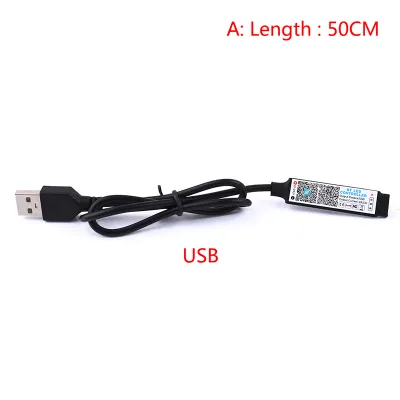
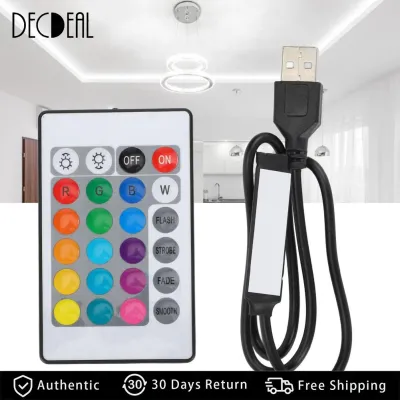
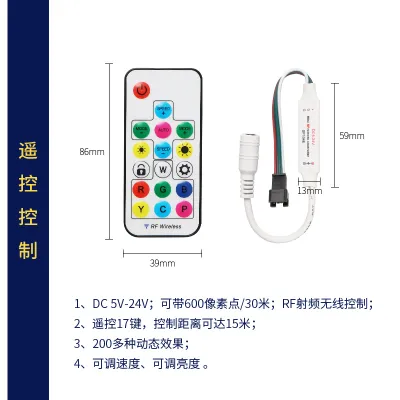
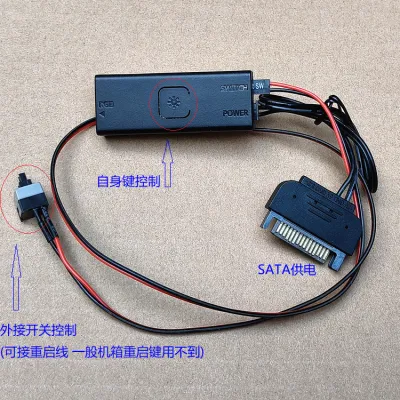
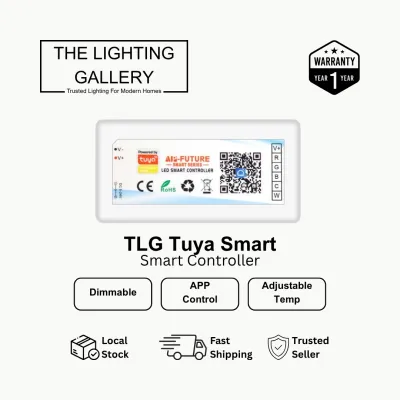
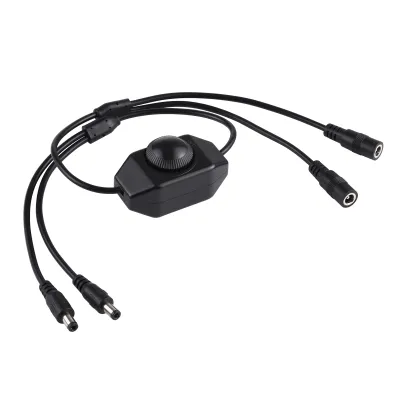
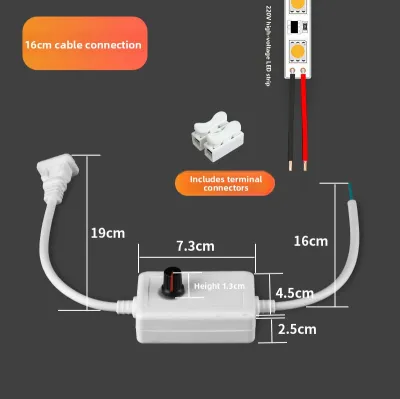
Prices are valid at publication and may change. Please refer to the product page for the latest price.
Choose a Standard Dimmer if:
- Your primary goal is simply adjusting the brightness of single-color (such as warm white or cool white) LED strips or compatible dimmable bulbs.
- You prefer a straightforward, highly reliable physical interface like a rotary dial, wall switch, or simple touch panel.
- You do not require color-changing capabilities, automated schedules, or wireless app control.
Choose an RGB or RGBW Controller if:
- You want dynamic color-changing capabilities, multi-color party effects, or the ability to dial in specific color temperatures.
- You prefer using a dedicated physical remote control (Infrared or Radio Frequency) or a dedicated wall-mounted panel.
- You want color control but have no need for smart home integration, voice commands, or scheduling via smartphone apps.
Choose a Smart LED Controller if:
- You require advanced automation features, including custom schedules, geofencing, or circadian rhythm transitions that shift light temperature throughout the day.
- You want to control your lights via smartphone apps, voice assistants (such as Google Assistant, Amazon Alexa, or Apple Home), or integrate them into a broader smart home ecosystem.
- You want the flexibility to control both single-color dimming and complex RGB/RGBW color mixing through a single, connected interface.
Verify first if: Before purchasing any controller, you must physically check your existing LED strip type (such as 2-pin single-color, 4-pin RGB, or 5-pin RGBW) and verify the operating voltage of both the strip and your power supply. The controller must physically and electrically match these components to operate safely and prevent permanent hardware damage.
Understanding the Core Differences: Dimmer, RGB, and Smart Controllers
To make an informed choice, it is essential to understand how each controller type operates and the specific technology it uses to manage your light sources. Each category serves a distinct purpose and employs different methods to regulate electrical current and user input.

Standard Dimmer Controllers (Single-Color Brightness)
Standard dimmers are engineered specifically to regulate the light output of single-channel, monochrome LED strips or compatible dimmable bulbs. They do not alter the inherent color temperature of the light source; instead, they focus entirely on smooth brightness transitions from zero to one hundred percent.
Most modern LED dimmers utilize Pulse Width Modulation (PWM) to control brightness. PWM works by rapidly switching the electrical current to the LED on and off at a high frequency that is imperceptible to the human eye. By adjusting the “duty cycle”—the ratio of time the light is fully on versus fully off—the controller alters the perceived brightness without reducing the voltage, which prevents flickering and maintains color consistency across all dimming levels.
These controllers typically feature robust, physical interfaces such as rotary knobs, slide switches, or wall-mounted touch panels. Because they do not rely on wireless networks or software updates, standard dimmers offer unmatched reliability, instant response times, and zero standby power consumption when switched off.
RGB and RGBW Controllers (Color Mixing and Effects)
RGB and RGBW controllers are designed to manage multi-channel LED strips, allowing users to mix primary light colors to create millions of distinct shades and dynamic lighting transitions.
An RGB controller manages three separate electrical channels: Red, Green, and Blue. By independently adjusting the intensity of each channel via PWM, the controller mixes these primary colors to produce various hues. An RGBW controller adds a fourth dedicated channel for pure white light. This dedicated white channel is crucial because mixing red, green, and blue to create white light often results in a cold, bluish, and low-quality white that is poorly suited for daily task lighting. The separate white diode on an RGBW strip provides high-quality, natural white light for functional use, while the RGB channels remain available for decorative color accents.
These systems are generally operated via handheld Infrared (IR) or Radio Frequency (RF) remote controls. IR remotes require a direct line of sight between the remote and the controller’s receiver, whereas RF remotes can transmit signals through walls and furniture, offering greater installation flexibility without requiring any home network connection.
Smart LED Controllers (WiFi, Bluetooth, and App Integration)
Smart LED controllers represent the most advanced tier of lighting control, utilizing wireless communication protocols to connect your lights directly to your home network or smart devices.
These controllers operate using various wireless standards, including WiFi (typically 2.4GHz), Bluetooth, Zigbee, or the unified Matter protocol. By connecting to these networks, smart controllers allow you to manage your lighting via mobile apps or voice commands. They act as a functional superset of both standard dimmers and RGB controllers, meaning a single smart controller can handle single-color dimming, tunable white adjustments, and full RGBW color mixing depending on the type of strip you connect to it.
Beyond basic control, smart units unlock sophisticated software features. These include music synchronization, custom scene creation, automated scheduling, and circadian lighting modes that automatically mimic natural daylight patterns. However, they require a stable wireless network to utilize these features and draw a small amount of standby power (typically under 1 watt) to keep their internal wireless radios active and listening for commands.
Key Comparison Dimensions for Your Lighting Setup
When choosing between these three controller types, evaluating how they compare across practical, real-world dimensions will help you select the system that fits your lifestyle and installation capabilities.
Control Method & Convenience
The daily user experience of your lighting depends heavily on how you interact with your controller. Standard dimmers and basic RGB controllers rely on physical interfaces—such as wall switches, rotary dials, or handheld remotes—that are always in a fixed location, require no setup, and can be operated instantly by any family member or guest. There is no risk of connection dropouts, and you do not need to locate a smartphone simply to turn off a light.
In contrast, smart controllers prioritize digital convenience, allowing you to adjust your lights via smartphone apps or hands-free voice commands. While this is incredibly convenient when entering a room with your hands full, relying solely on an app can introduce “smart home fatigue” if simple tasks require unlocking a phone and navigating menus. To mitigate this, many users pair smart controllers with wireless smart buttons or wall switches, combining physical convenience with digital automation.
Installation Complexity
Installation requirements vary significantly depending on the physical design of the controller and whether it interfaces with low-voltage DC power or high-voltage AC mains power.
Low-voltage inline controllers—whether standard, RGB, or smart—are generally plug-and-play. They sit between a external power adapter and the LED strip, utilizing simple DC barrel jacks or screw terminals. These setups carry minimal electrical risk and are entirely suitable for user installation.
Hardwired controllers, such as in-wall dimmers or smart modules designed to sit behind traditional wall switches, must be wired directly into your home’s 230V AC mains electrical grid. This type of installation carries high electrical risks, including short circuits and fire hazards. In Singapore, any installation involving fixed mains wiring must be performed by a licensed electrical professional to ensure compliance with local electrical safety standards.
Ecosystem Integration
If you plan to build a cohesive home automation system, ecosystem integration is a critical factor. Standard dimmers and basic RGB controllers operate as isolated, standalone systems. They cannot communicate with other devices in your home, meaning they cannot react to motion sensors, time-of-day triggers, or home security events.
Smart controllers, particularly those utilizing Zigbee, Z-Wave, or Matter protocols, can integrate seamlessly into broader smart home ecosystems (such as Apple Home, Google Home, or local hubs like Home Assistant). This integration allows your lighting to work in harmony with other smart devices. For example, you can program your hallway LED strips to illuminate at a dim ten percent when a smart motion sensor detects movement after midnight, or have your lights turn off automatically when your smart lock detects that you have left the house.
Cost and Value Evaluation
Budget considerations should focus on the long-term utility of the system rather than just the initial purchase price of the hardware.
Standard dimmers are the most cost-effective option, with basic inline models starting around S$10 to S$30. They offer excellent durability and require no additional hub hardware. Basic RGB and RGBW controllers with included RF remotes represent a mid-tier budget option, typically ranging from S$15 to S$40, providing color control without network complexity.
Smart controllers command a premium, generally costing between S$25 and S$80 or more, depending on the wireless protocol and brand reputation. If you choose a Zigbee or Matter-over-Thread controller, you may also need to budget for a compatible smart home hub. However, for spaces where scheduling and automation can reduce energy waste—such as automatically turning off decorative accent lights late at night—the long-term convenience and potential energy savings of a smart system can justify the higher upfront investment.
Matching the Controller to Your Specific Lighting Goals
Different areas of your home serve different functions, and matching the right controller to the specific room scenario ensures your lighting is both practical and atmospheric.
Task Lighting (Kitchens, Desks, Reading Nooks)
Task lighting requires highly consistent, flicker-free illumination that supports focus and reduces eye strain. In kitchens (such as under-cabinet counter lighting) or over study desks, standard dimmers or high-quality RGBW controllers are highly recommended.
For these areas, you should prioritize controllers that offer precise, high-frequency PWM dimming to eliminate any subtle strobing effects. If you use an RGBW controller, ensure you utilize the dedicated white channel for working, as this provides the high Color Rendering Index (CRI) needed to see colors accurately while preparing food or reading. Smart controllers can also be highly beneficial here when programmed with daylight-harvesting rules, gradually increasing the light intensity as natural afternoon light fades to maintain a consistent brightness on your workspace.
Ambient and Accent Lighting (Living Rooms, Entertainment Areas)
Ambient and accent lighting are designed to set a mood, soften shadows, and highlight architectural features. In living rooms, media centers, and entertainment areas, RGB or smart controllers excel.
Using an RGB or smart controller behind a wall-mounted television (bias lighting) helps reduce eye strain by balancing the contrast between the bright screen and the dark wall. Smart controllers are particularly useful in living areas because they allow you to program multi-device “scenes.” With a single tap or voice command, you can transition the room from a bright, active setting to a dim, warm “Movie Night” scene where the main lights turn off, and the accent LED strips dim to a deep amber hue.
Architectural and Hidden Coves
Cove lighting in false ceilings is a popular architectural feature in modern Singapore apartments, but it presents unique physical and environmental challenges. Because these light strips are tucked away in tight, enclosed drywall cavities, physical size and heat dissipation are critical factors.
Smart controllers and high-power RGB controllers contain internal microprocessors and wireless radios that generate heat during operation. When installed in confined cove spaces with limited airflow, excessive heat build-up can shorten the lifespan of both the controller and the LED strips. When planning cove lighting, always check the physical dimensions of the controller to ensure it fits comfortably in the space, and verify that the area has adequate ventilation. If you are running long lengths of LED strips that require high wattage, you may need to install dedicated LED signal amplifiers to distribute the electrical load and prevent any single controller from overheating.
Automation and "Away from Home" Scenarios
For homeowners who travel frequently or want to enhance their home security, smart controllers offer capabilities that physical dimmers and basic RGB remotes cannot match.
Only smart, network-connected controllers offer true remote access, allowing you to check the status of your lights and turn them on or off from anywhere in the world via your smartphone. You can also utilize automated scheduling to simulate occupancy while you are away on holiday. By programming your lights to turn on and off at natural, slightly randomized intervals in the evening, you can make your home appear occupied, deterring potential intruders far more effectively than a simple mechanical timer switch.
Critical Setup and Safety Checks Before You Buy
Before finalizing your purchase and beginning the installation process, you must perform several technical and safety verifications to protect your equipment and ensure your home remains safe.
Voltage Matching
One of the most critical rules of low-voltage LED installation is that the voltage rating of your controller must strictly match the voltage rating of both your LED strip and your DC power supply.
Most residential LED strips operate on either 12V DC or 24V DC. If you connect a 24V power supply to a 12V controller or a 12V LED strip, the excessive voltage will cause immediate, irreversible component failure, often accompanied by melting plastic and smoke, presenting a severe fire hazard. Conversely, running a 24V strip on a 12V system will result in extremely dim or completely non-functional lights. Always verify that all three components—power supply, controller, and LED strip—are rated for the exact same DC voltage.
Load Capacity and Wattage
To prevent electrical overloads and premature equipment failure, you must calculate the total power consumption of your lighting run and ensure it does not exceed the maximum capacity of your controller.
To calculate the total wattage of your setup, use the following standard formula:
Total Wattage = (LED Strip Wattage per Meter) × (Total Length of the Strip in Meters) × 1.2
The multiplier of 1.2 adds a crucial twenty percent safety headroom (often called the eighty percent load rule). This buffer ensures that your power supply and controller are never run at their absolute maximum capacity, which prevents overheating and extends the lifespan of the electronics. If your calculated total wattage exceeds the maximum rated output of your chosen controller, you must either split the run into smaller sections with separate controllers or use an LED signal amplifier (repeater) to safely distribute the load.
Wiring and Pin Configuration
LED strips and controllers use specific physical wiring layouts depending on their functionality. You must ensure that the physical pin configuration of your controller matches the pin layout of your LED strip.
- 2-Pin Configuration (V+, V-): Used for standard single-color, dimmable LED strips.
- 3-Pin Configuration (V+, Data, GND): Typically used for addressable (pixel) LED strips, where each individual diode can be controlled independently.
- 4-Pin Configuration (V+, R, G, B): Standard setup for multi-color RGB LED strips.
- 5-Pin Configuration (V+, R, G, B, W): Used for RGBW strips that feature a dedicated white channel.
- 6-Pin Configuration (V+, R, G, B, CW, WW): Used for RGBCCT strips, which include both color-changing capabilities and adjustable color temperature (cool white to warm white).
Attempting to force incompatible pin configurations together or misaligning the wires during installation will result in short circuits, incorrect color rendering, or complete system failure.
Safety Boundaries for Hardwiring
It is vital to recognize where safe DIY installation ends and professional electrical work must begin. Low-voltage DC wiring (12V or 24V) downstream of a certified power adapter is safe for homeowners to install and configure.
However, any task that involves connecting wires directly to your home’s 230V AC mains power grid—such as installing in-wall smart switch modules, hardwiring an LED driver into a junction box, or running fixed wiring through walls and ceilings—carries severe risks of electrocution and electrical fire. In Singapore, all such mains-voltage electrical work must be performed by a Licensed Electrical Worker (LEW). Additionally, always ensure that any power supplies or hardwired controllers you purchase carry the Enterprise Singapore Safety Mark, certifying that the equipment has been tested and approved for safe use in local households.
Frequently Asked Questions (FAQ)
Can I use a standard dimmer on an RGB LED strip?
No, you cannot use a standard single-channel dimmer to operate an RGB LED strip. A standard dimmer is designed to regulate only a single electrical channel, whereas an RGB strip requires three separate channels (Red, Green, and Blue) to function. If you attempt to connect an RGB strip to a standard dimmer, the controller will only be able to power one of the color channels (usually whichever wire you connect to the single output terminal), resulting in a single, unchangeable color. To control an RGB strip properly, you must use a dedicated multi-channel RGB or smart controller.
Do smart LED controllers work without an internet connection?
Yes, smart LED controllers can still perform basic functions without an active internet connection, but their capabilities will depend on the wireless protocol they use. Bluetooth controllers communicate directly with your phone and do not require internet access. Zigbee and Matter controllers can communicate locally with a compatible smart hub, allowing you to run automated schedules and use local physical switches even if your internet connection goes down. WiFi-based controllers will generally lose app control and voice assistant capabilities if the internet disconnects, though any physical buttons on the controller itself will continue to function.
How do I calculate the required power supply wattage for my controller?
To calculate the required wattage for your power supply, multiply the manufacturer’s rated wattage per meter of your LED strip by the total length of the strip you plan to install, and then add a twenty percent safety buffer. For example, if you have a 5-meter LED strip that draws 14 watts per meter, the calculation is: 14W × 5m = 70W. Adding the twenty percent safety buffer (70W × 1.2) gives a final required power supply rating of 84 watts. Both your power supply and your LED controller must be rated to handle at least this calculated wattage to ensure safe, long-term operation.
Community discussion
Share your experience or ask a question. Comments are reviewed before publication.