
Designing a comfortable living space in a standard Housing & Development Board (HDB) flat requires careful consideration of vertical space. With a typical structural ceiling height of 2.6 meters, every centimeter of headroom matters. Choosing the wrong lighting profile can make a room feel cramped, dark, or visually cluttered.
To maintain an open and airy atmosphere, the ideal downlights for a 2.6m HDB ceiling are ultra-slim recessed LED downlights or compact surface-mounted fixtures. Ultra-slim recessed options require minimal ceiling drop, preserving precious headroom while delivering clean, integrated illumination. Alternatively, surface-mounted downlights allow you to retain the full 2.6m height of the original concrete slab while adding architectural interest.
Achieving the perfect balance between light distribution and spatial comfort depends on understanding your flat’s structural limits, selecting the right fixture profiles, and verifying technical specifications. By matching your lighting choices to your specific ceiling structure, you can create a bright, welcoming home that feels significantly more spacious than its physical dimensions suggest.
Products mentioned in this guide
![[Climate Voucher] PHILIPS 3 Color Meson LED Downlight 5.5W 9W 13W 17W Tri Tone Scene Switch for False Ceiling Local Warranty](https://img.lazcdn.com/g/p/4f25f6fa6bf4fcf754b08b97b4102da3.jpg_400x400q80.jpg_.webp)
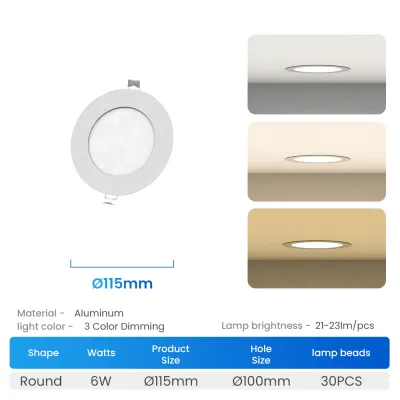
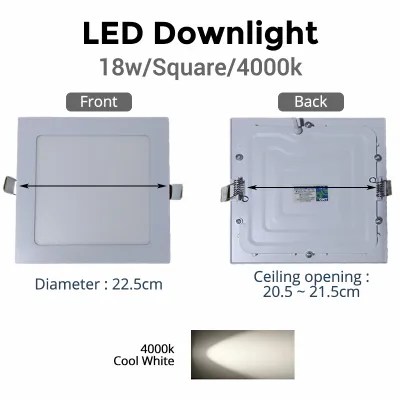
![[2x Efficiency] Megaman Classic Downlight (V3) 7/9/12W Ultra Bright · Visual Comfort CRI92](https://img.lazcdn.com/g/p/4f152f765f55b5ad35e8c27e5cbfb5d5.jpg_400x400q80.jpg_.webp)
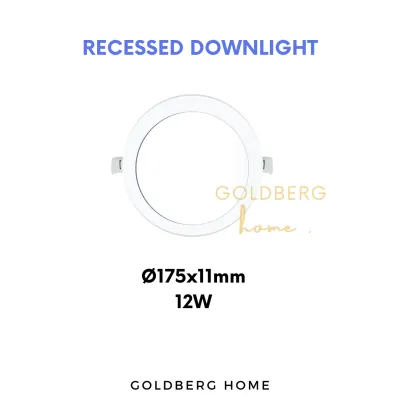
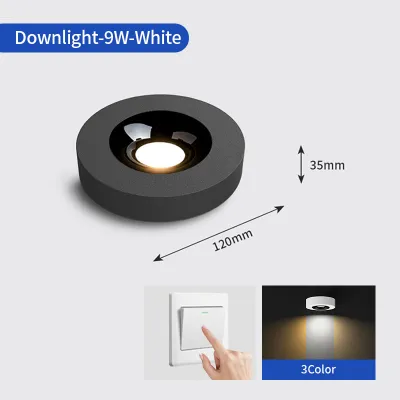
Prices are valid at publication and may change. Please refer to the product page for the latest price.
Understanding Ceiling Clearance and Downlight Profiles
Before purchasing any light fixtures, it is essential to distinguish between your flat’s structural slab height and the eventual finished false ceiling height. The structural slab is the solid concrete floor of the unit above you. In most standard HDB flats, this sits at approximately 2.6 meters from your finished floor.
If you opt for recessed downlights, you must install a plasterboard false ceiling to conceal the fixtures, drivers, and wiring. A traditional recessed downlight housing can require a ceiling cavity depth of 100mm to 150mm or more. Dropping a 2.6m ceiling by this much reduces your usable headroom to around 2.45 meters, which can make living areas feel noticeably restrictive.
In contrast, modern ultra-slim or wafer-style LED downlights require a much smaller cavity, often needing as little as 30mm to 50mm of clearance. This allows you to minimize the false ceiling drop, preserving a finished ceiling height of over 2.55 meters. Minimizing this drop is one of the most effective ways to maintain a sense of openness in your home.
Another popular design strategy is using partial false ceilings, such as perimeter L-boxes or cove lighting borders. These structures allow you to install recessed downlights along the edges of the room while keeping the central concrete ceiling at its original 2.6m height. This variation in height creates a sense of architectural depth and makes the entire room feel taller.
You must also account for localized structural constraints that dictate where a false ceiling can or cannot be installed. Structural beams, overhead sanitary pipes in kitchens and bathrooms, and air-conditioning copper pipes or ducting all create physical barriers. These elements often require deeper localized box-ups or multi-level false ceilings, which will influence where you can safely position your downlights.
Slim Recessed Downlights: Maximizing Headroom
Ultra-slim recessed LED downlights, often referred to as wafer lights, have revolutionized low-ceiling design. Unlike traditional can lights that house a bulky bulb and reflector assembly, ultra-slim profiles integrate the LED chips directly into a thin disc, often measuring less than 20mm in thickness. This design allows them to fit comfortably within the shallowest plasterboard cavities.

These ultra-slim fixtures typically utilize an external driver rather than an integrated one. The driver is housed in a small junction box connected to the light fixture by a flexible cable. During installation, this driver is tucked away into the ceiling cavity next to the fixture, allowing the light itself to remain incredibly thin and flush with the plasterboard.
While these slim profiles solve the physical space problem, they require careful consideration regarding heat dissipation. Because the LED driver and light source are packed into a compact housing, they rely on integrated heat sinks to draw warmth away from the components. When planning your installation, ensure there is at least 10mm to 20mm of free air space above the fixture within the false ceiling cavity to prevent premature driver failure.
Beam angles play a critical role in how spacious your room feels. Fixtures with a narrow beam angle (under 40 degrees) create concentrated pools of light, which can result in a dramatic but potentially shadowy environment. For a 2.6m ceiling, wider beam angles (between 90 and 120 degrees) are generally preferred for general ambient lighting. They distribute light more evenly across the floor and walls, reducing harsh shadows and making the room feel larger.
Lumen output must also be balanced carefully. Installing high-lumen fixtures in a low ceiling can cause uncomfortable glare. Instead of using a few highly intense lights, it is often better to use a larger number of lower-lumen, wide-beam slim downlights spaced evenly across the ceiling. This approach ensures uniform brightness without creating hot spots or visual discomfort.
Surface-Mounted and Trimless Alternatives
When installing a false ceiling is not feasible or desired, surface-mounted downlights offer an excellent alternative. These fixtures mount directly onto the concrete slab, allowing you to preserve the full 2.6m ceiling height throughout your living spaces. Because the wiring is run through slim surface conduits or pre-cast internal conduits, you do not lose any vertical clearance.
Surface-mounted downlights are available in various architectural shapes, such as minimalist cylinders or cubes. Instead of trying to hide the fixture, this approach embraces it as a design element. By choosing compact fixtures with a clean, neutral finish that matches your ceiling color, you can add modern visual interest without making the ceiling feel cluttered or heavy.
For instance, choosing a matte white finish that blends seamlessly with a white ceiling helps the fixtures disappear visually, maintaining an uninterrupted plane. Alternatively, selecting a contrasting matte black or metallic finish can draw the eye upward, creating a modern, industrial aesthetic that celebrates the structural reality of the flat.
For those who are installing a false ceiling and want the ultimate seamless look, trimless or plaster-in recessed downlights are an elegant option. These fixtures feature a mud-in flange that is plastered directly into the drywall, leaving no visible outer rim or trim. The result is a completely flush transition between the ceiling plane and the light source, which minimizes visual distractions and draws the eye upward.
Regardless of whether you choose surface-mounted or trimless options, balancing the visual weight of the fixtures is key. For a 2.6m ceiling, avoid oversized fixtures with large diameters. Opt for compact downlights (typically 3 to 4 inches in diameter) that blend harmoniously with the scale of the room, ensuring the ceiling remains an open canvas rather than a crowded grid.
Essential Specifications and Compatibility Checks
Selecting the right downlight profile is only half the battle; you must also ensure the electrical and environmental specifications are compatible with your home. Always verify that the input voltage of the downlight drivers matches the standard residential voltage in Singapore (230V, 50Hz). Using incompatible drivers can lead to flickering, buzzing, or immediate component damage.
If you plan to install dimmable downlights, compatibility between the LED driver and the wall dimmer switch is critical. LED dimming is highly sensitive, and pairing a leading-edge dimmer with a trailing-edge driver (or vice versa) can cause severe flickering and shorten the lifespan of the lights. Always consult the manufacturer’s compatibility charts or select matched dimmer and driver kits.
Color temperature and Color Rendering Index (CRI) significantly impact the perceived height and comfort of a room. For living rooms and bedrooms, warm white (2700K to 3000K) or cool white (4000K) temperatures are popular choices. A high CRI (typically 90 or above) ensures that colors appear vibrant and true to life under artificial light, which enhances the overall premium feel of your interior design.
Environmental conditions also dictate fixture selection, particularly in moisture-prone areas like bathrooms and kitchens. Standard downlights are not sealed against steam and water splashes. For these zones, look for fixtures with an appropriate Ingress Protection (IP) rating, such as IP44 or higher, which indicates resistance to moisture and dust ingress according to manufacturer guidelines.
Installation Safety and Professional Boundaries
Working with electrical installations carries inherent risks, and safety must always be your top priority. Before any installation, replacement, or maintenance work begins, the mains power supply must be completely isolated at the distribution board (DB box). Never rely solely on a wall switch to cut power, as wiring configurations can sometimes carry residual current.
HDB flats have strict structural guidelines regarding modifications to concrete slabs and walls. Hacking, deep drilling, or channeling into structural concrete slabs to hide wiring is strictly prohibited, as it can compromise the structural integrity of the building. Any wiring on a bare concrete ceiling must be run through surface-mounted conduits or concealed within an approved false ceiling structure.
Furthermore, when drilling into ceilings to mount fixtures or false ceiling brackets, care must be taken to avoid hitting embedded utility conduits or structural steel reinforcement bars (rebar). Using a digital wall scanner to check for hidden hazards before drilling is a highly recommended safety practice.
While basic tasks like swapping out a compatible, plug-and-play LED driver or replacing an existing bulb can sometimes be handled by homeowners, any new wiring, circuit modifications, or false ceiling installations must be performed by a licensed electrician or a qualified professional contractor. Engaging a certified professional ensures compliance with local electrical standards and guarantees a safe, durable installation.
Frequently Asked Questions (FAQ)
Can I install recessed downlights without a false ceiling?
Recessed downlights cannot be installed directly into a solid concrete ceiling slab because they require an internal cavity to house the fixture body, wiring, and driver. Attempting to carve out a cavity in a structural HDB concrete slab is dangerous and strictly prohibited under housing regulations. If you do not have a false ceiling, you should opt for surface-mounted downlights or track lighting systems, which install directly onto the flat concrete surface.
How do I calculate the right number of downlights for my room?
To determine the ideal number of downlights, you need to consider the room’s square footage, the desired light level (measured in lux), and the lumen output of each fixture. As a general guideline, living areas typically require around 100 to 150 lux, while task-oriented spaces like kitchens require 200 to 300 lux. Multiplying the room’s area by the target lux gives you the total lumens needed, which you can then divide by the lumen rating of your chosen downlights. Avoid over-lighting, as excessive fixtures on a 2.6m ceiling can cause harsh glare and make the space feel visually crowded.

Community discussion
Share your experience or ask a question. Comments are reviewed before publication.