
Selecting the right ceiling illumination for a standard 2.6-meter HDB flat requires a careful balance of physical dimensions and light distribution. In a space with moderate vertical clearance, choosing the wrong fixture can make the ceiling feel lower, create harsh glare, or cast distracting shadows. To maintain an open, airy atmosphere, the ideal approach involves selecting shallow-recessed or ultra-slim downlights with a wide beam angle of 60 to 120 degrees. This combination ensures even light coverage across your living areas while keeping the ceiling plane clean and visually unobstructed.
By understanding how fixture depth, beam spread, and trim design interact with your ceiling height, you can make informed purchasing decisions. This guide outlines the essential specifications, safety checks, and design principles needed to achieve a comfortable, well-lit home.
Lighting Goals for 2.6m Ceilings: Space and Shadow Management
Designing a lighting layout for a 2.6-meter ceiling requires a shift in focus from dramatic spotlighting to balanced, ambient illumination. Because the light sources sit closer to eye level than they would in high-ceiling properties, the primary goal is to distribute light evenly without cluttering the ceiling plane. Standard-height rooms benefit most from fixtures that blend into the architecture rather than protruding into the living volume.
Products mentioned in this guide
![[Buy 3 Free 1] LED PRO LED LIGHT Recessed Light/LED Downlight Light LED Downlight Square/ Round Downlight Tri-Tone/3000k/4000k/6000k 6W/8W/15W/20W](https://img.lazcdn.com/g/p/7c53b390a776d5c966b89af519a4ccae.jpg_400x400q80.jpg_.webp)
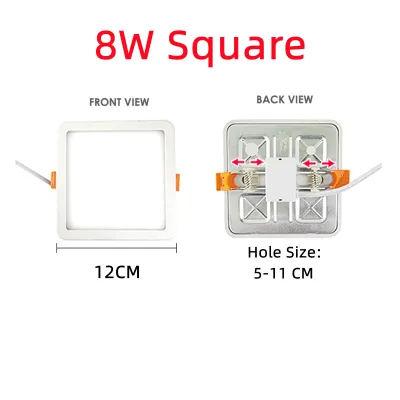
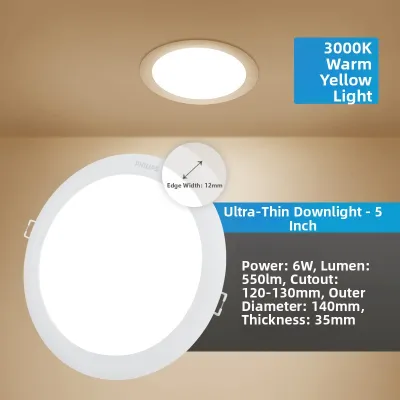
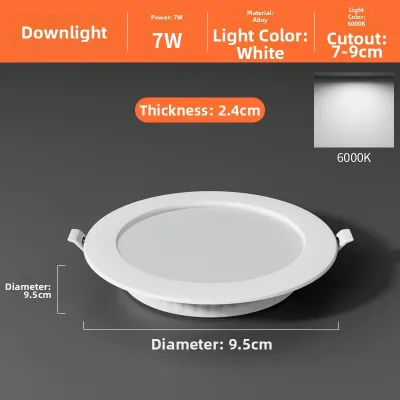
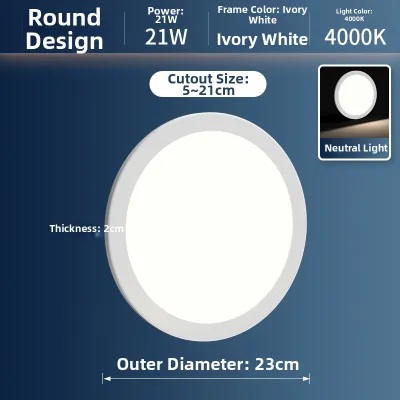
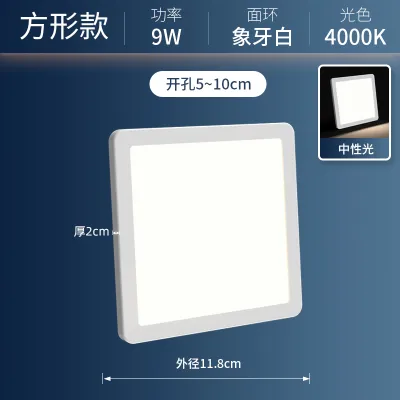
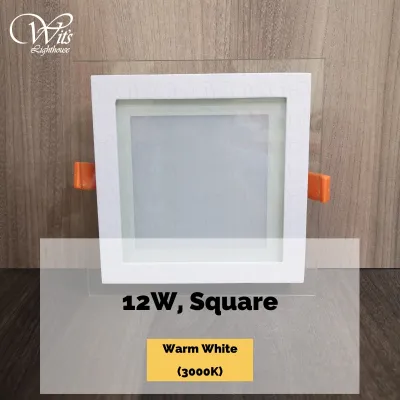
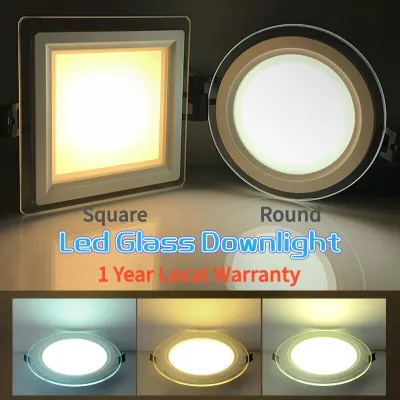
Prices are valid at publication and may change. Please refer to the product page for the latest price.
When downlights are poorly spaced or feature excessively narrow beams, they create a visual phenomenon known as the “cave effect.” This occurs when intense pools of light illuminate only the floor directly beneath the fixtures, leaving the upper portions of the walls and the ceiling in deep shadow. This high contrast makes a room feel smaller and more confined than its actual physical dimensions.
To counter this effect, your lighting plan should aim to wash the walls with soft, diffused light. Illuminating vertical surfaces tricks the eye into perceiving a larger, more open volume. Achieving this balance depends entirely on selecting the correct physical specifications for your downlights, starting with how they fit into your ceiling structure.
Recessed Depth: Navigating Ceiling Clearance and Heat Dissipation
Before purchasing any recessed downlights, you must determine the structural composition of your ceiling. HDB flats typically feature either solid concrete structural slabs or suspended false ceilings. Recessed fixtures require a physical cavity to house the driver and heat sink, making them highly suitable for false ceilings but challenging for direct concrete installations.

If you have a false ceiling, the available cavity depth is often limited to maximize headroom, sometimes leaving as little as 50mm to 100mm of clearance. You must verify the physical dimensions of the downlight housing against this available space. Additionally, check the manufacturer’s specifications for the required minimum clearance around the fixture. This space is critical for heat dissipation; LED drivers and chips generate heat that must escape to prevent premature component failure or safety hazards.
When the available recessed depth is insufficient, you have two primary alternatives:
- Ultra-slim LED panels: These fixtures often require less than 20mm of depth, making them highly compatible with tight false ceiling cavities.
- Surface-mounted downlights: These fixtures mount directly to concrete slabs or shallow ceilings, eliminating the need for a recessed cavity entirely.
If you encounter structural concrete beams, metal framing, or utility pipes during your planning, do not attempt to cut or modify them. You must halt your installation planning immediately and consult a qualified structural engineer or licensed contractor to evaluate alternative mounting options.
Beam Angle Selection: Softening Shadows and Even Light Distribution
Beam angle determines how wide the light spreads from the fixture. For a 2.6-meter ceiling, selecting the correct beam angle is essential to prevent harsh shadows and ensure comfortable, everyday usability.
Wide beam angles, typically ranging from 60 to 120 degrees, are highly recommended for general ambient lighting in standard-height rooms. Because the light spreads quickly upon leaving the fixture, wide-angle downlights overlap their beams at a lower height. This overlap creates a continuous, soft blanket of light across the room, softening shadows on faces and furniture while effectively illuminating the walls to expand the perceived space.
Conversely, narrow beam angles of 15 to 36 degrees concentrate light into tight, intense cones. While useful for highlighting artwork or architectural features, using narrow beams as primary ambient lighting in a 2.6-meter room creates harsh, high-contrast hot spots on the floor. These intense pools of light can cause eye strain and make the ceiling feel lower due to the dark gaps left between the fixtures.
To achieve visual depth, consider layering your light sources. Use wide-beam downlights for overall illumination, and reserve narrower, adjustable spotlights for specific task areas, such as kitchen countertops or reading nooks. Always verify the beam angle specifications on the product packaging or technical datasheets before finalizing your purchase.
Trim Size and Finishes: Maintaining Clean Ceiling Aesthetics
The physical appearance of the downlight on your ceiling plane significantly influences how spacious the room feels. Large, bulky trims draw the eye upward, creating visual clutter that emphasizes the lower ceiling height.
To maintain a clean, uninterrupted ceiling aesthetic, consider the following design options:
- Minimal-trim or micro-trim downlights: These fixtures feature incredibly thin outer bezels (often under 5mm) that sit nearly flush with the plaster, reducing the visual footprint of each light.
- Trimless (plaster-in) downlights: These fixtures are plastered directly into the false ceiling, leaving only the light aperture visible for a completely seamless, modern look.
- Deep-recessed trims: These position the light source slightly higher inside the ceiling cavity, hiding the physical bulb or LED chip from direct view at normal standing angles.
Matching the finish of the downlight trim to your ceiling paint is a highly effective way to reduce visual fragmentation. In most residential spaces, choosing a matte white trim that matches the ceiling paint allows the fixtures to blend into the background when turned off, preserving a clean and spacious feel.
Glare Control and Color Temperature for Visual Comfort
Because a 2.6-meter ceiling positions light sources closer to your line of sight, managing glare is crucial for daily comfort. Direct exposure to intense light sources can cause visual fatigue and discomfort.
To mitigate this, look for downlights equipped with deep-recessed baffles, anti-glare rings, or those with a low Unified Glare Rating (UGR). These design features physically shield the light source, ensuring that light is directed downward onto living surfaces rather than sideways into your eyes.
Perceived color temperature is a conditional preference that should align with the function of each zone. Warm white (2700K to 3000K) is highly suitable for living rooms and bedrooms, creating a cozy, relaxing environment. Cool white (4000K) offers a neutral, crisp light that is excellent for kitchens, study areas, and bathrooms where task clarity is important. Avoid mixing highly contrasting color temperatures within the same open-plan area, as this can create a disjointed visual flow.
Additionally, verify the dimming method and compatibility of your downlights. Dimmable drivers allow you to adjust light intensity based on the time of day, helping you transition from bright daytime task lighting to soft evening ambiance. Ensure your dimmer switches match the driver specifications (such as trailing-edge or smart protocols) to prevent flickering.
Installation Safety: Electrical Limits and Professional Boundaries
Any lighting installation must prioritize electrical safety and compliance with local regulations. Before adding new downlights or replacing existing fixtures, you must verify several critical technical specifications:
- Voltage and Certification: Ensure all fixtures match your local residential voltage and carry recognized electrical safety certifications.
- Wattage and Load Limits: Calculate the total wattage of the new fixtures to ensure they do not exceed the safe load limits of your existing lighting circuits or transformers.
- Installation Environment: Verify that fixtures installed in damp areas, such as bathrooms or kitchen cooking zones, carry appropriate Ingress Protection (IP) ratings (such as IP44 or higher) to protect against moisture.
For any fixed wiring, mains connections, or modifications to your home’s electrical distribution board, you must hire a licensed electrical professional. Working with electricity carries inherent risks of shock and fire. Always isolate the power supply at the main distribution board before inspecting, cleaning, or performing maintenance on any light fixture. If you encounter complex wiring configurations or are unsure of your ceiling’s structural integrity, halt the installation immediately and seek professional assistance.
Frequently Asked Questions (FAQ)
Can I install downlights without a false ceiling?
Yes, you can install downlights without a false ceiling, but you cannot use recessed fixtures directly in a solid concrete slab. Instead, you must use surface-mounted downlights, which attach directly to the concrete surface and house their drivers within a decorative outer casing. Alternatively, you can install track lighting systems, which allow you to position adjustable spotlights along a single track fed from an existing ceiling point. Chasing concrete slabs to hide recessed wiring is subject to strict structural regulations and should only be evaluated by a professional contractor.
How do I calculate the number of downlights needed for a room?
To estimate the number of downlights required, first calculate the floor area of your room in square meters. Next, determine the target illuminance (lux) needed for the space; for example, a living room typically requires 100 to 150 lux, while a kitchen task area may require 250 to 300 lux. Multiply the area by the target lux to find the total required lumens. Finally, divide this total by the lumen output of your chosen downlight to determine the approximate number of fixtures. Adjust the final layout to ensure even spacing, keeping fixtures away from the immediate edges of walls to prevent harsh shadows.
Do anti-glare downlights reduce overall brightness?
Anti-glare downlights use physical design elements, such as deep-set baffles or honeycomb louvers, to block stray light rays that would otherwise shine directly into your eyes. While these features direct the light more precisely downward and can slightly reduce the total raw lumen output compared to a flat, exposed diffuser, they do not necessarily make the room feel dimmer. By directing the light where it is needed most and reducing eye strain, they actually improve visual comfort. If you are concerned about light levels, you can select fixtures with a slightly higher lumen efficiency or adjust your spacing layout accordingly.

Community discussion
Share your experience or ask a question. Comments are reviewed before publication.