
Creating a cohesive picture frame wall transforms a blank surface into a curated visual narrative. The key to success lies in balancing structure with personal expression, ensuring that multiple frames feel like a single, unified installation rather than a cluttered afterthought. By carefully planning your layout, testing your arrangement on the floor, and using precise hanging techniques, you can achieve a professional-grade gallery wall that complements your home’s architecture.
Planning Your Picture Frame Wall Layout
Before driving any nails or drilling holes, evaluate the physical characteristics of your selected wall. Consider how the ambient light changes throughout the day, as strong afternoon sun can cause distracting glare on glass frames or fade delicate prints. Take note of nearby furniture, such as sofas, sideboards, or console tables, which will act as the visual anchor for your display.
Visual cohesion does not require identical frames, but it does require a unifying thread. You might choose a consistent color palette for your artwork, matching frame materials like natural oak or matte black metal, or a singular photographic theme. This common element prevents the eye from becoming overwhelmed by too many competing details.
Products mentioned in this guide
![[SG Stock] Wooden Picture Frame Wooden Photo Frame- Wall Art Poster Painting Hanging Stand Table Decor A3 A4 4R 5R](https://img.lazcdn.com/g/p/dbe873a1b973510e498244e54cebad2f.jpg_400x400q80.jpg_.webp)
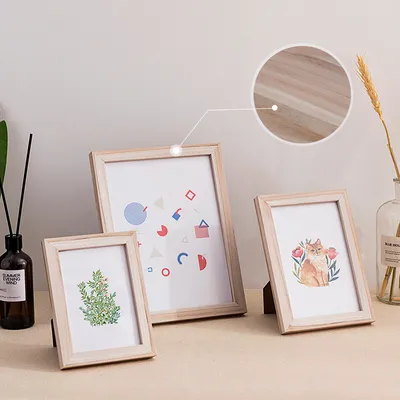
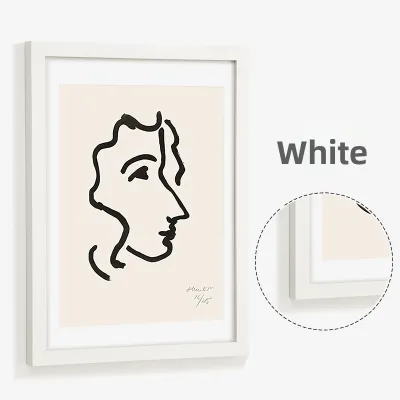
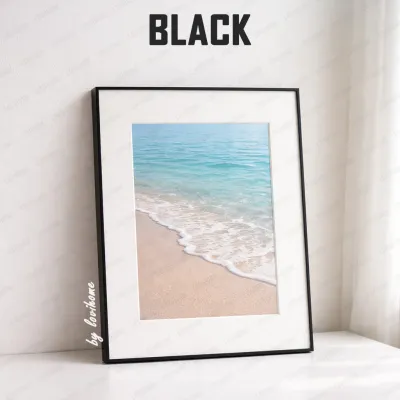



Prices are valid at publication and may change. Please refer to the product page for the latest price.
Prepare your toolkit before starting the physical installation. You will need a reliable measuring tape, a spirit level to ensure straight lines, painter’s tape, a pencil for marking, and appropriate wall anchors. In Singapore, many residential walls are constructed from solid concrete or structural brick, which require a masonry drill bit and plastic wall plugs, while internal partition walls typically require specialized drywall anchors.
Step-by-Step Guide to Arranging Picture Frames
Mapping the Layout on the Floor and Wall
Begin by clearing a large floor space directly in front of your target wall. Lay out your picture frames on the floor, experimenting with different configurations until you find a balanced composition. Place larger or more visually dominant frames near the center or slightly off-center to act as anchor points, then arrange smaller frames around them.

Once you are satisfied with the floor arrangement, translate it to the wall using paper templates. Trace the outline of each frame onto butcher paper, newspaper, or wrapping paper, and cut out the shapes. Label each paper template with the corresponding frame’s orientation and hanger location, then use low-tack painter’s tape to stick them to the wall.
This paper-template method allows you to step back and assess the entire layout from a distance. You can easily adjust the spacing, swap positions, or raise the entire arrangement without leaving a single mark or damaging your wall finish.
Measuring, Spacing, and Hanging the Frames
Maintain consistent spacing between your frames to keep the gallery wall looking intentional. A gap of roughly five to eight centimeters is generally effective for medium-sized frames, while larger frames can handle slightly wider gaps. Keeping this distance uniform across the entire display binds the individual pieces into a single cohesive unit.
Determine the weight of each loaded frame to select the correct mounting hardware. Lightweight frames may hang securely on simple picture hooks, but heavier wooden or metal frames require robust wall anchors. Always verify the load capacity of your selected hardware against the actual weight of the frame, glass, and backing combined.
To mark the exact spot for your wall hardware, measure the distance from the top of the frame to the hanging bracket or wire on the back. Transfer this measurement onto your paper template on the wall, marking the spot with a pencil. Use a spirit level across the top edge of your templates to ensure your marks are perfectly horizontal before drilling or hammering.
Safety is paramount during any wall installation. If you encounter unexpected resistance while drilling, or if your layout is close to light switches, power outlets, or water pipes, stop immediately to avoid damaging hidden utility lines. For exceptionally heavy, oversized frames or installations high up on double-volume walls, consider hiring a qualified professional installer to ensure structural safety.
Layout Techniques for Different Frame Collections
Grid Layout
A symmetrical grid layout is ideal for collections of identical frame sizes and matching art styles, such as a series of botanical prints or black-and-white architectural photography. This approach relies on absolute precision, where every frame is aligned perfectly horizontally and vertically. Even a minor deviation of a few millimeters can disrupt the clean, modern aesthetic, making a spirit level and precise measuring tape indispensable.
Salon or Eclectic Layout
The salon layout is highly adaptable and works beautifully for mixing different frame sizes, finishes, and art mediums. To keep this eclectic style from looking chaotic, start by placing your largest or most striking piece near the center at eye level. Work outward, balancing a large frame on one side with two smaller stacked frames on the other, and try to maintain a consistent outer boundary to give the overall shape a sense of order.
Linear or Stair-Step Layout
A linear layout aligns frames along a single horizontal or vertical axis, which is excellent for narrow hallways or tight transitional spaces. For staircases, a stair-step layout mimics the upward angle of the steps. Measure a consistent height up from each step to establish a diagonal baseline, then align the bottom edges of your frames along this imaginary diagonal line to create a natural sense of movement.
Common Mistakes to Avoid When Hanging Gallery Walls
One of the most frequent errors is hanging a gallery wall too high, which disconnects the artwork from the room’s furniture and makes it appear to float aimlessly. The center of your overall arrangement should generally sit at comfortable eye level, which is typically around 145 to 150 centimeters from the floor.
Another common pitfall is ignoring the environmental conditions of the room. In humid tropical climates, adhesive hanging strips can lose their grip over time, potentially causing frames to fall and break. Additionally, placing delicate artwork in direct sunlight can lead to rapid fading, while hanging frames too close to high-traffic doorways increases the risk of accidental bumps.
Frequently Asked Questions (FAQ)
How high should I hang a picture frame wall above a sofa or console table?
When positioning a gallery wall above a sofa, console table, or sideboard, aim to leave a gap of approximately 15 to 20 centimeters between the top of the furniture and the bottom of your lowest frames. This spacing ensures the display feels visually anchored to the furniture rather than floating independently. Additionally, the overall width of the frame arrangement should ideally span about two-thirds to three-quarters of the width of the furniture below to maintain balanced proportions.
Can I mix different frame colors and styles in one gallery wall?
Yes, mixing different frame colors and styles can add depth and character to your display, provided there is a unifying element to tie them together. You can achieve harmony by using identical white mat boards inside every frame, or by sticking to a cohesive color palette within the artwork itself. To maintain visual balance, distribute the different frame styles evenly throughout the layout rather than clustering all the heavy, dark frames in one corner.
Community discussion
Share your experience or ask a question. Comments are reviewed before publication.