
To arrange multiple A4 magnetic frames on a wall for a professional gallery look, you must establish a precise layout using paper templates, maintain consistent spacing of 5 to 8 centimeters, and select a secure mounting method tailored to your wall type. A4 magnetic frames offer a modern, clean-lined aesthetic that allows for effortless artwork updates, making them an excellent choice for dynamic home displays, office certificates, or art collections. Achieving a polished, gallery-standard result requires meticulous planning, the right tools, and an understanding of structural mounting limits.
Choose the Right Layout for Uniform A4 Frames
The standardized dimensions of an A4 frame (exactly 210 x 297 mm) provide a perfect geometric foundation for structured wall displays. Because the dimensions are uniform, you can easily design symmetrical configurations that look balanced and intentional. A strict grid layout, such as a three-by-three or two-by-four arrangement, works exceptionally well for A4 frames, projecting a clean, architectural feel. Alternatively, a single linear row creates a modern, minimalist look that guides the eye along a hallway or above a low piece of furniture. For spaces where you want a more relaxed or organic feel, a staggered salon-style layout allows you to group frames around a central focal point while maintaining a balanced overall footprint.
Before committing to a layout, you must measure your available wall space carefully. Take note of the total width and height of the wall section, keeping in mind surrounding elements like light switches, door frames, and furniture heights. Calculate the total footprint of your planned arrangement by adding the width of the frames plus the planned spacing between them. For instance, a grid of six A4 frames (two rows of three) in portrait orientation with 5 cm gaps will require a total width of approximately 73 cm and a height of roughly 64.4 cm.
Products mentioned in this guide
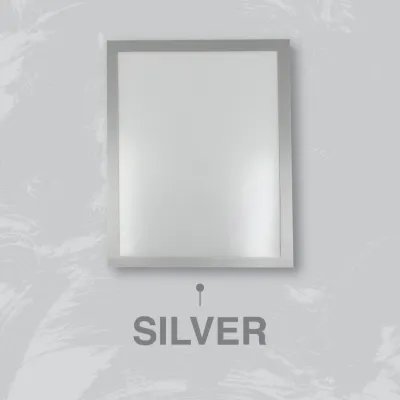


Prices are valid at publication and may change. Please refer to the product page for the latest price.
To avoid unnecessary marks or structural damage to your walls, create physical paper templates before picking up a drill or hammer. Trace each A4 magnetic frame onto kraft paper, wrapping paper, or newspaper, and cut out the templates to the exact dimensions of 210 x 297 mm. Using painter’s tape, you can temporarily stick these paper templates to the wall. This hands-on visualization allows you to step back, assess the scale, adjust the spacing, and confirm that the layout complements the room’s proportions before any permanent hardware is installed.
Gather the Right Tools for Secure Wall Mounting
A professional gallery installation relies heavily on precision and safety. Gathering the correct tools before you begin ensures that your alignment is flawless and that the frames remain securely anchored to the wall. For measuring and marking, you will need a reliable measuring tape, a pencil for light wall markings, painter’s tape that will not peel away your wall paint, and a reliable spirit level. A spirit level is indispensable; relying on visual estimation alone often results in crooked lines that disrupt the clean geometry of A4 frames.

The choice of mounting hardware depends entirely on the construction of your walls. In Singapore, many interior walls are made of solid concrete or masonry, which requires a rotary hammer drill, masonry drill bits, and plastic wall anchors to secure screws. If you are mounting onto drywall partitions, you must use specialized drywall anchors that expand behind the board to distribute weight. For renters or those seeking damage-free options, heavy-duty adhesive mounting strips are an alternative, but they must be selected with caution.
Before choosing your mounting method, check the manufacturer’s weight rating for your specific a4 magnetic frame. The total weight includes the backing, the magnetic front panel, the protective acrylic or glass sheet, and the inserted artwork. Never assume a generic adhesive strip will hold any frame; verify that the strip’s rated capacity exceeds the combined weight of the frame by a safe margin. If the frame is particularly heavy or if the wall surface is uneven, mechanical fasteners like screws and wall anchors are the only reliable way to prevent the frame from falling and causing damage.
Step-by-Step Installation for Magnetic Frames
Measure, Mark, and Space Your Templates
Achieving a high-end gallery look requires uniform spacing between each frame. Standard gallery wall spacing typically ranges from 5 to 8 centimeters. Spacing smaller than 5 cm can make the arrangement look crowded and cluttered, while spacing wider than 8 cm can cause the individual frames to look disconnected rather than part of a cohesive collection.
Once you have cut your A4 paper templates, use painter’s tape to secure them to the wall according to your chosen layout. Start with the central frame or the bottom row to anchor the design. Use your measuring tape to ensure that the distance between each template is perfectly consistent across both horizontal and vertical axes.
With the templates temporarily taped in place, rest your spirit level along the top and bottom edges of each paper sheet. Adjust the templates until the bubble in the level is perfectly centered. Once aligned, use a pencil to mark the exact mounting points directly through or just above the templates, indicating where the center of each frame’s wall mount or magnetic base will sit.
Secure the Wall Mounts or Magnetic Bases
For installations requiring drilling, select a drill bit that matches the diameter of your wall anchors exactly. If you are drilling into concrete or masonry, use a masonry bit and set your drill to hammer mode. Before pulling the trigger, always check for hidden hazards. If you suspect that electrical wiring or plumbing pipes run behind the wall section—especially near light switches, power outlets, or adjacent bathrooms—stop immediately and consult a qualified professional to locate the utilities. Insert the wall anchors into the drilled holes until they are flush with the wall surface, then secure the mounting brackets or magnetic bases with screws.
For adhesive-based installations, proper surface preparation is critical for a long-lasting bond. Clean the wall surface thoroughly with isopropyl alcohol to remove dust, grease, and oils; avoid using household spray cleaners, which can leave a slippery residue. Ensure the wall is completely dry, smooth, and not freshly painted, as paint typically requires several weeks to fully cure before supporting adhesive weight.
Always adhere to the strict safety boundary of your materials. If your wall surface is heavily textured, covered in wallpaper, or showing signs of flaking paint, adhesive strips will not hold securely. In these scenarios, or if the weight of your A4 magnetic frame exceeds the adhesive’s certified limit, you must switch to mechanical anchors and screws. Failing to do so risks the frame detaching, which can damage the wall, the frame itself, or nearby furniture.
Attach and Level the Magnetic Frames
With the mounting bases securely fastened to the wall, you can now mount the frames. Depending on the design of your specific a4 magnetic frame, this process may involve hanging the frame backing onto a central screw or snapping the frame directly onto a magnetized wall plate. Carefully align the frame with its base, ensuring that the magnetic mechanism engages fully or that the bracket clicks securely into place. You should feel a positive connection or hear a distinct click, confirming that the frame is stable.
Once the frame is mounted, place your spirit level across the top edge of the frame. Even with precise template marking, slight variances can occur during drilling or adhesive placement. Make minor physical adjustments to the frame’s angle until the level indicates it is perfectly horizontal.
After all frames are securely mounted and leveled, carefully peel away the painter’s tape and remove the paper templates from the wall. Pull the tape slowly at a 45-degree angle to prevent peeling off any wall paint or leaving sticky residue behind. Step back several meters to inspect the entire installation, verifying that the lines are straight and the spacing is visually balanced from a distance.
Styling Tricks for a Cohesive Gallery Aesthetic
To elevate your A4 magnetic frame display from a simple collection of pictures to a sophisticated gallery installation, consider using custom matting, also known as a passe-partout. Placing a high-quality paper mat inside the frame creates a clean, professional border around your artwork. This technique is especially useful if your photos or prints are smaller than the standard A4 size, as the matting bridges the gap and prevents small images from looking lost. A white, off-white, or light gray mat board adds depth and draws the viewer’s eye directly to the artwork.
Maintaining thematic and color consistency is another powerful way to unify your gallery wall. If your prints feature a wide variety of subjects, you can create a cohesive look by converting all images to black and white, or by selecting a consistent color palette, such as warm earth tones or cool blues. If the artwork itself is highly diverse, keeping the frame styles identical—such as using the same black or white magnetic frames throughout—will provide the necessary visual anchor to tie the collection together.
Proper lighting is the final touch that transforms a standard wall into a true gallery display. When choosing a wall for your frames, avoid areas that receive direct, intense sunlight, as ultraviolet rays can fade your prints and damage the frame materials over time. Instead, utilize indirect room lighting or install dedicated directional lighting. Adjustable track lights, recessed spotlights, or sleek, battery-operated LED picture lights mounted above the frames will highlight the texture of your prints and create a dramatic, professional ambiance in the room.
Safe Maintenance and Artwork Swapping
One of the greatest benefits of an a4 magnetic frame is the ability to swap out artwork quickly without removing the entire mounting system from the wall. However, to preserve the integrity of your wall mounts, you must use the correct technique when opening the frame. Avoid pulling the front panel straight outward with force, as this exerts sheer stress on the wall anchors or adhesive strips, potentially loosening them over time. Instead, gently slide the front magnetic panel to the side, or peel it back slowly starting from a designated corner or edge, minimizing the pulling force exerted on the wall.
Over time, fine dust particles can settle on the magnetic contact surfaces, creating a physical barrier that weakens the magnetic attraction. During your regular cleaning routine, detach the front panel and wipe down the magnetic strips on both the base and the frame with a dry, clean microfiber cloth. Avoid using wet cloths, liquid spray cleaners, or harsh chemicals on the magnetic surfaces, as moisture can trap dust and promote rust or degradation of the magnetic material.
Additionally, you should perform periodic safety checks on your installation. In high-humidity environments, such as Singapore’s tropical climate, adhesive backings can gradually degrade, and drywall can soften slightly around anchor points. Every few months, gently touch the frames to verify that the wall mounts remain firmly attached and show no signs of movement or sagging. Finally, always ensure that the new artwork you insert is not too thick; inserting heavy cardstock or multi-layered collages can prevent the magnetic panels from sealing completely, which compromises the grip and could cause the front panel to fall.
Frequently Asked Questions (FAQ)
Can I use adhesive strips instead of drilling for A4 magnetic frames?
Yes, adhesive strips can be used, but only under specific conditions. You must ensure that the total weight of your A4 magnetic frame, including the backing, front panel, and artwork, is well below the maximum weight capacity specified by the adhesive manufacturer. Furthermore, adhesive strips require a completely smooth, clean, and non-porous surface; they are not suitable for textured plaster walls, wallpaper, or walls that have been painted within the last month. Keep in mind that removing adhesive strips incorrectly can tear drywall paper or peel away paint finishes, so follow the manufacturer’s removal instructions carefully.
How do I prevent the magnetic frame from losing its grip over time?
To maintain a strong magnetic hold, you must keep the contact surfaces clean and avoid overloading the frame. Dust and airborne oils can accumulate on the magnetic strips, reducing friction and grip; regular dusting with a dry microfiber cloth will prevent this. Additionally, ensure that the artwork or photo paper you insert does not exceed the thickness recommended by the frame manufacturer. If the insert is too thick, it will prevent the magnetic front panel from seating flush against the base, significantly reducing the magnetic hold and increasing the risk of the front panel slipping off.
Community discussion
Share your experience or ask a question. Comments are reviewed before publication.