
To arrange your Frameo photo frame for the best home display, you must balance technical requirements—such as continuous power access and a stable Wi-Fi connection—with the visual flow of your living space. The ideal placement ensures that your digital memories are highly visible, free from distracting screen glare, and safely integrated into your interior decor. Because these devices serve as both functional technology and personalized art, finding the right spot requires a thoughtful approach to room function, mounting safety, and ambient light management.
Assess Your Space and Technical Requirements Before Placement
Before committing to a specific location for your digital photo frame, evaluating the technical and physical limitations of your home environment is essential. The first priority is verifying your local Wi-Fi signal strength at the exact spot you plan to use. Since these frames rely on a continuous internet connection to receive new photos and software updates from family members, a weak signal will result in failed transfers and frustrating sync delays. You can easily test this by holding your smartphone in the proposed spot and running a quick connection speed test.
Electrical safety and power outlet proximity are equally critical factors. Unlike traditional picture frames, digital photo frames require constant mains power to operate. In Singapore, homes utilize a standard 230V supply with Type G three-pin plugs; ensure your frame’s power adapter is compatible and carries the appropriate safety certifications to prevent electrical hazards. Plan your placement near an existing wall outlet to avoid running long, messy extension cords across walkways, which can present a severe tripping hazard or disrupt the clean aesthetic of your room.
Products mentioned in this guide

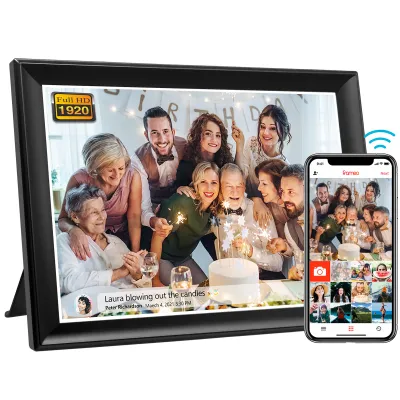
![[SG SELLER] FRAMEO Digital Photo Album WI-FI / WIFI [Upload from Phone] Advertisement Panel and Sentimental Gift Idea](https://img.lazcdn.com/g/p/80c7d6ad7d279cd4d3c7199ae91701af.jpg_400x400q80.jpg_.webp)




Prices are valid at publication and may change. Please refer to the product page for the latest price.
Finally, you must review the physical specifications of your specific Frameo model. Consider the screen size, overall dimensions, and weight, as well as whether the frame utilizes a tabletop kickstand or is compatible with a standard VESA wall mount. Larger models, such as those with 15.6-inch screens, require more physical space and sturdier mounting surfaces than compact 10.1-inch versions. Ensuring the structural integrity of your chosen shelf, mantel, or wall before installation prevents costly damage to both the device and your home.
Match Room Functions With Your Photo-Sharing Goals
Different rooms in your home serve distinct purposes, and matching these functions with your photo-sharing goals helps you get the most out of your digital display.

High-Traffic and Social Spaces
Placing your digital display in high-traffic areas like the living room, dining room, or entryway maximizes its potential as a social hub. In these communal spaces, the screen naturally becomes a dynamic conversation starter, allowing guests to admire recent family holidays, milestones, or artistic shots as they gather. Position the frame at a height and angle where it can be easily viewed from multiple seating positions, rather than tucking it away in a narrow corner.
When planning the layout in busy areas, pay close attention to the flow of foot traffic. A frame placed on a narrow console table near a main doorway is highly vulnerable to being accidentally bumped or knocked over by passing family members. Ensure there is ample clearance around the display, keeping it clearly visible from the main sofa or dining table while remaining safely out of the direct path of movement.
Private and Personal Retreats
For a more intimate experience, private spaces like bedrooms, home offices, or cozy reading nooks offer an excellent alternative. In these rooms, the display is intended for personal reflection and relaxation rather than social entertainment. Position the frame at a comfortable eye level when you are seated at your desk or resting in bed, allowing you to enjoy a rotating gallery of personal memories during quiet moments of the day.
To ensure the screen does not disrupt your rest or cause eye strain in low-light environments, make full use of the frame’s built-in scheduling and auto-dimming features. You can program the display to enter sleep mode during your typical sleeping hours, turning the screen completely off to maintain a dark, restful sleeping environment. Additionally, curating specific, calming photo albums for these private spaces—such as serene nature scenes or quiet family portraits—helps maintain a peaceful and focused atmosphere.
Choose Between Wall Mounting and Tabletop Display
Deciding whether to mount your frame on a wall or display it on a flat surface depends on your aesthetic preferences, room layout, and safety considerations.
Tabletop Placement
Setting your frame on a flat surface like a mantelpiece, console table, or bookshelf is the most flexible option. This method allows you to easily reposition the frame whenever you want to redecorate or move it to a different room. When choosing a tabletop surface, ensure it is completely stable, level, and free from vibrations caused by nearby electronics or heavy foot traffic. Always position the frame far enough back from the edges of the furniture to prevent curious pets or young children from accidentally pulling it down.
Wall Mounting
For a cleaner, more integrated look that mimics traditional art galleries, wall mounting is highly effective. Before you begin drilling, you must identify the type of wall you are working with. In Singapore, structural walls in HDB flats and condominiums are typically made of solid concrete or brick, which requires a hammer drill, masonry drill bits, and heavy-duty wall plugs to secure the mount safely. If you are mounting on a drywall partition, you must locate the wooden or metal studs or use specialized hollow-wall anchors to prevent the frame from pulling out of the wall.
Safety and Compliance Boundaries
Hiding unsightly power cables behind the wall or drilling deep into structural concrete requires caution. If you are renting your home, always consult your tenancy agreement and seek permission from your landlord before making permanent modifications to the walls. For complex installations, such as running electrical wires inside a wall cavity, working at heights, or drilling near hidden utility pipes, it is highly recommended to hire a qualified local handyman or professional installer. This ensures compliance with local building regulations and protects your safety.
Manage Ambient Lighting and Screen Glare
Digital screens are highly sensitive to ambient lighting, and improper placement can severely degrade the visual quality of your photos.
Avoid placing your digital frame directly opposite large windows or sliding glass doors that receive direct sunlight. In tropical climates, harsh sunlight will not only wash out the colors on the screen, making your photos difficult to see, but it can also cause the device to overheat, potentially damaging the internal components and shortening its lifespan.
Spend a few days observing how the natural and artificial light changes in your chosen room. Note any times of day when overhead spotlights, floor lamps, or sunlight create harsh glare hotspots on the screen. If you notice significant reflections, you can adjust the physical environment by hanging sheer curtains to diffuse the incoming daylight or slightly angling the frame away from direct light sources.
Most digital frames allow you to manually adjust the screen’s brightness settings to match the room’s lighting conditions. Setting the brightness to auto-adjust, if the model supports it, or manually lowering it in the evening ensures the display remains vibrant without becoming an overwhelming light source in a dimly lit room.
Test and Finalize Your Frameo Arrangement
Once you have selected the perfect spot and completed the physical installation, a final verification check ensures everything functions seamlessly.
Begin by sending a diverse batch of test photos from your mobile device using the companion app. View the frame from various distances and angles around the room to check the image clarity, color accuracy, and readability of any captions. This step helps you determine if the frame needs to be slightly tilted or if the screen brightness needs further adjustment to optimize the viewing experience.
Next, inspect the power cable to ensure it is neatly managed and secured. Loose, dangling wires not only look untidy but also present a safety hazard for children and pets. Use adhesive cable clips, paintable wall trunking, or decorative cable covers to run the wire flush against the wall or along the top of your baseboards, keeping it completely out of sight and out of the way.
Finalize your setup by monitoring the frame’s performance over the first few days to confirm that the Wi-Fi connection remains stable and that new photo uploads are received without interruption. If you experience frequent disconnections, you may need to adjust the position of your home router, install a Wi-Fi range extender, or move the frame slightly closer to a stronger signal source.
Community discussion
Share your experience or ask a question. Comments are reviewed before publication.