
Arranging multiple 4R photo frames on a wall requires a thoughtful balance of geometry, spacing, and visual weight to transform a collection of small prints into a cohesive gallery. Because a 4R photo—measuring approximately 10.2 by 15.2 centimeters (4 by 6 inches)—is relatively compact, hanging these frames individually can make a wall look cluttered or sparse. Grouping them systematically creates a unified focal point that draws the eye and elevates the room’s overall decor. Achieving this balance depends on selecting a structured layout, preparing the wall surface correctly, and using precise alignment techniques.
Planning Your 4R Gallery Wall Layout
Before driving any nails or applying adhesives, you must decide on a layout style that complements both your frames and the room’s architecture. A structured grid layout is highly effective for uniform 4R frames, especially if they share identical borders and orientations. This clean, symmetrical arrangement works exceptionally well in modern or minimalist spaces, projecting an orderly and curated feel. Alternatively, a linear row layout—whether aligned horizontally along a single baseline or stacked vertically—suits narrow walls, hallways, or the space directly above a console table. For a more dynamic and personal touch, an organic salon-style cluster allows you to mix horizontal and vertical 4R frames, growing outward from a central point while maintaining a balanced outer boundary.
Visualizing your arrangement physically before mounting prevents unnecessary damage to your walls. Start by laying your frames out on the floor in front of the target wall to experiment with different configurations and spacing. Once you settle on a design, trace each frame onto paper and cut out these templates, marking the exact position of the hanging hardware on each sheet. Secure these templates to the wall using low-tack painter’s tape, which allows you to step back, assess the proportions from a distance, and adjust the layout without leaving marks.
Products mentioned in this guide

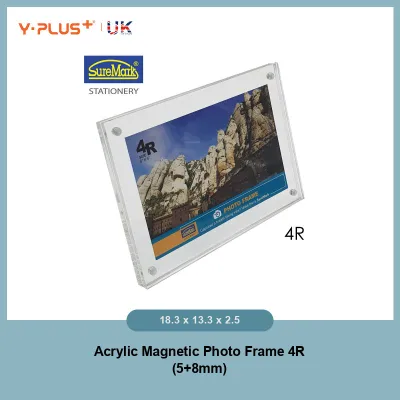
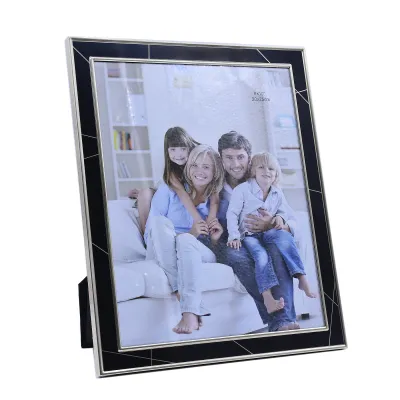



![[Local Stock] 10R 8R 5R 4R Bronze Designer Stainless Steel Photo frame](https://img.lazcdn.com/g/p/6aeb04f064a714fc7b4a8a28a7f07815.jpg_400x400q80.jpg_.webp)

Prices are valid at publication and may change. Please refer to the product page for the latest price.
Establishing a clear focal point is essential for anchoring the display within the room. Identify the natural line of sight in the space, which is typically at eye level or centered over a major piece of furniture like a sofa or sideboard. The central anchor of your gallery wall—whether it is a single prominent frame or the exact center point of a symmetrical grid—should align with this focal point to ensure the entire installation feels grounded and intentional.
Essential Tools and Materials for Hanging
Precision is the key to a professional-looking gallery wall, and gathering the right tools beforehand ensures a smooth installation process. You will need a reliable tape measure to calculate precise gaps, a sharp pencil for marking reference points, and a spirit level to guarantee every frame hangs perfectly straight. Relying solely on your eyes can lead to noticeable slanting, especially when multiple small frames are placed in close proximity.

The choice of wall hardware depends heavily on your wall construction and the weight of your frames. In Singapore, many residential walls are made of solid concrete or structural brick, which require a masonry drill bit, plastic wall plugs, and screws for a permanent, heavy-duty mount. If you are renting or prefer not to drill, high-quality adhesive strips or foam tape rated for the specific weight of your 4R frames are excellent alternatives, provided the wall surface is clean, dry, and painted with non-silicone paint. For drywall or plasterboard partitions, standard picture hanging hooks or self-drilling drywall anchors offer sufficient support for lightweight 4R frames.
Before purchasing or installing hardware, inspect the back of each 4R frame to verify its built-in hanging mechanism. Most frames come equipped with sawtooth hangers, D-rings, or a tension wire. Ensure that your chosen wall hooks or screws are compatible with these mechanisms; for instance, a wide sawtooth hanger requires a hook or screw head that can slot securely into its grooves, while D-rings may require two separate hanging points to prevent the frame from pivoting.
Step-by-Step Guide to Hanging 4R Frames
To transfer your planned layout to the wall accurately, begin by marking your primary reference point. If you are using paper templates, this point will correspond to the center or top edge of your anchor frame. Measure from the floor or adjacent architectural features to ensure this initial mark is positioned correctly, then tape your first paper template over it. Use your spirit level to verify that the template is perfectly horizontal before securing all four corners.
Once the anchor template is in place, establish uniform spacing for the surrounding frames. A consistent gap of 3 to 5 centimeters between frame borders generally works best for 4R displays, keeping the collection cohesive without feeling cramped. Use your tape measure to mark these exact intervals outward from your anchor template, and place the subsequent paper templates accordingly. Continually check the alignment of the templates relative to one another using your spirit level, ensuring that both horizontal rows and vertical columns remain perfectly aligned.
With all paper templates leveled and taped to the wall, you can install the hardware directly through the marked hanging points on the paper. If you are drilling into concrete, use a slow, steady speed with a masonry bit, insert the plastic wall plug, and drive the screw home, leaving a small portion of the head exposed. For adhesive strips, press the adhesive firmly against the wall according to the manufacturer’s instructions, ensuring proper adhesion before hanging the frame. Once the hardware is secure, gently tear away the paper templates from around the hooks.
Hang your 4R frames onto the installed hardware one by one, starting from the center and working your way outward. Place your spirit level on top of each frame as you hang it to verify its alignment. If a frame sits slightly crooked due to minor hardware shifts, you can make micro-adjustments by gently nudging the frame or adjusting the tension of the hanging wire.
Adjusting and Maintaining Your Photo Display
Even a perfectly aligned gallery wall can shift over time due to daily household vibrations, closing doors, or routine cleaning. To prevent your 4R frames from tilting or scratching the wall paint, apply small silicone bumpers or a tiny piece of removable museum putty to the bottom corners of each frame backing. This simple addition adds friction against the wall surface, keeping the frames securely in place and maintaining your precise spacing.
Make it a habit to periodically inspect your gallery wall, especially after dusting or vacuuming nearby. If you notice a frame has shifted, check the internal hanging wire or sawtooth hanger to ensure it has not slipped off the center of the wall hook. Over time, wall anchors in drywall can loosen slightly under tension, so verify that all hardware remains firmly seated in the wall.
Proper maintenance also extends to protecting the physical photographs inside the frames. When cleaning the glass or acrylic covers, never spray liquid glass cleaner directly onto the frame, as moisture can seep through the edges and damage the 4R prints. Instead, spray a small amount of cleaner onto a microfiber cloth and gently wipe the surface. In humid climates, such as in Singapore, ensure your room is well-ventilated to prevent moisture buildup behind the glass, which can cause the photo paper to stick to the glazing and degrade over time.
Frequently Asked Questions (FAQ)
What is the standard spacing between 4R frames in a gallery wall?
For a balanced and cohesive look, the standard spacing between 4R frames should be between 3 and 5 centimeters. If your frames have thick, chunky borders, you can lean toward the wider end of this range to prevent the display from feeling visually heavy. Conversely, thin or borderless frames benefit from tighter spacing to maintain a strong collective identity. Consistency is key; ensure the gap remains identical between all adjacent frames, whether they are arranged horizontally or vertically.
How high should I hang my 4R gallery wall?
The general rule of thumb is to position the center of your gallery wall at eye level, which is approximately 140 to 145 centimeters from the floor. If you are hanging the display above a piece of furniture, such as a sofa or a console table, the bottom edge of the lowest frames should sit about 15 to 20 centimeters above the top of the furniture. This gap prevents the display from looking disconnected while ensuring the frames are safe from accidental bumps.
Can I mix 4R frames with other sizes in the same display?
Yes, mixing 4R frames with larger sizes, such as 5R or 8R, can create a visually engaging and dynamic gallery wall. To maintain balance, use the larger frames as your central anchors or distribute them evenly across the layout to balance the visual weight. Keep your spacing consistent between all frames, regardless of their size, and try to align the outer edges of the overall arrangement to give the diverse collection a clean, structured boundary.
Community discussion
Share your experience or ask a question. Comments are reviewed before publication.