
Creating a balanced gallery wall transforms a blank surface into a curated visual narrative. Achieving this look requires a systematic approach that balances frame dimensions, wall space, and proper installation techniques. By planning your layout beforehand, selecting the correct hardware for your wall type, and maintaining consistent spacing, you can securely hang multiple framed paintings to elevate your home’s interior design.
Planning Your Gallery Wall Layout
Before making any permanent marks on your wall, you must evaluate which layout style best suits your space and the collection of artwork you wish to display. A structured grid layout works exceptionally well for frames of identical sizes and matching mats, offering a clean, symmetrical, and modern aesthetic. For an eclectic mix of frame sizes, finishes, and art mediums, an organic salon cluster provides a dynamic, curated feel that can grow over time. Linear arrangements, where frames are aligned along a single horizontal or vertical axis, are ideal for narrow hallways or spaces above low-profile furniture.
Visualizing the arrangement on the floor is a crucial preparatory step that prevents unnecessary holes in your walls. Lay your framed paintings on a clean floor space that matches the dimensions of your target wall. This physical staging allows you to experiment with different configurations, swap positions, and adjust the spacing until the entire composition feels balanced.
Products mentioned in this guide


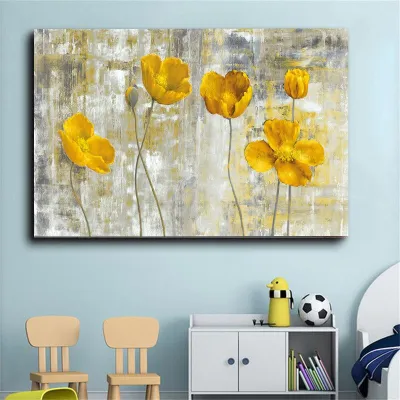
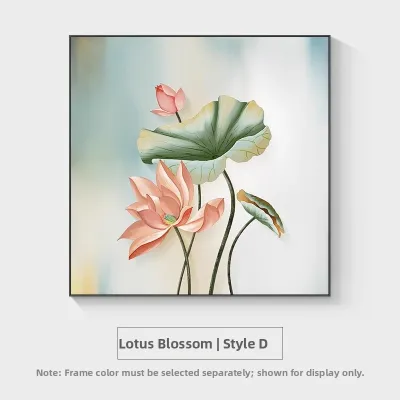

Prices are valid at publication and may change. Please refer to the product page for the latest price.
Once you are satisfied with the floor arrangement, translate it into paper templates. Trace each painting with frame onto butcher paper or newspaper, cut out the shapes, and label them. Tape these paper templates to the wall using low-tack painter’s tape, which allows you to step back and assess the scale of the layout from different angles in the room.
Establishing a primary focal point is essential for anchoring the entire gallery wall. Identify the most prominent or largest piece of art to serve as the visual anchor, typically positioned near the center of the arrangement. For the most comfortable viewing experience, position this focal point so its center sits at standard eye-level, which is generally measured between 140 and 145 centimeters from the floor.
Essential Tools and Hardware Selection
Securing your artwork safely requires matching your hanging hardware to both the weight of the framed painting and the specific material of your wall. In many modern homes, particularly concrete or masonry walls common in Singapore apartments, standard nails will not suffice. For solid concrete or brick walls, you must use plastic wall plugs paired with compatible screws to ensure a firm hold. If you are mounting on drywall or partition walls, select hollow-wall anchors or toggle bolts rated for the specific weight of your frames.

The back of each painting with frame dictates the type of hanging hardware you need to install on the wall. Sawtooth hangers are suitable for lightweight frames, while D-rings or heavy-duty picture wire are preferred for larger, heavier pieces. Always inspect the existing hardware on the back of your frames to ensure it is securely attached to the frame itself before hanging.
Gathering the correct tools before beginning the installation process saves time and prevents alignment errors. You will need a reliable tape measure to calculate distances, a pencil for marking drill points, and a high-quality spirit level to ensure every frame hangs perfectly straight. For concrete walls, a hammer drill equipped with a masonry drill bit matching the size of your wall plugs is indispensable.
Step-by-Step Installation Process
Begin the physical installation by establishing a clear baseline on your wall. Use your tape measure and spirit level to draw a light, erasable pencil line or apply a strip of painter’s tape to represent the bottom or center axis of your layout. Position your paper templates on the wall relative to this baseline, securing them firmly with painter’s tape.
Calculating the exact drill points requires accounting for the offset of the hanging hardware on the back of each frame. Do not simply drill at the top edge of the paper template. Measure the distance from the top of the frame to the actual hanging point—such as the apex of the picture wire when pulled taut, or the hook of the D-ring—and transfer this exact measurement downward onto your paper template. Mark this precise spot with a pencil, pressing firmly enough to leave a mark on the wall beneath the paper.
Once all drill points are marked, carefully remove the paper templates and prepare to drill. If you are working with concrete walls, hold the drill perpendicular to the surface and drill to the depth of your plastic wall plug. Insert the wall plug into the hole, ensuring it sits flush with the wall surface, and then drive the screw in, leaving a small portion of the screw head protruding to catch the frame’s hardware.
Hang each painting with frame onto its designated screw and use your spirit level to check the alignment. Adjust the frame gently until the bubble in the level sits perfectly centered between the indicator lines. If a frame tilts slightly due to loose wire, you can apply small adhesive rubber bumpers to the bottom corners of the frame back to add friction against the wall and keep it in place.
Always remain alert to potential hazards during the drilling process. If you encounter unexpected resistance, hear a hollow metallic sound, or suspect the presence of electrical conduits or water pipes behind the wall, stop drilling immediately. In damp areas or walls shared with bathrooms, moisture can compromise wall strength and damage artwork backing, so it is wise to consult a qualified professional installer if you encounter complex wall conditions.
Spacing and Visual Alignment Techniques
Maintaining consistent spacing between your frames is the secret to making a collection of individual paintings look like a cohesive gallery wall. A standard gap of 5 to 8 centimeters between adjacent frames is generally recommended. If the spacing is too wide, the artwork will look disconnected; if it is too narrow, the arrangement will feel cramped and cluttered.
Your chosen alignment strategy should complement the overall layout style. For structured grids, maintain strict top, bottom, and side alignments across all frames. For organic salon clusters, focus on aligning the inner edges of the outer frames to create an invisible boundary box, or align the centers of the frames along a shared horizontal centerline that runs through the middle of the entire display.
Balancing visual weight is crucial when mixing different frame sizes, colors, and art styles. Heavy, dark frames or highly detailed paintings carry more visual weight and should generally be placed toward the bottom or center of the arrangement to anchor the display. Lighter frames, white mats, and minimalist artwork can be positioned toward the outer edges to keep the overall composition from feeling bottom-heavy or lopsided.
Common Installation Mistakes to Avoid
One of the most frequent mistakes is hanging a gallery wall too high, which disconnects the artwork from the rest of the room. A gallery wall should feel integrated with your living space, especially when positioned above furniture like a sofa, console table, or sideboard. Aim to keep the bottom edge of the lowest frames approximately 15 to 20 centimeters above the top of the furniture to maintain a strong visual connection.
Ignoring the manufacturer’s weight limits on wall anchors and hanging hardware can lead to structural failures and damaged artwork. Always weigh your painting with frame on a digital scale before selecting your fasteners, and never exceed the recommended load capacity of your wall plugs or adhesive strips.
Overcrowding the wall is another common pitfall that detracts from the beauty of individual pieces. A successful gallery wall requires negative space—the empty wall area around and between the frames—to allow the viewer’s eyes to rest. If your arrangement feels overwhelming, edit your selection by removing one or two pieces to restore balance and breathing room to the composition.
Frequently Asked Questions (FAQ)
How should I handle hanging heavy framed paintings?
Heavy framed paintings require robust support to prevent damage to your walls and artwork. For frames exceeding standard weight limits, you must use heavy-duty toggle bolts for drywall or deep-set expansion anchors for concrete walls. Whenever possible, locate the wooden or metal studs behind drywall and mount your hardware directly into them. To distribute the weight evenly and prevent the frame from tilting, install two separate hanging points on the back of the frame rather than relying on a single central hook.
What is the safest way to clean glass and frames once they are mounted?
To preserve your framed paintings and protect the wall, use a dry or slightly damp microfiber cloth to gently wipe away dust from the frames and glass. Avoid spraying liquid glass cleaners directly onto the mounted artwork, as moisture can seep into the frame joints, damage the matting, or ruin the painting underneath. Periodically check the stability of the hanging hardware and ensure the frames remain level, particularly in high-humidity environments where wood frames may expand or contract slightly over time.
Community discussion
Share your experience or ask a question. Comments are reviewed before publication.