
Arranging multiple medal display frames on a wall is a powerful way to transform personal achievements into a compelling visual narrative. Whether you are showcasing marathon finishes, academic milestones, or professional accolades, a haphazardly hung collection can quickly look cluttered rather than celebratory. To achieve the best visual impact, you must approach the project with a clear plan that balances structural safety, geometric alignment, and aesthetic storytelling. By selecting a cohesive layout pattern, verifying your wall’s load-bearing capacity, and executing precise measurements, you can create an organized, gallery-worthy display that honors your hard work.
Planning Your Medal Display Layout
Before driving a single nail into your wall, you must carefully evaluate the physical canvas of your room. Take note of the wall’s overall dimensions, the surrounding furniture, and the ambient lighting conditions. In many Singapore homes, where living spaces are designed for maximum efficiency, selecting the right wall is crucial. A narrow hallway, a study room accent wall, or the space above a living room console are all excellent candidates. Observe how natural light enters the room throughout the day, as well as the placement of overhead downlights, to ensure your display won’t be obscured by harsh shadows or blinding reflections.
Once you have selected the wall, compare different layout patterns to find one that matches the quantity and style of your medal display frames.
Products mentioned in this guide
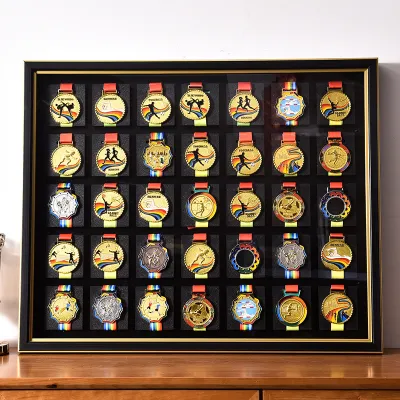
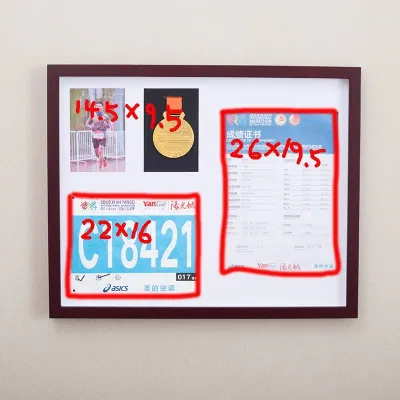
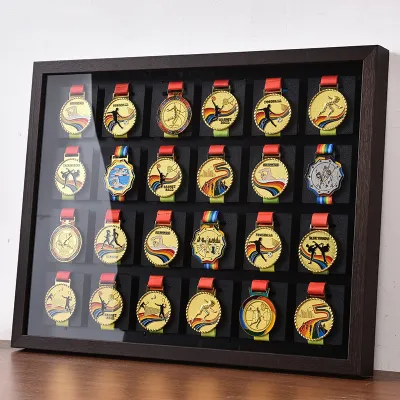
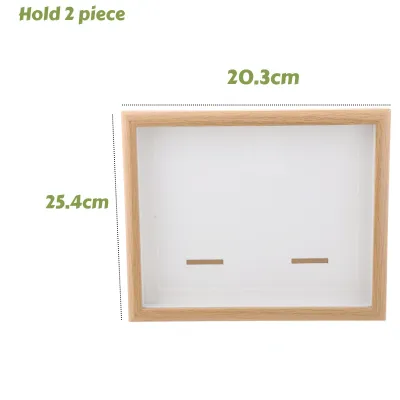
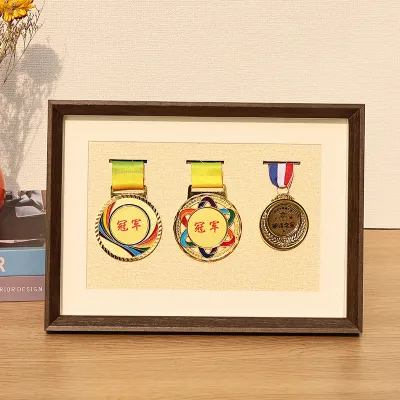
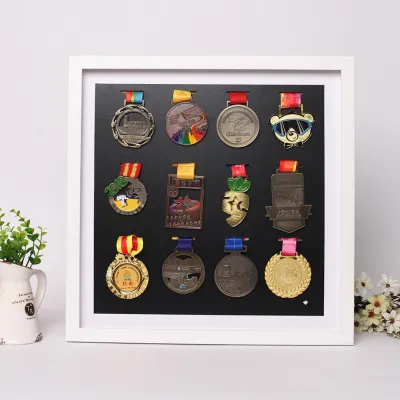
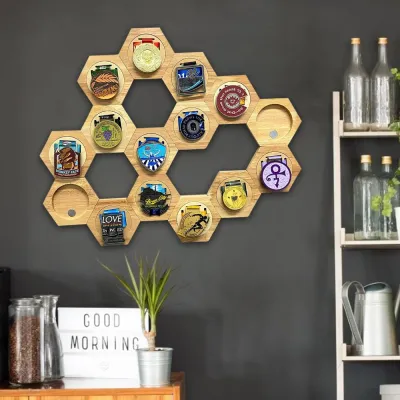
Prices are valid at publication and may change. Please refer to the product page for the latest price.
- The Grid Layout: This pattern relies on perfect symmetry and uniform spacing. It is highly suited for identical frames of the exact same size and shape. Arranging frames in a neat two-by-two or three-by-two grid creates a disciplined, modern, and clean aesthetic.
- The Salon-Style Layout: Also known as a gallery wall, this approach is highly flexible and dynamic. It allows you to mix different frame sizes, shapes, and orientations. It is the ideal choice if you plan to expand your collection over time, as you can organically add new frames to the outer edges without disrupting the core structure.
- The Linear Timeline: This layout arranges frames in a single horizontal or vertical line. It is highly effective for telling a chronological story, such as tracking your athletic progress over several consecutive years.
To visualize these patterns without damaging your wall, create a paper template mock-up. Trace the outline of each medal display frame onto butcher paper, newspaper, or cardboard, and cut them out. Label each template so you know which frame it represents. Use low-tack painter’s tape to arrange these paper templates on the wall. This hands-on method allows you to step back, evaluate the overall footprint, adjust the spacing, and experiment with different configurations until you find the perfect visual balance.
Choosing the Right Hanging Hardware for Your Wall Type
Securing your medal display frames safely requires a clear understanding of your wall’s structural material. In Singapore, residential walls generally fall into two categories: solid concrete or brick walls (common in structural and external walls of HDB flats and condominiums) and drywall or gypsum board partitions (often used to divide internal rooms). Each material has vastly different load-bearing characteristics and requires specific mounting hardware.

Matching your hardware to the total weight of the loaded medal display frame is essential for long-term safety. A frame packed with heavy metal medals, thick glass or acrylic glazing, and a solid wood backing can easily weigh several kilograms.
- Concrete and Brick Walls: These require a hammer drill, a masonry drill bit, plastic wall plugs (anchors), and matching screws. The wall plug expands inside the drilled hole, providing a secure grip that can easily support heavy frames.
- Drywall Partitions: Standard nails or simple picture hooks are insufficient for heavy frames on drywall. Instead, use specialized hollow-wall anchors, such as toggle bolts or self-drilling threaded anchors, which distribute the weight across a larger surface area behind the board.
- Adhesive Strips: While high-quality adhesive strips are convenient and damage-free, they should only be used for exceptionally lightweight, small frames.
Safety boundaries must be strictly observed to prevent costly damage or injury. Never use adhesive hooks for heavy glass-fronted frames. Singapore’s high relative humidity can degrade the adhesive backing over time, causing the frame to fall unexpectedly. If you are drilling into any wall, always use a digital stud finder with a cable-detection feature to avoid hitting hidden electrical conduits or water pipes. If you encounter extremely hard reinforced concrete or feel unsure about operating a hammer drill safely, stop immediately and consult a qualified professional handyman.
Step-by-Step Guide to Measuring and Hanging the Frames
Transforming your paper mock-up into a permanent, perfectly aligned display requires patience, precision, and the right tools. Gather a reliable tape measure, a sharp pencil, a spirit level, a hammer or drill, painter’s tape, and safety goggles before you begin.
First, calculate the exact placement of the hanging hardware on the back of each frame. Do not assume that the hanging hook or wire is positioned at the exact same distance from the top edge on every frame, even if the frames look identical. Lay the frame face down on a soft surface. Measure the distance from the very top edge of the frame to the point where the hanging hardware (such as a D-ring, a sawtooth hanger, or a taut drop wire) will actually rest on the wall hook. Write this measurement down.
Next, identify your “anchor frame.” This is typically the central frame in a salon-style layout or the top-left frame in a structured grid. Locate the corresponding paper template on your wall. Mark the top edge of the template with a pencil, then remove the paper. Measure down from that top-edge mark using the hardware offset distance you calculated earlier. This precise spot is where your screw, nail, or hook must be installed.
Install the hardware for the anchor frame, hang the frame, and place your spirit level on top of it to ensure it is perfectly horizontal. Once the anchor frame is secure and level, use it as your physical reference point. Use painter’s tape to mark out consistent gaps—typically 5 to 8 centimeters—between the frames. Work your way outward from the anchor frame, measuring, marking, and leveling each subsequent frame. Constantly step back to verify that the horizontal and vertical lines remain perfectly aligned across the entire arrangement.
Design Strategies for Visual Balance and Storytelling
An effective medal display is more than just a collection of frames; it is a visual story of your dedication and achievements. To make the display visually engaging, group your frames by a logical theme, chronological order, or color palette. For example, you can group all your running medals together, separate your academic achievements from your sports trophies, or arrange the frames so that the ribbon colors create a pleasing gradient. This thematic grouping gives the viewer a clear path to follow.
Balancing visual weight is crucial to prevent the display from feeling lopsided. Visual weight is determined by a frame’s size, color, and frame profile. Large, dark, or thick frames naturally look heavier than small, light-colored, or thin frames. To achieve balance, distribute these heavier elements evenly across your layout. If you have one dominant, oversized frame, place it near the center or the lower-left quadrant to anchor the display. You can then balance its visual weight on the opposite side using a cluster of two or three smaller frames.
Incorporate negative space—the empty wall area around and between your frames—to give the display breathing room. A cramped arrangement can feel overwhelming and diminish the importance of individual achievements. If you want to add variety, you can integrate complementary elements such as a small floating shelf to hold trophies, or a framed photograph of you crossing a finish line. However, ensure these secondary items do not overcrowd or distract from the primary medal display frames.
Maintaining and Updating Your Medal Wall
Once your medal wall is complete, regular maintenance will keep it looking pristine and secure. Dust can quickly accumulate on the tops of the frames and the glass fronts. Use a dry, clean microfiber cloth to gently wipe down the frames weekly. For glass fronts, spray a small amount of glass cleaner onto the microfiber cloth first—never spray it directly onto the glass, as the liquid can run down, seep behind the frame, and damage the medals or ribbons. For acrylic fronts, avoid standard glass cleaners, which can cause cloudiness or fine scratches; instead, use a specialized acrylic cleaner or a slightly damp, soft cloth.
In Singapore’s warm and humid climate, periodic structural checks are highly recommended. Once a year, gently wiggle each frame to ensure the wall anchors, screws, or hooks remain firmly seated in the wall. Check the back of the frames for any signs of moisture buildup or mildew, which can occasionally occur on walls that share an exterior boundary.
Finally, plan ahead for future achievements. If you know you will continue to earn medals, choose a salon-style layout from the beginning. This allows you to expand the display outward over time. Alternatively, you can leave intentional, symmetrical gaps in a grid layout, filling them with framed photographs or motivational quotes that can easily be replaced by new medal display frames as your collection grows.
Frequently Asked Questions (FAQ)
How high should I hang my medal display frames on the wall?
The standard gallery guideline is to position the center point of the entire display at eye level, which is approximately 140 to 150 centimeters from the floor. If you are hanging the frames above a piece of furniture, such as a sideboard, console table, or desk, ensure the bottom edge of the lowest frame sits roughly 15 to 20 centimeters above the tabletop. This gap prevents the frames from being accidentally bumped while keeping the display visually connected to the furniture below.
Can I mix different sizes and styles of medal display frames?
Yes, mixing different sizes and styles can add character and depth to your wall. To prevent the arrangement from looking chaotic, establish at least one unifying element. You can use identical matting colors inside the frames, choose frames made of the same material (such as natural wood or matte black aluminum), or align the outer edges of the entire cluster to form a clean, imaginary rectangle on the wall.
What is the best way to prevent glare on the glass of my medal frames?
To minimize distracting reflections, avoid positioning your display directly opposite large windows or intense, unshielded light sources. You can slightly reduce glare by inserting small adhesive rubber bumpers on the bottom corners of the back of the frame, which tilts the top of the frame slightly forward and redirects light reflections downward. For the ultimate glare reduction, consider upgrading to anti-reflective glass or anti-glare acrylic when selecting your medal display frames.
Community discussion
Share your experience or ask a question. Comments are reviewed before publication.