
Creating a visually balanced gallery wall is an art that transforms a blank surface into a personal narrative. When you arrange multiple photo frames, the goal is to establish a sense of harmony where no single element overwhelms the others. Achieving this balance requires a thoughtful combination of spatial planning, precise measurement, and the right hardware. Whether you are displaying family portraits, travel photography, or abstract art prints, a systematic approach ensures your collection looks intentional and professionally curated rather than cluttered.
To begin, you must understand how a frame interacts with both the artwork it holds and the wall it occupies. The visual weight of each frame—determined by its size, color, profile thickness, and matting—dictates how it should be positioned relative to its neighbors. By planning your layout beforehand, testing the arrangement on a flat surface, and using paper templates to map out the wall, you can execute a flawless installation that elevates your home’s interior design.
Planning Your Gallery Wall Layout for Visual Balance
Before driving a single nail into the wall, invest time in designing the layout. The way you arrange each frame determines the overall mood of the space. A well-planned layout guides the viewer’s eye smoothly across the display, creating a cohesive visual story.
Products mentioned in this guide
![[SG Stock] Wooden Picture Frame Wooden Photo Frame- Wall Art Poster Painting Hanging Stand Table Decor A3 A4 4R 5R](https://img.lazcdn.com/g/p/7e82d3ea8ef383b11bfd2b9f17d6a169.jpg_400x400q80.jpg_.webp)

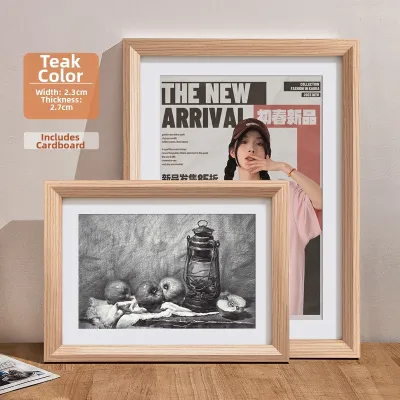
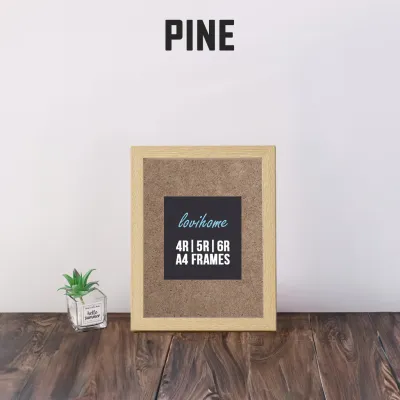



Prices are valid at publication and may change. Please refer to the product page for the latest price.
Defining a Unifying Design Direction
You can choose between two primary design directions: a cohesive, uniform look or an eclectic, curated mix. A cohesive gallery wall utilizes matching frame styles, colors, and materials—such as sleek black metal or light oak wood—to create a clean, modern aesthetic. To tie diverse pieces of art or photography together within a uniform scheme, use consistent matting (also known as a passe-partout). White or off-white mats create a border of neutral space around each image, giving the collection a museum-quality finish and reconciling different photo sizes.
Conversely, an eclectic mix combines various frame materials, textures, and colors, such as pairing ornate vintage gold frames with minimalist black borders. While this style is highly personal and dynamic, it requires a unifying element to prevent it from looking chaotic. You can achieve this by keeping the subject matter within a specific color palette (such as all black-and-white photography) or by maintaining a strict, uniform distance between each piece.
Selecting a Layout Structure
Your choice of layout should complement the architectural features of your room. Consider these three classic arrangement structures:
- Strict Grid: This layout uses identical frames arranged in a symmetrical pattern, such as a three-by-three or two-by-four grid. It works exceptionally well for cohesive collections, black-and-white portraits, or botanical prints. A grid requires absolute precision, as even a millimeter of misalignment will be highly noticeable.
- Salon-Style Cluster: This organic, overlapping arrangement features a mix of sizes and styles clustered around a central focal point. It is highly flexible and can grow over time. To balance a salon cluster, place the largest, visually heaviest frames near the center or bottom-left of the arrangement, and surround them with smaller pieces.
- Linear Alignment: This structure anchors the frames along a central horizontal or vertical axis. You can align either the top edges, bottom edges, or the exact centers of the frames along an imaginary straight line. This is an excellent option for long hallways, staircases, or walls above low-profile furniture like a sideboard.
The Floor Test Method
To visualize your composition without risking wall damage, perform a physical “floor test.” Clear a large, flat floor space in front of your target wall. Lay out your frames on the floor and experiment with different configurations. Move them around, swap their positions, and observe how the colors and shapes interact. Take photos of different options on your phone so you can easily compare them. This low-risk step allows you to refine the composition until the visual weight feels perfectly distributed.
Spacing Guidelines
Maintaining consistent negative space is the secret to a professional-looking gallery wall. As a general rule of thumb, aim for a spacing of 5 to 10 cm between each frame. If you are creating a tight, modern grid, a smaller gap of 5 cm works beautifully. For larger, heavier frames, wider gaps of 8 to 10 cm prevent the display from feeling visually crowded. Whichever distance you choose, keep it absolutely consistent across the entire arrangement to maintain structural harmony.
Essential Tools and Materials for a Flawless Installation
Having the correct tools on hand makes the transition from floor layout to wall installation seamless and stress-free. Gathering these materials beforehand prevents interruptions and ensures your measurements remain accurate.

Measuring and Alignment Tools
Precision is crucial when hanging multiple items. You will need a reliable tape measure to calculate distances and a pencil to mark placement lightly on the wall. A spirit level is indispensable for ensuring every frame hangs perfectly straight; a laser level can be incredibly helpful for larger installations or linear alignments across a wide wall. Use low-tack painter’s tape to secure templates without damaging your paint or leaving sticky residue.
Template Materials
To bridge the gap between your floor test and the final installation, create paper templates. Kraft paper, large sheets of cardboard, or old newspapers are ideal for this step. You will also need sharp scissors to cut the templates to the exact outer dimensions of each frame.
Hardware Options
The choice of hardware depends on your wall type and the weight of your frames. Standard picture hooks and nails work well for lightweight frames on plasterboard or drywall. For heavier frames, you will need plastic wall plugs or anchors to prevent the hardware from pulling out. If you are living in a rented property or prefer not to drill holes, heavy-duty adhesive strips or adhesive hooks are excellent alternatives, provided they are rated for the weight of your frames.
Installation Tools
Keep a reliable claw hammer nearby for driving nails or picture hooks into drywall. If you are using wall anchors or mounting brackets, a screwdriver (or a power drill with appropriate drill bits) is necessary. Finally, a sturdy step ladder is essential for safely reaching higher sections of the wall without straining or compromising your balance.
Step-by-Step Guide to Measuring and Hanging Your Frames
Once you have planned your layout on the floor and gathered your tools, it is time to transfer your design to the wall. Following a systematic, step-by-step process eliminates guesswork and prevents unnecessary holes in your plaster or concrete.
Creating and Positioning Paper Templates
The safest way to finalize your gallery wall is by using paper cutouts to test the arrangement directly on the wall. Begin by placing each frame face-down on your template paper. Trace the outer edges of the frame carefully with a pencil, then cut out the resulting shape. Repeat this process for every frame in your layout, labeling each paper template with the name or description of the corresponding artwork so you do not mix them up.
Next, examine the back of each frame to locate its hanging hardware. Whether it has a central sawtooth hanger, D-rings, or a hanging wire, you need to find where the hook or nail will actually sit. On your paper template, mark this exact hanging point. If the frame uses a wire, pull the wire taut toward the top of the frame to find its highest point, and mark that spot on the paper.
Using small rolls or strips of painter’s tape, stick your paper templates to the wall in the exact configuration you planned during your floor test. This step allows you to step back and evaluate the entire arrangement in its actual environment. Check the sightlines from different entry points of the room, ensure the spacing feels balanced, and verify that the overall height is comfortable. You can easily peel off and reposition the templates until you are completely satisfied with the layout.
Marking the Wall and Installing Hardware
With your paper templates perfectly positioned, you can now mark the exact spots where your hardware needs to be installed. However, you must account for the “drop distance” of each frame. The drop distance is the vertical gap between the top inner edge of the frame and the point where the hanging wire or bracket rests when taut.
To measure this, lay the frame face down. Pull the hanging wire or bracket upward as tight as it would be when hanging on a hook. Use your tape measure to find the distance from this taut point to the very top edge of the frame. On your paper template, measure down from the top edge by this exact distance, and make a clear mark. This is where your nail or hook must go.
Once all hanging points are marked on the templates, you can transfer these marks directly to the wall. Press your pencil firmly through the paper at the marked point to leave a small dot on the wall, or use a nail to poke a tiny guide hole through the paper. Carefully peel away the paper templates. Before installing any hardware, use your spirit level and tape measure to double-check that the marks are aligned and that the spacing between them remains consistent with your design.
Safety Boundary: Before drilling or driving nails into any wall, always verify what lies behind the surface. Check for hidden electrical wiring, conduit, or plumbing pipes, particularly when working near power outlets, light switches, or on walls shared with bathrooms and kitchens. If your home uses metal studs or if you suspect utilities are running through the wall, use a reliable stud finder with live-wire detection. If you are unsure of the wall’s internal structure or feel uncomfortable performing the installation, stop immediately and consult a qualified professional.
Hanging, Leveling, and Final Adjustments
With your hardware securely installed in the wall, you are ready to hang your collection. Carefully mount each frame onto its designated hook, nail, or anchor. If you are using hanging wires, ensure the wire sits securely in the center of the hook to prevent the frame from slipping or hanging crookedly.
Once all the frames are up, place a spirit level flat along the top edge of each frame, one by one. Gently adjust the frame until the bubble in the level is perfectly centered. If a frame refuses to stay level due to a loose wire or uneven back hardware, you can make minor adjustments by shifting the wire’s position on the hook or adjusting the bracket slightly.
After leveling every piece, step back several meters to evaluate the entire gallery wall as a single composition. Observe the arrangement from different angles, seating positions, and lighting conditions throughout the day. Natural light shifts can sometimes create shadows that make certain frames look slightly off-center. Make any necessary micro-adjustments to ensure the final display feels balanced, cohesive, and perfectly integrated into your living space.
Adapting to Different Wall Types and Rental Constraints
The structural composition of your walls dictates the specific installation methods and hardware you must use. In Singapore, residential properties feature diverse wall materials, each requiring a tailored approach to ensure your frames remain securely mounted without causing structural damage.
Concrete and Masonry Walls
Many local HDB flats and private condominiums feature solid concrete or brick internal walls. These structural walls provide excellent support for heavy frames but cannot be penetrated with standard nails or light hammer blows. To hang frames on concrete, you must use an electric drill equipped with a masonry drill bit. Drill a hole to the depth of your plastic wall plug, insert the plug flush with the wall surface, and then drive a screw into the plug. This creates a highly secure anchor capable of holding substantial weight, including large solid wood frames with heavy glass panes.
Drywall and Plasterboard
Modern partition walls, often found in offices, renovated rooms, or newer condominium layouts, are typically constructed from drywall or plasterboard. Because these walls are hollow and relatively soft, standard nails can easily pull out under tension. For lightweight frames, specialized drywall hooks that distribute weight across a wider area are sufficient. For heavier frames, always use dedicated drywall anchors, such as toggle bolts or self-drilling expansion anchors. These expand behind the plasterboard, gripping the wall securely from the inside and preventing the frame from sagging or pulling free.
Rented Spaces and No-Drill Alternatives
If you are living in a rental property or simply want to avoid drilling holes, heavy-duty adhesive strips or adhesive hooks are excellent alternatives. Before applying these adhesives, clean the wall surface thoroughly with rubbing alcohol and allow it to dry completely; dust, grease, and tropical humidity can compromise the adhesive bond. Always check the manufacturer’s packaging for specific weight limits and application instructions.
When using adhesive solutions, follow the removal instructions carefully—typically pulling the tab straight down parallel to the wall—to avoid peeling away the paint or plaster. It is important to note that adhesive strips are best suited for lightweight frames with acrylic or plastic covers. They may not be safe or reliable for very heavy solid wood frames, large glass-fronted displays, or walls with textured paint, where mechanical fasteners remain the safest choice.
Maintaining, Cleaning, and Updating Your Display
A gallery wall is a dynamic feature that requires regular care to preserve both the frames and the precious memories or artwork they protect. Implementing a simple maintenance routine keeps your display looking pristine for years.
Dusting Routines
Dust accumulates quickly on the top edges of frames and on glass surfaces. To prevent buildup, incorporate your gallery wall into your weekly cleaning routine. Use a dry, clean microfiber cloth or a soft-bristled static duster to gently sweep away dust. Avoid using abrasive paper towels or harsh chemical cleaners, which can scratch delicate acrylic covers or degrade wooden frame finishes. If the glass requires spot cleaning, spray a small amount of ammonia-free glass cleaner onto a microfiber cloth first—never spray liquid directly onto the frame, as it can seep behind the glass and ruin the artwork.
UV and Environmental Protection
Environmental factors can cause irreversible damage to prints and photographs. Direct, harsh sunlight accelerates the fading of inks and yellows paper over time. Position your gallery wall away from windows that receive intense direct sunlight, or use frames equipped with UV-protective glass or acrylic. Additionally, Singapore’s high-humidity tropical climate can trap moisture inside frames, leading to mold growth or warping. Avoid hanging valuable, unsealed artwork in high-humidity zones like bathrooms or directly opposite open kitchen areas unless the frames are specifically sealed for moisture resistance.
Updating the Display
Your gallery wall can evolve as your family grows or your artistic tastes change. To make updating your photos simple, choose frames designed with easy-open backing mechanisms, such as turn buttons or flexible metal tabs. Alternatively, front-loading frames allow you to swap out artwork without even removing the frame from the wall. This flexibility lets you refresh your home’s decor seasonally or celebrate new milestones with minimal effort.
Frequently Asked Questions (FAQ)
What is the ideal height to hang a gallery wall?
The standard interior design guideline is to position the center of your gallery wall arrangement at eye level. This is typically about 145 to 152 cm (57 to 60 inches) from the floor to the center of the overall display. If you are hanging the frames above a piece of furniture, such as a sofa, console table, or sideboard, adjust this baseline. Leave a gap of about 15 to 20 cm between the bottom of the lowest frame and the top of the furniture to maintain a clear visual connection and prevent the arrangement from feeling disconnected.
How do I hang heavy frames securely without them tilting forward?
Heavy or deep frames have a natural tendency to lean forward at the top, leaving a gap between the frame and the wall. To prevent this, use two separate hanging points (such as two hooks or nails) spaced horizontally apart on the back of the frame. This distributes the weight evenly and prevents the frame from pivoting or tilting. Additionally, stick self-adhesive felt pads or small rubber bumpers to the bottom inside corners of the frame. This keeps the frame flush against the wall, prevents tilting, and protects your wall paint from scuffs.
Can I mix different frame styles and colors in one gallery wall?
Yes, mixing different frame styles, colors, and textures is a fantastic way to create a personalized, eclectic display. However, to keep the arrangement from looking chaotic, you should maintain at least one unifying element. This could be keeping the spacing between all frames absolutely identical, using a consistent matting color (such as all white mats) across different frames, or adhering to a coordinated color palette in the artwork itself to tie the diverse pieces together beautifully.
Community discussion
Share your experience or ask a question. Comments are reviewed before publication.