
Creating a cohesive wall picture decor arrangement can transform a blank wall into a personalized focal point. However, hanging multiple frames without a clear plan often leads to uneven spacing, unnecessary wall damage, and visual clutter. Achieving a balanced layout requires a systematic approach that combines thoughtful design planning with precise physical installation. This guide provides a step-by-step method to design, measure, and hang your picture frames securely, ensuring a professional finish that complements your living space.
Planning Your Wall Picture Decor Layout
Before picking up a hammer or drill, you must determine the layout style that best suits your room’s proportions and existing furniture. A structured grid layout works exceptionally well for identical frame sizes and matching artwork, creating a clean, symmetrical look. For a more eclectic display, a salon or gallery layout allows you to mix various frame sizes, orientations, and matting styles within an organic boundary. Linear layouts align frames along a single horizontal or vertical axis, which is ideal for hallways, while an organic layout starts with a central anchor piece and expands outward over time.
Once you select a style, measure the available wall space carefully. Note the dimensions of the wall and any nearby furniture, such as a sofa, console table, or bed, to ensure the arrangement does not overwhelm the room. When choosing frame sizes, consider the proportion of the matting; wider mats can make smaller prints look more substantial and elegant.
Products mentioned in this guide
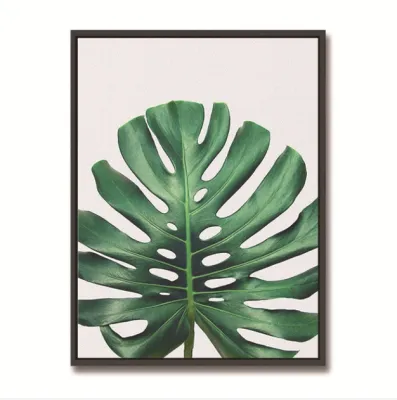
Prices are valid at publication and may change. Please refer to the product page for the latest price.
To visualize the arrangement without damaging your walls, create paper templates of each frame. Trace the outline of each frame onto plain paper, cut them out, and label them with the corresponding picture. You can then arrange these templates on the floor, adjusting the spacing until you find a balanced composition. Once satisfied, transfer the templates to the wall using low-tack painter’s tape, allowing you to evaluate the layout from different angles in the room.
Gathering the Right Tools and Materials
Executing a clean installation requires having the correct tools and hardware prepared. The choice of hanging hardware depends heavily on the weight of your frames and the construction of your walls. For lightweight frames on drywall, simple picture hooks or nails are often sufficient. However, for heavier frames or solid masonry and concrete walls—which are highly common in Singapore apartments—you will need plastic wall plugs and matching screws to ensure the installation remains secure.

In addition to hardware, gather your measuring and alignment tools. A reliable tape measure, a pencil for marking, and a spirit level are indispensable for keeping your frames straight. Low-tack painter’s tape is essential for holding your paper templates in place without peeling the wall paint.
Safety should always be a priority during installation. If you are drilling into solid concrete or masonry, wear safety goggles and a dust mask to protect yourself from flying debris and fine dust. Always verify that you are using a drill bit that matches the diameter of your wall plugs exactly to prevent loose fittings.
Step-by-Step Guide to Hanging Your Picture Frames
Transitioning from your paper plan to the physical installation requires patience and methodical execution. By taking your time to mark, drill, and mount each frame individually, you can avoid alignment errors and minimize the risk of damaging your walls.
Marking the Wall and Finding the Focal Point
The first step in the physical installation is establishing the focal point of your arrangement. For most rooms, the center of the display should sit at a standard eye-level height, which is generally between 140 cm and 150 cm from the floor. If you are hanging the arrangement above a piece of furniture, such as a sideboard or sofa, the bottom of the lowest frame should typically sit 15 cm to 20 cm above the top of the furniture to prevent the space from feeling cramped.
Once you establish the central anchor point, position your main paper template on the wall and secure it with painter’s tape. Work outward from this central template, maintaining consistent spacing between the paper sheets. A spacing of 5 cm to 8 cm between frames is generally recommended to keep the arrangement cohesive without looking crowded.
To mark the exact spot for your nail or screw, you must account for the hanging hardware on the back of each frame. Measure the distance from the top edge of the frame to the point where the hanging wire or bracket will sit when under tension. Transfer this measurement onto your paper template, measuring down from the top edge, and mark the spot with a pencil. This ensures that when the frame is hung, the center of the picture aligns perfectly with your planned layout.
Installing Hardware and Hanging the Frames
With all the hanging points marked clearly on your paper templates, you can begin installing the hardware. If you are working with drywall, tap your picture hooks or nail anchors gently into the marked spots. For solid concrete or masonry walls, use a hammer drill with a masonry bit to drill a hole to the depth of your plastic wall plug, insert the plug flush with the wall surface, and secure the screw or hook.
Before hanging each frame, use your spirit level to verify that the installed hardware is perfectly horizontal. This is especially important for frames that utilize two hanging points, as even a minor deviation of a few millimeters can cause the frame to tilt noticeably.
Always remain alert to potential hazards during the drilling process. If you encounter unexpected resistance, hit a metal plate, or notice the wall material crumbling excessively, stop drilling immediately. These signs can indicate that you have encountered an electrical conduit, a water pipe, or structural steel, in which case you should consult a qualified professional to complete the installation safely.
Adjusting and Finalizing Your Gallery Wall
Once all the frames are on the wall, step back several meters to assess the overall visual balance. Look at the distribution of visual weight, ensuring that darker frames or busier images are balanced by lighter elements across the arrangement. If any frame appears slightly misaligned, use your spirit level to check it and make micro-adjustments to the hanging wire or bracket tension.
To prevent your frames from shifting or tilting over time due to vibrations from doors closing or nearby footsteps, secure the bottom corners. Applying small adhesive rubber bumpers or a tiny piece of removable mounting putty to the bottom corners of each frame keeps them firmly in place. This also creates a small gap between the frame and the wall, which promotes air circulation and protects your paintwork.
Maintenance and Safety Checks for Wall Decor
Maintaining your wall picture decor involves periodic inspections to ensure everything remains secure and undamaged. Over time, wall anchors can loosen slightly, or hanging wires can stretch, causing frames to sag. Check your arrangement every few months to verify that the hardware remains tight and the frames are level.
Environmental factors play a significant role in preserving both your frames and the artwork inside them. In tropical climates with high humidity, such as Singapore, moisture can easily become trapped behind glass frames, leading to mold growth or paper warping. Avoid hanging sensitive artwork in areas with direct sunlight or high humidity, and ensure your frames utilize acid-free backing boards to protect the prints.
Finally, always respect the weight limits of your hanging hardware and wall types. If you plan to hang exceptionally heavy or oversized frames, or if you are unsure of your wall’s load-bearing capacity, seek professional mounting services to prevent accidental damage or injury.
Frequently Asked Questions (FAQ)
How do I hang heavy picture frames safely?
To hang heavy frames safely, always check the manufacturer’s weight rating for both the frame and the hanging hardware. Use heavy-duty wall anchors, such as toggle bolts for drywall or expansion plugs for solid concrete, which are designed to distribute weight effectively. Avoid relying on simple nails or adhesive strips for heavy items, and consider using two hanging points spaced apart to distribute the load evenly. If a frame is exceptionally heavy or valuable, consulting a professional installer ensures structural safety.
Can I arrange picture frames without putting holes in the wall?
Yes, you can arrange picture frames without drilling or nailing by using high-quality adhesive strips and hooks. Before applying them, clean the wall surface thoroughly and ensure the frame weight falls well within the adhesive’s specified limit. Keep in mind that adhesive strips may not adhere well to highly textured walls or in areas with high humidity, where the bond can weaken over time. Alternatively, you can use leaning shelves, picture ledges, or mantels to display your frames without making any holes in the wall.
What is the standard height for hanging picture frames?
The standard height for hanging picture frames is to position the center of the artwork at eye level, which is typically 140 cm to 150 cm from the floor. If you are hanging frames above furniture like a sofa or console table, position the bottom of the frames 15 cm to 20 cm above the furniture piece to maintain a balanced visual connection. For rooms with exceptionally high ceilings, you can adjust the height slightly upward, but keep the focus on creating a comfortable viewing level for standing or seated guests.
Community discussion
Share your experience or ask a question. Comments are reviewed before publication.