
Achieving a balanced gallery wall requires a systematic approach that blends visual planning, precise measurement, and structural safety. By mapping out your design before making any permanent marks, you can create a cohesive display that enhances your interior space without causing unnecessary damage to your walls. Selecting the appropriate frames for pictures and matching them to your specific wall type is the foundation of a successful, long-lasting installation.
Whether you are displaying family portraits, fine art prints, or travel photography, a well-arranged gallery wall acts as a focal point that ties a room together. This guide provides a clear, step-by-step methodology to help you plan, measure, drill, and hang your collection with professional-level precision.
Planning Your Gallery Wall Layout with Frames for Pictures
Before picking up a hammer or drill, you must define the boundaries of your gallery wall and choose an appropriate focal point. In Singapore apartments, common locations include the wall space above a living room sofa, along a prominent hallway, or surrounding a dining area console. The scale of your arrangement should relate directly to the furniture below it; a display that is too small will look lost, while one that is too large can overwhelm the space.
Products mentioned in this guide
![[SG Stock] Wooden Picture Frame Wooden Photo Frame- Wall Art Poster Painting Hanging Stand Table Decor A3 A4 4R 5R](https://img.lazcdn.com/g/p/7e82d3ea8ef383b11bfd2b9f17d6a169.jpg_400x400q80.jpg_.webp)
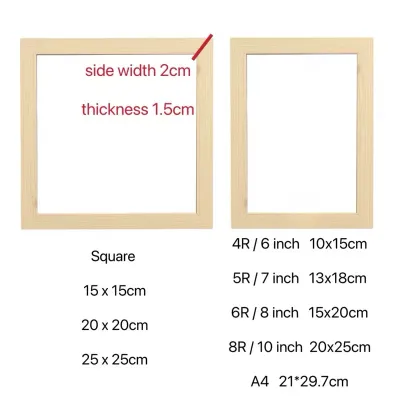
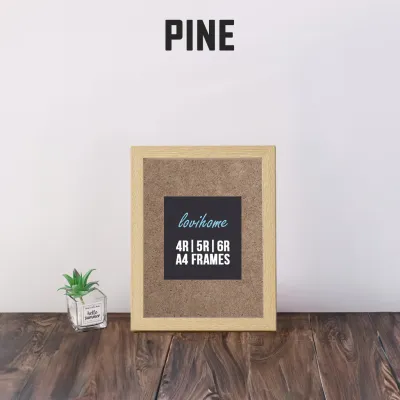



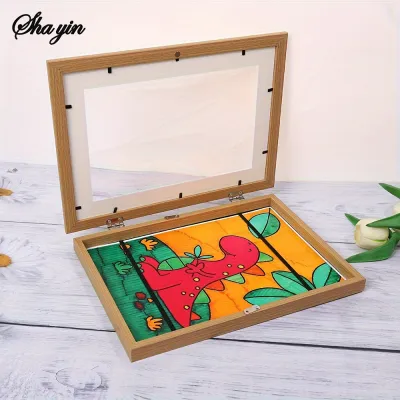
Prices are valid at publication and may change. Please refer to the product page for the latest price.
Curating your collection involves balancing frame sizes, orientations, and art styles. You can mix landscape and portrait orientations, as well as different art mediums, provided there is a unifying element that prevents the display from looking chaotic. This unifying thread could be a consistent frame color, identical matting widths, or a shared color palette within the artwork itself. When selecting frames for pictures, consider how their visual weight will distribute across the wall.
The most reliable way to visualize your layout without damaging your plaster or paint is the paper template method. Begin by tracing the outline of each frame onto kraft paper or newspaper, then cut out the shapes. Label each paper template with the corresponding picture’s description and orientation. Using low-tack painter’s tape, experiment with different arrangements on your wall, stepping back several meters to evaluate the balance and composition from various angles.
For complex or highly symmetrical arrangements, digital layout tools or floor-planning can provide an alternative starting point. You can measure your wall and lay out your frames on a clean floor space to test configurations. However, physically taping paper templates to the wall remains an indispensable step, as it allows you to see how ambient light, shadows, and surrounding furniture interact with the proposed layout in real-time.
Essential Tools and Materials for Hanging Frames
Securing your gallery wall requires selecting the right tools and hardware for your specific wall construction. Singapore residential properties typically feature solid concrete, precast concrete panels, or brick walls, though some modern condominiums and HDB flats use drywall partitions for non-load-bearing internal walls. Using the wrong hardware can lead to loose frames, damaged walls, or falling hazards.

For measuring and marking, gather the following essential items:
- A high-quality steel tape measure
- A sharp pencil for precise marking
- Low-tack painter's tape
- A spirit level (or a self-leveling laser level for large, multi-frame grids)
For the physical installation, the required tools depend on your wall type. Concrete walls require a power drill equipped with a hammer function and high-quality masonry drill bits. Drywall partitions require a standard drill and a reliable stud finder or a multi-scanner wall detector to locate underlying timber or metal studs.
Hardware selection must match both the wall material and the weight of your framed pictures. For concrete walls, use plastic wall plugs (often referred to as rawlplugs) paired with matching screws, or heavy-duty masonry picture hooks. For drywall, use threaded drywall anchors or toggle bolts when hanging between studs, or drive screws directly into the studs. Always check the manufacturer’s load limits on your hardware packaging to ensure it can support the weight of your frames.
Step-by-Step Guide to Hanging Your Picture Frames
Once your layout is finalized and your tools are ready, follow this systematic process to mount your frames safely and accurately.
Step 1: Marking the Wall and Preparing the Surface
Keep your paper templates taped to the wall in their approved positions. To mark the exact drilling or nailing points, do not simply measure from the top of the paper template. You must account for the specific hanging hardware on the back of each frame, as the mounting point is rarely flush with the top of the frame.
Measure the distance from the top edge of the physical frame to its hanging hardware, such as a D-ring, sawtooth hanger, or hanging wire. If your frame uses a hanging wire, pull the wire taut toward the top of the frame with your tape measure to simulate the tension of it hanging on a hook. Note this “drop” distance, measure that exact distance down from the top edge of your paper template on the wall, and mark the spot directly on the paper with a pencil.
Before drilling or driving any fasteners, perform a critical safety check. Use a multi-scanner wall detector to scan the area around your pencil marks for hidden electrical conduits or water pipes. This step is especially vital near light switches, electrical sockets, or on walls shared with bathrooms and kitchens. For maximum safety, isolate the electrical power to the target wall zone at your home’s main distribution board (DB box) before you begin drilling.
Step 2: Drilling and Installing Wall Anchors
For solid concrete walls, set your drill to hammer mode and equip it with a masonry bit that matches the exact diameter of your plastic wall plugs. Hold the drill perfectly perpendicular to the wall, apply steady forward pressure, and drill a hole slightly deeper than the length of the wall plug. Clear any concrete dust from the hole using a vacuum cleaner or a small brush, then insert the plastic wall plug, tapping it gently with a hammer until it sits completely flush with the wall surface.
For drywall partitions, use your stud finder to determine if your marked point aligns with a wall stud. If it does, you can screw directly into the stud for a highly secure hold. If you are hanging between studs, drill a pilot hole and install a threaded drywall anchor or a toggle bolt. Avoid over-tightening plastic drywall anchors, as excessive torque can strip the gypsum core of the drywall, significantly reducing its holding capacity.
If your drill bit suddenly encounters hard, metallic resistance while drilling into concrete, stop immediately. You may have hit structural steel rebar. Do not attempt to force the drill through the metal; instead, shift your hole position slightly or consult a structural professional to avoid damaging your equipment or compromising the wall structure.
Step 3: Hanging, Leveling, and Final Adjustments
With your anchors and screws securely in place, carefully tear away the paper templates from the wall, leaving the hardware exposed. Mount each frame onto its designated hook or screw, ensuring the hanging hardware on the back of the frame is fully engaged with the wall fastener.
Place a spirit level on the top edge of each frame to verify that it is perfectly horizontal. Even with precise measurements, minor adjustments are often necessary. If a frame sits slightly crooked, you can gently nudge it into alignment, but standard single-point hangers are prone to shifting over time due to household vibrations from closing doors or foot traffic.
To prevent frames from shifting out of alignment, use two hanging points (such as two separate hooks or D-rings spaced apart) for wider or heavier frames. Alternatively, apply a small, pea-sized piece of museum putty or double-sided silicone mounting tape to the bottom back corners of each frame. This secures the bottom of the frame flush against the wall, keeping your entire gallery display perfectly level over the long term.
Design Rules for a Cohesive and Balanced Look
Creating a visually satisfying gallery wall relies on applying established design principles that manage negative space, alignment, and visual weight.
- Spacing and Alignment: Maintain a consistent gap of 5 to 8 cm between all frames. This consistent spacing acts as a visual anchor, making different frame sizes look like they belong to a single, unified installation. Gaps wider than 10 cm can make the display look disjointed, while gaps smaller than 5 cm can feel cluttered.
- Grid Layout: This highly structured arrangement uses identical frame sizes aligned in perfect rows and columns. It is ideal for a clean, modern aesthetic and works best with matching matting and a cohesive photo series, such as black-and-white architectural prints.
- Centerline Alignment: For collections featuring varying frame sizes and shapes, align the vertical or horizontal centers of all frames along an imaginary centerline. This centerline should sit at eye level, roughly 145 to 150 cm from the floor. This method provides a sense of order while allowing for an eclectic mix of art.
- Salon or Organic Style: This style features a dense, layered mix of different frames and art mediums. To keep it balanced, place the largest, darkest, or visually "heaviest" frames near the center or bottom of the arrangement to anchor the display. Work outward with smaller, lighter frames to distribute the visual weight evenly across the wall.
Safety Precautions and Wall Care
Maintaining the structural integrity of your walls and ensuring physical safety should always be a priority when installing wall decor. Never exceed the manufacturer’s rated load capacity for your wall anchors, screws, or hanging wire. Overloading hardware can lead to sudden structural failure and damage to both your art and your walls.
Avoid drilling into structural load-bearing columns, concrete shear walls, or window lintels without proper authorization or professional assessment, particularly in strata-titled condominiums or HDB estates where structural modifications are tightly regulated. If you are unsure whether a wall is load-bearing, consult your building’s management office or a qualified contractor.
For lightweight frames weighing under 1.5 kg, high-quality adhesive strips can offer a reliable, damage-free alternative to drilling. To ensure proper adhesion, prep the wall surface by wiping it with isopropyl alcohol to remove dust and oils, and allow it to dry completely. Always follow the manufacturer’s instructions regarding application pressure and curing times before hanging the frames. When removing adhesive strips, pull the tab slowly and parallel to the wall surface to avoid peeling away the paint or plaster.
For exceptionally heavy frames, oversized mirrors, or complex wall finishes such as marble, granite, or delicate wallpaper, do not attempt a DIY installation. Hire a licensed, professional handyman or contractor who has the specialized diamond-tipped drill bits and heavy-duty anchoring systems required to complete the job safely without cracking premium wall materials.
Frequently Asked Questions (FAQ)
How high should I hang a gallery wall above furniture?
The bottom edge of the lowest frames in your gallery wall should typically sit 15 to 25 cm above the top of your furniture, such as a sofa, console table, or headboard. This spacing ensures the display feels connected to the furniture rather than floating aimlessly on the wall. Treat the entire gallery arrangement as a single large artwork, positioning its visual center roughly 145 to 150 cm from the floor.
What is the best way to hang heavy frames on concrete walls?
To hang heavy frames safely on concrete walls, use heavy-duty nylon wall plugs or sleeve anchors rather than standard thin plastic plugs. You must use a hammer drill to create a clean, precise hole that matches the exact diameter of the anchor. Ensure the screw penetrates the full depth of the wall plug to expand the anchor securely against the concrete interior.
How do I arrange mismatched frames without it looking messy?
You can unify mismatched frames by using consistent white or off-white matting inside every frame, which provides a clean visual break between diverse frame styles and the artwork. Alternatively, paint all the mismatched frames a single, cohesive color, such as matte black or soft white, to harmonize their different shapes and textures while maintaining an eclectic feel.
Community discussion
Share your experience or ask a question. Comments are reviewed before publication.