
To transform a plain ceiling into a breathtaking, celestial canopy, physically arranging star LED lights offers an organic depth and tactile charm that standard projectors cannot replicate. Achieving a convincing starry night effect requires thoughtful planning, the right mounting materials to protect your ceiling, and a layout that mimics the random beauty of the cosmos. By taking a systematic approach to design, surface preparation, and cable management, you can create a safe, durable, and visually stunning celestial escape right in your bedroom or living room.
Planning Your Ceiling Starry Night Layout
In a typical residential room—such as a Singapore HDB bedroom with a standard ceiling height of 2.6 to 2.8 meters—the physical distance to the overhead surface is relatively close. This proximity means that any layout mistakes, such as perfectly straight lines or uniform grids, will immediately break the illusion of an infinite night sky. To avoid a cluttered or artificial look, begin by visualizing the space as a dynamic canvas. Instead of distributing the lights evenly across the entire surface, plan a layout that mimics the natural clustering of the cosmos. Divide your ceiling into primary viewing zones, focusing the highest density of lights directly above your main resting areas, such as the bed or a cozy lounge sofa.
Design a layout that balances high-density “constellations” with vast, empty spaces. You can sketch a rough map on paper first, designating one or two areas where the star LED lights cluster closely together, gradually thinning out into scattered, isolated stars toward the edges of the room. This variation in density creates a powerful sense of visual depth, making the ceiling appear to recede upward.
Products mentioned in this guide

Prices are valid at publication and may change. Please refer to the product page for the latest price.
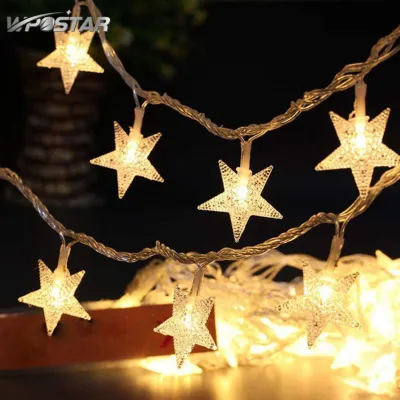
It is also essential to distinguish between physical star-shaped LED fairy lights and projection-based devices. While star projectors cast moving light across a wide area, physical star LED lights provide physical, pinpoint sources of light that drape elegantly and add a tactile, three-dimensional texture to the room. By physically mounting these strings, you gain complete control over the placement, brightness, and structure of your custom night sky.
Tools and Materials for Ceiling Installation
To execute this project seamlessly without causing structural or cosmetic damage to your home, assemble a precise set of tools and materials before you begin:

- Star LED Lights: Select lightweight, flexible LED fairy light strings. Ensure they have the appropriate power source (battery-operated, USB, or plug-in) for your room's layout.
- Damage-Free Adhesive Hooks or Clips: Choose high-quality, clear adhesive clips designed specifically for wire management or holiday lights.
- Measuring Tape and Marking Tool: A standard measuring tape and a piece of light chalk or a soft graphite pencil will help you map out your layout without leaving permanent marks.
- Safety and Access Gear: A sturdy, slip-resistant step ladder is mandatory for safely reaching the ceiling. Never stand on unstable furniture like chairs or beds.
- Cable Management Supplies: Paintable cable trunking or small, low-profile cable clips will help keep power cords flush against the walls.
Before purchasing your adhesive hooks, perform a critical check on their specifications. Verify that the adhesive is explicitly rated for your ceiling’s paint type (such as matte, semi-gloss, or flat emulsion paint) and can comfortably support the weight of your light strands. In humid climates like Singapore’s, look for moisture-resistant adhesive strips, as standard adhesives can degrade and slip over time when exposed to ambient humidity or fluctuating temperatures from air conditioning units.
Step-by-Step Guide to Installing Star LED Lights
Preparing and Marking the Ceiling
Achieving a long-lasting bond between your adhesive clips and the ceiling requires a pristine surface. Over time, ceilings accumulate a thin, invisible layer of dust, cobwebs, and airborne oils that can severely compromise adhesive performance. Begin by gently wiping down the ceiling areas where you plan to mount the lights using a dry microfiber cloth or a slightly damp cloth with a mild, non-greasy cleaning solution. If you use a damp cloth, ensure the surface is allowed to dry completely for at least one to two hours before proceeding.
Once the ceiling is clean and dry, use your layout sketch as a guide to mark the physical placement of your lights. Take a soft pencil or a piece of light chalk and gently make small, barely visible dots on the ceiling where each adhesive hook will be positioned. Focus on mapping out your clustered constellation zones first, then mark the positions for the scattered, outlying stars. This step allows you to step back, look up, and assess the overall balance of the layout from your primary viewing angles before committing to any adhesive placement.
Securing the Star LED Lights
With your layout marked, you can begin installing the adhesive hooks or clips. Before applying them across the entire ceiling, always perform a mandatory safety and compatibility check: test a single adhesive strip on a small, hidden area of the ceiling, such as inside a built-in wardrobe or a high corner near the cornice. Let it sit for a short period, then remove it according to the manufacturer’s instructions to ensure it does not peel or damage the plaster skim coat or paint.
Once compatibility is verified, apply the adhesive clips to your marked points, pressing each clip firmly against the ceiling for the duration recommended by the manufacturer (typically 30 seconds). For the best results, allow the adhesive to cure completely—often up to an hour—before hanging any wires. When threading the star LED lights through the clips, drape the wires naturally and loosely. Avoid pulling the wire tight between hooks, as constant tension will exert downward force on the adhesive, eventually causing the clips to fail and peel away. Loose, gentle draping also creates a softer, more organic aesthetic that mimics a natural sky.
Routing Cables and Hiding the Power Source
A common visual distraction in DIY lighting projects is a messy tangle of power cables hanging down the wall. To maintain the magic of your starry night ceiling, route the main power lines along the natural architectural lines of the room, such as ceiling cornices, crown moldings, or corner joints. Use small, paintable cable clips or low-profile cable trunking to secure these lines flush against the wall, painting them to match your wall color if necessary.
If you are using a plug-in or USB-powered star LED light set, position the power outlet connection in an inconspicuous location. You can conceal the plug and any excess cabling behind floor-to-length curtains, on top of a tall wardrobe, or tucked neatly inside a decorative ceiling canopy or fabric drape. For battery-operated models, mount the battery pack in an accessible but hidden spot using a damage-free hook, ensuring you can easily reach it to switch the lights on and off or change the batteries without disturbing the main ceiling installation.
Tips for a Realistic Starry Night Ambience
To elevate your ceiling from a simple decorative display to an immersive, realistic night sky, pay close attention to the visual characteristics of natural stars. In the night sky, stars do not shine with uniform color or brightness. To replicate this depth, consider mixing light strands of slightly different color temperatures, such as combining warm white (around 2700K) and cool white (around 5000K) LEDs. The warm white stars will appear closer and softer, while the cool white stars will seem to twinkle from a vast distance, instantly adding layers of dimension to your ceiling.
Avoid the temptation to align your lights in symmetrical rows, grids, or geometric shapes. True celestial bodies are scattered in organic, random patterns. If you find yourself accidentally creating a uniform layout, step back and deliberately break up the lines by shifting a few hooks off-center or adding unexpected clusters.
Additionally, coordinate your new ceiling installation with the existing light sources in the room. The starry night effect is most impactful when the room is highly dark. Install dimmers on your main overhead lights, or rely on low-level bedside lamps to transition the room into a cozy evening mood before turning on your star LED lights.
Finally, keep environmental factors in mind. If your room is prone to high humidity—such as a bedroom with an open en-suite bathroom or a space without consistent air conditioning in Singapore’s tropical climate—verify the IP (Ingress Protection) rating of your lights. While standard indoor fairy lights are perfectly suitable for dry, air-conditioned bedrooms, rooms with elevated moisture levels benefit from lights with an IP44 rating or higher to protect the internal wiring from humidity-induced wear.
Safety, Maintenance, and Safe Removal
Working overhead presents unique safety challenges that require careful attention. When installing your lights, always prioritize ladder safety. Use a sturdy, fully opened step ladder placed on a flat, level floor. Avoid overreaching; instead, descend and move the ladder as you progress across the ceiling. Whenever possible, have a second person present to stabilize the base of the ladder and hand you tools, minimizing the need to climb up and down repeatedly.
Electrical safety is equally critical. Before hanging your star LED lights, inspect the entire length of the wire for any signs of fraying, exposed copper, or damaged insulation. If you are using a plug-in model, ensure the power adapter is certified by local safety authorities (such as carrying the Enterprise Singapore Safety Mark) to protect against short circuits and overheating. Avoid overloading your wall sockets or extension cords by plugging too many high-wattage appliances into the same outlet as your decorative lights.
When it comes time to remove or reposition your lights, taking shortcuts can result in unsightly paint damage and torn plaster. For damage-free adhesive hooks, never pull the hook straight off the ceiling. Instead, hold the hook gently in place with one hand and use your other hand to pull the adhesive removal tab straight down, parallel to the ceiling surface. Pull slowly and steadily; this stretches the adhesive strip, releasing its bond cleanly without taking the paint with it. If the adhesive feels stubborn or is several years old, applying gentle heat from a hairdryer for a few seconds can soften the adhesive, making removal much easier.
If your ceiling material is fragile, crumbling, or shows signs of water damage, stop immediately and consult a professional plasterer or contractor. Do not attempt to install adhesives or tension mounts on compromised surfaces, as this can cause larger sections of plaster to fail, posing a safety hazard.
Frequently Asked Questions (FAQ)
Can I use star LED lights on a popcorn or textured ceiling?
Standard adhesive hooks and clips rely on a completely flat, smooth surface to create a secure vacuum and chemical bond. On popcorn, stippled, or heavily textured ceilings, the uneven surface area significantly reduces the contact point for the adhesive, causing standard clips to fail and fall off under the weight of the lights. If you have a textured ceiling, check the adhesive manufacturer’s guidelines, as some brands offer specialized high-tack or flexible foam adhesives designed for slightly uneven surfaces. Alternatively, consider using tension-based hanging methods, such as thin wire grids suspended from the smooth cornices or walls, which allow you to drape the lights across the ceiling without adhering anything directly to the textured plaster.
Are battery-operated or plug-in star LED lights better for ceilings?
The choice between battery-operated and plug-in star LED lights depends largely on your ceiling height and how often you plan to use the lights. Plug-in or USB-powered models are ideal for high ceilings or daily use because they provide a continuous, reliable power source without the need for maintenance. To make them even more convenient, you can connect plug-in lights to a smart plug or a remote-controlled outlet, allowing you to turn your starry sky on and off via voice commands or a smartphone app, completely eliminating the need to climb a ladder. On the other hand, battery-operated lights are highly portable and eliminate the need to route long power cables down your walls, making them excellent for temporary setups or rental homes. However, they require physical access to the battery pack for periodic battery replacements, which can become tedious and physically demanding if your ceiling is exceptionally high.
Community discussion
Share your experience or ask a question. Comments are reviewed before publication.