
Creating a visually balanced gallery wall transforms blank vertical surfaces into a curated focal point that anchors your room’s entire design. To achieve a balanced arrangement, you must coordinate three fundamental elements: the layout style, the physical spacing between frames, and the structural integrity of your hanging hardware. A successful display relies on pre-planning to avoid turning your wall into a patchwork of accidental drill holes. Whether you are working with uniform frames or an eclectic mix of sizes, the secret to a professional finish lies in mapping out your layout on paper or with painter’s tape before lifting a single tool.
Plan Your Layout and Visualize Before Drilling
Before you drive a single nail into your wall, you must define the boundaries of your display area. A gallery wall should never float aimlessly; it needs to relate directly to the surrounding architecture and furniture. If you are centering your display over a sofa, console table, or sideboard, aim to keep the overall width of the gallery between two-thirds and three-quarters of the furniture’s width. This ratio prevents the arrangement from overpowering the furniture or looking insignificantly small. The bottom edge of the lowest frames should sit approximately 15 to 25 centimeters above the top of the furniture piece to maintain a cohesive visual connection.
Choosing a layout style depends on the types of frames you have and the atmosphere you want to create. A structured grid layout works best for uniform frames of the exact same size, creating a clean, symmetrical, and minimalist aesthetic. This style is highly disciplined and requires precise measurements. If you have a collection of varied frame sizes, materials, and orientations, a salon-style eclectic cluster is more appropriate. This layout organizes frames around a central focal point and expands outward in a balanced but asymmetrical fashion. Alternatively, an aligned top or bottom line layout coordinates frames along a single horizontal axis, offering a clean, modern compromise between symmetry and variation.
Products mentioned in this guide




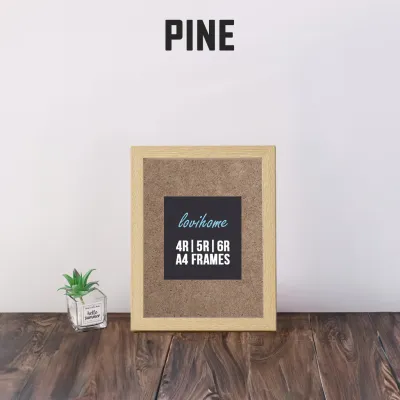



Prices are valid at publication and may change. Please refer to the product page for the latest price.
To visualize your arrangement without damaging your walls, create paper templates of each frame. Trace the outline of each wall decoration frame onto kraft paper or newspaper, and cut out the shapes. Label each template with the contents of the frame so you can easily identify its orientation. Use low-tack painter’s tape to stick these templates to the wall, allowing you to experiment with different configurations. Step back, view the layout from different angles in the room, and adjust the templates until you achieve a harmonious balance.
Maintaining consistent spacing between your frames is the final step in planning your layout. As a general rule, keep a gap of 5 to 8 centimeters between each frame. Closer spacing, around 5 centimeters, works beautifully for smaller frames and tight grids, keeping the collection visually connected. Larger frames can handle wider gaps of up to 8 centimeters. Keeping this spacing uniform across the entire display prevents the gallery from looking cluttered or fragmented.
Select Safe Hanging Hardware for Your Wall Type
Securing your frames safely requires matching your hanging hardware to your specific wall material. In Singapore, residential walls typically consist of solid concrete, brick, or lightweight drywall partitions. Concrete and brick walls are incredibly sturdy but require a hammer drill, masonry drill bits, and plastic wall plugs (anchors) paired with matching screws. Drywall partitions, often found in newer condominiums or as internal room dividers, cannot support heavy loads on their own and require specialized hollow-wall anchors, toggle bolts, or self-drilling threaded anchors to distribute weight safely across the plasterboard.

You must also match your hardware to the weight of your wall decoration frame. Lightweight plastic, acrylic, or thin wooden frames can often be hung using damage-free adhesive strips, which are ideal for keeping walls intact. However, heavy solid wood, metal, or glass-fronted frames require robust structural anchors. Always check the load capacity printed on the hardware packaging to ensure it can safely support the weight of your frame.
Safety must be your top priority when preparing to drill into any wall. Always check for hidden electrical conduits, water pipes, or structural columns before drilling. Use a reliable multi-scanner or stud finder with live wire detection to scan the area thoroughly. If you are drilling near light switches, power outlets, or wet areas like bathrooms and kitchens, exercise extreme caution as utilities often run vertically and horizontally from these fixtures. If your wall material is unknown, compromised, or if you are dealing with exceptionally heavy, oversized, or high-ceiling installations, stop immediately and consult a qualified professional handyman or structural specialist to ensure a safe installation.
Step-by-Step Installation for a Level Display
Executing your planned layout with precision requires a systematic installation process.
Step 1: Establish a Baseline Do not rely on your ceiling, floor, or adjacent door frames as straight references, as structural settling often makes these lines slightly crooked. Instead, use a high-quality spirit level or project a self-leveling laser level across your display area to establish a true horizontal baseline. Lightly mark this baseline with a pencil. This line will serve as your primary reference point for all subsequent measurements.
Step 2: Mark Hanging Points Do not simply mark the top center of your paper templates on the wall. You must calculate the exact drop distance of the hanging mechanism. Turn your physical frame over and pull the hanging wire, D-ring, or sawtooth hanger taut toward the top of the frame. Measure the distance from the highest point of this taut hanger to the top edge of the frame. Transfer this measurement downward from the top edge of your paper template on the wall to locate the exact spot where your screw, nail, or hook must sit. Mark this point clearly with a pencil.
Step 3: Install Hardware Once all hanging points are marked, carefully remove the paper templates. For concrete walls, drill a hole using a masonry bit of the correct size, tap in the plastic wall plug until it sits flush with the wall surface, and drive in the screw, leaving a few millimeters exposed to catch the hanger. For adhesive strips, clean the wall surface with isopropyl rubbing alcohol and apply the strips according to the manufacturer’s instructions. In humid climates, it is crucial to let the adhesive cure fully—typically for 24 hours—before hanging any weight to ensure the bond does not fail.
Step 4: Hang and Adjust Gently place your frames onto the installed hooks or screws. If your frame uses a wire suspension, slide it slowly left or right along the screw head to find the balance point. If using dual D-rings, ensure both rings are seated securely on their respective wall anchors to prevent the frame from tilting.
Verification Step back several meters to observe the entire layout from a distance. Look for any subtle misalignments or visual imbalances. Place your spirit level on the top edge of each individual frame to verify that they are perfectly level. Make minor adjustments to the wire tension or hook placement if necessary to lock the frames into their correct positions.
Styling Rules for a Balanced and Cohesive Look
Achieving a professional-looking gallery wall requires balancing the visual weight of your frames. Visual weight is determined by a frame’s size, color intensity, and profile thickness. To prevent your display from looking lopsided, distribute heavy elements evenly. Place larger, darker, or more heavily matted frames near the center or bottom-center of your layout to anchor the display. Balance a large frame on one side by grouping two or three smaller frames on the opposite side, keeping the overall visual weight balanced.
An eclectic gallery wall can easily look chaotic without a unifying thread. Establish a cohesive theme by coordinating either your frames or your artwork. For instance, you can mix different frame materials, such as warm oak, sleek black aluminum, and gold accents, if you keep all the artwork in a consistent black-and-white color palette. Alternatively, if your artwork is highly colorful and diverse, use matching white or light wood frames with identical mat boards to tie the collection together.
For the most comfortable viewing experience, the visual center of your entire gallery display should sit at average eye level. This is generally defined as approximately 145 to 150 centimeters from the floor to the center of the arrangement. If you are hanging the display above a console table or a low sideboard, adjust the height slightly so the bottom frames sit 15 to 20 centimeters above the tabletop, maintaining a clear spatial relationship between the furniture and the decor.
Frequently Asked Questions (FAQ)
How do I hang frames on a concrete wall without drilling?
If you are renting or prefer to avoid drilling into solid concrete, you can use specialized heavy-duty adhesive hooks or double-sided mounting strips designed for picture hanging. Before application, ensure the wall surface is clean, dry, and free of dust or grease by wiping it down with rubbing alcohol. Always check the manufacturer’s weight limit and use multiple strips if recommended. Do not use adhesive solutions on heavily textured plaster, porous brick, or freshly painted walls, as the adhesive may fail to bond properly, leading to falling frames and damaged walls.
What is the best way to clean glass photo frames on a gallery wall?
To maintain your gallery wall without risking damage to the frames or the wall surface, avoid spraying liquid cleaners directly onto the display. Spraying glass cleaner directly onto the frame can cause the liquid to run down, seep behind the glass, and permanently ruin your photos or mat boards. Instead, spray a small amount of glass cleaner or water onto a clean microfiber cloth until it is slightly damp, then gently wipe the glass surfaces. Use a separate dry microfiber cloth to buff away any remaining streaks or dust.
Community discussion
Share your experience or ask a question. Comments are reviewed before publication.