
To transform a blank wall into a dynamic gallery, selecting the right digital photo frame requires looking beyond basic screen size. A successful wall-mounted display blends seamless physical installation with reliable software performance. The ideal frame must offer dedicated mounting hardware, clean cable management, and an intuitive cloud ecosystem that allows you to update your gallery effortlessly. By focusing on structural compatibility and display technology, you can ensure your digital frame looks like a natural piece of art rather than a misplaced tablet.
Quick Selection Criteria for Wall-Mounted Frames
When planning a wall-mounted digital photo frame installation, the primary decision factors differ significantly from tabletop setups. A wall display demands dedicated mounting hardware, such as VESA-compliant patterns or reinforced keyhole slots, to ensure the unit remains flush and secure. Cable management is equally critical; look for recessed back panels and right-angle power connectors that prevent the power cord from pushing the frame away from the wall. Additionally, integrated auto-orientation sensors are essential to automatically adjust your images when switching between portrait and landscape layouts.
Your evaluation approach should prioritize brands that offer robust cloud ecosystems and reliable physical mounting mechanisms over standalone tabletop models. Tabletop frames often rely on permanent kickstands or rear-facing speakers that interfere with wall mounting. Because individual wall conditions and product designs vary, you must verify the manufacturer’s exact specifications for weight, depth, and mounting clearances before making a purchase. Taking these precautions ensures the frame integrates cleanly into your living space without requiring frequent physical adjustments.
Products mentioned in this guide



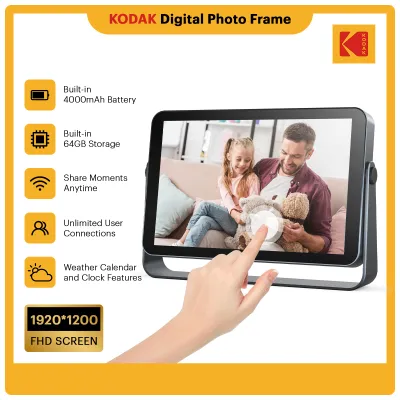



Prices are valid at publication and may change. Please refer to the product page for the latest price.
Essential Hardware and Mounting Features
Mounting Interfaces Before purchasing a digital photo frame, inspect the rear panel to identify the mounting interface. Standard Video Electronics Standards Association (VESA) mount patterns, typically 75mm x 75mm or 100mm x 100mm, offer the most secure and versatile mounting options, allowing you to use third-party low-profile wall brackets. Alternatively, many decorative frames utilize proprietary keyhole slots, which require precise screw placement but allow the frame to hang flat against the wall like a traditional picture frame. Always verify the total weight of the frame against the weight limits of your selected wall anchors, especially when mounting on drywall or hollow partition walls.

Cable Management A clean aesthetic depends entirely on how well you can conceal the power cable. Look for frames designed with recessed back panels where the power port is set deep within the frame’s body, allowing the plug to sit flush. Right-angle power adapters are highly beneficial because they prevent the cable from bending sharply against the wall, which can damage the wire over time. Some premium models feature integrated cable channels molded into the back cover, guiding the thin wire straight down to the bottom edge of the frame for a neater appearance.
Power and Connectivity Wall-mounted frames require a continuous power source, making the proximity of electrical outlets a primary placement consideration. Because these devices rely on wireless networks to receive new photos, you must also verify the Wi-Fi signal strength at the exact wall location before drilling. For safety and compliance in Singapore, ensure the power adapter carries the local Safety Mark certification, which guarantees the electrical component has been tested for safe continuous operation under local voltage standards.
Orientation Sensors A wall-mounted frame should adapt to your content without requiring you to take it down to adjust settings. Built-in gyroscopes or gravity sensors are critical hardware components that detect whether the frame is mounted horizontally or vertically. These sensors automatically rotate the user interface and adjust the image scaling to match the physical orientation. Without a reliable sensor, you may find yourself stuck with sideways images or forced to manually configure the display settings through an app every time you change the frame’s position.
Evaluating Brand Software and Cloud Ecosystems
Cloud Storage and Privacy Because digital frames display personal memories, evaluating the brand’s software ecosystem and privacy policy is paramount. Review the manufacturer’s documentation to confirm how your photos are transmitted and stored, looking for end-to-end encryption standards that protect your data from unauthorized access. Be sure to check whether the brand’s cloud storage features require a recurring monthly subscription fee, which can range from a few dollars to over S$10, or if they offer a generous free tier for basic photo sharing.
Remote Management A wall-mounted frame is often positioned at eye level or higher, making physical buttons on the back of the device highly impractical to reach. A high-quality mobile application is essential for remote management, allowing you to upload photos, organize playlists, schedule sleep timers, and perform firmware updates from your smartphone. Look for brands that support multi-user access, enabling family members from different locations to send photos directly to the wall display, creating a collaborative and evolving gallery.
Offline Functionality While cloud connectivity is convenient, your frame should not become a blank screen during internet outages. Verify the internal storage capacity of the frame, aiming for at least 8GB to 16GB of local memory, which can store thousands of optimized images. The software should feature offline caching, ensuring that the frame continues to run its active slideshow smoothly even if your home Wi-Fi network temporarily disconnects.
Support and Warranty Investing in a wall-mounted display means expecting long-term reliability from a screen that may run for twelve or more hours a day. Carefully read the manufacturer’s warranty terms to understand their policies regarding screen burn-in, dead pixels, and power adapter failures. Brands that offer dedicated customer support and regular software updates are preferable, as they ensure the companion app remains compatible with future smartphone operating system updates.
Aesthetic Integration and Display Quality
Bezel and Finish The physical frame surrounding the screen determines how well the digital display blends with your existing home decor. Traditional matte woodgrain finishes, brushed metal borders, or minimalist plastic bezels offer distinct visual styles that can either match or contrast with your traditional wall art. Choosing a frame with interchangeable bezels allows you to update the look of the device if you decide to redecorate your room or move the frame to a different wall.
Screen Technology Standard glossy screens are highly reflective, turning your beautiful family photos into a mirror under bright overhead lights or near windows. For wall displays, prioritize screens with matte or anti-glare coatings that diffuse light reflections, preserving the visibility and contrast of the image. This technology is crucial for maintaining the illusion of a traditional printed photograph rather than an active electronic monitor.
Brightness and Color Accuracy To ensure your photos look natural in both bright daylight and dim evening settings, look for frames equipped with ambient light sensors. These sensors automatically adjust the screen’s brightness to match the surrounding room lighting, preventing the frame from glowing too brightly in the dark or appearing washed out during the day. Additionally, select a frame that utilizes In-Plane Switching (IPS) panel technology, which provides wide viewing angles so the colors remain accurate and vibrant even when viewed from the side.
Aspect Ratio and Cropping Most modern smartphones capture photos in a 4:3 or 16:9 aspect ratio, while digital frames come in various screen shapes, including 16:10 or standard square formats. Evaluate how the frame’s software handles aspect ratio mismatches; look for smart cropping features that center faces or options to display subtle blurred borders rather than harshly cutting off the edges of your images. Understanding these display behaviors helps you prepare your photos for the best visual presentation on the wall.
Installation, Power Routing, and Safety Checks
Wall Assessment and Anchoring Before mounting any hardware, you must assess the composition of your wall to select the correct installation tools. In Singapore, many residential walls, particularly structural walls in HDB flats, are made of solid concrete, which requires a rotary hammer drill and masonry wall plugs for secure mounting. For drywall or partition walls, use specialized toggle bolts or heavy-duty threaded anchors, ensuring that the combined weight of the frame and mount does not exceed the structural limits of the wall material.
Power Routing Solutions Concealing the power cord is the final step to achieving a professional, gallery-like look. For a non-invasive solution, you can use paintable surface-mounted cable raceways that run flat against the wall and can be painted to match your wall color. If you prefer a completely hidden look, recessed wall outlets or in-wall low-voltage cable routing kits can be used, but you must verify local building codes to ensure that any cables run behind the wall are rated for in-wall use.
Safety Boundaries While basic mounting and surface cable management are straightforward DIY tasks, electrical modifications carry inherent risks. Any work that involves cutting into walls near existing wiring, routing high-voltage power cables behind drywall, or installing new electrical outlets must be performed by a licensed electrical worker. Always isolate the power at the main distribution board before inspecting or working near any electrical points, and prioritize safety over aesthetic convenience.
Pre-Installation Checklist To avoid unnecessary damage to your walls, complete a thorough pre-installation check on a tabletop before drilling any holes. Plug in the frame, connect it to your Wi-Fi network, update the firmware, and upload a few test photos to ensure the screen and software function perfectly. Hold the active frame against the wall at your desired mounting height to verify the viewing angles, check for glare from nearby light sources, and ensure the power adapter has adequate ventilation space to prevent overheating once installed.
Frequently Asked Questions (FAQ)
Do all digital photo frames support wall mounting?
No, not all digital photo frames are designed for wall mounting. Many budget models or frames designed primarily for tabletops lack the necessary physical features, such as VESA mounting holes or keyhole slots on the back panel. Additionally, some tabletop frames feature permanent, non-removable kickstands or have power cords that plug directly into the back at an angle, preventing the frame from sitting flush against a flat wall surface. Before purchasing, always inspect the product specifications and rear-panel images to confirm the presence of dedicated wall-mounting hardware or compatible mounting patterns.
How do I hide the power cord for a wall-mounted digital frame?
The safest and most common non-invasive method to hide the power cord is using a paintable surface-mounted cable cover or raceway, which adheres to the wall and can be painted to match your wall color. If you want a completely flush, cord-free look, you can have a licensed electrician install a recessed electrical outlet directly behind the frame’s mounting location. Never run standard power cords or high-voltage cables inside your walls, as standard device cables are not rated for in-wall use and can pose a serious fire hazard; only use certified in-wall rated low-voltage extension kits if permitted by local building regulations.
Can I mount a digital photo frame in a humid area like a bathroom?
Standard digital photo frames are not designed to withstand high-humidity environments like bathrooms. Moisture and steam can easily penetrate the non-sealed housing of the frame, leading to internal condensation, screen fogging, and eventual short-circuiting of the electronic components. Unless a manufacturer explicitly states that a specific model has an Ingress Protection (IP) rating suitable for damp environments, you should avoid installing these devices in bathrooms or outdoor areas exposed to weather. Always consult the manufacturer’s safety guidelines regarding operating humidity and temperature limits to protect your investment.
Community discussion
Share your experience or ask a question. Comments are reviewed before publication.