
Singapore’s urban landscape is characterized by compact living spaces, where maximizing every square meter of an HDB flat or condominium is a common design priority. While traditional glass mirrors have long been the standard for creating an illusion of depth, they present challenges in terms of weight, installation complexity, and safety. Acrylic mirror sheets have emerged as a highly practical alternative, offering a lightweight and shatter-resistant solution that can visually double the size of a room when selected and installed correctly.
To achieve a clear, glass-like reflection without the characteristic warping or distortion often associated with plastics, you must understand the technical specifications of acrylic. Selecting the right sheet involves evaluating thickness, backing quality, and mounting methods tailored to Singapore’s unique tropical climate and typical wall structures. This guide provides the essential criteria for choosing, placing, and maintaining acrylic mirror sheets to transform your compact living areas safely and effectively.
Understanding Acrylic Mirrors for Compact Homes
Acrylic mirror sheets, manufactured from polymethyl methacrylate (PMMA) with a reflective vacuum-metallized backing, offer distinct physical properties that make them highly suitable for modern residential interiors. One of the primary advantages of acrylic is its exceptional impact resistance, which is significantly higher than that of standard glass. This shatterproof quality makes it an excellent choice for high-traffic zones, narrow hallways, children’s playrooms, or homes with active pets where accidental impacts could otherwise cause dangerous glass breakage.
Products mentioned in this guide
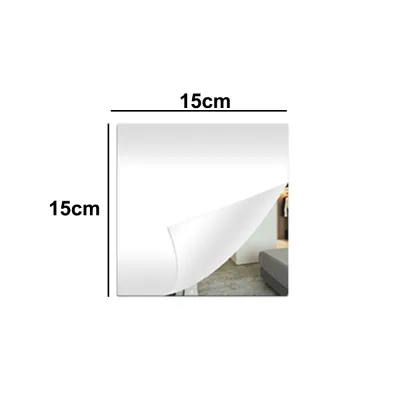
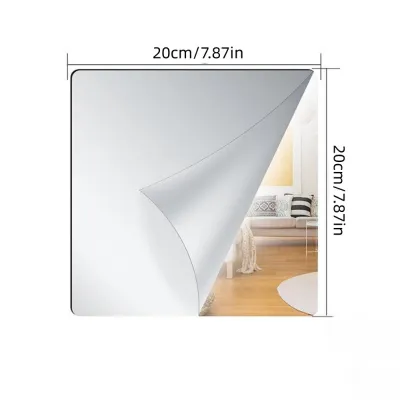
![SG [ READY STOCK ] HD Acrylic soft mirror attached to wall self-adhesive full body dressing mirror non perforated](https://img.lazcdn.com/g/p/10f5a09c2f952c5c8f6fe9a8d334827a.jpg_400x400q80.jpg_.webp)
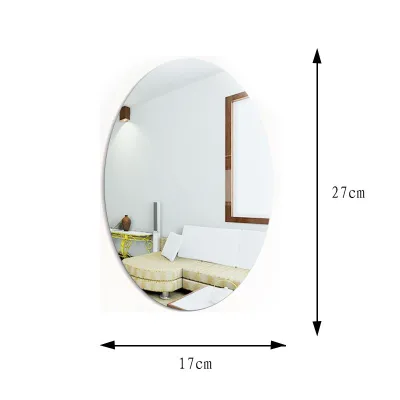
Prices are valid at publication and may change. Please refer to the product page for the latest price.
In addition to safety, the lightweight nature of acrylic simplifies both transport and installation. Navigating tight HDB corridors, passenger lifts, and stairwells with large sheets of glass can be logistically challenging and hazardous. Acrylic sheets weigh approximately half as much as glass panels of equivalent size and thickness, allowing for easier handling by DIY enthusiasts and reducing the structural load on partition walls or drywall common in newer condominium layouts.
However, integrating acrylic mirrors into your home requires an understanding of their material limitations. Acrylic is a flexible thermoplastic, meaning it lacks the natural structural rigidity of glass. If it is mounted on an uneven wall or subjected to temperature fluctuations, it can bend slightly, resulting in a distorted reflection. Furthermore, the surface of acrylic is softer than glass, making it highly susceptible to fine scratches from abrasive cleaning tools or accidental contact.
What to Look for When Buying Acrylic Mirror Sheets
Achieving a high-fidelity reflection depends heavily on selecting the correct sheet thickness. Thin acrylic sheets, such as those measuring 1mm to 2mm, are highly flexible and will inevitably conform to any slight imperfections on your wall, leading to noticeable visual distortion. For wall-mounted mirrors where optical clarity is paramount, a minimum thickness of 3mm is recommended for smaller panels, while larger installations require 5mm or 6mm sheets to maintain a flat, rigid surface.

The dimensions and modularity of your mirror layout also play a critical role in both aesthetics and logistics. While a single, expansive sheet offers a seamless and highly immersive sense of space, transporting and handling a panel larger than 1.2 meters by 2.4 meters can be exceptionally difficult in standard residential lifts. Opting for a modular design, such as a grid of smaller, precision-cut acrylic tiles, can bypass transport limitations while creating a contemporary, paneled aesthetic that is easier to align and install.
When sourcing your material, pay close attention to the edge finishing and protective treatments applied by the manufacturer. Raw, saw-cut edges can be sharp and visually unappealing; look for sheets that offer polished or beveled edges for a clean, professional appearance. Additionally, verify whether the sheet features a hard-coated or scratch-resistant protective layer on the front surface, which helps mitigate the risk of micro-abrasions during routine cleaning.
Optical clarity should be verified through manufacturer specifications rather than visual inspection alone. High-quality acrylic mirrors are typically produced using optical-grade extruded or cast acrylic. Cast acrylic generally offers superior thickness consistency and flatter surfaces compared to extruded options, reducing the likelihood of localized warping. Always check the product labels for material composition and ensure the reflective backing is fully opaque and sealed to prevent moisture or adhesive chemicals from degrading the reflective layer.
Where to Place Mirrors to Maximize the Illusion of Space
Strategic placement is key to transforming a cramped room into an airy, light-filled space. Positioning an acrylic mirror sheet directly opposite a window allows it to capture natural daylight and bounce it deep into the darker corners of an HDB living room or dining area. Placing mirrors along narrow entryways or hallways visually widens these transitional zones, making the entire home feel more expansive from the moment you step through the front door.
However, certain environments within a Singapore home are poorly suited for acrylic mirrors. High-humidity zones, such as unventilated bathrooms or areas directly adjacent to kitchen stoves, should be avoided. Prolonged exposure to steam and moisture can seep behind the edges of the sheet, causing the reflective backing to delaminate, cloud, or peel over time. Additionally, avoid placing large sheets on walls that receive intense, direct tropical sunlight for several hours a day, as localized heat buildup can cause the plastic to expand and warp.
To ensure the reflection feels natural and comfortable for occupants, pay careful attention to height and alignment. The primary viewing zone of the mirror should be centered at average eye level, which is typically between 1.4 and 1.6 meters from the floor. If you are using mirrors to elongate a room, extending the panels from the skirting board to the ceiling can create a powerful illusion of height, provided the vertical alignment is perfectly plumb.
Safe Installation Methods and Wall Requirements
A successful installation begins with a thorough assessment of the wall surface. Because acrylic mirrors are flexible, the mounting surface must be exceptionally flat, clean, dry, and structurally sound. Any bumps, textured paint, or crumbling plaster will transfer directly to the acrylic sheet, ruining the reflection. If your wall is uneven, consider mounting the acrylic sheet to a rigid backing board, such as a flat sheet of plywood or medium-density fibreboard (MDF), before securing the assembly to the wall.
For adhesive mounting, you must select a glue that is explicitly labeled as safe for acrylic mirrors. Standard construction adhesives often contain solvents that will dissolve the protective backing of the mirror, leading to dark spots and permanent damage to the reflective layer. Apply the mirror-safe adhesive in vertical, parallel beads rather than rings or blobs; this pattern allows air to circulate and prevents moisture from becoming trapped behind the sheet, which is particularly important in Singapore’s humid climate.
Mechanical fastening offers a highly secure alternative, especially for thicker, heavier sheets. Using metal stand-offs or mirror clips allows the sheet to hang flat without being forced to conform to wall irregularities. If you choose to screw the sheet directly to the wall, you must pre-drill holes that are slightly larger than the screw shafts to accommodate the natural thermal expansion and contraction of the acrylic. Always use rubber washers behind the screw heads to distribute pressure evenly and prevent cracking.
Recognizing the limits of a DIY approach is essential for a safe and successful project. If your design involves working at height, installing panels near fixed electrical wiring or light switches, or handling exceptionally large sheets that require precise alignment, stop and consult a qualified professional installer. Ensuring that power is isolated before working near electrical outlets and using proper personal protective equipment, such as safety goggles and cut-resistant gloves, are non-negotiable safety steps.
How to Clean and Maintain Acrylic Mirrors
Preserving the pristine, reflective surface of an acrylic mirror requires a gentle cleaning regimen. You must never use standard glass cleaners, ammonia-based sprays, alcohol, or solvent-based solutions on acrylic. These harsh chemicals can cause “crazing,” a process that creates a network of fine, microscopic cracks on the surface, permanently clouding the material. Instead, prepare a simple solution of mild dishwashing liquid and lukewarm water.
The choice of cleaning tool is equally critical to prevent scratching. Avoid paper towels, kitchen sponges, or dry cloths, which can trap tiny dust particles and drag them across the soft plastic surface, leaving fine scratches. Use only clean, damp, high-quality microfiber cloths. Gently wipe the surface in a single direction rather than rubbing in circular motions, and use a second dry microfiber cloth to buff away any remaining moisture streaks.
If your acrylic mirror does develop minor surface scratches, check the manufacturer’s guidelines before attempting any repairs. Some light scratches can be minimized using specialized acrylic polishing compounds designed specifically for PMMA. However, if the scratch has penetrated the reflective backing on the rear of the sheet, the damage is irreversible, and the affected panel will need to be replaced to restore its visual appeal.
Frequently Asked Questions (FAQ)
Can acrylic mirror sheets be cut to custom shapes at home?
Yes, acrylic mirror sheets can be cut at home, but the process requires specialized tools and careful technique to avoid damaging the material. For thin sheets up to 3mm, a heavy-duty utility knife or a specialized acrylic scoring tool can be used to score a deep line across the sheet, which is then carefully snapped over a straight edge. For thicker sheets, a fine-toothed jigsaw or table saw designed for plastics is necessary to prevent melting or chipping.
The primary risk during DIY cutting is cracking the brittle reflective backing or chipping the edges of the acrylic. To minimize this, always leave the protective plastic film on the sheet while cutting, and apply masking tape along the cut line to support the material. If your project requires complex curves, intricate shapes, or highly polished edges, it is generally more practical and cost-effective to order custom-cut sheets directly from a professional supplier who utilizes laser-cutting technology.
Do acrylic mirrors yellow or degrade over time?
The long-term stability of an acrylic mirror depends largely on the grade of the material and its exposure to environmental factors. Standard, indoor-grade acrylic sheets can maintain their clarity for many years without yellowing when kept in climate-controlled environments. However, prolonged exposure to direct ultraviolet (UV) radiation from intense sunlight can cause lower-quality acrylics to degrade, turn yellow, or become brittle over time.
In Singapore’s tropical climate, where UV levels and humidity are consistently high, it is crucial to verify the UV-resistance specifications of the material before purchasing. High-quality, UV-stabilized acrylic sheets are formulated to resist solar degradation, making them suitable for areas near large windows. Always review the manufacturer’s technical data sheets or warranty terms to ensure the product is rated for your specific environmental conditions and will resist delamination of the reflective backing.
Community discussion
Share your experience or ask a question. Comments are reviewed before publication.