
Installing an artificial skylight in a Singapore HDB flat with a standard 2.6m ceiling height requires balancing visual depth with physical clearance. To prevent the room from feeling cramped, the ideal setup relies on ultra-slim recessed panels or flush-mount designs that do not protrude significantly into the living space. By selecting fixtures with minimal bezels and appropriate proportions, you can create the convincing illusion of an open sky while preserving essential headroom.
Understanding Spatial Constraints in 2.6m Ceilings
A standard 2.6m ceiling height leaves very little margin for vertical protrusion. When you introduce a ceiling fixture, its physical thickness directly impacts the perceived volume of the room. A bulky, deep-set fixture can draw the ceiling downward visually, making a standard living room or bedroom feel claustrophobic. To maintain an airy atmosphere, the physical profile of the light must be as unobtrusive as possible.
To maintain comfortable headroom, physical drop length must be kept to an absolute minimum. Standard walk-through clearances require keeping the space beneath the light completely unobstructed. This constraint makes recessed or ultra-slim flush-mount designs the only practical options for standard HDB flats, as they sit nearly level with the surrounding ceiling plane and do not interfere with daily movement.
Products mentioned in this guide
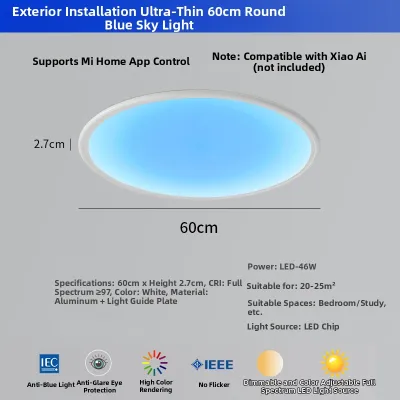
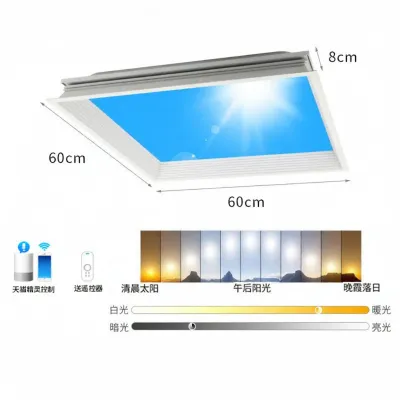
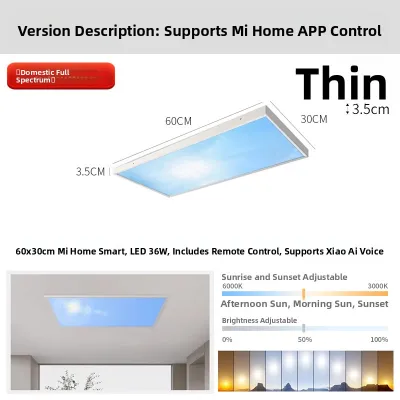
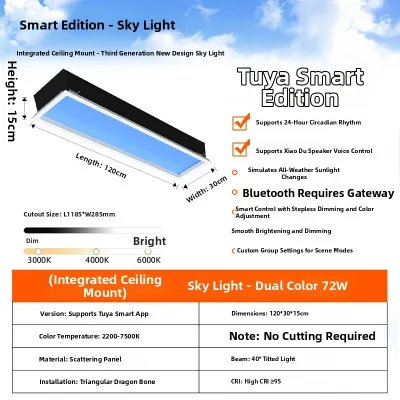
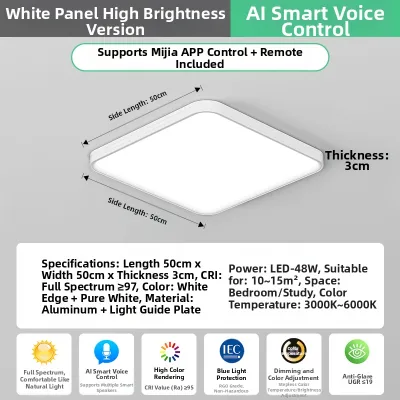
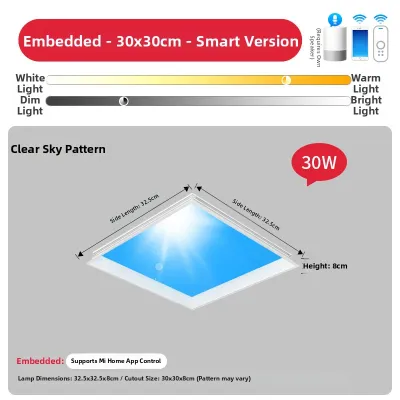
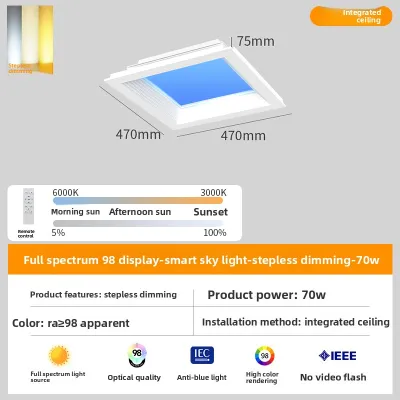
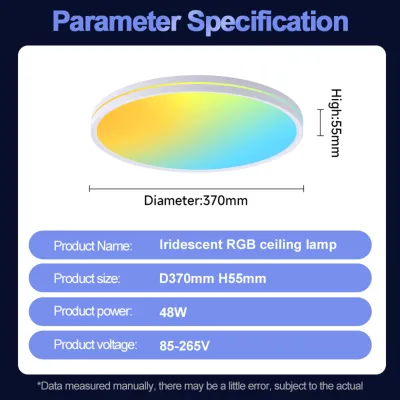
Prices are valid at publication and may change. Please refer to the product page for the latest price.
The footprint of the artificial skylight must also correlate with the overall room size. A massive square panel in a small study or narrow corridor will overwhelm the space, destroying the illusion of a distant, natural opening. Instead, matching the fixture’s dimensions to the room’s layout ensures the light source feels like a natural architectural feature rather than an intrusive appliance.
Key Dimensions and Design Features to Look For
When shopping for an artificial skylight, the profile depth of the housing is the most critical physical specification to verify. Many commercial-grade skylight simulators require a deep ceiling cavity of 15cm to 30cm to house their optical components. For a 2.6m HDB ceiling, you should look for residential-targeted models that feature ultra-slim profiles, ideally requiring less than 10cm of recessing depth, or surface-mount models with a tapered bezel.

The design of the frame and bezel plays a major role in how seamlessly the fixture integrates into your ceiling. Frameless or narrow-edge bezels allow the illuminated panel to blend directly into the plasterboard of a false ceiling. This lack of a heavy border tricks the eye into perceiving the panel as a genuine architectural opening to the outdoors rather than a framed light box.
Panel size ratios should be chosen based on the specific room geometry of your flat. Rectangular panels (such as 30x120cm or 60x120cm) work exceptionally well in narrow corridors, galley kitchens, or along the main axis of a living room, as they draw the eye forward and elongate the space. Square panels (such as 60x60cm) are better suited for centered installations in square bedrooms or dining areas where they can serve as a balanced focal point.
Installation Clearances and Electrical Safety Checks
Before purchasing any recessed artificial skylight, you must verify the actual depth of your existing or planned false ceiling cavity. HDB flats often have concrete structural beams or utility pipes running through the ceiling void, which can severely limit where a deep fixture can be placed. Measuring the available clearance at multiple points across the ceiling ensures you do not buy a fixture that cannot physically fit into the designated spot.
Heat dissipation is another crucial safety factor to consider within confined ceiling voids. Even highly efficient LED panels generate heat, and trapping this thermal energy in a tight, unventilated space can shorten the lifespan of both the LEDs and the electronic driver. Check the manufacturer’s instructions for the minimum clearance required around the sides and top of the fixture to ensure adequate passive airflow.
Working with electrical wiring and ceiling modifications carries inherent risks that require professional expertise. While planning the layout can be done independently, you should engage a licensed electrician or a qualified contractor to handle the actual installation. A professional can safely isolate the power, verify that the existing wiring can support the load, make precise cuts in the plasterboard, and ensure the fixture is securely anchored to prevent structural hazards.
Evaluating Light Output and Visual Depth
Creating a convincing sky illusion in a low-ceiling room requires precise control over glare and light distribution. Because the light source sits closer to eye level in a 2.6m room, poorly shielded LEDs can cause intense glare and visual fatigue. Look for models equipped with micro-prismatic diffusers or deep-recessed optical designs that direct the light downward while keeping the source obscured from side angles.
Color temperature and the Color Rendering Index (CRI) are fundamental to achieving a realistic daylight effect. To mimic a clear blue sky, look for fixtures that offer a high color temperature (typically 6500K or higher for the sky portion) paired with a high CRI (ideally Ra 90 or above). This combination ensures that the light feels natural and vibrant, rendering the colors of your furniture and decor accurately without casting a clinical, sterile hue over the room.
Dimming compatibility is essential for adapting the artificial skylight to different times of day and changing moods. A fixture running at full brightness might feel refreshing during a gloomy afternoon, but it can be overwhelmingly bright in the evening. Verify that the LED driver is compatible with standard dimming protocols used in Singapore, such as Triac, 0-10V, or smart home wireless standards, allowing you to transition smoothly from bright midday sun to a soft twilight glow.
Common Sizing Mistakes to Avoid
One of the most common mistakes homeowners make is oversizing the fixture in an attempt to maximize the daylight effect. In a room with a 2.6m ceiling, an excessively large skylight panel dominates the visual field and actually makes the ceiling feel lower than it is. A smaller, well-proportioned panel creates a more convincing “window” effect, as the surrounding ceiling area provides the necessary contrast to establish a sense of depth.
Another frequent oversight is failing to plan for the placement and ventilation of the external LED driver. Unlike standard ceiling lights with integrated drivers, high-quality artificial skylights often use bulky external transformers that must be housed separately. Forgetting to allocate a cool, accessible space in the ceiling void for this driver can lead to premature component failure and make future maintenance incredibly difficult.
Finally, overlooking the beam angle of the fixture can result in disappointing visual performance. Fixtures with excessively wide beam angles can wash the upper portions of nearby walls with harsh, direct light, highlighting minor plaster imperfections and destroying the illusion of a distant sky. Selecting a model with a controlled, downward-directed beam angle ensures the light behaves like natural sunlight streaming from above, casting soft, realistic shadows.
Frequently Asked Questions (FAQ)
Can I install an artificial skylight if I do not have a false ceiling?
Installing an artificial skylight on a bare concrete ceiling is possible but presents distinct aesthetic and structural challenges. Without a false ceiling to conceal the housing, you must use a surface-mount kit, which adds physical bulk and can make a 2.6m ceiling feel lower. Additionally, concealing the electrical wiring requires running surface-mounted plastic trunking across the concrete slab, which can disrupt the clean, minimalist look of the installation. Before undertaking any drilling into structural concrete, always consult your building management or HDB guidelines to ensure compliance with local renovation regulations.
Do artificial skylights require special maintenance in humid climates?
Singapore’s tropical climate and high humidity levels can affect sensitive electronic fixtures installed in ceiling voids. Over time, moisture ingress can lead to condensation forming inside the diffuser panel, which ruins the sky illusion and can damage the internal LEDs. To prevent this, look for fixtures with an appropriate Ingress Protection (IP) rating, such as IP44 or higher, which indicates a degree of protection against moisture and dust. It is also wise to perform routine visual inspections around the bezel for any signs of mold growth or paint discoloration caused by trapped humidity.
How do I clean the diffuser panel without damaging the optical coating?
Maintaining the realistic appearance of your artificial skylight requires keeping the diffuser panel free of dust and smudges, but you must clean it with care. Always turn off the power at the main switch and allow the fixture to cool completely before starting. Use a soft, dry microfiber cloth to gently wipe away dust; avoid using abrasive sponges or harsh chemical solvents, as these can permanently scratch or strip away specialized anti-glare and optical coatings. For stubborn spots, a slightly damp cloth with a mild, diluted soap solution is generally safe, provided you dry the surface immediately afterward.
Community discussion
Share your experience or ask a question. Comments are reviewed before publication.