
Soft mirror stickers are an excellent, lightweight, and budget-friendly alternative to heavy glass mirrors for expanding small spaces. The best soft mirror stickers for making a small room look bigger are those made of high-quality acrylic (PMMA) with a thickness of at least 1mm to 2mm, featuring a highly reflective vacuum-metallized coating. Unlike thin PET film rolls, thicker acrylic tiles maintain their shape and resist the warping that causes distorting “funhouse” reflections. To achieve the illusion of a larger room, you must pair the right material with a perfectly flat wall surface and strategic placement that captures natural light.
By understanding the physical properties of these flexible materials and applying smart design principles, you can transform a cramped hallway, a tiny bedroom, or a compact living area into a brighter, more open space. This guide will walk you through the essential criteria for selecting, placing, and installing soft mirror stickers to maximize their space-enhancing effects.
Core Criteria for Selecting Space-Enhancing Mirror Stickers
When shopping for soft mirror stickers, optical clarity should be your primary concern. Traditional glass mirrors are perfectly flat and rigid, which is why they provide a flawless reflection. Soft mirrors, usually made from plastics like acrylic (polymethyl methacrylate) or PET (polyethylene terephthalate), are inherently flexible. If the material is too thin, it will conform to every microscopic imperfection on your wall, resulting in a distorted, wavy reflection that can cause eye strain and ruin the illusion of depth. To avoid this, look for stickers with a thickness of at least 1mm, though 2mm is highly preferred for larger applications.
Products mentioned in this guide
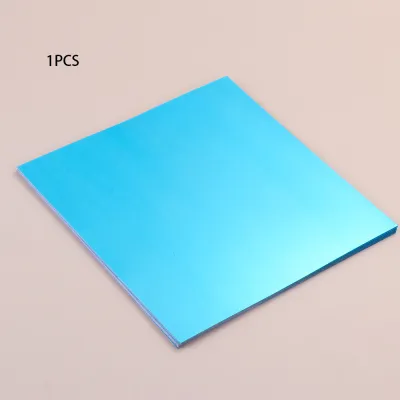
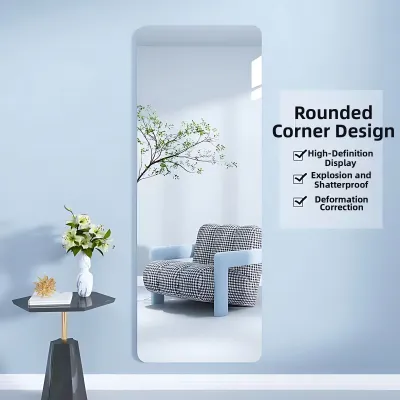
![SG [ READY STOCK ] HD Acrylic soft mirror attached to wall self-adhesive full body dressing mirror non perforated](https://img.lazcdn.com/g/p/b229ade12ec2d63218623b2358730fb7.jpg_400x400q80.jpg_.webp)
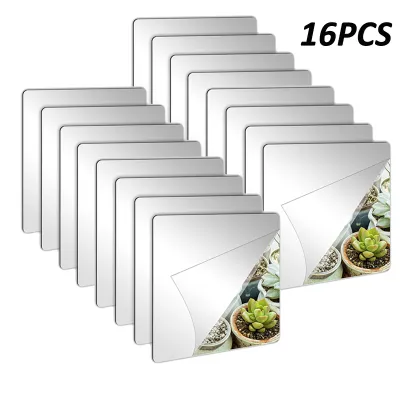
Prices are valid at publication and may change. Please refer to the product page for the latest price.
The material composition directly dictates how light bounces off the surface. PET mirror rolls are highly flexible and inexpensive, but they are incredibly thin (often less than 0.2mm) and are best reserved for small craft projects rather than wall-sized spatial illusions. Acrylic mirror sheets, on the other hand, offer much higher rigidity and a flatter surface profile. This rigidity ensures that the vacuum-metallized reflective backing remains uniform, providing a clear, stable image that closely mimics the performance of real glass.
Adhesion is the final piece of the structural puzzle. Most soft mirror stickers come with either a fully self-adhesive backing or separate double-sided adhesive pads. A full-coverage self-adhesive backing is ideal for perfectly smooth surfaces like glass or polished tile, as it prevents air pockets from forming behind the mirror. However, if your wall has minor texture, high-quality double-sided foam tape can help absorb these slight uneven patches, keeping the front surface of the acrylic sheet flat. In humid environments, such as compact bathrooms or kitchens, ensure the adhesive is rated for moisture resistance to prevent the corners from peeling over time.
Design and Shape Options for Visual Expansion
The shape and configuration of your mirror stickers play a massive role in how your brain perceives the dimensions of a room. Large, continuous acrylic sheets are highly effective at creating an unbroken horizon, which tricks the eye into believing a room extends much further than it actually does. However, installing a single large sheet of flexible plastic without trapping air bubbles or causing slight bends can be challenging.

Modular geometric tiles, such as hexagons, squares, or long rectangular strips, offer a highly practical and visually engaging alternative. While the seams between tiles do break up the reflection slightly, a well-planned layout can guide the eye dynamically across the room. For instance, arranging hexagonal tiles in a cascading pattern can draw attention upward and outward, making a narrow wall feel wider. The key is to keep the gaps between tiles as microscopic as possible to maintain a cohesive visual flow.
To maximize the seamless blending of your mirrors with the surrounding wall, prioritize frameless designs or tiles with clean, straight edges. Frames create a hard visual boundary that stops the eye, reminding the viewer of the room’s physical limits. Frameless soft mirrors allow the reflected image to merge directly with the wall, enhancing the boundary-stretching illusion.
Avoid heavily patterned, tinted, or frosted mirror stickers if your primary goal is spatial expansion. While gold, bronze, or geometric-patterned mirrors can look highly decorative, they absorb and scatter light rather than reflecting it cleanly. To make a small room look bigger, you need maximum light return. Stick to classic silver or clear finishes, which reflect the full spectrum of light and maintain the natural brightness of your space.
Strategic Placement for Compact Apartments
In compact apartments, strategic placement is everything. The most effective way to double the perceived size of a room is to position your mirror stickers directly opposite a window or a primary light source. By doing this, the mirror acts as a second window, bouncing natural daylight deep into dark corners and illuminating the entire space. This simple trick not only makes the room feel larger but also significantly reduces the need for artificial lighting during the day.
Equally important is what your mirrors will be reflecting. Before sticking anything to the wall, stand in the exact spot where you plan to install the mirror and look at what lies directly opposite. If the mirror reflects a cluttered bookshelf, a messy utility closet, or a busy workspace, it will visually double that clutter, making the room feel twice as cramped and chaotic. Instead, aim to reflect clean, open spaces, minimalist decor, a piece of indoor greenery, or an open doorway to create a sense of continuous passage.
If your apartment suffers from low ceilings, you can use vertical strip arrangements to create the illusion of height. Installing tall, narrow mirror stickers that stretch from just above the skirting board to near the ceiling draws the eye upward, making the walls feel elongated. Conversely, if you want to make a narrow hallway feel wider, arrange the mirror strips horizontally along the length of the wall. This horizontal line guides the viewer’s gaze along a wider path, visually stretching the corridor.
Wall Preparation and Safe Installation
The success of your soft mirror installation depends almost entirely on the preparation of the wall surface. Because flexible plastics conform to the surface beneath them, even a tiny speck of dust, a paint drip, or a textured wall finish will cause noticeable distortion in the reflection. Ideal surfaces include smooth plaster, painted drywall, glass, polished tiles, and sealed wood. If your walls have a heavy texture, such as orange peel or stucco, soft mirror stickers are not recommended unless you mount them to a rigid backing board first.
Before beginning the installation, clean the wall thoroughly to remove all dust, grease, and oils. Use a mixture of mild dish soap and water, or isopropyl alcohol for non-painted surfaces, and wipe the area down with a lint-free microfiber cloth. Allow the wall to dry completely for several hours. Any trapped moisture behind the sticker can degrade the adhesive over time, leading to peeling, bubbling, and warping of the reflective surface.
To avoid ruining a large batch of stickers, always perform a test run. Apply a single tile or a small test strip of the adhesive in an inconspicuous area, such as behind a door or near the floor. Leave it in place for 24 to 48 hours to check both the adhesion strength and the optical quality. This test period allows you to observe if the adhesive damages your paint upon removal and whether the wall’s natural texture causes unacceptable distortion in the reflection. Once satisfied, install the remaining stickers slowly, using a soft squeegee or a clean cloth to smooth out air bubbles from the center outward.
Building Your Shortlist: What to Verify Before Buying
When browsing online marketplaces for soft mirror stickers, it is easy to be misled by highly stylized product renders that show flawless, glass-like reflections. Because you cannot physically touch the product before purchasing, you must look closely at the technical specifications and customer feedback to make an informed decision.
First, verify the exact material and thickness listed by the seller. Avoid listings that use vague terms like “reflective wall decor” without specifying the material. Look for explicit mentions of “acrylic” or “PMMA” and a thickness of 1mm or greater. If a listing does not state the thickness, it is highly likely to be an ultra-thin PET film, which will yield a highly distorted, funhouse-mirror effect when applied to standard walls.
Second, dive deep into the buyer-uploaded photos in the review section. Ignore the polished promotional images and focus on real-world photos taken by customers from a distance of two to three meters. Look at the straight lines in the reflected background, such as door frames or ceiling lines. If these lines appear wavy, jagged, or heavily distorted in the customer photos, the material is either too thin or the adhesive backing is uneven. Pay close attention to reviews that mention how the edges of the stickers look after a few weeks of installation.
Finally, check the seller’s return policy and guarantees regarding product damage during transit. Flexible acrylic sheets can easily bend, scratch, or crack if they are not packaged with rigid protective layers. Ensure the seller ships the mirrors with a protective film on the front surface, which you should only peel off after the installation is completely finished. A robust return policy protects your investment if the stickers arrive warped or fail to adhere to a properly prepared wall.
Frequently Asked Questions (FAQ)
Do soft mirror stickers provide the same clarity as glass mirrors?
No, soft mirror stickers do not provide the same optical clarity as traditional glass mirrors. Because they are made of flexible plastics like acrylic or PET, they are susceptible to minor surface variations. While they are excellent for creating a sense of light and space from a distance, they will almost always show slight distortion at the edges or when viewed from far away. For functional tasks like shaving or applying makeup, a rigid glass mirror remains superior, but for decorative space-enhancement, high-quality acrylic stickers are a highly effective and safe alternative.
Can I remove soft mirror stickers without peeling off the paint?
Removing soft mirror stickers without damaging your wall paint requires patience and the right technique. Because these stickers rely on strong adhesives to stay flat, pulling them off forcefully will likely tear the underlying drywall paper or peel the paint. To remove them safely, use a hairdryer on a low-to-medium heat setting to gently warm the surface of the mirror. This heat softens the adhesive backing, making it pliable. Slowly peel the sticker away from the wall at a sharp 45-degree angle. If any sticky residue remains on the wall, clean it gently using a mild adhesive remover or soapy water on a microfiber cloth.
Community discussion
Share your experience or ask a question. Comments are reviewed before publication.