
Selecting the right frame for your photos involves balancing the physical dimensions of your print with the design language of your living space. A 3R photo frame, designed to hold a standard 3.5 by 5-inch (approximately 8.9 by 12.7 cm) print, offers a compact canvas that can either blend seamlessly into your walls or serve as a deliberate visual accent. Because of their smaller scale, these frames require thoughtful styling, matting, and placement to ensure the images do not get lost among larger furniture pieces or expansive wall surfaces.
To integrate 3R frames successfully, you must match their material, profile thickness, and color to your existing interior design. Whether your home features the clean lines of modern minimalism, the warm textures of classic vintage styling, or the raw elements of industrial design, the frame acts as the crucial bridge between your personal memories and your home’s architecture. Understanding how to scale these small frames through matting and creative layouts is the key to making a modest print look intentional and sophisticated.
Quick Guide: Matching 3R Frame Styles to Interior Aesthetics
Before purchasing frames, evaluating how different materials and profiles interact with your room’s design simplifies the selection process. The table below outlines how common interior design styles pair with specific 3R frame characteristics.
Products mentioned in this guide
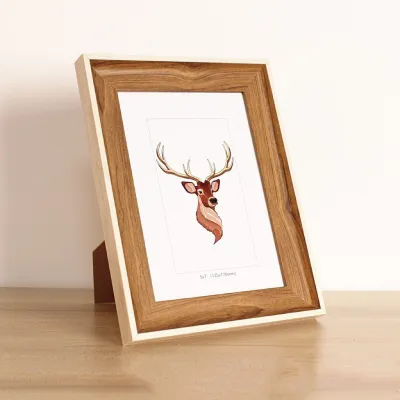
![[SG Stock]Simple classic Wooden photo frame 3R/4R/5R/8R/A4 For Table Display Decorations Picture Frame Gift Christmas gift](https://img.lazcdn.com/g/p/9161cc234a6af3d66393f5124dc21143.jpg_400x400q80.jpg_.webp)

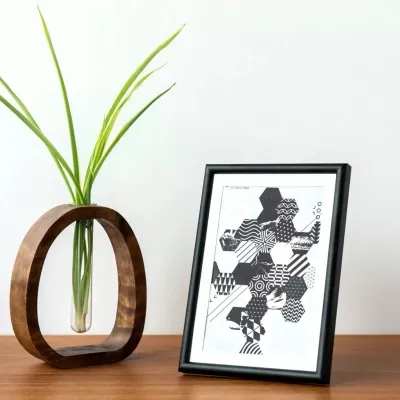

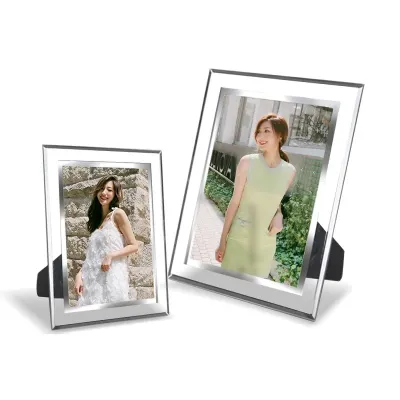
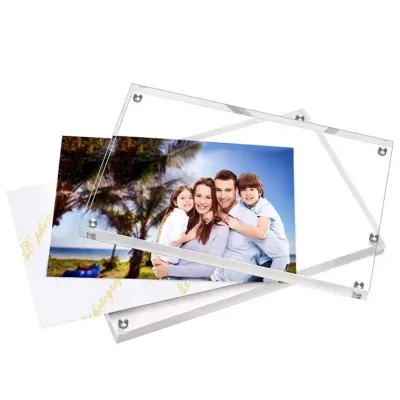
![[SG Stock] Transparent L-Shaped Acrylic Stand | Photo Frame | Menu Display | Sign Board | A4 Size | 3R - S8R](https://img.lazcdn.com/g/p/0ce00ff315c4a0f79da5f7d08a3b954e.png_400x400q80.png_.webp)
Prices are valid at publication and may change. Please refer to the product page for the latest price.
| Interior Style | Recommended Frame Materials | Color Palette | Profile & Matting Suggestion |
|---|---|---|---|
| Minimalist / Contemporary | Thin aluminum, matte composite, frameless acrylic | Matte black, stark white, satin silver | Ultra-thin profile (under 1 cm) with a wide, neutral mat board |
| Vintage / Traditional | Carved timber, distressed wood, cast metals | Walnut, mahogany, antique gold, bronze | Medium to thick ornate profile; no mat or a warm cream mat |
| Industrial | Raw steel, reclaimed wood, concrete-finish composites | Charcoal, gunmetal, rustic brown | Bold, blocky profile with visible grain or metallic hardware |
| Scandinavian / Japandi | Light oak, ash, matte ceramic | Natural timber, soft beige, off-white | Clean, flat profile with a wide, textured white mat board |
| Eclectic | Mixed materials, colored lacquer, stained glass | Bold primary colors, contrasting jewel tones | Varied profiles and thicknesses grouped together without mats |
When evaluating your room, look at the dominant visual cues before choosing a frame style. Observe the texture of your walls; smooth plaster or flat paint supports thin, delicate frames, while highly textured surfaces like brick or patterned wallpaper require bolder, thicker frames to stand out. Consider the existing wood tones in your furniture and flooring; matching or deliberately contrasting your frame materials with these elements creates a sense of visual continuity. Finally, assess the ambient lighting in the room, as high-glare environments will affect how the frame and its glazing material present your photos.
Using a single frame style across contrasting rooms can create visual friction. For instance, a heavy, ornate gold frame that looks beautiful in a classic study will feel out of place in a sleek, minimalist kitchen. To transition between spaces smoothly, establish a common design thread. You can vary the frame materials from room to room while keeping the mat board color identical, or maintain a consistent frame color while adapting the profile thickness and material to suit each specific room’s aesthetic.
Modern and Minimalist Interiors: Sleek 3R Frame Choices
Minimalist and contemporary spaces prioritize clean lines, open space, and the reduction of visual clutter. When decorating these interiors, your 3R photo frames should support this understated aesthetic rather than compete with it. Opt for frames with exceptionally thin profiles, typically under one centimeter in width. Materials like anodized aluminum, matte black engineered wood, or high-quality frameless acrylic blocks are excellent choices that keep the focus entirely on the photograph.

Color selection in minimalist spaces should remain highly disciplined. Monochromatic schemes—such as matte black, stark white, or brushed silver—allow the frames to integrate quietly into neutral walls. If your walls are painted a deep charcoal or a soft off-white, matching the frame color directly to the wall paint creates a sophisticated, low-contrast look where the photo appears to float on the surface. This technique prevents the small 3R frame from breaking up the clean, expansive planes of a modern room.
Because a 3R photo is relatively small, placing it directly in a small, thin frame can sometimes look insignificant on a large contemporary wall. To elevate the presentation, utilize wide matting. Placing a 3R print inside a larger frame—such as an 8R or 10R frame—fitted with a generous, custom-cut white or off-white mat board creates essential visual breathing room. This technique draws the eye inward, transforming a casual snapshot into a gallery-worthy art piece while maintaining the spacious feel of minimalist design.
For tabletop displays, desks, or low consoles in modern spaces, frameless acrylic magnetic blocks are highly effective. These solid, clear blocks hold the 3R photo securely between two polished layers without any visible border. The absence of a traditional frame allows the light to pass through the edges, making the photo look clean and integrated into the surrounding space. This approach works particularly well for black-and-white photography or high-contrast architectural prints.
Vintage and Classic Spaces: Ornate and Wooden 3R Frames
Classic, traditional, and vintage interiors celebrate warmth, history, and intricate craftsmanship. In these environments, a simple plastic or metal frame can feel cold and out of place. Instead, look for 3R frames made from rich, natural timbers or those featuring detailed carvings and metallic finishes. Materials like walnut, cherry, and mahogany bring natural grain patterns and deep tones that complement traditional wooden furniture and architectural moldings.
Ornate details such as beaded borders, scrollwork, or distressed finishes add character and a sense of age to your display. Subtle metallic accents, including antique brass, burnished bronze, or tarnished gold, work beautifully in classic settings. These finishes catch the ambient light softly, adding a layer of quiet luxury to a mantelpiece, side table, or gallery wall without appearing overly flashy or modern.
When styling ornate frames, you must balance the detailed frame design with the small 3R photo size. Because the print is compact, an excessively wide or heavily carved frame can easily overwhelm the image. To avoid this, select frames where the ornate detailing is scaled down, or use a thin, plain inner mat to separate the photograph from the busy patterns of the frame. A warm cream, beige, or textured linen mat board provides a gentle visual transition that protects the photo from being visually swallowed by the surrounding timber or metal.
To integrate these frames seamlessly into classic rooms, coordinate them with existing architectural features. Position your framed photos near traditional wall paneling, wainscoting, or decorative plasterwork. Placing a cluster of vintage-style wooden frames on a dark wood console table or hanging them alongside classic oil paintings and brass wall sconces reinforces the timeless, curated feel of the space.
Industrial and Eclectic Decors: Mixed Materials and Bold Frames
Industrial and eclectic design styles embrace texture, contrast, and highly personalized curation. Industrial spaces, characterized by exposed brick, concrete, and metal ductwork, benefit from frames that reflect these raw, utilitarian materials. Look for 3R frames constructed from reclaimed timber, weathered barn wood, or metals with visible welds, rivets, and matte finishes like gunmetal or blackened steel.
In eclectic decors, the goal is to create a curated, collected-over-time look rather than a perfectly matched set. You can achieve this by intentionally mixing different frame styles, thicknesses, and colors on a single wall or shelf. Pair a distressed rustic wood frame next to a sleek brass frame and a colorful lacquered piece. To keep this arrangement looking cohesive rather than chaotic, maintain a consistent spacing interval between the frames or ensure the photographs themselves share a similar color grading or subject matter.
Textured walls, such as exposed brick or rough concrete, present a unique display challenge because their busy patterns can distract from small photos. To combat this, use contrasting mats or borderless float frames. A solid, dark mat board inside a raw wood frame creates a clear boundary that separates the 3R photo from the textured background. Alternatively, a double-glass float frame—where the photo is sandwiched between two panes of glass with a clear border around it—allows the raw texture of the brick wall to show through around the edges of the photo, integrating the display directly into the room’s architecture.
For an industrial edge, consider frames that incorporate functional hardware as part of their design. Frames suspended from black iron chains, mounted with exposed corner brackets, or held together by heavy-duty industrial clips add a tactile, mechanical quality that fits perfectly in loft-style apartments or creative workspaces. These rugged details elevate the simple 3R print into a striking decorative feature.
How to Arrange and Display 3R Photo Frames on Your Walls
Because 3R photo frames are small, hanging a single frame on a large, empty wall can look unbalanced. To create visual impact, group multiple frames together using structured layouts or organic arrangements. A structured grid layout is ideal for modern, minimalist, or formal spaces. By aligning four, six, or nine identical 3R frames in a precise geometric pattern, you create a clean, high-impact installation that functions as a single, cohesive piece of art.
For cozy, eclectic, or transitional spaces, an organic cluster layout offers a more relaxed feel. Start by placing your favorite or most visually dominant frame near the center of the arrangement at eye level, then build outward with other frames. Maintain a consistent gap of approximately 5 to 8 centimeters between each frame to ensure the cluster feels unified. Mixing portrait and landscape orientations within the cluster adds visual interest and allows you to display a wider variety of memories.
If you want to avoid drilling multiple holes in your walls—which is particularly important in rental properties or on hard concrete walls—consider alternative display methods like floating shelves or picture ledges. A shallow picture ledge allows you to lean and overlap several 3R frames of varying styles and heights. This method makes it incredibly easy to swap out photos or rearrange the display whenever you like, without the need for tools or wall repairs.
When hanging frames, always adhere to standard height and alignment rules to keep the arrangement looking professional. The center of your gallery wall or main frame grouping should sit at eye level, which is generally between 145 and 150 centimeters from the floor. If you are hanging frames above a piece of furniture, such as a sofa or a console table, position the bottom of the frames 15 to 20 centimeters above the top of the furniture to prevent the arrangement from looking disconnected.
What to Check Before Buying 3R Photo Frames
Before purchasing any 3R photo frame, verifying its physical specifications ensures a proper fit and a safe installation. First, confirm the exact inner dimensions of the frame. While a standard 3R print measures 3.5 by 5 inches, some frames manufactured internationally may use slightly different metric conversions. Check the frame’s “sight size” or inner rebate—the actual opening visible from the front—to ensure it will not crop out crucial details along the edges of your photograph.
Next, evaluate the glazing material, choosing between real glass and acrylic based on where the frame will be placed.
- Real Glass: Offers excellent optical clarity, is highly scratch-resistant, and does not attract dust through static electricity. However, it is heavy and fragile, making it less suitable for high-traffic hallways, children's playrooms, or areas prone to vibrations.
- Acrylic / Plexiglass: Extremely lightweight and shatterproof, making it the safer choice for suspended displays, earthquake-prone areas, or homes with active pets and children. On the downside, acrylic scratches easily and can attract dust, requiring specialized microfiber cloths for cleaning.
In humid environments, such as tropical climates or near bathrooms, moisture can easily become trapped inside a tightly sealed frame. This trapped humidity can cause solid wood frames to warp, mold to develop, or the photo emulsion to stick permanently to the glass. To protect your prints, always use an acid-free mat board to create a physical gap between the photo surface and the glazing, and choose frames with moisture-resistant backing materials like sealed MDF or plastic rather than cheap, untreated cardboard.
Finally, inspect the backing board and hanging hardware. Ensure the frame features sturdy turn buttons or flexible metal tabs that allow you to open and close the back easily without damaging the frame. The hanging hardware should be securely attached to the frame backing or timber border, supporting both portrait (vertical) and landscape (horizontal) orientations. For tabletop frames, verify that the fold-out easel stand is sturdy and balanced, preventing the frame from tipping over easily on polished surfaces.
Frequently Asked Questions (FAQ)
What are the exact dimensions of a standard 3R photo frame?
A standard 3R photo frame is designed to accommodate a print that measures exactly 3.5 inches by 5 inches, which translates to approximately 8.9 centimeters by 12.7 centimeters. When shopping for frames, it is important to distinguish between the photo size, the frame’s inner window opening, and the frame’s overall outer dimensions. The inner window opening is usually slightly smaller than 3.5 by 5 inches—often by about 2 to 3 millimeters on each side—to create a lip (or rebate) that holds the edges of the print in place so it does not fall through the front.
Should I use glass or acrylic for my 3R photo frames?
The choice between glass and acrylic depends on your installation environment and safety priorities. Real glass is highly scratch-resistant, easy to clean with standard glass cleaners, and maintains excellent clarity over time without yellowing. It is ideal for stable tabletop displays or low-traffic wall areas. Acrylic is lightweight and virtually shatterproof, making it the preferred choice for frames hung in children’s bedrooms, high-traffic corridors, or directly above beds and sofas where a falling frame could cause injury. However, acrylic requires gentle cleaning with a damp microfiber cloth to avoid fine surface scratches.
Community discussion
Share your experience or ask a question. Comments are reviewed before publication.