
In Singapore’s highly competitive property market, maximizing the perception of space in compact HDB flats, build-to-order (BTO) apartments, and cozy condominiums is a constant design challenge. While traditional glass mirrors are the classic solution for visually expanding a room, they come with significant drawbacks, including high costs, heavy weight, and the need for permanent wall drilling. A high-quality mirror sticker offers a modern, flexible, and budget-friendly alternative that can instantly make small rooms look twice their actual size. By understanding how to select, place, and install these reflective decals, you can transform cramped interiors into bright, airy spaces without risking your rental deposit or breaking your home renovation budget.
Why Mirror Stickers Are Ideal for Compact Homes
To understand why a mirror sticker is such an effective tool for compact homes, it helps to look at the basic physics of interior design. When light enters a room, it hits various surfaces and is absorbed or scattered. A highly reflective surface, however, bounces light back into the room, effectively doubling the visual path that light travels before reaching your eyes. This optical phenomenon tricks the brain into perceiving depth where a solid wall actually stands. By reflecting the opposite side of a room, a strategically placed mirror sticker creates an illusion of an extra room or an extended corridor, instantly breaking up the claustrophobic feel of tight spaces.
For Singapore homeowners and renters alike, mirror stickers offer massive practical advantages over traditional glass. Standard glass mirrors are incredibly heavy and fragile, requiring robust mounting hardware, wall anchors, or heavy-duty construction adhesives that can permanently scar walls. In Singapore’s concrete-walled apartments, mounting a heavy mirror often requires a hammer drill, dust containment, and professional installation fees. Mirror stickers, by contrast, are lightweight, shatterproof, and incredibly easy to handle. If you are renting a home, these stickers allow you to enjoy the spatial benefits of large-scale mirrors without violating tenancy agreements that prohibit drilling. Furthermore, they are highly cost-effective, allowing you to cover large wall areas for a fraction of the cost of custom-cut glass panels.
Products mentioned in this guide
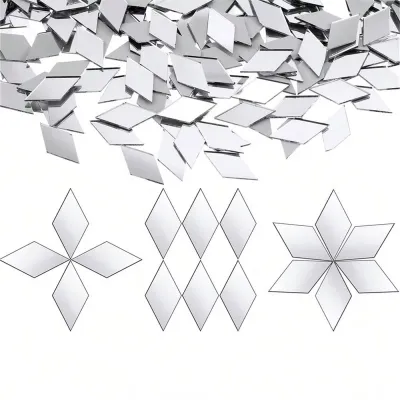
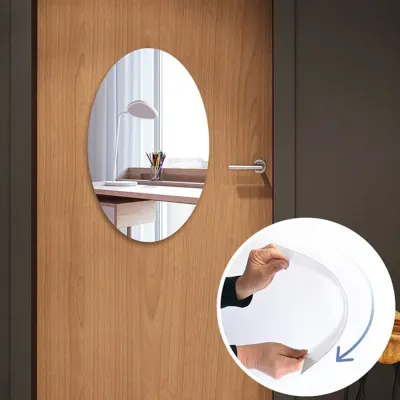
![[OKLIFE. SG]Mirror Wall Sticker Self Adhesive Decorative Mirror 3D Acrylic Glass Sticker mirror](https://img.lazcdn.com/g/p/287f9ae0f82e6a421d138f466656fe1c.jpg_400x400q80.jpg_.webp)
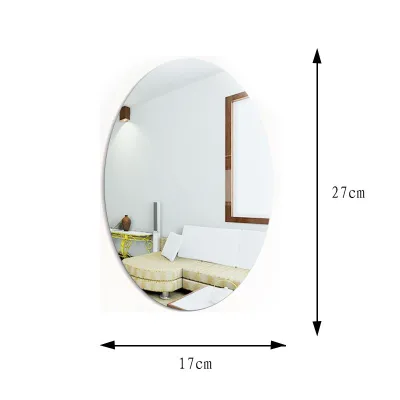
Prices are valid at publication and may change. Please refer to the product page for the latest price.
Key Quality Indicators When Shopping for Mirror Stickers
Not all mirror stickers are created equal, and choosing the wrong product can lead to a disappointing aesthetic. To ensure your walls look sophisticated rather than cheap, you must evaluate several technical specifications before making a purchase.

Material and Thickness: Acrylic vs. PET
The two primary materials used for mirror stickers are acrylic (polymethyl methacrylate) and PET (polyethylene terephthalate) films. Acrylic mirror stickers are rigid, semi-flexible plastic sheets that mimic the flat surface of glass remarkably well. PET stickers, on the other hand, are incredibly thin, highly flexible films that resemble heavy-duty foil. While PET options are highly affordable and easy to cut, they conform to every single microscopic bump, texture, or imperfection on your wall. This lack of rigidity leads to the dreaded “funhouse mirror” effect, where the reflected image appears warped, wavy, and distorted.
To achieve a crisp, true-to-life reflection that genuinely expands your space, prioritize rigid acrylic mirror stickers over thin PET films. When browsing product specifications, look closely at the thickness of the material. High-quality acrylic mirror panels typically range from 1mm to 2mm in thickness. This added thickness provides the structural rigidity necessary to bridge minor wall imperfections, ensuring the reflective surface remains perfectly flat and the resulting reflection stays clear and undistorted.
Reflective Clarity and Edge Safety
The quality of the reflective coating directly determines how bright and realistic the illusion of space will be. Premium mirror stickers utilize advanced vacuum metallization processes, applying a highly uniform layer of aluminum or silver to the back of the acrylic sheet. Lower-grade stickers often have uneven coatings that look cloudy, dim, or have a distinct bluish-gray tint, which reduces the amount of light bounced back into the room. Always check product details for high-reflectivity ratings to ensure your space benefits from maximum brightness.
Physical safety and visual seamlessness are equally dependent on how the edges of the stickers are finished. Cheaply manufactured acrylic tiles often have sharp, jagged, or unfinished edges that can easily cut your fingers during installation. Look for products that feature polished or bevelled edges. Smooth, rounded edges are not only safer to handle, but they also allow you to place multiple tiles directly adjacent to one another without leaving unsightly, uneven gaps, resulting in a much more professional, seamless installation.
Adhesive Strength and Wall Compatibility
Because Singapore experiences high year-round humidity, adhesive selection is critical to prevent your mirror stickers from peeling off the wall over time. Many mirror stickers come with pre-applied adhesive backings, while others require separate mounting tapes, liquid adhesives, or reusable mounting putty. Pre-applied full-coverage adhesive sheets offer the flattest bond, which is essential for preventing warping, but they can be incredibly difficult to remove without tearing the underlying wall paint.
Before purchasing, match the adhesive type to your specific wall surface. Standard painted drywall and smooth plaster walls are highly compatible with double-sided foam mounting tapes, which absorb minor wall textures. However, if your walls are finished with delicate, chalky, or matte emulsion paints common in Singapore homes, aggressive adhesives can easily strip the paint during removal. For temporary installations or rentals, using high-quality, removable mounting putty or specialized damage-free adhesive strips is highly recommended, even if it requires a bit more care during initial alignment.
Best Mirror Sticker Styles to Enlarge a Room
Selecting the right design style of mirror stickers allows you to tailor the spatial illusion to your room’s specific layout and architectural quirks.
Large-Format Seamless Panels
If your primary goal is to create the most convincing illusion of an open, extended room, large-format seamless panels are your best option. These are large, single-piece acrylic sheets that cover a significant portion of a wall, creating an uninterrupted field of reflection. By eliminating seams and grout lines, these panels trick the eye into believing that the wall has completely disappeared, opening up narrow dining areas or small living rooms beautifully.
However, large-format panels come with unique installation challenges. Because of their size, they are highly susceptible to bending or flexing during application, which can introduce permanent creases or optical distortions. Applying these large sheets requires a patient, two-person approach to ensure the panel remains perfectly flat as it meets the wall, preventing air bubbles from getting trapped behind the reflective surface.
Modular Geometric Tile Sets
Modular geometric tile sets—such as hexagons, triangles, or small squares—offer incredible design flexibility and are highly popular in modern Singapore apartments. These sets allow you to piece together custom configurations that fit your space perfectly. They are particularly useful for navigating around fixed household obstacles that are difficult to move, such as wall-mounted air conditioning units, windows, structural pillars, or light switches.
Beyond their practical flexibility, the way you arrange these tiles can actively manipulate the perceived dimensions of a room. Arranging hexagonal tiles in a tall, vertical column draws the eye upward, making low ceilings feel significantly higher. Conversely, spreading a staggered brick or honeycomb pattern horizontally across a wall stretches the perceived width of a narrow entryway or hallway, making the entire home feel grander and more welcoming upon entry.
Bevelled or Faux-Framed Decals
For those who want their wall decor to look like a deliberate, high-end design choice rather than a simple spatial hack, bevelled or faux-framed decals are an excellent choice. These stickers feature angled, bevelled edges that catch and refract light at different angles, creating a beautiful shimmering effect along the borders. This mimics the heavy, expensive look of traditional framed glass mirrors.
Using faux-framed or bordered mirror stickers allows you to establish a clear focal point in a room. Placing a large, elegantly bordered mirror sticker on the wall behind a dining table or in a dark entryway anchors the space visually. It draws attention to the reflective surface, making the room feel styled, curated, and intentionally spacious rather than merely functional.
Strategic Placement to Maximize the Space Illusion
Simply sticking reflective panels on any random wall will not automatically make your room feel larger. To truly unlock the spatial benefits of mirror stickers, you must apply strategic interior design placement rules.
First, always aim to place your mirror stickers opposite or adjacent to natural light sources, such as large windows or balcony sliding doors. By positioning the reflective surface where it can directly capture incoming daylight, you allow the mirror to act as an additional window, bouncing natural light deep into the darker corners of your home. This instantly brightens the entire room, making it feel open, fresh, and significantly larger than its physical footprint.
Second, consider what the mirror sticker will be reflecting. Position your stickers behind low-profile furniture, such as low-backed sofas, sideboards, or console tables. This creates an illusion of depth that extends far beyond the furniture itself, giving the impression that the room continues onward. Ensure the reflected field of view captures clean, attractive elements of your home, such as a well-styled bookshelf, indoor plants, or an open doorway.
Conversely, you must avoid placements that can ruin the spatial illusion or create visual discomfort. Never place mirror stickers directly opposite cluttered areas, open kitchen counters, or laundry drying racks, as doubling the view of clutter will make your home feel twice as messy and cramped. Additionally, avoid placing mirrors where they will catch direct, harsh glare from overhead light fixtures or face completely blank, dark walls, which will only emphasize the darkness and make the space feel cold and uninviting.
How to Vet Brands and Sellers in Singapore
Because the market is flooded with low-grade, highly distorted reflective films, vetting sellers on local online marketplaces and e-commerce platforms requires a critical eye.
When browsing online marketplaces, do not rely on polished, computer-generated stock photos that show perfectly flat, glass-like reflections. Instead, navigate straight to the customer review section and scrutinize user-uploaded photos. Look closely at the reflections captured in real-world home environments. If the straight lines of doors, windows, or ceilings appear wavy, jagged, or distorted in the customer photos, it is a clear sign of thin, low-quality material that will create a funhouse effect on your walls. Also, look out for reviews mentioning peeling protective films or scratched surfaces upon delivery.
Another critical factor to consider is the shipping origin of the product. Singapore’s tropical climate means that packages shipped from overseas can spend weeks in transit inside sweltering cargo containers or delivery trucks. Prolonged exposure to extreme heat and humidity can prematurely degrade the adhesive backing or cause the reflective metallized coating to lift and delaminate from the acrylic base. Whenever possible, choose reputable local sellers or brands that maintain local inventory in climate-controlled warehouses, reducing transit times and the risk of heat damage.
Finally, always verify the seller’s return and refund policies regarding visual defects. Many standard e-commerce return policies exclude minor surface distortions, slight warping, or adhesive failure from their “change of mind” return windows. Ensure the seller explicitly guarantees that the product will arrive flat, scratch-free, and with fully functional adhesive, giving you peace of mind and recourse if the product fails to meet your expectations upon unboxing.
Step-by-Step Installation and Safe Wall Removal
Achieving a flawless, bubble-free finish and ensuring you can eventually remove the stickers without damaging your walls requires a careful, methodical approach.
Step 1: Surface Preparation
Before applying any adhesive, you must prepare the wall surface thoroughly. Dust, grease, and ambient moisture will rapidly degrade adhesive strength, leading to peeling edges. Clean the target wall area using a lint-free microfiber cloth dampened with a mild detergent and water solution. Avoid harsh chemical cleaners that can leave a soapy residue. Once clean, allow the wall to dry completely for at least 24 hours. Before committing to the full installation, always test a small, duplicate piece of adhesive on an inconspicuous area of the wall (such as behind a door or near the skirting board) to check for paint damage or adhesion issues.
Step 2: Precise Alignment and Application
Map out your desired layout on the wall using a pencil, a spirit level, and painter’s tape to ensure perfectly straight lines. Peel a small portion of the protective backing from the top edge of the mirror sticker. Align the edge carefully with your pencil guidelines. Using a soft squeegee, a clean felt block, or a folded microfiber cloth, slowly press the sticker onto the wall, working your way from the center outward to the edges. This outward sweeping motion effectively pushes out any trapped air bubbles, ensuring a completely flat bond. Once the panel is securely affixed to the wall, gently peel away the protective film on the front reflective surface to reveal the clear finish.
Step 3: Safe Removal and Cleanup
When it is time to move out or change your decor, do not rip the mirror stickers off the wall, as this will almost certainly tear the paint or plaster. Instead, use a handheld hairdryer set to a low-heat setting. Direct the warm air along the edges and surface of the mirror sticker for one to two minutes to soften the underlying adhesive. Once the adhesive is warm and pliable, gently insert a thin plastic putty knife or a piece of dental floss behind the corner of the sticker. Slowly peel the sticker back at a shallow 45-degree angle, applying continuous heat as you go. If any sticky residue remains on the wall, apply a small amount of rubbing alcohol or a mild, wall-safe adhesive remover to a cloth and gently wipe it away, testing a hidden spot first to ensure the solvent does not strip your wall paint.
Frequently Asked Questions (FAQ)
Are mirror stickers safe to use in high-humidity areas like bathrooms?
While high-quality acrylic mirror stickers are inherently water-resistant and will not rust like traditional glass mirrors, the high humidity and steam in bathrooms present a major challenge for the adhesive backing. Over time, moisture can seep behind the sticker, causing the adhesive to break down, mold to grow, or the panel to peel away from the wall. To ensure longevity, restrict the use of mirror stickers to well-ventilated powder rooms or areas away from direct steam, rather than inside enclosed shower zones.
Can I cut mirror stickers to fit around switches or outlets?
Yes, you can customize the shape of your mirror stickers, but the method depends entirely on the material. Thin, flexible PET mirror stickers can be easily cut using standard heavy-duty household scissors or a sharp utility knife. However, rigid acrylic mirror panels are highly prone to cracking or shattering if cut with scissors. To cut acrylic safely, use a utility knife to score a deep line across the panel several times, then place the sheet over a sharp edge and snap it cleanly, or use a fine-toothed saw for complex cuts.
How do I remove mirror stickers without peeling off the wall paint?
To prevent paint damage, the key is to use heat to break down the adhesive bond before attempting to pull the sticker away. Warm the sticker thoroughly with a hairdryer on low heat to soften the glue, then peel it away slowly at a 45-degree angle. For stubborn leftover residue, apply a small amount of rubbing alcohol or a specialized, wall-safe adhesive remover to a microfiber cloth and gently rub the spot clean, always testing the solvent on an inconspicuous area of the wall first.
Community discussion
Share your experience or ask a question. Comments are reviewed before publication.