
To choose the right ceiling light cover clip, you must match the replacement hardware to the mechanical design of your existing fixture—typically spring-loaded, twist-lock, or screw-mount—while verifying physical dimensions, weight limits, and environmental conditions. Selecting the incorrect clip type or material can lead to loose covers, damaged glass, or sudden fixture failure. In Singapore’s humid tropical climate, choosing the wrong material can also result in rapid corrosion and structural weakening.
Before purchasing any replacement parts, always consult the light fixture’s original product label and the manufacturer’s care and installation instructions. If the instructions are unavailable or if you are dealing with an unidentified proprietary fixture, stop and consult the manufacturer or a qualified professional to ensure compatibility and safety.
Common Types of Ceiling Light Cover Clips and How They Work
Spring-Loaded Tension Clips
These clips utilize the natural elasticity of metals, such as spring steel, to exert constant outward or inward pressure. When you pull back the clip to insert an acrylic or thin glass diffuser, the spring tension clamps down on the lip of the cover once released. This style is highly popular in modern, minimalist flush-mount ceiling lights because they allow for quick, tool-free removal during bulb changes or cleaning. Because they rely entirely on mechanical tension, they are best suited for lightweight covers that do not put excessive strain on the metal over time.
Products mentioned in this guide
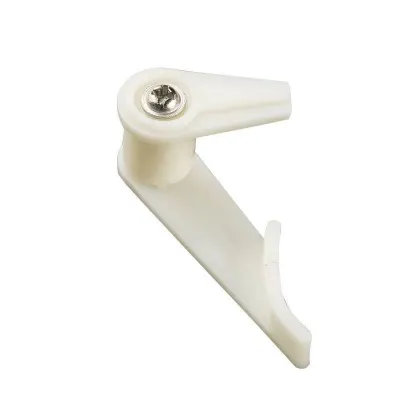
![[SG 🚚] Ceiling Light Clip Clamps With Screws Lampshade Fixed Clamp Plastic Buckle For LED Fixture Ceiling Lamp LED Lighg Accessories](https://img.lazcdn.com/g/p/3f45fb12b292e5c24478f9227dda20bd.jpg_400x400q80.jpg_.webp)
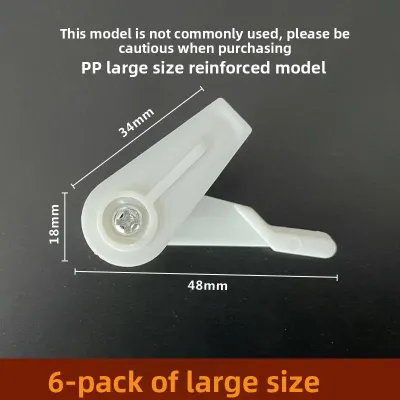
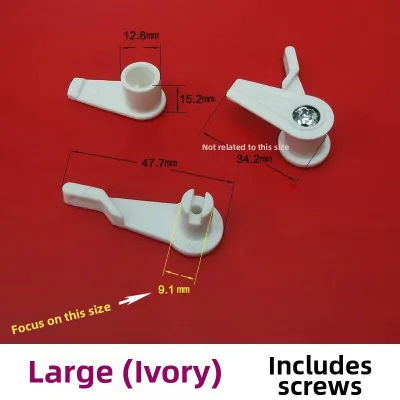
Prices are valid at publication and may change. Please refer to the product page for the latest price.
Twist-Lock or Bayonet Clips
Operating on a rotational locking principle, twist-lock clips require you to align tabs on the cover with corresponding slots on the fixture base, then rotate the cover a fraction of a turn to lock it into place. This mechanism distributes weight evenly along a molded track, making it exceptionally reliable for heavier glass globes or bowl-shaped diffusers. Gravity works with the locking channel rather than against it, and the physical barrier of the track prevents the cover from slipping out due to minor vibrations.
Screw-Mount or Threaded Clips
These clips feature physical threads or integrated thumb screws that clamp directly onto the edge of the light cover. By tightening the screws manually, you create a rigid, unyielding hold. This design is the standard for high-security, heavy-duty, or industrial-style fixtures where a fall would be catastrophic. Because the clamping force is adjustable, you must exercise care not to overtighten them against glass covers, which can crack under localized thermal expansion.
Magnetic or Adhesive Mounts
Emerging in ultra-slim LED profiles and modern architectural lighting, magnetic or adhesive clips offer a completely seamless aesthetic. These systems use high-strength neodymium magnets or industrial-grade double-sided adhesives to hold decorative trims or ultra-lightweight plastic diffusers in place. It is critical to understand that these are strictly non-structural accessories. They should never be used to support primary glass covers or heavy light fittings, as heat from the fixture can rapidly degrade adhesives, and magnets can lose their holding power if misaligned.
Key Specifications Decoded: What Actually Matters for Fit and Safety
Dimensions and Canopy Clearance
When sourcing a replacement ceiling light cover clip, physical dimensions are paramount. You must measure the clip’s total length, width, and projection depth—the distance the clip extends from the canopy base to the holding point. A clip with excessive projection depth will leave a gap, causing the cover to rattle or sit unevenly, while one with insufficient depth will prevent the cover from seating flush, making it impossible to secure safely. Always measure the thickness of your diffuser’s lip to ensure the clip’s throat can accommodate it.

Material and Heat Resistance
Ceiling light fixtures generate significant localized heat, especially older models using incandescent bulbs or compact CFLs, and even compact LED drivers. Metal clips, such as stainless steel or brass, offer superior heat resistance and structural longevity. If you select plastic clips, they must be rated for high-temperature environments, such as polycarbonate or flame-retardant ABS. Standard plastics will rapidly degrade, become brittle, and crack under the constant thermal cycling of an enclosed light fixture, leading to sudden cover failure.
Load Capacity and Tension Rating
Every light cover clip is engineered to support a specific weight range. You can typically find these load limits on the replacement clip’s packaging or within the fixture’s technical documentation. Exceeding the recommended load capacity forces the spring or metal bracket to operate beyond its elastic limit. Over time, this causes material fatigue, causing the clip to sag or lose its grip, which eventually allows the heavy glass or acrylic cover to fall.
Specs That Matter Less
While structural specifications are critical for safety, cosmetic features like the clip’s color, finish, or decorative plating are largely irrelevant to its mechanical function. Because these clips are almost entirely hidden inside or behind the canopy once the cover is installed, paying a premium for a specific brass or chrome finish on a utility clip is rarely necessary. Focus your budget on material grade and spring tension rather than aesthetic matching.
Matching the Clip to Your Fixture: A Step-by-Step Checklist
Identify the Fixture Category
Begin by assessing the type of fixture you have. Standard flush-mount lights on concrete ceilings can use spring-loaded or twist-lock clips safely. However, if you are dealing with a ceiling fan light kit or a semi-flush pendant, the rules change. Ceiling fans generate constant, low-frequency vibrations that can cause spring-loaded clips to shift or lose tension over time. For these dynamic fixtures, you must use positive-locking mechanisms, such as screw-mount or twist-lock clips, to prevent the cover from vibrating loose.
Verify Manufacturer Compatibility
Before purchasing a generic replacement, inspect the light fixture’s housing for a model number or manufacturer label. Many proprietary lighting brands design custom canopy shapes that require Original Equipment Manufacturer (OEM) clips. While “universal” replacement clips are widely available in Singapore hardware stores, they may not align perfectly with the mounting holes or angles of a proprietary canopy, creating hidden structural weak points. Always prioritize OEM parts or verify that the universal clip’s mounting pattern matches your fixture exactly.
Assess the Installation Environment
The physical location of your light fixture dictates the material requirements of the clip. Singapore’s high relative humidity can cause rapid oxidation and rusting on cheap, untreated steel or zinc-plated clips. For fixtures installed in high-moisture zones—such as bathrooms, kitchens, service yards, or outdoor balconies—you must select corrosion-resistant hardware. Look for marine-grade stainless steel (316 or 304), solid brass, or high-temperature, UV-stabilized engineered plastics to ensure the clips do not rust and fail prematurely.
Measure the Existing Attachment Points
To ensure a precise fit, measure the physical distance between the mounting holes on the canopy edge and the lip of the diffuser cover. Use a digital caliper or a precise ruler to record these distances. If the replacement clip is even a few millimeters off, it can apply uneven pressure to the cover. This uneven stress can cause glass covers to shatter during installation or cause plastic covers to warp and slip out of their tracks.
Installation Safety and When to Call an Electrician in Singapore
Power Isolation Protocol
Working on ceiling fixtures requires strict adherence to electrical safety protocols. Simply turning off the wall switch is highly dangerous, as some older or improperly wired properties may still have live neutral wires or bypassed switches. Before you touch the canopy or attempt to replace any clips, switch off the main circuit breaker for the lighting loop at your home’s distribution board (DB box). Always verify that the power is fully isolated using a reliable non-contact voltage tester directly at the fixture’s housing.
Structural Integrity Checks
During installation, never attempt to force a mismatched clip by drilling new holes into the metal canopy or modifying the fixture’s structural frame. Altering the canopy can damage internal wiring insulation, bypass the fixture’s grounding mechanism, or compromise the structural integrity of the entire mount. If a replacement clip does not fit naturally into the existing mounting points, it is the wrong clip for your fixture.
Professional Boundaries
While replacing a simple external clip is a straightforward DIY task, certain scenarios require professional intervention. If you discover frayed, brittle, or discolored wiring inside the canopy, or if the fixture lacks a proper green-and-yellow earth ground wire, stop immediately. Under Singapore’s electricity regulations, any modification to fixed electrical wiring must be performed by a licensed electrical worker (LEW). Additionally, if your light cover is exceptionally heavy, or if the ceiling junction box shows signs of cracking or sagging, contact a professional electrician to reinforce the structural supports and ensure a safe installation.
Community discussion
Share your experience or ask a question. Comments are reviewed before publication.