
Selecting the right dimmer for LED strips housed in an aluminium profile is essential for achieving smooth, flicker-free illumination. To make the correct choice, you must look beyond the metal housing and focus on the electrical compatibility between your LED strip, its power supply (or driver), and the dimming controller. While the profile plays a critical role in heat dissipation and aesthetics, it does not dictate the electrical dimming protocol itself.
Instead, successful dimming relies on matching the voltage of your LED strip (typically 12V or 24V) with a compatible driver and a corresponding control interface. By understanding how these components interact, you can design a lighting system that operates silently, dims smoothly to low levels, and fits seamlessly into your space without unsightly wires or bulky components.
Understand How Aluminium Profiles Affect Dimmer Selection
An led aluminium profile serves primarily as a physical housing and a highly efficient thermal heat sink. LED strips generate heat during operation, and without proper thermal dissipation, their lifespan and brightness will degrade rapidly. The aluminium extrusion draws this heat away from the delicate light-emitting diodes, transferring it safely into the surrounding air. However, the metal structure itself is electrically inert and has no direct influence on the electrical dimming signals or protocols running through your wiring.
Products mentioned in this guide
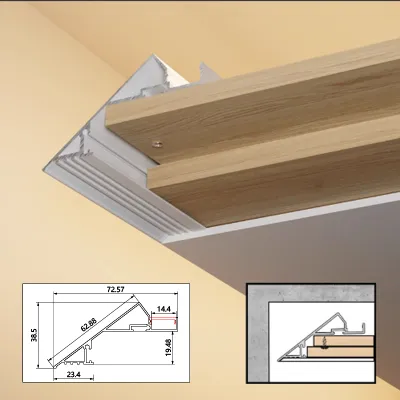
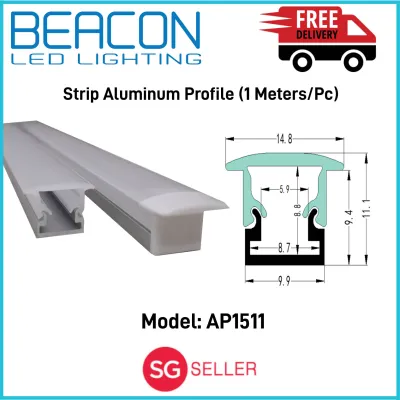
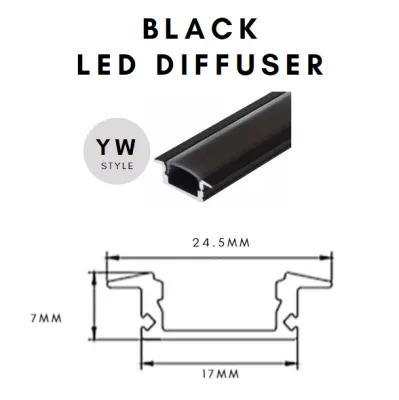
![[Local Seller] LED Strip Light Aluminium Profile Diffuser Corner With Milky Diffuser Light Housing](https://img.lazcdn.com/g/p/c4dcac9dc69ca1857fcdfc77852219a6.jpg_400x400q80.jpg_.webp)
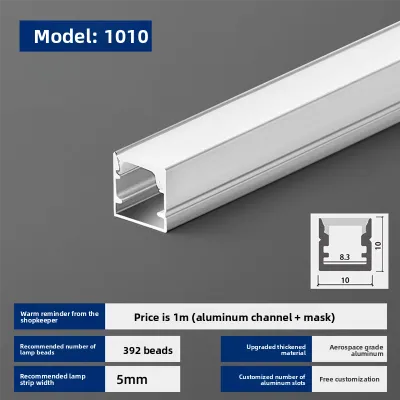
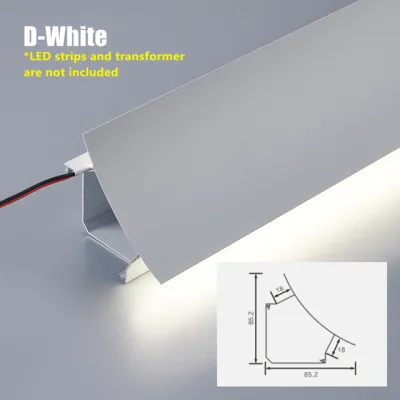
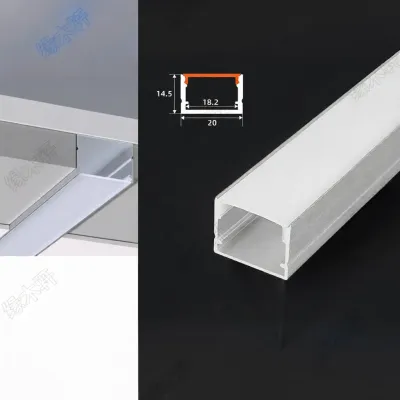
Prices are valid at publication and may change. Please refer to the product page for the latest price.
The primary ways the profile impacts your dimmer selection are physical and spatial rather than electrical. Because these profiles are often sleek and slim, they present strict physical space constraints if you intend to hide receivers, controllers, or sensors directly inside the channel. Additionally, any electronic component placed inside or immediately adjacent to the metal extrusion will be subjected to the heat dissipated by the LED strip, meaning you must carefully consider thermal management and component placement to avoid premature device failure.
Match the Dimmer to Your LED Power Supply Type
The most critical step in preventing system failure, buzzing, or flickering is ensuring that your dimmer matches the specific type of LED power supply (commonly called an LED driver) powering your strip lights. LED drivers translate the high-voltage alternating current (AC) from your home’s mains supply into the low-voltage direct current (DC) required by the LED strip. How your driver handles this conversion determines which dimming technology you must use.

Mains Dimmable Drivers (TRIAC / Phase-Cut)
Mains dimming, often referred to as TRIAC or phase-cut dimming, alters the high-voltage AC power (230V in Singapore) on the input side of the LED driver before it reaches the light source. This method relies on traditional wall-mounted dimmer switches, which chop out portions of the incoming AC voltage wave to reduce the total power delivered. For this setup to function without severe flickering or flashing, you must pair the wall dimmer with a driver explicitly labelled as “mains dimmable” or “TRIAC dimmable.”
Within phase-cut dimming, there are leading-edge (TRIAC) and trailing-edge (electronic low-voltage, or ELV) technologies. Trailing-edge dimmers are generally preferred for LED systems because they turn off the voltage wave gradually, reducing electrical stress and minimizing the audible buzzing noises often associated with leading-edge dimmers. Because these dimming components are integrated directly into the high-voltage wall switch, they are housed safely in standard wall boxes rather than inside the aluminium profile itself.
Low Voltage Signal Drivers (0-10V, 1-10V, DALI)
For commercial spaces or high-end residential installations, low-voltage signal dimming protocols like 0-10V, 1-10V, or DALI (Digital Addressable Lighting Interface) offer robust and highly scalable control. Instead of altering the mains power line, these systems use a dedicated pair of low-voltage control wires to transmit a signal directly to a compatible LED driver. This signal instructs the driver’s internal circuitry on exactly how much output current to deliver to the LED strip.
Implementing a signal-based dimming system requires running these extra control cables alongside your standard electrical power lines. This additional wiring can influence how you route your led aluminium profile through false ceilings, drywalls, or joinery, as you must allocate physical space for both the power and signal conduits. While highly reliable and virtually immune to interference, these systems require specialized drivers that are typically larger and more expensive than standard residential options.
Secondary Side PWM (Pulse Width Modulation) Dimmers
If you are using a standard, non-dimmable LED driver, the most effective way to achieve perfectly smooth, flicker-free dimming is by installing a Pulse Width Modulation (PWM) dimmer on the secondary (low-voltage) side of the power supply. A PWM dimmer is wired directly between the constant-voltage output of the driver (12V or 24V) and the LED strip itself. Rather than lowering the voltage, a PWM controller rapidly switches the power on and off thousands of times per second—at a frequency imperceptible to the human eye—to control the perceived brightness.
Because PWM dimmers operate entirely on the safe, low-voltage side of the circuit, they are incredibly compact and highly efficient. These miniature modules are excellent candidates for hiding near the start of your aluminium profile, inside adjacent junction boxes, or within custom joinery. This setup allows you to use highly affordable, standard non-dimmable power supplies while still achieving professional-grade, smooth dimming down to less than one percent brightness.
Calculate Wattage to Prevent Flickering and Overloading
To ensure your dimming system operates reliably without overheating, buzzing, or causing the lights to flicker, you must perform a few straightforward mathematical calculations before purchasing your hardware. Both your LED driver and your low-voltage dimmer have maximum load capacities that must never be exceeded.
First, determine the total wattage of your LED installation. To do this, find the power consumption rating of your chosen LED strip, which is typically listed in Watts per metre (W/m). Multiply this value by the total length of the strip that will be installed inside your aluminium profile. For example, if you are installing 4 metres of an LED strip rated at 14.4 W/m, your total load is 57.6 Watts (14.4 × 4 = 57.6).
Once you have established the total wattage, apply a mandatory 20% safety buffer to both the LED driver and the dimmer’s maximum rated capacity. This buffer prevents the components from running at 100% capacity, which generates excessive heat and dramatically shortens their operational lifespan. To calculate this, multiply your total wattage by 1.2. Using the previous example, a 57.6W load requires a driver and a dimmer rated for at least 69.1 Watts (57.6 × 1.2 = 69.12W). In practice, you would select standard-sized components rated for 75W or 100W.
Additionally, you must be aware of the “minimum load” requirements common to many mains-dimmable wall switches. If the total wattage of your LED strip falls below the dimmer’s minimum operating threshold (often 10W to 15W for older or lower-cost dimmers), the circuit will fail to regulate properly, resulting in rapid flickering or a complete failure to turn on. To resolve this, ensure you select a modern LED-compatible dimmer with a very low minimum load requirement, or install a specialized dummy load (resistor) to bring the circuit’s total power draw into the stable operating range.
Choose the Right Control Method for Your Installation Space
The physical location and accessibility of your led aluminium profile should dictate the control interface you choose. Whether your lighting is integrated into a living room cove, hidden under kitchen cabinets, or recessed into stair treads, the control method must match your daily habits and aesthetic preferences.
Wall Switches and Rotary Dials
Replacing standard wall switches with dedicated rotary dials or push-button phase-cut dimmers offers a highly intuitive and permanent control solution. This traditional approach is ideal for main room lighting, such as ceiling-mounted profiles or wall-wash installations. However, before purchasing modern smart wall switches or electronic dimmers, you must verify the existing wiring inside your wall box. Many advanced dimming switches require a dedicated neutral wire to power their internal electronics. In many older Singapore homes, light switches are wired without a neutral line, which would require you to either choose a specialized “no-neutral” dimmer or have a licensed electrician pull new wiring through your conduits.
Remote Controls and In-Profile Sensors
Wireless remote controls and integrated sensors provide excellent flexibility, particularly for localized task lighting like under-cabinet installations or wardrobe shelves. When choosing a wireless system, it is crucial to understand the difference between Infrared (IR) and Radio Frequency (RF) technologies. Aluminium is a dense metal that completely blocks IR light waves. If you hide an IR receiver inside the aluminium profile, the remote control will not work unless you route the physical IR sensor probe outside the channel via an extension cable. To avoid this limitation, you should use RF, Bluetooth, or Wi-Fi receivers, which rely on radio waves that can pass through the plastic diffuser cover of the profile with minimal signal loss.
Smart Home Modules (Wi-Fi, Zigbee, Bluetooth)
For seamless integration with smart home ecosystems, voice assistants, or mobile applications, you can install inline smart dimmer modules. These compact receivers—often operating on Zigbee, Wi-Fi, or Bluetooth protocols—are wired directly between the LED driver and the strip. When selecting these modules, you must compare their physical dimensions against the internal width and depth of your chosen aluminium profile. If the module is even a millimetre too thick, the plastic diffuser cover will not snap securely onto the aluminium channel, forcing you to relocate the smart module to an external junction box or a nearby cabinet void.
Manage Space and Heat When Hiding Dimmers in Profiles
Integrating electrical components directly into an led aluminium profile requires careful planning to balance sleek aesthetics with long-term safety. While hiding a miniature dimmer or smart receiver inside the metal channel creates a clean, wireless appearance, it introduces physical and thermal challenges that must be managed.
When selecting inline PWM dimmers or smart receivers, always measure the precise internal dimensions of your profile’s channel. Standard channels often have an internal width of only 10mm to 12mm, which is too narrow for standard smart modules. You must seek out specialized “mini” or “micro” dimmer variants specifically designed to fit within these narrow tracks.
Thermal management is equally critical. Although the aluminium profile acts as an excellent heat sink for the LED strip, the electronic components inside a dimmer module also generate heat during operation. Placing a dimmer in a tightly enclosed space alongside a high-power LED strip can cause heat to build up rapidly. To prevent component failure, never wrap the dimmer in heavy insulation, and avoid potting or sealing the dimmer inside completely airtight end-caps. Ensure there is adequate air volume around the controller to allow heat to dissipate naturally through the aluminium housing.
Finally, you must adhere strictly to safety and compliance boundaries. In Singapore, any electrical work involving the 230V mains supply—such as installing TRIAC wall dimmers, hardwiring LED drivers to the mains, or modifying home distribution boards—must be performed by a licensed electrical worker (LEW) in accordance with local electrical regulations. Only the low-voltage (12V or 24V) DC side of the system is suitable for DIY connection, and even then, you must ensure the main power supply is completely isolated at the breaker before touching any wiring.
Troubleshoot Common Issues: Flickering, Buzzing, and Ghosting
Even with careful planning, LED dimming systems can occasionally exhibit performance issues. Understanding the root causes of these common problems allows you to diagnose and resolve them quickly.
Flickering is almost always caused by an electrical mismatch between the dimmer and the LED driver, or by the system load falling below the dimmer’s minimum threshold. If your lights flicker at low brightness levels, check if your wall dimmer features a physical trim dial or a digital setting that allows you to adjust the lower limit. Raising this minimum dimming level slightly will often stabilize the current and eliminate the flicker. If the flickering occurs across all brightness levels, double-check your compatibility charts to ensure your driver and dimmer are designed to work together.
Audible buzzing or humming is typically the result of electromagnetic resonance. This occurs when a leading-edge TRIAC dimmer chops the AC voltage wave too abruptly, causing the internal coils or capacitors of the LED driver to vibrate. The most effective solution is to replace the leading-edge dimmer with a high-quality trailing-edge (ELV) dimmer, which features a softer electrical transition. Alternatively, moving to a secondary-side PWM dimming setup completely bypasses high-voltage phase-cutting, ensuring silent operation.
Ghosting, where the LED strip continues to glow faintly even when the switch is turned off, is common in systems utilizing smart switches or dimmers with built-in locator lights. These switches allow a tiny “leakage” current to flow through the circuit to keep their internal smart chips or LED indicators powered. Because LED strips are highly efficient, even this micro-current can cause them to glow. To fix this, you can install a specialized bypass capacitor across the input terminals of the LED strip to divert the leakage current, or replace the switch with one that utilizes a dedicated neutral wire for its own power needs.
Frequently Asked Questions (FAQ)
Can I hide a smart dimmer receiver inside the aluminium profile?
Yes, you can hide low-voltage PWM smart receivers inside the aluminium profile, provided the physical dimensions of the receiver are small enough to fit comfortably beneath the plastic diffuser. However, you must consider the signal-blocking properties of the metal housing. Because aluminium is a conductor, it acts as a partial electromagnetic shield that can degrade wireless signals. While RF, Wi-Fi, and Bluetooth signals can usually penetrate the plastic diffuser, placing the receiver deep inside a thick metal channel can cause signal dropouts. To ensure reliable connectivity, place the smart receiver as close as possible to a plastic end-cap or choose a module with an external antenna. Note that Infrared (IR) receivers will not work at all if completely enclosed in metal.
Do I need a special waterproof dimmer for outdoor aluminium profiles?
You do not necessarily need a waterproof dimmer, provided the dimmer and its associated power supply are housed safely inside a dry, indoor space or a dedicated, IP-rated weatherproof junction box. While the led aluminium profile and its sealed diffuser protect the LED strip itself from rain and dust, the electronic dimming components are highly sensitive to moisture. If you must install the dimmer outdoors, ensure it is rated IP65 or higher, or seal all low-voltage connection points between the strip and the external driver using waterproof cable glands and outdoor-grade silicone sealant to prevent moisture from wicking into the profile.
Community discussion
Share your experience or ask a question. Comments are reviewed before publication.