
Selecting the right LED light strip connector is the defining step between a flawless, professional lighting installation and a frustrating DIY project plagued by flickering lights. While flexible LED tape allows you to cast vibrant hues or warm ambient glows across your living spaces, the physical connections between strip segments, corners, and power supplies require precise mechanical and electrical alignment. Choosing the correct connector involves matching the physical dimensions of your light strip, identifying the exact pin configuration, and deciding whether a solderless clamp or a permanent soldered joint suits your installation environment.
To ensure a reliable connection, you must treat your LED strip and its accessories as a unified system. Mismatched components not only lead to poor performance but can also create safety hazards such as localized overheating or short circuits. By taking the time to diagnose your hardware specifications and plan your layout geometry beforehand, you can execute a clean, durable installation that operates safely for years to come.
Diagnose Your LED Strip Specifications Before Buying
Before purchasing any connector accessories, you must determine the exact physical width of your LED strip’s flexible printed circuit board (FPCB). Standard consumer LED strips typically come in widths of 8mm, 10mm, or 12mm. A mismatch of even a single millimeter will prevent a solderless connector from functioning; a connector that is too narrow will physically crush the edges of the strip, while one that is too wide will allow the strip to shift, preventing the internal metal teeth from aligning with the copper contact pads. Always use a precise ruler or a digital caliper to measure the tape width across the copper pads rather than relying on visual estimation.
Products mentioned in this guide
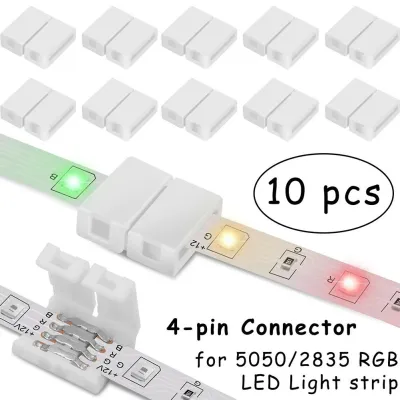
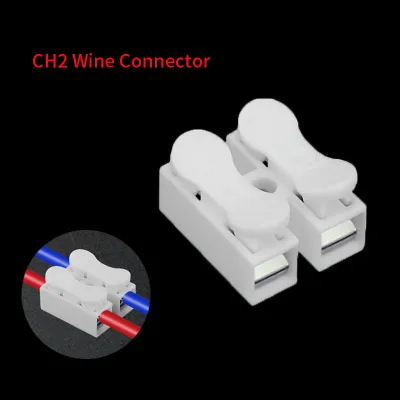
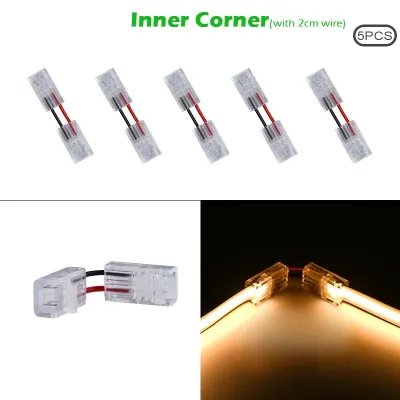
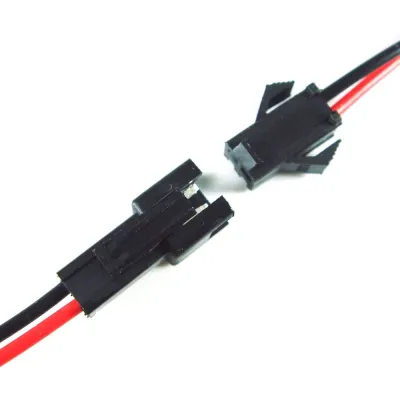
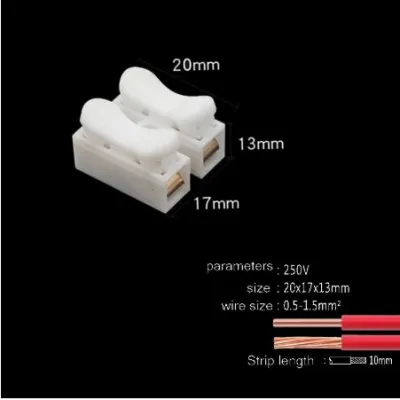
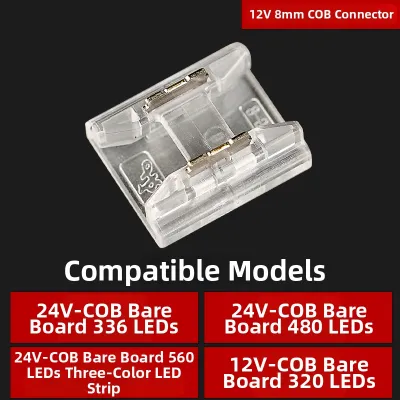
Prices are valid at publication and may change. Please refer to the product page for the latest price.
Next, examine the copper contact pads at the designated cut lines to identify the exact pin count of your strip. A standard single-color strip features two copper pads (positive and negative), requiring a 2-pin connector. Tunable white (CCT) strips or basic addressable strips generally utilize three pads, requiring a 3-pin connector. Multi-color RGB strips use four pads, while RGBW and advanced RGBCCT strips require 5-pin and 6-pin connectors respectively. Placing a connector with the wrong pin count over your strip will result in misaligned contacts, which can bridge adjacent circuits, cause incorrect color rendering, or trigger a short circuit that damages your controller.
It is equally critical to differentiate between Surface Mounted Device (SMD) and Chip-on-Board (COB) LED strips, as their physical structures demand different connector designs. SMD strips feature distinct, raised LED chips soldered at intervals along the tape, leaving flat spaces of bare FPCB where standard clip-on connectors can clamp down easily. In contrast, COB strips feature a continuous, dense line of light-emitting diodes covered by a uniform yellow phosphor coating. Because this phosphor layer is delicate and adds physical height, standard clamping mechanisms can crush the diode layer or fail to pierce through to the underlying copper pads. For COB installations, you must select specialized low-profile COB connectors that feature piercing teeth designed to bypass the phosphor layer, or opt for a soldered connection.
Finally, verify the operating voltage and current limits of your lighting system. LED strips typically operate on low-voltage direct current (DC), commonly 12V or 24V. While a physical connector does not alter the voltage, its internal metal conductors have a maximum current rating, usually measured in amperes (such as 3A or 5A). Running an excessively long run of LED strips through a single connector can draw more current than the connector is rated to handle, causing the joint to bottleneck, drop voltage, and generate excessive heat. Always check the manufacturer’s technical specifications for both the strip and the connector to ensure the total wattage of your installation does not exceed the safe current-carrying capacity of the connection joint.
Solderless vs. Soldered: Diagnosing the Right Connection Method
Solderless quick connectors are the most popular choice for residential DIY projects due to their tool-free installation and accessibility. These connectors utilize plastic clip-on housings containing spring-loaded metal teeth or compression plates that press firmly against the strip’s copper pads. They are ideal for beginners, temporary decorative setups, or quick adjustments where speed is prioritized. However, if you are using waterproof LED strips coated in silicone or epoxy, solderless connectors require you to carefully peel back or shave off the protective coating at the connection point using a utility knife. This prep work must be done with extreme care to avoid slicing the delicate copper traces underneath.

Soldered connections represent the professional standard for permanent, high-reliability architectural lighting. Soldering involves melting a lead-free alloy directly onto the copper pads of the strip to join them physically and chemically to hookup wires. This method provides the lowest possible electrical resistance, eliminates the risk of mechanical loosening over time, and occupies virtually no physical space. It is the superior choice for tight mounting profiles, high-moisture areas, and continuous COB installations where a bulky plastic clamp would cast an unsightly shadow on the diffuser lens. However, soldering requires specialized tools, including a temperature-controlled soldering iron, solder, flux, and heat-shrink tubing, along with a moderate level of manual dexterity.
To decide which method is right for your project, evaluate your technical comfort, the installation environment, and the expected lifespan of the lighting setup. If you are installing under-cabinet lighting in a dry kitchen area and prefer a fast, straightforward assembly, high-quality solderless connectors will serve you well. If you are mounting strips in a high-humidity zone, planning a permanent cove installation, or using slim aluminum channels, investing the time to solder the joints will yield a far more durable result. Always check the manufacturer’s care and installation instructions before proceeding; applying excessive heat with a soldering iron can delaminate the copper pads from the flexible backing, permanently damaging the strip.
Match the Connector Shape to Your Physical Layout
To translate your lighting design into a physical reality, you must match your connector shapes to the geometry of your mounting surface. Straight and extension connectors are the primary tools used to lengthen your light runs or bridge physical gaps. Straight connectors join two strip segments end-to-end with no gap, creating a seamless line of light. Extension connectors feature a length of flexible wire between two terminal clamps, which is invaluable for jumping over cabinet frames, navigating architectural pillars, or extending the connection from the end of a strip to a remote power supply or controller.
When navigating 90-degree turns, such as the inner corners of a tray ceiling or the edges of a kitchen counter, you must use dedicated L-shape or corner connectors. Although flexible LED strips are highly pliable along their length, attempting to fold, twist, or bend them flat around a sharp 90-degree corner puts severe mechanical stress on the FPCB. This bending can easily fracture the microscopic copper traces running inside the tape, leading to partial circuit failure where sections of the strip go dark or lose color control. L-shaped connectors allow you to maintain a clean, flat profile around corners without bending the strip itself.
For more complex layouts that branch out in multiple directions from a single power source, T-shape and splitter connectors are required. These are commonly used in symmetrical shelving displays, walk-in wardrobes, or multi-tiered ceiling designs. However, branching your wiring introduces complex electrical loads. You must calculate the total wattage of all connected branches combined and verify that your power supply and controller can handle the load. As a safety rule, ensure the cumulative wattage of your connected strips does not exceed 80% of your power supply’s maximum rated capacity to prevent overheating and premature power supply failure.
Finally, strip-to-wire connectors are essential for making clean, low-profile transitions from the flexible LED tape to standard structural wiring. These connectors clamp onto the copper pads of the strip on one end and feature wire-retaining terminals on the other, allowing you to insert bare hookup wires directly. They eliminate the need for bulky, pre-molded connector heads, making it much easier to run clean wiring through wall cavities, conduit, or tight cabinet drill-holes back to your centralized power and dimming equipment.
Run These Compatibility and Safety Checks Before Installation
Before mounting your LED strips and sealing your connectors, you must perform a series of rigorous compatibility and safety checks to prevent system failures. First, verify that the Ingress Protection (IP) rating of your connector matches or exceeds the rating of your LED strip. In Singapore’s highly humid tropical climate, standard indoor connectors (IP20) exposed to moisture in bathrooms, kitchens, or semi-outdoor balconies will rapidly oxidize, leading to high electrical resistance, flickering, and eventual joint failure. For damp or outdoor environments, always use specialized IP65 or IP67 waterproof connectors equipped with internal silicone seals or marine-grade heat-shrink tubing to lock out ambient moisture.
Next, check the physical clearance of your connected joints within your mounting hardware. Most professional LED installations house the light strips inside aluminum channels with plastic diffuser lenses to eliminate hot spots and protect the tape from dust. However, standard plastic solderless connectors are significantly wider and taller than the LED strip itself. Before purchasing, measure the internal width and depth of your aluminum channels to ensure the connector housing can sit completely flat inside the profile and allow the diffuser cover to snap shut securely. If space is too tight, you may need to use ultra-slim solderless connectors or opt for soldered joints insulated with thin heat-shrink tubing.
Finally, verify the polarity and pin alignment across your entire system before applying electrical power. Every LED strip has clearly marked polarities—such as “+” and “-” for single-color strips, or “+12V/24V”, “R”, “G”, “B” for multi-color strips—printed directly onto the copper pads. The connector must maintain this exact alignment from one segment to the next; reversing the polarity can prevent the LEDs from illuminating, cause incorrect color rendering, or damage the sensitive diodes and controllers. Always isolate the power supply by switching off the mains electricity before making or adjusting any physical connections. For fixed-wiring installations connected directly to your home’s electrical grid, always engage a licensed electrician to ensure compliance with local electrical safety standards.
Frequently Asked Questions (FAQ)
Can I use a 4-pin connector on a 2-pin single-color LED strip?
While a 4-pin connector may physically fit over a wider 2-pin single-color strip, doing so is highly discouraged. The metal contact pins inside a 4-pin connector are spaced specifically for RGB layouts and will not align correctly with the wider copper pads of a 2-pin strip. This misalignment can easily bridge the positive and negative pads on the single-color strip, creating a direct short circuit when the system is powered on. To ensure safety and reliable operation, always use a dedicated 2-pin connector that matches your strip’s exact width and pad spacing.
Do I need special connectors for waterproof LED strips?
Yes, waterproof LED strips (typically rated IP65 or higher) feature a protective silicone sleeve or epoxy coating that prevents standard solderless connectors from making physical contact with the copper pads. To use a standard connector, you must carefully shave away the protective coating at the connection point using a utility knife, taking care not to damage the underlying copper traces. Alternatively, you can purchase specialized IP-rated waterproof connectors equipped with sharp piercing teeth that penetrate the silicone layer directly to establish a secure, sealed connection without manual peeling.
Why is my LED strip flickering at the connector joint?
Flickering at a connection joint is almost always a symptom of poor electrical contact or excessive voltage drop. First, check if the clamp on your solderless connector has loosened or if the internal metal teeth are misaligned with the copper pads on the strip. If the physical connection is secure, the issue may be a voltage drop caused by running too many strip segments in series, which increases electrical resistance. To resolve this, ensure your total run length does not exceed the manufacturer’s recommended limits, and verify that your power supply is delivering stable voltage.
Community discussion
Share your experience or ask a question. Comments are reviewed before publication.