
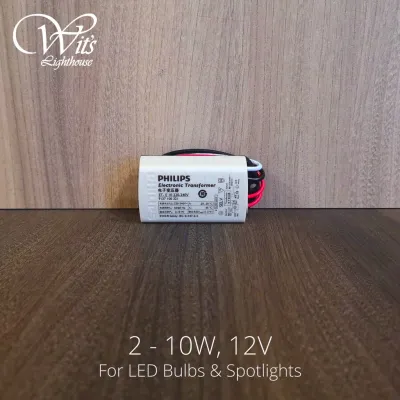
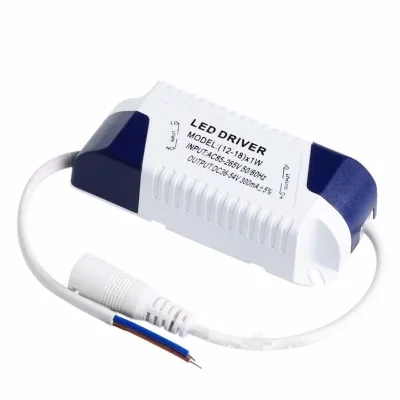
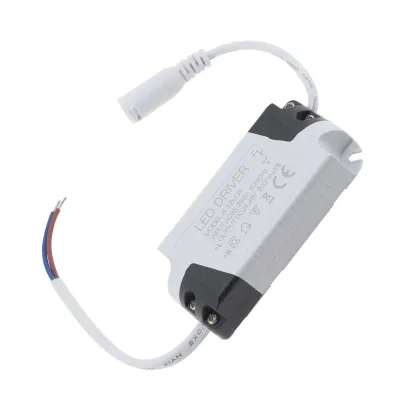
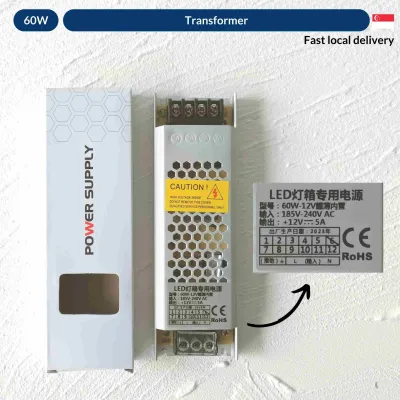
Choosing the right LED transformer for a dimmable lighting setup is the difference between a beautifully ambient room and a frustrating environment filled with flickering lights and constant buzzing. When upgrading to low-voltage LED strip lights or fixtures, your standard household electricity cannot power them directly. You need a transformer—often called an LED driver—to step down the high-voltage alternating current (AC) from your wall to the low-voltage direct current (DC) required by the LEDs.
To achieve seamless, flicker-free dimming, you must look beyond simple power conversion. The transformer must act as a perfect translator between your wall dimmer switch and the LED fixtures. This process requires precise compatibility across three core pillars: voltage matching, load calculation, and dimming protocol alignment. Ignoring any of these factors can lead to poor performance, shortened hardware lifespans, or electrical hazards.
Calculate Total Wattage and Choose the Right DC Voltage
Before purchasing any hardware, you must determine the exact electrical load your system will draw and the operating voltage it requires. LED strips and low-voltage fixtures typically operate on either 12V DC or 24V DC. Connecting a 12V LED strip to a 24V transformer will instantly destroy the LEDs, while connecting a 24V strip to a 12V transformer will result in extremely dim or non-functional lights. Always check the manufacturer’s specification label on your LED strip to identify the required input voltage before selecting your transformer.
Products mentioned in this guide
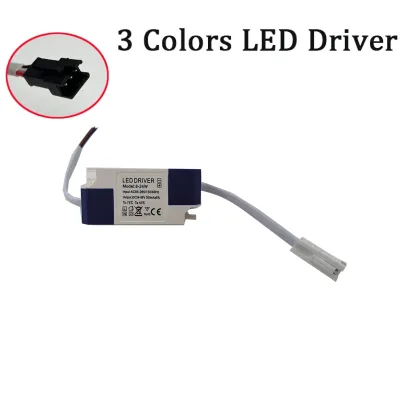
Prices are valid at publication and may change. Please refer to the product page for the latest price.
To calculate the total wattage of your setup, look for the power consumption rating of your light source, which is usually expressed in watts per meter (W/m) for LED strips, or total watts per fixture for spotlights. Multiply this value by the total length of the strip or the total number of fixtures on the circuit. For example, if you plan to install 6 meters of LED strip that draws 14.4 watts per meter, your base electrical load is 86.4 watts (6 meters multiplied by 14.4 W/m).
Once you have this base figure, you must apply the 80% derating rule, which is a critical safety margin used by lighting professionals. This rule dictates that you should never load an LED transformer beyond 80% of its maximum rated capacity. Running a transformer at 100% capacity continuously causes extreme thermal stress, leading to premature component failure, efficiency loss, and potential fire hazards. To find the minimum transformer capacity you need, divide your calculated base wattage by 0.8. Using our previous example, an 86.4-watt load divided by 0.8 requires a transformer rated for at least 108 watts. In this scenario, you would select a standard 120-watt transformer.
When deciding between a 12V and a 24V system for a new installation, consider the physical layout of your lighting. A 24V DC system is generally superior for longer runs because it suffers far less from voltage drop. Voltage drop occurs as electrical current travels along a wire, gradually losing energy due to resistance; this causes the far end of an LED strip to look noticeably dimmer than the start. Because 24V systems carry half the current of a 12V system for the same wattage, they experience less resistance and maintain consistent brightness across extended runs.
Finally, you must verify that the input side of the transformer is compatible with your local electrical grid. In Singapore, the standard utility mains supply is 230V AC at 50Hz. Ensure that any transformer you purchase is designed to accept this input voltage safely. Using a transformer rated only for 110V AC (common in North America) will result in immediate failure and severe safety risks when connected to a Singaporean outlet.
Match the Dimming Protocol to Prevent Flickering and Buzzing
Achieving smooth dimming requires matching the control signal from your dimmer switch with the internal circuitry of the LED transformer. Unlike traditional incandescent bulbs that dim simply by reducing voltage, LEDs are highly sensitive semiconductor devices that require sophisticated control. If the transformer cannot interpret the signal coming from the dimmer switch, the result is almost always rapid flickering, a limited dimming range, or an annoying audible buzz.

Several dimming protocols exist in residential and commercial spaces, each suited to different control methods. The most common household protocol is TRIAC (also known as phase-cut or mains dimming), which operates on the high-voltage AC side of the circuit. Commercial or high-end residential setups often use 0-10V dimming, Pulse Width Modulation (PWM), or Digital Addressable Lighting Interface (DALI). To ensure compatibility, you must identify what type of dimmer switch you have or plan to install, and select a transformer that explicitly lists support for that exact protocol.
For standard wall dimmers, you must also understand the distinction between leading-edge and trailing-edge phase-cut dimming. Leading-edge dimmers are older technology designed for traditional magnetic transformers and resistive loads; they often cause modern electronic LED transformers to vibrate physically, creating a loud buzzing sound. Trailing-edge dimmers are designed specifically for electronic loads and offer much smoother control for LEDs. Many modern dimmable LED transformers are compatible with trailing-edge dimmers, but you must verify this specific compatibility in the product data sheets.
Another common oversight is ignoring the minimum and maximum load limits of the dimmer switch itself. Wall dimmers have their own operational ranges, often requiring a minimum wattage (such as 10W or 20W) to operate stably. If your total LED wattage falls below this minimum threshold, the dimmer cannot regulate the current properly, leading to unstable light output and flickering at lower dimming levels. Conversely, overloading the dimmer beyond its maximum rated capacity will trigger internal thermal cutoffs or damage the switch permanently.
When dealing with smart home dimmers or dimming modules, compatibility becomes even more critical. Smart dimmers often use electronic switching mechanisms that require a neutral wire and specific minimum loads to function without leaking current. If you use an incompatible transformer, this leaked current can cause your LEDs to glow faintly even when the switch is turned completely off. Always consult both the dimmer manufacturer’s compatibility list and the transformer’s technical specifications to ensure they have been tested together.
Check Physical Fit and Environmental Safety Ratings
A technically compatible transformer is of no use if it cannot be safely housed within your home’s architecture. LED transformers come in various form factors, from slim, elongated designs meant to slide through narrow ceiling cutout holes to bulky metal junction boxes. You must measure the physical dimensions of your planned installation site—whether it is a false ceiling cavity, a custom kitchen cabinet joinery channel, or an external electrical enclosure—to ensure the unit fits with room to spare.
Airflow and heat dissipation are critical for the longevity of any electronic transformer. Even highly efficient dimmable transformers generate heat during operation, especially when dimmed for long periods. You must avoid squeezing a transformer into a tightly sealed, unventilated space. Unless the manufacturer explicitly states that the transformer is rated for contact with insulation or sealed enclosures, always maintain at least 50mm of clear air space around the unit to allow natural convection cooling.
The environmental conditions of the installation site dictate the required Ingress Protection (IP) rating of the transformer. For standard indoor dry areas like living rooms, bedrooms, or hallways, an IP20-rated transformer is sufficient, as it protects against solid objects but offers no water protection. However, if you are installing lighting in damp or wet environments, you must choose a higher rating.
For bathrooms, kitchens, or semi-outdoor spaces like balconies in Singapore’s humid climate, look for a minimum of IP65 or IP67. An IP65-rated transformer is dust-tight and protected against water jets, while an IP67-rated unit can withstand temporary immersion. Installing an under-rated transformer in a high-humidity area will eventually lead to moisture ingress, causing short circuits, tripped circuit breakers, or permanent damage to your entire lighting system.
Step-by-Step Selection and Pre-Installation Checklist
To avoid costly mistakes and ensure a safe, functional installation, follow this structured checklist before purchasing and mounting your hardware:
- Step 1: Audit your lighting components. Read the specification labels on your LED strips or fixtures. Note down the required voltage (e.g., 12V or 24V DC), the total wattage draw, and whether the LEDs themselves are dimmable.
- Step 2: Calculate the transformer capacity. Add up the total wattage of all connected lights. Multiply this total by 1.25 (or divide by 0.8) to add the mandatory 20% safety buffer. Select a transformer with a maximum output rating that meets or exceeds this calculated value.
- Step 3: Match the dimming system. Identify your dimmer switch type (e.g., TRIAC trailing-edge, 0-10V, DALI). Verify that the transformer's input dimming specifications match this protocol. Check that your total system wattage falls comfortably within the dimmer switch's minimum and maximum load limits.
- Step 4: Assess the physical environment. Measure the installation space to ensure physical clearance. Select the appropriate IP rating (IP20 for dry indoor rooms, IP65 or higher for wet or humid areas). Ensure there is adequate ventilation for heat dissipation.
- Step 5: Verify certifications. Look for recognized safety markings on the transformer, such as the Safety Mark in Singapore, which indicates the product has been tested and approved for local electrical standards.
Working with household electrical mains involves severe risks of electric shock, fire, and fatal injury. Before touching any wiring, always isolate the circuit by turning off the corresponding circuit breaker at your home’s main distribution board. Verify that the power is completely off using a reliable non-contact voltage tester. Because hardwiring a transformer directly to the 230V AC mains requires professional expertise, it is highly recommended to hire a licensed electrician (such as a Licensed Electrical Worker in Singapore) to handle all primary AC connections and ensure compliance with local wiring regulations.
Test and Verify Smooth Dimming Performance
Once your dimmable LED transformer is physically installed and wired, you must conduct a thorough performance test before sealing any ceiling panels or completing your renovation. Turn on the main power and use your dimmer switch to cycle the lights through their entire range, from 100% maximum brightness down to the lowest possible setting.
As you adjust the levels, observe the lights closely for any signs of instability. Look for rapid flickering or strobing, which often occurs at the lowest 10% of the dimming range. Listen carefully to the transformer itself; a quiet, barely audible hum is normal when standing right next to the unit, but a loud buzz that can be heard from across the room indicates an electrical mismatch or poor-quality components. Finally, turn the dimmer to the “off” position and verify that the LEDs shut down completely without any lingering glow.
If you experience minor issues at the extreme ends of the dimming range, you can often resolve them with minor adjustments. Many modern smart dimmers and high-quality wall dimmers feature a physical dial or digital setting called “low-end trim.” Adjusting this trim allows you to set the minimum power level the dimmer sends to the transformer, effectively cutting off the bottom range where flickering typically occurs. For advanced dimmers, check if there is a setting to toggle between leading-edge and trailing-edge modes to see if it resolves any audible humming.
However, you must know when to stop and reassess the system. If you encounter severe, violent flickering, if the transformer becomes hot to the touch within minutes of operation, or if there is a loud, persistent buzzing noise, turn off the power immediately at the distribution board. These symptoms indicate a fundamental incompatibility between the dimmer, the transformer, or the load. Continuing to run the system under these conditions can permanently damage your LED strips, degrade the transformer’s internal circuits, or create a serious fire hazard. Re-verify all specifications and consult a professional lighting specialist or electrician to identify the mismatched component.
Frequently Asked Questions (FAQ)
Can I use a non-dimmable LED transformer with a dimmable LED strip?
No, you cannot use a standard, non-dimmable LED transformer if you plan to control the brightness using a wall dimmer switch on the mains AC side. While the dimmable LED strip will work perfectly fine at 100% brightness when connected to a non-dimmable transformer, attempting to dim the circuit will lead to severe flickering, strobing, and potential damage to both the transformer and the LEDs. If you must use a non-dimmable transformer, the only way to dim the lights safely is by installing a secondary controller on the low-voltage DC side (between the transformer and the LED strip), such as a remote-controlled inline dimmer.
Why does my LED transformer buzz when dimmed?
Audible buzzing is usually caused by the rapid chopping of the electrical waveform by phase-cut (TRIAC) dimmers. This rapid switching creates electromagnetic interference and physical vibrations within the magnetic coils or ceramic capacitors inside the transformer. While a very faint hum is normal for electronic components, a loud, distracting buzz typically points to a protocol mismatch, such as using an old leading-edge dimmer with a modern electronic transformer. It can also indicate that the transformer is overloaded, underloaded, or constructed with low-quality internal components that lack proper noise dampening.
Do I need a smart LED transformer for smart home integration?
Not necessarily. If your smart home system relies on a smart wall dimmer switch (such as a Lutron, Aqara, or other smart switches that physically replace your wall switch), you only need a standard, high-quality dimmable transformer that is compatible with that switch’s dimming protocol (usually phase-cut or 0-10V). However, if you want to control the colors, color temperature, or individual zones of your LED strips directly via an app or voice assistant without using a smart wall switch, you will need either a smart transformer with built-in wireless protocols (like Zigbee, Wi-Fi, or Bluetooth) or a separate smart receiver installed on the low-voltage DC side.
Community discussion
Share your experience or ask a question. Comments are reviewed before publication.