
Proper bathroom lighting is essential for daily grooming routines, yet it is one of the most frequently overlooked aspects of home design. A poorly sized or incorrectly positioned vanity light can cast frustrating shadows across your face, make makeup application difficult, and leave your bathroom feeling dim or clinical. Finding the perfect balance between aesthetic appeal and practical performance requires a clear understanding of sizing ratios, lumen requirements, and safety standards.
To achieve optimal illumination, your vanity light should be scaled precisely to your mirror’s dimensions and positioned to distribute light evenly. For overhead fixtures, this means selecting a light bar that spans 75% to 100% of the mirror’s width. Alternatively, mounting flanking wall sconces on either side of the mirror at eye level provides balanced cross-illumination. Combining these physical dimensions with a brightness level of 1,600 to 2,400 lumens and a high Color Rendering Index (CRI) of 90 or above will transform your bathroom into a functional, beautifully lit space.
Assess Your Mirror and Vanity Layout for Light Placement
Before browsing fixtures, you must evaluate the existing architecture of your bathroom vanity area. Accurate measurements are the foundation of a successful lighting plan, preventing the frustration of purchasing a fixture that is either visually overwhelming or physically impossible to mount. Begin by measuring the exact width of your vanity countertop and the height and width of your mirror. If you have a double vanity, measure the distance between the center points of the two sinks, as this determines whether you need a single long fixture or multiple separate lights.
Products mentioned in this guide


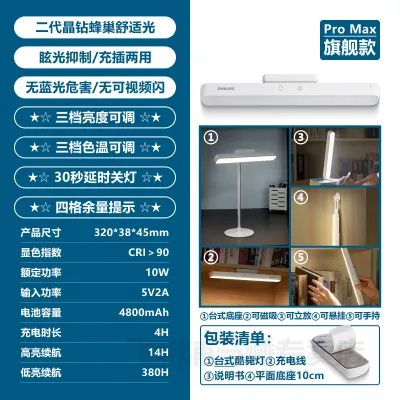
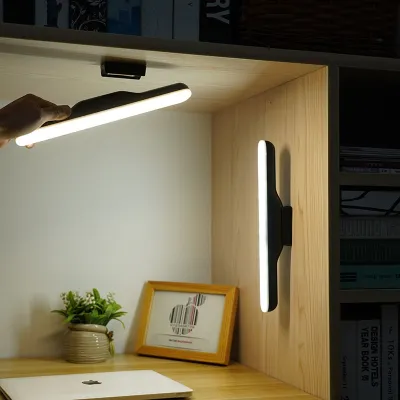
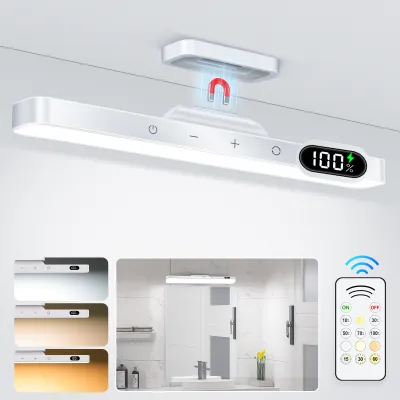
Prices are valid at publication and may change. Please refer to the product page for the latest price.
The choice between over-mirror lighting and flanking wall sconces depends heavily on your physical space and design preferences. Over-mirror lights, such as multi-bulb bars or linear LED strips, are highly practical and space-efficient. They work exceptionally well in compact bathrooms where the mirror is flush against adjacent walls, leaving no room for side fixtures. Flanking wall sconces, on the other hand, offer superior functional lighting by casting light directly onto the face from both sides, which eliminates the downward shadows often created by overhead sources.
Your mirror’s shape and the room’s ceiling height also play decisive roles. Round, oval, or uniquely shaped mirrors often look best when paired with flanking sconces, which frame the organic curves of the glass. Rectangular mirrors are highly versatile and can easily accommodate either overhead or side lighting. Additionally, consider the eye level of the primary users of the space. If the mirror is mounted exceptionally high or if the ceiling is low, an overhead fixture may sit too close to the ceiling, trapping heat and casting harsh shadows downward.
To avoid costly installation delays, create a physical checklist of potential obstructions in your vanity area:
- Medicine Cabinets: Ensure that surface-mounted cabinets can swing fully open without hitting the light fixture or its shades.
- Towel Racks and Hooks: Verify that wall-mounted accessories do not crowd the space intended for flanking sconces.
- Crown Molding and Trim: Check for decorative woodwork near the ceiling that might limit the mounting height of an over-mirror light.
- Faucets: High-spout or gooseneck faucets can sometimes block the lower portion of an over-mirror light or cause unwanted reflections.
Determine the Right Vanity Light Size and Mounting Height
Achieving a balanced look and even light distribution requires adhering to established sizing ratios and height guidelines. If you decide on an over-mirror light, the standard rule of thumb is to select a fixture that is 75% to 100% of the mirror’s total width. For example, if your bathroom mirror is 80 centimeters wide, your light fixture should ideally measure between 60 and 80 centimeters. Selecting a fixture smaller than 75% of the mirror’s width can leave the outer edges of the vanity in darkness, while a fixture wider than the mirror creates a top-heavy, unbalanced aesthetic.

The mounting height of an over-mirror fixture is equally critical for minimizing facial shadows. The industry standard is to mount the fixture approximately 190 to 200 centimeters from the finished floor. This height ensures the light source is positioned above the average user’s head, casting light downward onto the face without causing direct glare. Additionally, maintain a clearance gap of at least 7.5 to 10 centimeters between the top edge of the mirror frame and the lowest point of the light fixture. This space prevents a cramped appearance and allows room for routine cleaning and bulb replacement.
If you choose flanking wall sconces, their placement must be calculated relative to both the floor and the mirror. Mount the sconces so that the center of the light source aligns with average eye level, which is typically 150 to 165 centimeters from the floor. This eye-level positioning ensures that light is projected directly onto the face, filling in shadows under the eyes and chin. Space the sconces approximately 70 to 100 centimeters apart to allow for comfortable framing of the mirror, and keep them positioned roughly 10 to 15 centimeters away from the outer edges of the mirror frame.
Finally, evaluate the fixture’s protrusion depth, which is the distance the light extends outward from the wall. In compact bathrooms, a deep-set fixture can feel intrusive or interfere with daily movements. Ensure the fixture does not extend so far forward that it blocks the movement of medicine cabinet doors or hangs directly over a tall faucet, where splashing water could potentially contact a hot bulb.
Calculate the Ideal Brightness and Lumen Output for Tasks
To design an effective bathroom lighting scheme, you must distinguish between ambient illumination and the high-intensity task lighting required for precise grooming. Ambient lighting provides general illumination for navigating the room safely, while task lighting delivers the focused brightness needed for shaving, applying makeup, or styling hair. Relying solely on a central ceiling light often results in a dim vanity area, forcing you to lean forward and strain your eyes.
When determining how bright your vanity light should be, focus on lumen output rather than wattage. Wattage merely measures the amount of electrical energy a bulb consumes, whereas lumens measure the actual amount of visible light emitted. Because modern LED bulbs are highly energy-efficient, they produce significantly more lumens per watt than legacy incandescent or halogen bulbs. For a standard single-sink vanity, aim for a total light output of approximately 1,600 to 2,400 lumens at the mirror. If you have a larger double-sink vanity, you will likely need 3,000 to 4,000 lumens to illuminate the wider surface area.
If your chosen vanity fixture features multiple bulb sockets, you must distribute the required lumens across those sockets. For example, if you require 2,400 lumens of task lighting and have selected a three-light vanity bar, you should purchase three bulbs that emit approximately 800 lumens each. Before buying bulbs, always check the fixture’s maximum wattage rating, which is typically printed on a label near the sockets. Installing bulbs that exceed this rating can cause excessive heat buildup, damaging the fixture’s wiring and presenting a fire hazard.
Incorporating dimming capabilities into your vanity lighting offers immense functional flexibility. Dimming allows you to enjoy bright, clear light during your morning routine, and then dial down the intensity to create a soft, relaxing atmosphere for a late-night bath. To achieve smooth dimming without frustrating issues like flickering, buzzing, or premature bulb failure, you must verify compatibility between your components. Ensure that your LED bulbs are explicitly labeled as “dimmable,” and pair them with a compatible trailing-edge or LED-specific wall dimmer switch rather than an older dimmer designed for incandescent lighting.
Select the Best Color Temperature and CRI for True Colors
The quality of light is just as important as its quantity when it comes to accurate grooming. Two key metrics determine light quality: Correlated Color Temperature (CCT) and the Color Rendering Index (CRI). Understanding how these metrics interact will help you select lighting that is both highly functional and visually flattering.
Correlated Color Temperature, measured in Kelvins (K), describes the warmth or coolness of the light emitted by a bulb. Warm white light (2700K to 3000K) is highly popular for bedrooms and living rooms because it creates a cozy, relaxing ambiance. However, in a bathroom, warm light can cast a yellow or amber hue over your skin, making it difficult to accurately judge makeup shades or skin tones. Conversely, cool white light (5000K to 6500K) can feel harsh, clinical, and overly blue, which is often unflattering. For the ideal balance, select a neutral white color temperature between 3500K and 4000K. This range closely mimics natural daylight, providing a crisp, clean light that is perfect for precise grooming tasks.
The Color Rendering Index (CRI) measures a light source’s ability to reveal the true colors of objects compared to natural sunlight, on a scale from 0 to 100. For a bathroom vanity, a high CRI is absolutely essential. Look for bulbs or integrated LED fixtures with a CRI rating of 90 or higher. A high-CRI light ensures that your skin tones, hair color, and makeup shades appear exactly as they will when you step outdoors. Lower CRI lighting can make skin look dull, gray, or unnatural, which often leads to over-application of cosmetics or missed spots while shaving.
Even with the correct color temperature and CRI, direct exposure to bare light bulbs can cause uncomfortable glare and eye strain. To prevent this, choose vanity fixtures that incorporate light-diffusing materials. Frosted glass shades, opal glass globes, or fabric diffusers help to soften the light and spread it evenly across the space. Alternatively, look for fixtures designed to bounce light off the wall or ceiling, creating a soft, indirect glow that illuminates your face beautifully without shining directly into your eyes.
Verify IP Ratings and Electrical Safety for Bathroom Use
Because bathrooms are high-moisture environments, electrical safety must always take precedence over aesthetic considerations. Water and electricity are a hazardous combination, making it vital to select fixtures specifically designed and certified for wet or damp locations.
The primary indicator of a fixture’s moisture resistance is its Ingress Protection (IP) rating, which consists of two digits. The first digit represents protection against solid objects, while the second digit indicates protection against liquids. For vanity lights installed near washbasins or in areas subject to steam and condensation, a minimum rating of IP44 is highly recommended. An IP44 rating ensures the fixture is protected against splashing water from any direction, making it safe for standard bathroom use.
When purchasing lighting fixtures, you must also verify that they are compatible with the local electrical infrastructure. In Singapore, the standard domestic electrical supply operates at a voltage of 230V and a frequency of 50Hz. Ensure that any imported or locally purchased vanity light is rated for 230V operation to prevent electrical faults or damage to the fixture. Additionally, check the specific lamp holder or base type required by the fixture before buying bulbs. Common types include E27 screw bases, GU10 twist-and-lock bases, or integrated LED modules that do not require separate bulbs.
Before beginning any installation or replacement work, establish strict safety boundaries. Always isolate the electrical circuit by turning off the main power supply at your home’s consumer unit or circuit breaker. Use a reliable voltage tester to confirm that the wires are completely dead before touching them.
While simple bulb replacements are straightforward, hardwiring new fixtures, modifying existing electrical boxes, or installing lights in high-moisture zones are complex tasks that carry significant risks. In Singapore, all fixed electrical installation work must be performed by an Energy Market Authority (EMA) licensed electrical worker. Hiring a qualified professional ensures that the installation complies with local safety standards, protects your home from electrical hazards, and preserves the manufacturer’s warranty on your premium lighting fixtures.
Frequently Asked Questions (FAQ)
Can I use a single overhead vanity light for a double sink vanity?
While a single wide overhead fixture can work if it spans at least 75% of the total width of your mirror layout, it is often not the most effective solution for a double vanity. A single central light source can struggle to distribute light evenly to both outer edges, leaving the sides of your face in shadow and creating a dim zone in the middle of the vanity. For optimal illumination over a double sink, install two separate overhead fixtures centered directly over each sink basin, or combine them with flanking wall sconces to ensure uniform, shadow-free lighting across the entire grooming area.
How do I prevent shadows on my face when applying makeup?
Overhead-only vanity lighting naturally casts downward shadows under your eyes, nose, and chin, which can interfere with precise grooming and makeup application. To eliminate these shadows, install flanking wall sconces on both sides of your bathroom mirror. Mounting these side lights at eye level—approximately 150 to 165 centimeters from the floor—creates balanced cross-illumination that fills in dark areas. This setup provides a soft, flattering light that mimics natural daylight and ensures your face is illuminated evenly from all angles.
Do LED vanity lights require special dimmer switches?
Yes, LED vanity lights typically require compatible dimmer switches to function correctly without issues. Standard dimmer switches designed for older incandescent bulbs operate on different electrical principles and often cause modern LED fixtures to flicker, buzz, or fail prematurely. Before purchasing, check the product packaging to confirm that both the fixture and the LED bulbs are certified as dimmable. You should then pair them with a high-quality trailing-edge or LED-specific dimmer switch recommended by the manufacturer to ensure smooth, buzz-free performance.
Community discussion
Share your experience or ask a question. Comments are reviewed before publication.