
Connecting multiple T5 LED tubes using extension cables is an efficient way to create a continuous, seamless run of illumination in your home or workspace. Often referred to as daisy-chaining, this method allows you to link several light fixtures together in a series, running them all from a single power source. This setup is highly popular for under-cabinet kitchen lighting, cove lighting, and workshop benches where multiple individual power outlets are unavailable or impractical to install. By using a compatible t5 extension cable, you can bridge gaps around corners, bypass architectural obstacles, and customize the spacing between your light fixtures.
To achieve a successful and safe installation, you must understand the physical and electrical requirements of your specific lighting system. While the process is relatively straightforward, it requires careful layout planning, strict adherence to manufacturer limits, and robust safety precautions. Properly linking your T5 LED tubes ensures stable light output, prevents electrical hazards, and maintains the aesthetic appeal of your space.
Before You Start: Safety and Compatibility Checks
Before beginning any physical installation or handling electrical components, you must prioritize safety. The absolute first step for any electrical project is to isolate the power supply. Go to your home’s main distribution board (DB box) and switch off the circuit breaker that controls the room or outlet where you will be working. Never rely solely on a wall switch to turn off the power, as current can still flow through the wiring to the fixture, posing a severe risk of electrical shock. Use a reliable non-contact voltage tester to confirm that the wires or outlets are completely dead before proceeding.
Products mentioned in this guide
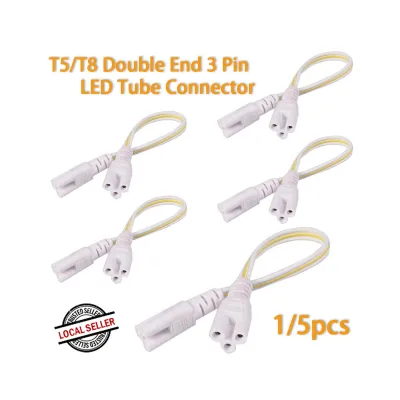
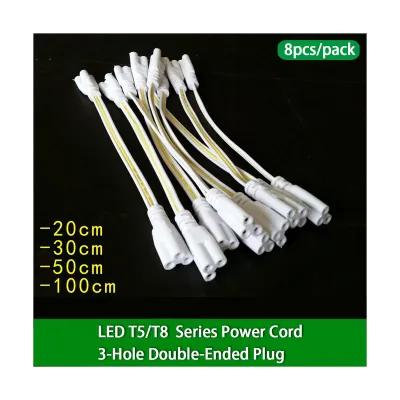
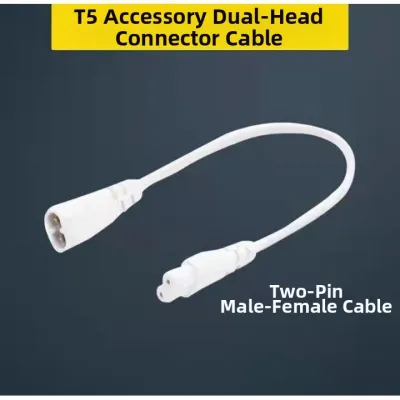
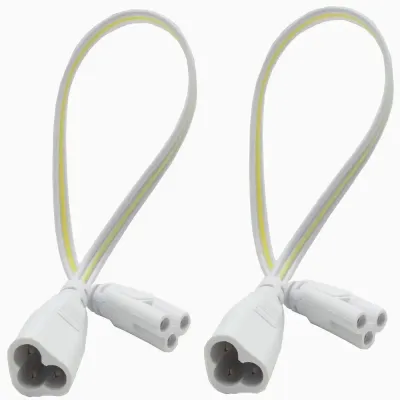
Prices are valid at publication and may change. Please refer to the product page for the latest price.
It is equally important to verify that your specific T5 LED tubes are designed for daisy-chaining. Not all T5 LED fixtures are linkable; some are designed strictly as stand-alone units with sealed end caps and no output ports. Check the product packaging, instruction manual, or the manufacturer’s specification sheet for explicit terms such as “linkable,” “daisy-chainable,” or “connectable.” Attempting to force a connection on a non-linkable tube can damage the fixture and create a serious electrical hazard.
Every daisy-chained lighting run has strict electrical limitations that you must calculate beforehand. When you link multiple fixtures in a series, the cumulative current of all the downstream tubes passes through the internal wiring of the first tube in the chain. To prevent circuit overloading, overheating, and potential fire hazards, you must find the manufacturer’s stated maximum limit for linked fixtures. This limit is typically expressed either as a maximum number of tubes (such as a limit of 6 or 8 fixtures) or as a maximum total wattage (such as 100W or 150W) allowed on a single continuous run.
Additionally, note that T5 LED tubes with integrated drivers have different linking rules compared to those requiring external ballasts or drivers. Integrated T5 tubes are much simpler to daisy-chain using standard T5 extension cables because each fixture processes its own voltage internally. If your system uses an external driver, you must consult the manufacturer’s specific system schematic, as the wiring topology and voltage drop calculations will differ significantly.
Tools and Materials Needed
Having the correct tools and materials on hand before you begin ensures a smooth, uninterrupted installation process. Collect all necessary components and verify their compatibility to avoid mid-project delays.

- Linkable T5 LED tubes: Ensure all fixtures are of the same brand, model, and wattage to guarantee uniform brightness and color temperature.
- Compatible T5 extension cables: A dedicated t5 extension cable is required to bridge the physical gap between each tube. These cables are highly proprietary; the pin spacing, connector shape, and electrical ratings differ across brands, so you must use cables supplied or approved by your fixture's manufacturer.
- Main power cord: This cord connects the first T5 tube in the run to your power source, featuring either a standard 3-pin plug or bare wires for hardwiring.
- Mounting clips and screws: These are usually included with your T5 fixtures and are used to secure the tubes to the ceiling, wall, or underside of cabinets.
- Screwdriver or power drill: Required to secure the mounting clips to your chosen surface.
- Non-contact voltage tester: Essential for verifying that the electrical circuit is completely de-energized before installation.
- Cable management accessories: Adhesive cable clips, zip ties, or small plastic conduit paths to keep the extension cables neat and hidden.
Remember that extension cables for LED battens are rarely universally interchangeable. Even if a third-party cable physical fits into the port, minor differences in pin depth or diameter can lead to loose connections, electrical arcing, or localized overheating.
Step-by-Step Guide to Linking T5 LED Tubes
Step 1: Plan the Layout and Power Source
Begin by measuring your installation space carefully to determine exactly where each T5 LED tube will sit. Calculate the total physical length of the tubes combined with the spacing required between them. This step is crucial for determining the precise lengths of the T5 extension cables you will need to purchase, especially if you need to route the cables around cabinet supports or structural beams.
Identify where your primary power source is located. If you are plugging the system into a standard wall outlet, the first tube in the sequence must be positioned within comfortable reach of the main power cord without stretching or straining the cable. If you plan to hardwire the system into a ceiling rose or a wall junction box, locate that connection point and plan the starting position of your first fixture accordingly.
Map out the routing path for all extension cables. Ensure the cables can run smoothly along the mounting surface without being subjected to sharp bends, excessive tension, or contact with sharp edges. Planning this path beforehand prevents physical stress on the cable insulation and ensures a much cleaner, professional-looking final installation.
Step 2: Connect the First Tube to the Power Supply
Once your layout is planned, focus on installing the first T5 LED tube, which serves as the anchor and power entry point for the entire run. Take the main power cord and insert its female connector firmly into the designated male input port on the first T5 tube. Ensure the connection is fully seated and secure.
If you are hardwiring the first fixture directly to your home’s mains wiring, you must match the wires strictly according to the product manual. Typically, this involves connecting the Live wire (brown) to Live, the Neutral wire (blue) to Neutral, and the Earth wire (green/yellow) to Earth. Before touching any wires, use your non-contact voltage tester to double-check that the circuit is completely dead. If you are unsure about hardwiring, always consult a qualified professional electrician to complete this step.
Position the first T5 tube against your marked layout lines. Align the mounting clips on the surface, secure them with the appropriate screws and wall anchors, and gently snap the tube into the clips. Verify that the fixture is level, stable, and firmly anchored before moving on to the next step.
Step 3: Link Additional Tubes Using Extension Cables
With the first tube securely mounted and connected to the power supply, you can begin linking the subsequent fixtures. Take your t5 extension cable and plug one end into the output port of the first T5 tube. This port is typically located at the opposite end of the input connection.
Next, plug the other end of the extension cable into the input port of the second T5 LED tube. Push the connectors in firmly until they are completely seated. Some connector designs feature a locking tab or a distinct clicking mechanism; make sure this engages fully to prevent loose connections, which are a primary cause of flickering lights and electrical arcing.
Repeat this linking process for all remaining tubes in your planned run. Keep a strict count of the connected fixtures as you proceed. Ensure that you do not exceed the manufacturer’s maximum link limit under any circumstances, even if you have physical space for more fixtures.
Step 4: Secure the Tubes and Manage Cables
As you link each subsequent tube, mount it securely using its respective mounting clips. Ensure that all fixtures are aligned perfectly in a straight line to maintain a clean, professional aesthetic. Misaligned fixtures can put unnecessary physical tension on the connecting extension cables.
Once all the tubes are physically mounted, focus on cable management. Use adhesive cable clips or zip ties to secure the loose T5 extension cables flat against the mounting surface or tucked neatly behind the fixture housings. This not only hides the cables from view but also prevents them from hanging down and becoming snagged.
Pay close attention to how the cables pass near the fixture bodies. Never pinch or compress the extension cables between the rigid metal or plastic housing of the T5 tubes and the wall or cabinet surface. Over time, physical compression and minor vibrations can wear down the cable’s outer insulation, leading to short circuits or electrical faults.
Testing and Troubleshooting Your Continuous Lighting Run
After completing the physical installation and securing all cables, it is time to test your new continuous lighting run. Go back to your main distribution board and switch the circuit breaker back on. Turn on the light switch to verify that all linked T5 LED tubes illuminate simultaneously, evenly, and without any noticeable delay.
If one or more tubes in the chain fail to light up, turn off the power at the circuit breaker immediately before investigating. Most issues are caused by simple physical connection faults. Check the connection points of the T5 extension cables on both ends of the non-functioning tube, ensuring they are pushed entirely into their sockets. You can isolate a faulty cable by temporarily swapping it with a working cable from another part of the run, or by connecting the non-working tube directly to the main power source.
Flickering or intermittent light output usually points to a loose physical connection or an overloaded circuit. If you have connected more tubes than the manufacturer’s recommended limit, the voltage drop across the run can cause the furthest tubes to flicker or appear dimmer. If your system is connected to a dimmer switch, verify that both the T5 LED tubes and the dimmer switch are explicitly rated as compatible; incompatible dimming systems frequently cause severe flickering and can damage the LED drivers.
Common Mistakes to Avoid When Using T5 Extension Cables
- Mixing different brands: A common mistake is attempting to connect T5 tubes and extension cables from different manufacturers. Even if the connectors look identical, minor variations in pin spacing, diameter, or internal wiring configurations can lead to poor electrical contact, short circuits, or physical damage to the pins. Always use matching brands and product lines.
- Cutting or modifying cables: Never cut, splice, or solder T5 extension cables to modify their length or fit a tight space. Modifying factory-molded cables compromises their electrical insulation, voids your product warranty, and introduces severe shock and fire hazards. If you need a specific length, purchase a manufacturer-approved cable of that size.
- Exceeding the maximum link limit: Daisy-chaining more fixtures than the manufacturer recommends draws excessive current through the internal wiring of the first tube in the chain. This can cause the internal components to overheat, melt the plastic casing, or cause premature driver failure.
- Using indoor cables in damp areas: Do not use standard indoor T5 extension cables in damp or outdoor environments, such as bathrooms, near kitchen sinks, or on open balconies. For these locations, ensure both the T5 fixtures and the extension cables carry the appropriate Ingress Protection (IP) rating, such as IP44 or IP65, and are certified for wet-area use.
Frequently Asked Questions (FAQ)
Can I use extension cables from a different brand with my T5 LED tubes?
No, you should avoid mixing brands. T5 LED connectors and their internal wiring configurations are proprietary to each manufacturer. Using a mismatched cable can result in loose physical connections, electrical arcing, damage to the pins, or voided product warranties. Always use cables explicitly recommended or supplied by your fixture’s manufacturer.
How many T5 LED tubes can I connect in a single run?
The maximum number of linked tubes depends entirely on the manufacturer’s guidelines, the wattage of each individual tube, and the electrical load capacity of the circuit. Generally, manufacturers specify a limit, which typically ranges from 4 to 10 tubes or a maximum combined wattage like 100W on a single power feed. Always consult your product manual to find the exact limit before installation.
Community discussion
Share your experience or ask a question. Comments are reviewed before publication.