
Decorating your home with fairy lights for Christmas is one of the most effective ways to create a warm, inviting, and festive atmosphere. Achieving a beautiful and safe display requires a systematic approach that covers planning your layout, selecting the correct light specifications, using surface-safe mounting techniques, and adhering to electrical safety guidelines. By mapping out your space and matching your lights to your specific indoor or outdoor environment, you can transform your home into a holiday haven while protecting your property and ensuring peace of mind.
Plan Your Christmas Lighting Layout and Power Needs
Before purchasing any lights or climbing a ladder, you must assess your decorating zones and measure the spaces you plan to illuminate. Use a flexible measuring tape or a piece of string to trace the exact path where the lights will hang, whether along a window frame, across a balcony railing, or wound around a pillar. If you plan to wrap a Christmas tree, a helpful general guideline is to allocate roughly 10 to 15 meters of light strands for every meter of tree height, depending on how densely you want the bulbs spaced.
Determining the installation environment is crucial for selecting the correct equipment. Indoor lights are designed strictly for dry, climate-controlled spaces and must never be used outdoors where they can be exposed to moisture. For outdoor areas such as balconies, patios, or gardens, you must use lights with an appropriate Ingress Protection (IP) rating. Look for lights rated at least IP44, which protects against splashing water from any direction, or IP65 if the lights will be fully exposed to heavy tropical downpours.
Products mentioned in this guide
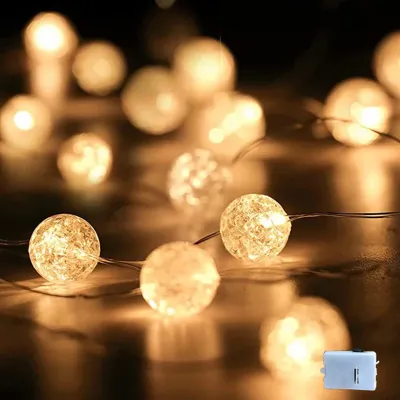
Prices are valid at publication and may change. Please refer to the product page for the latest price.
Power accessibility is another critical factor in your planning phase. Locate your nearest electrical outlets and map out safe routes for your extension cords. Avoid running cords across high-traffic walkways, under heavy carpets, or through doorways where they can be pinched, damaged, or present a tripping hazard. Ensure that all extension cords used outdoors are specifically rated for outdoor use and that their connections are kept completely dry.
Choose the Right Fairy Lights for Your Display
Selecting the right fairy lights involves balancing aesthetic preferences with technical specifications. Light-emitting diode (LED) fairy lights are highly recommended over traditional incandescent bulbs because they consume significantly less electricity, emit virtually no heat, and have a much longer operational lifespan. This makes them both a safer and more cost-effective choice for prolonged holiday displays.

Color temperature plays a major role in setting the mood of your home. Warm white lights (typically between 2700K and 3000K) deliver a classic, cozy, and traditional holiday glow that complements wooden furniture and warm color schemes. Cool white lights (5000K to 6500K) offer a bright, modern, and snowy aesthetic that pairs well with minimalist decor. Multicolor strands bring a playful, vibrant energy that is particularly popular in households with children.
Consider the power source that best fits each decorating location. Plug-in fairy lights are ideal for main displays like the primary Christmas tree or large window frames because they provide consistent, bright illumination without the need for battery replacements. For isolated areas like dining table centerpieces, wreaths, or high shelves where running a power cord is impractical, battery-operated or USB-powered fairy lights offer excellent flexibility. Always check the product packaging for convenient features such as built-in timers, dimming capabilities, or smart home integration that allows you to control the display via a mobile application.
Techniques for Wrapping Trees and Draping Mantels
To achieve a professional-looking display on your Christmas tree, weave the lights systematically rather than simply wrapping them around the outer branches. Start at the base of the tree near the power outlet and work your way upward, wrapping the light strands around individual branches from the trunk out to the tip and back. This technique creates incredible depth, making the entire tree appear to glow from within rather than just on the surface.
When decorating flat surfaces such as mantels, bookshelves, and window frames, avoid pulling the light strands taut. Instead, drape the lights in gentle, natural curves or “swags” to create a relaxed and elegant look. You can layer the fairy lights with green garlands, pinecones, or festive ribbons to add texture and hide the wiring. Ensure the strands are secured loosely enough that there is no tension on the electrical connections.
Creating DIY centerpieces using glass jars, lanterns, or domes is a popular way to add festive accents to tables and sideboards. When placing fairy lights inside enclosed glass containers, always use low-voltage LED lights that generate minimal heat. Verify that the bulbs do not come into direct contact with highly flammable decorative materials such as dry paper, synthetic snow, or delicate fabrics to prevent any risk of scorching or ignition.
Securing Lights Without Damaging Surfaces
Hanging holiday lights should not come at the cost of damaging your walls, paint, or furniture. Avoid using nails, staples, tacks, or metal pins to secure your lights, as these can easily pierce the protective plastic insulation of the wires, creating a severe shock or fire hazard. Additionally, they leave permanent holes in your walls and woodwork that require patching and painting later.
Instead, opt for damage-free adhesive hooks, specialized plastic light clips, or removable mounting tape designed specifically for temporary displays. Before applying any adhesive to your walls or trim, clean the surface thoroughly with rubbing alcohol and let it dry completely to ensure a strong bond. Always test the adhesive on an inconspicuous spot first to verify that it will not peel the paint or damage the finish when it is time to remove the hooks after the holidays.
When hanging the lights, pay close attention to the weight capacity of each hook or clip. Space the hooks closely enough to support the weight of the strands evenly, preventing sagging and reducing tension on the wires. Avoid wrapping light strands tightly around sharp metal corners, curtain rods, or heavy furniture edges, as friction and pressure can wear down the wire insulation over time.
Electrical Safety and Maintenance During the Holidays
Electrical safety must be your top priority when installing and maintaining holiday lighting. Before plugging in any light strand—whether brand new or retrieved from storage—lay it out on a flat surface and inspect it thoroughly. Check for frayed wires, cracked or brittle plastic insulation, loose bulb connections, or broken sockets. If you detect any damage, discard the strand immediately; do not attempt to repair it with electrical tape.
Avoid the dangerous practice of daisy-chaining, which is connecting too many light strands end-to-end. Always consult the manufacturer’s instructions to find the maximum number of strands or total wattage that can be safely connected to a single outlet or power strip. Overloading your electrical circuits can cause the wires to overheat, potentially leading to a short circuit or an electrical fire.
Keep all electrical connections, plugs, and transformers away from direct heat sources, open flames, and areas where moisture can accumulate. If you are decorating an outdoor balcony or patio, ensure that all plug connections are housed inside weatherproof electrical boxes. For complex outdoor setups, work at height, or any installation that requires modifying your home’s fixed electrical wiring, stop immediately, isolate the power at your main distribution board, and consult a qualified, licensed electrician.
Taking Down and Storing Fairy Lights Properly
Taking the time to dismantle your holiday display carefully will protect your investment and save you hours of frustration next year. Always begin by unplugging the lights from the wall outlet to eliminate any electrical risk. Gently remove each strand from its mounting clips or hooks one at a time, working in the reverse order of how you installed them. Never pull or yank the wires to force them free, as this can stretch the internal copper conductors and cause the lights to fail.
To prevent the wires from tangling and breaking internally during storage, wrap each strand neatly. You can wrap them around a piece of sturdy cardboard, a plastic clothes hanger, or a specialized light storage spool. Secure the loose ends of the wire with a reusable twist tie or a piece of hook-and-loop tape to keep the bundle intact.
Store your packed lights in a cool, dry place away from direct sunlight, high humidity, and heavy objects that could crush the bulbs. In humid tropical climates, storing your lights inside an airtight plastic container with a few silica gel packets is an excellent way to protect the delicate electrical components from moisture damage and rust during the off-season.
Frequently Asked Questions (FAQ)
Can I leave Christmas fairy lights on overnight?
It is not recommended to leave Christmas fairy lights operating unattended overnight or while you are away from home. Always check the manufacturer’s instructions for any continuous use limits or overheating warnings. To enjoy your holiday display safely and conserve energy, connect your lights to an automated timer or a smart plug programmed to turn the power off automatically when you go to bed.
How do I fix a section of fairy lights that stopped working?
If a section of your lights fails, first unplug the strand from the power source to ensure your safety. Check the plug for a replaceable fuse and swap it out if it has blown, or check for loose bulbs along the dark section and gently press them back into their sockets. If the strand has a broken bulb, replace it with a matching spare bulb according to the product manual. If the wiring is visibly frayed, exposed, or if you cannot easily identify the source of the fault, discard the entire strand and replace it with a new one.
Community discussion
Share your experience or ask a question. Comments are reviewed before publication.