
Selecting reliable outdoor solar lights requires looking beyond attractive designs and focusing on the underlying engineering. In tropical climates characterized by intense sunlight, high humidity, and heavy seasonal rainfall, off-brand solar fixtures often fail prematurely due to water ingress, rapid battery degradation, or inefficient solar conversion. To identify trustworthy brands that deliver consistent performance and long-term energy savings, you must evaluate specific hardware components, material standards, and power management technologies.
By understanding how to read technical specifications and verify manufacturer claims, you can avoid the common cycle of buying cheap, disposable solar lights that fail after a few months of exposure. High-quality solar lighting is an investment in your property’s safety, security, and aesthetic appeal. This guide provides a structured framework to help you assess solar panel efficiency, battery chemistry, build quality, and environmental suitability, allowing you to build a reliable shortlist of products that will withstand the elements and provide dependable illumination night after night.
How to Evaluate Energy Efficiency and Battery Reliability
The heart of any outdoor solar light is its power generation and storage system. To ensure you are choosing an energy-efficient and reliable product, the first step is to examine the solar panel type. Monocrystalline solar panels are the industry standard for high-performance fixtures. They feature a uniform dark appearance and offer conversion efficiencies between 15% and 22%, meaning they can generate more electricity in a smaller footprint. This is particularly crucial for compact fixtures like path lights or wall-mounted sconces. In contrast, polycrystalline panels, recognizable by their speckled blue appearance, are less expensive but have lower conversion efficiencies, typically ranging from 13% to 16%. For areas with limited daily sunlight or frequent cloud cover, prioritizing monocrystalline panels is essential for maintaining a full charge.
Products mentioned in this guide
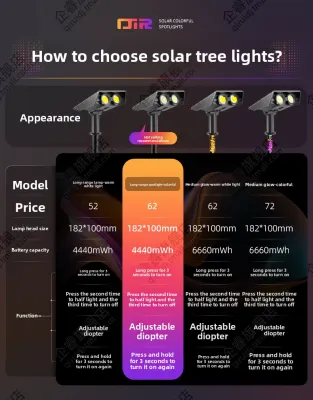
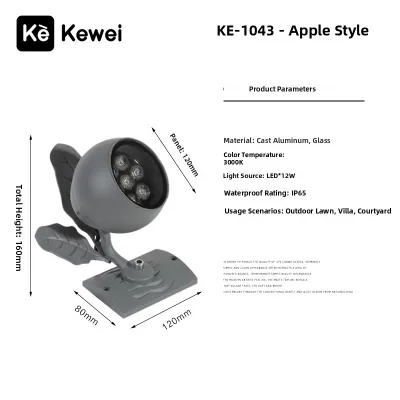
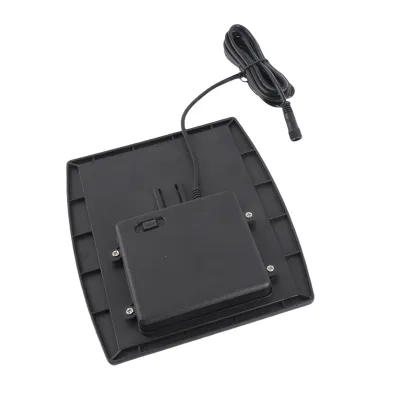
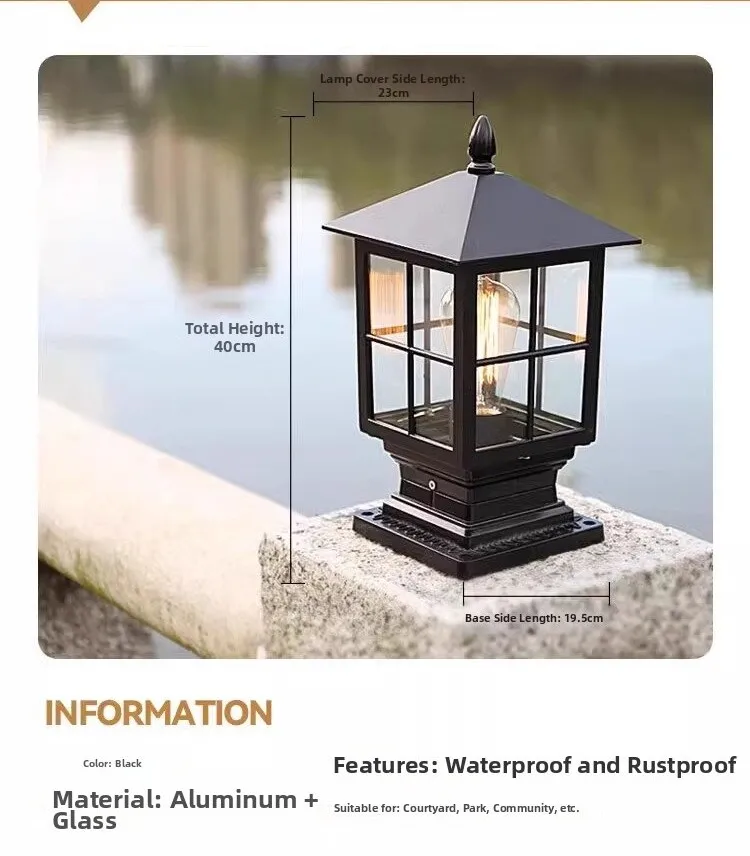
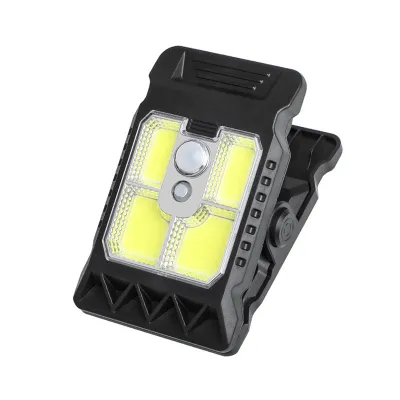
![🇸🇬 [READY STOCK] Camping Light Bright Waterproof Outdoor Solar Light Portable Handheld Emergency Lamp LED Solar Light USB Rechargeable Mobile Power Lamp](https://img.lazcdn.com/g/p/15dae932bd6bc6a7781c6cedf7618b89.jpg_400x400q80.jpg_.webp)
Prices are valid at publication and may change. Please refer to the product page for the latest price.
Equally important is the battery chemistry housed within the fixture. Modern, high-quality solar lights utilize Lithium Iron Phosphate (LiFePO4) batteries. These batteries are highly regarded for their exceptional thermal stability, safety, and longevity, often lasting for over 2,000 charge-discharge cycles before their capacity degrades significantly. Standard Lithium-ion (Li-ion) batteries are also common and offer high energy density, but they typically support only 300 to 500 cycles and degrade much faster when exposed to high ambient temperatures. Older or lower-end fixtures may still use Nickel-Metal Hydride (NiMH) batteries. While NiMH batteries are inexpensive and easy to replace, they suffer from lower energy density and a “memory effect” that can permanently reduce their storage capacity if they are not fully discharged regularly.
To verify a brand’s runtime claims, you must cross-reference the battery capacity with the power consumption of the LEDs. Manufacturers often advertise runtimes of 10 to 12 hours, but these figures are typically based on optimal laboratory conditions with maximum sunlight exposure. To estimate real-world performance, look for the battery capacity stated in milliampere-hours (mAh) or watt-hours (Wh) and compare it to the wattage of the light source. A fixture with a high-capacity battery paired with low-wattage, high-efficiency LEDs will naturally deliver a more stable and prolonged runtime, even after a cloudy day. In tropical regions where daylight hours remain relatively constant but weather patterns can bring sudden overcast skies, choosing a brand that offers a generous battery-to-LED ratio ensures your outdoor spaces remain illuminated throughout the night.
Key Hardware and Build Quality Checks Before Buying
Outdoor solar lights must endure harsh environmental conditions, making physical durability and electrical safety critical selection criteria. The primary indicator of weather resistance is the Ingress Protection (IP) rating. For general outdoor use, such as path lighting or garden accents, a minimum rating of IP65 is recommended, indicating the fixture is dust-tight and protected against water jets from any angle. For security floodlights mounted in highly exposed areas, or ground-level well lights that may experience temporary pooling during heavy downpours, look for an IP67 rating, which certifies protection against temporary immersion in water. Avoid fixtures rated IP44 or lower for fully exposed installations, as they are only splash-proof and are highly susceptible to internal moisture buildup, leading to short circuits and corrosion.

Beyond weatherproofing, you must evaluate the lighting specifications to ensure the fixture matches its intended function. Lumens measure the total amount of visible light emitted by the source. For accent and path lighting, a range of 50 to 200 lumens is generally sufficient to guide footsteps without causing glare. Security lights and motion-activated floodlights require much higher outputs, typically between 500 and 1,500 lumens, to effectively illuminate large areas. Color temperature, measured in Kelvin (K), should also align with your aesthetic and functional needs. Warm white light (2700K to 3000K) creates a welcoming, cozy atmosphere suitable for patios and gardens, while cool white light (5000K to 6500K) provides high-contrast visibility ideal for security and task lighting. Additionally, consider the beam angle; a narrow beam (15 to 30 degrees) is perfect for highlighting architectural features, while a wide beam (120 degrees or more) is necessary for broad area coverage.
Electrical safety and material quality are the final pillars of hardware verification. Look for recognized compliance markings on the packaging, such as CE, RoHS, or local electrical safety certifications, which ensure the product meets rigorous manufacturing and environmental standards. The housing material itself must be UV-stabilized to prevent cracking, fading, and embrittlement under intense sunlight. High-grade ABS plastic, polycarbonate, and powder-coated aluminum are excellent choices that offer superior resistance to both UV radiation and corrosion. If you are installing fixtures that require fixed wiring—such as split-panel solar lights where the panel is mounted on a roof and wired to an indoor or covered fixture—always ensure the power is isolated before installation. For complex setups, work at height, or installations near wet areas, consulting a qualified professional is the safest approach to ensure compliance with local electrical codes.
Matching Solar Lights to Your Outdoor Environment and Climate
The performance of even the most advanced solar light is ultimately limited by its installation environment. To maximize energy efficiency, you must carefully assess the availability of direct sunlight in your chosen location. Solar panels require unobstructed sunlight to charge effectively; even partial shading from overhanging tree branches, roof eaves, or adjacent buildings can reduce power generation by 50% or more. Before purchasing, observe your outdoor space throughout the day to identify areas that receive at least four to six hours of direct, unshaded sunlight. If your desired lighting location is permanently shaded, look for brands that offer split-panel designs, allowing you to mount the solar panel in a sunny spot while running a cable to the light fixture located in the shade.
In tropical climates, seasonal weather variations play a significant role in solar light performance. During monsoon seasons or extended periods of heavy rain and cloud cover, the amount of solar energy harvested daily will drop. To mitigate this, select brands that incorporate intelligent power management systems. These systems automatically monitor battery levels and adjust the light output accordingly—such as dimming the LEDs during late-night hours or switching the fixture to a motion-sensor-only mode—to conserve energy and ensure the light remains functional when needed most. Adjusting your expectations during these seasons is important, as even high-quality fixtures may experience reduced runtimes when consecutive cloudy days prevent a full battery charge.
Proper installation is key to optimizing both solar charging and sensor functionality. When mounting solar lights, pay close attention to the angle of the solar panel. In regions close to the equator, a horizontal or slightly tilted panel (around 10 to 15 degrees) is ideal for capturing the high-angle sun while allowing rainwater to wash away dust, pollen, and debris that can block sunlight. Ensure there is adequate clearance around the fixture to prevent dirt buildup and moisture retention. If the light features an integrated Passive Infrared (PIR) motion sensor, mount the fixture at the manufacturer’s recommended height—typically between 2 and 2.5 meters—and ensure the sensor’s field of view is clear of moving foliage or heat sources that could trigger false activations, draining the battery prematurely.
How to Build a Shortlist of Trustworthy Solar Light Brands
With countless solar lighting products available online, building a shortlist of trustworthy brands requires a systematic evaluation process. Start by examining the manufacturer’s warranty and customer support policies. Reputable brands stand behind their products by offering a comprehensive warranty, typically ranging from 1 to 3 years. Be sure to read the warranty terms carefully, as some manufacturers offer a shorter warranty period for the battery compared to the LED housing. Accessible customer support, clear contact information, and a straightforward claims process are strong indicators of a brand’s commitment to long-term reliability.
Identifying red flags in product listings is an effective way to filter out low-quality options. Be highly skeptical of brands that make unrealistic performance claims, such as “24 hours of continuous brightness on a single charge” or “fully charges in complete shade.” Another major red flag is the absence of detailed technical specifications. If a listing fails to specify the solar panel type (monocrystalline vs. polycrystalline), the battery chemistry (LiFePO4 vs. NiMH), the exact battery capacity in mAh, or the IP rating, it is highly likely the manufacturer is cutting corners on component quality. Trustworthy brands provide transparent, detailed specifications to help consumers make informed decisions.
To gain insight into real-world reliability, cross-reference user reviews on major ecommerce platforms and independent lighting forums. Focus on reviews written after six months to a year of continuous outdoor use, as these are much more likely to highlight issues with battery degradation, water ingress, or fading materials than initial unboxing reviews. When comparing options, evaluate the price-to-warranty ratio rather than simply choosing the cheapest option. For example, spending S$40 to S$60 on a well-engineered solar light with a 2-year warranty and replaceable batteries is far more cost-effective over time than repeatedly purchasing S$10 unbranded fixtures that fail after the first heavy rainstorm. By prioritizing transparency, build quality, and verified user experiences, you can confidently select solar lights that deliver lasting value and dependable performance.
Frequently Asked Questions (FAQ)
How often do the batteries in outdoor solar lights need replacing?
The lifespan of the battery in an outdoor solar light depends primarily on its chemistry and the quality of the charge controller. Lithium Iron Phosphate (LiFePO4) batteries are highly durable and typically last between 3 to 5 years before experiencing significant capacity loss. Standard Lithium-ion (Li-ion) batteries generally require replacement every 2 to 3 years, while Nickel-Metal Hydride (NiMH) batteries often need to be replaced every 1 to 2 years. Common signs that your battery is degrading include a noticeable reduction in nightly runtime, the light flickering, or the fixture failing to turn on at night despite receiving a full day of direct sunlight. When replacing batteries, always refer to the manufacturer’s instructions, isolate the power if applicable, and use a replacement battery that matches the original voltage, capacity, and chemistry specifications precisely to ensure safe and optimal operation.
Can outdoor solar lights be installed in covered or shaded areas?
Standard integrated solar lights, where the solar panel is built directly onto the light fixture, cannot function effectively in covered or heavily shaded areas because they require direct sunlight to charge. Installing them under deep shade, covered patios, or carports will result in extremely short runtimes or a complete failure to illuminate. If you need to light a shaded area, the most effective solution is to use a split-panel solar light. This design features a separate solar panel connected to the light fixture by a long, weather-resistant cable, allowing you to mount the panel in an area that receives direct sunlight while placing the light fixture exactly where illumination is needed. If direct sunlight is completely unavailable on your property, solar lighting is not a viable option; in such cases, you should consider low-voltage wired landscape lighting systems or consult a qualified professional to install a mains-powered outdoor lighting solution.

Community discussion
Share your experience or ask a question. Comments are reviewed before publication.