
Installing a solar panel light outdoors does not require drilling holes into your walls or running complex electrical wiring. By utilizing heavy-duty outdoor adhesives, magnetic mounts, or tension clips, you can securely mount these eco-friendly fixtures to various exterior surfaces. This approach is ideal for renters, those living in high-rise apartments with strict structural guidelines, or anyone wanting to avoid permanent modifications to their exterior masonry.
Because solar panel lights operate on low-voltage, self-contained battery systems charged by the sun, they completely eliminate the risk of electrical shock associated with mains-voltage wiring. However, achieving a long-lasting, drill-free installation in a tropical environment requires careful preparation and the correct choice of mounting hardware. Understanding how to match your mounting method to your specific surface material ensures your light remains safely secured through heavy downpours and intense sun.
Assessing Your Space to Choose the Right No-Drill Mount
Before purchasing your solar panel light, examine the exact surface where you intend to mount it. Exterior surfaces behave differently under the weight of a light fixture and the stress of environmental conditions. Smooth, non-porous materials like window glass, aluminum window frames, glazed ceramic balcony tiles, and smooth metal panels offer the best grip for adhesives.
Products mentioned in this guide
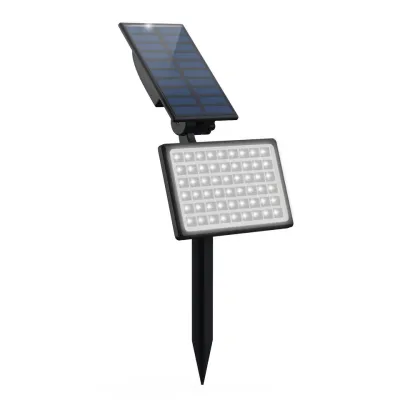
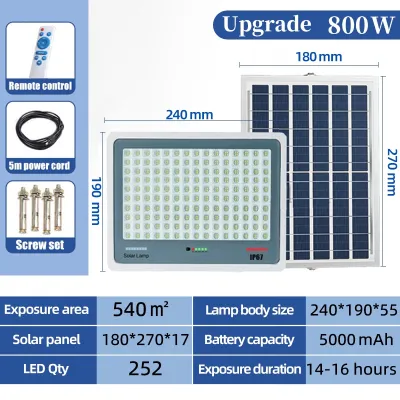
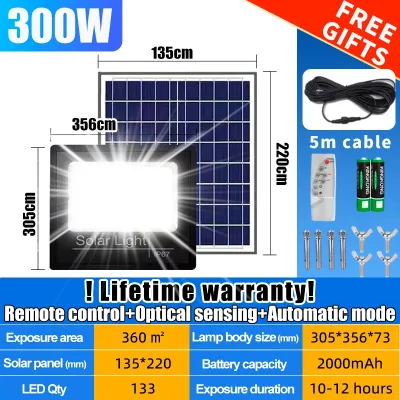
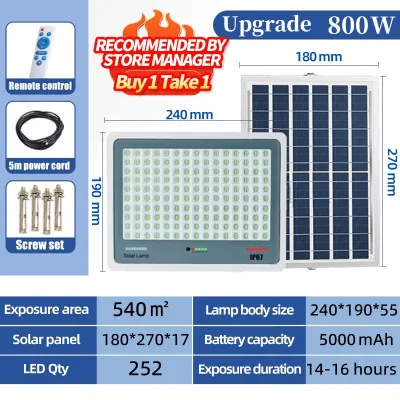
Prices are valid at publication and may change. Please refer to the product page for the latest price.
Conversely, textured or porous surfaces present significant challenges for drill-free mounting. Rough concrete, textured plaster, brickwork, and painted masonry do not allow adhesives to form a complete bond. If you attempt to use adhesive tape on a textured or peeling painted wall, the bond will eventually fail, causing the fixture to fall. In high-rise environments, such as Singapore apartments, a falling light fixture poses a severe safety hazard to passersby below and must be avoided at all costs.
To select the safest mounting method, match your hardware to the surface material and the weight of your light:
- Heavy-Duty Outdoor Nano Tape or Polyurethane Adhesive Pads: Best suited for smooth glass, glazed tiles, and polished metal surfaces. Ensure the tape is rated for outdoor use, high temperatures, and waterproof performance.
- Neodymium Magnetic Mounts: Ideal for ferrous metal structures such as window grilles, iron gates, metal railings, or steel air-conditioner ledges. These provide an incredibly strong grip that can be adjusted or removed without leaving any residue.
- Clip-On Brackets and UV-Resistant Zip Ties: Perfect for balcony railings, pipes, or metal grilles. Using heavy-duty nylon zip ties is highly effective for lightweight integrated solar lights, while adjustable metal hose clamps offer a more permanent, rigid grip on poles or thick railings.
Tools and Materials Checklist for a Drill-Free Setup
Gathering the correct tools and materials beforehand ensures a seamless installation process and prevents premature mounting failures. Make sure your chosen solar panel light is lightweight, as heavier models are more difficult to secure reliably without screws.

You will need the following items for a successful drill-free setup:
- Solar Panel Light Kit: Choose either an integrated unit (where the solar panel and light are housed together) or a split-unit system (where the solar panel connects to the light via a thin cable).
- Cleaning Supplies: High-purity isopropyl alcohol (at least 70% concentration) and a clean, lint-free microfiber cloth to prep the surface. Avoid using household glass cleaners, as they often leave behind a thin chemical residue that prevents adhesives from bonding.
- Mounting Hardware: Outdoor-rated double-sided acrylic foam tape (such as VHB tape), neodymium magnets with adhesive backing, or heavy-duty UV-stabilized zip ties.
- Measuring Tape: Useful for measuring the distance between your light and the solar panel in split-unit systems, ensuring the cable is long enough to reach without being pulled taut.
Before starting, verify the technical specifications of your light kit. Check the manufacturer’s weight limits, dimensions, and the ingress protection (IP) rating. For outdoor use in wet environments, an IP65 or higher rating is highly recommended to protect against heavy rain. Additionally, confirm that the battery is fully compatible with the solar panel’s voltage output to prevent overheating or battery degradation.
If you are working at height—such as on a high-rise balcony or near an open window ledge—safety must be your top priority. Ensure you are securely positioned, never lean over ledges, and drop-proof your tools by using wrist lanyards. If your installation requires complex electrical work or if you eventually decide to convert to a fixed-wire mains system, always isolate the power source and consult a qualified professional or licensed electrical worker.
Step-by-Step Solar Panel Light Installation Guide
Following a structured installation process is critical to ensuring your drill-free mount remains secure over time. Skipping minor steps, such as surface preparation or adhesive curing times, is the primary reason why outdoor adhesives fail.
Step 1: Prepare and Clean the Surface
The presence of invisible oils, dust, pollen, and moisture on your mounting surface will ruin the bond of even the strongest adhesive. To prevent this, spray the target area generously with isopropyl alcohol and wipe it firmly with a microfiber cloth.
Allow the surface to dry completely for several minutes before applying any mounting materials. This step is particularly vital in humid tropical climates, where ambient moisture can easily trap a layer of condensation on exterior surfaces. Never use water, soapy detergents, or mineral spirits to clean the area, as these substances leave residues that actively repel adhesives.
Step 2: Secure the Mounting Base
Once the surface is completely clean and dry, apply your chosen mounting hardware according to the manufacturer’s specific instructions. If you are using outdoor double-sided tape, cut the tape to size and apply it directly to the back of the light’s mounting bracket first.
Press the bracket firmly against the prepared wall or surface, applying even pressure across the entire adhesive area for at least 30 to 60 seconds. Crucially, do not attach the heavy solar panel light unit to the bracket immediately. Most high-performance outdoor adhesives require a curing period of 12 to 24 hours to reach their maximum bond strength. Leaving the bracket unweighted during this period prevents the adhesive from sliding or peeling away before it is fully cured.
Step 3: Attach the Light and Solar Panel
After the adhesive has cured completely, you can safely attach the light fixture. Carefully slide, snap, or screw the light housing onto the secured mounting bracket, taking care not to apply excessive downward force that could pull the bracket off the wall.
If you are installing a split-unit system, mount the solar panel in its designated sunny spot using the same cleaning and mounting steps. Route the connecting cable neatly along your wall, window frame, or railing. Secure the loose cable every 30 centimeters using outdoor-rated adhesive cable clips or small zip ties. This prevents the cable from dangling, which creates a tripping hazard, looks untidy, and risks wind damage during heavy storms.
Step 4: Optimize Angles for Sun and Sensor Coverage
To ensure your solar panel light functions efficiently, you must position both the solar panel and the motion sensor correctly. The solar panel needs to receive maximum daylight exposure to charge the internal battery fully.
Because Singapore is located near the equator, the sun passes directly overhead for much of the year. Angle your solar panel at a slight tilt of approximately 10 to 15 degrees facing either north or south, depending on which side of your building gets more unobstructed light. This minor tilt ensures rain runs off the panel naturally, washing away dust, pollen, and debris that would otherwise block sunlight and reduce charging efficiency.
Next, adjust the motion sensor’s angle to cover your target walkway, doorway, or patio area. Point the sensor slightly downward so that it detects foot traffic rather than distant movement. Avoid pointing the sensor toward busy public pathways, neighboring units, or swaying tree branches, as constant false triggers will quickly drain the battery.
Testing and Verifying Your Setup
Before relying on your new light for security or safety, verify that both the physical mount and the electrical components are functioning correctly.
- The Dark Room Test: Because solar lights only activate in the dark, you must simulate nighttime to test the sensor. Cover the solar panel completely with a thick, opaque cloth or a piece of cardboard. Turn the physical power switch on the light unit to the "On" or "Auto" position. Walk into the sensor's detection zone to confirm that the light triggers promptly and stays illuminated for the designated duration.
- Physical Stability Check: Gently tug the light housing from different angles to ensure the adhesive, magnetic mount, or zip ties are holding firm. The mount should not wiggle, slide, or show any signs of peeling. If you notice any movement, remove the light immediately and re-evaluate your mounting method before the fixture falls.
- Troubleshooting Basic Issues: If the light fails to turn on during your test, verify that the physical switch is set to "Auto" or "On" rather than "Off." Ensure the battery has received at least 8 hours of direct sunlight prior to testing. Additionally, check that the motion sensor lens is clean and not obstructed by any portion of the mounting bracket or cable.
Maintaining Your Mount and Light in a Tropical Climate
The extreme heat, high humidity, and intense monsoon seasons of a tropical climate put significant stress on outdoor lighting and adhesives. Regular maintenance is necessary to prevent premature failure of both the light and its mount.
Wipe down the solar panel every few weeks with a damp, soft microfiber cloth to remove accumulated dust, soot from nearby roads, and bird droppings. Avoid using abrasive scrubbing pads or harsh chemical cleaners, which can scratch the protective glass or plastic cover and permanently reduce solar energy absorption.
Inspect your no-drill mounts every three to six months to ensure they remain structurally sound. Extreme outdoor heat can cause some adhesive tapes to soften, while heavy rain can slowly seep behind the tape and degrade the bond. If you observe any peeling, slipping, or tilting, remove the light fixture immediately, clean the surface again, and re-apply a fresh layer of high-quality outdoor-rated mounting tape. For zip ties, check for signs of UV degradation, such as cracking or brittleness, and replace them before they snap.
Frequently Asked Questions (FAQ)
Can I use standard indoor command strips for outdoor solar lights?
No, standard indoor adhesive strips are not formulated to withstand outdoor environments. They will quickly degrade when exposed to ultraviolet (UV) radiation, high humidity, and heavy rain, causing the adhesive to liquefy or lose its grip. Always use heavy-duty, double-sided acrylic foam tape specifically rated for exterior, weatherproof, and high-temperature applications to ensure your light remains safely mounted.
How do I install a solar light on a shaded apartment balcony?
If your balcony is heavily shaded by overhanging ceilings or neighboring buildings, an integrated solar light may not receive enough sunlight to charge. Instead, use a split-unit solar panel light. This system allows you to mount the solar panel on the outer edge of your balcony railing or window frame using clip-on brackets or UV-resistant zip ties where it can catch direct sunlight, while routing the cable inside to power the light fixture positioned in the shaded area.
Will heavy-duty adhesive tape damage my rental property walls?
Yes, high-strength outdoor adhesive tapes are designed to be permanent and can easily peel away paint, plaster, or drywall when removed. To protect your security deposit in a rental property, avoid applying these strong adhesives directly to painted or plastered walls. Instead, apply the adhesive to non-porous, durable surfaces like window glass, glazed balcony tiles, or metal frames, or opt for completely non-destructive mounting methods like magnetic mounts or zip ties on grilles and railings.
Community discussion
Share your experience or ask a question. Comments are reviewed before publication.