
Achieving a seamless, glare-free lighting effect with an LED strip setup requires combining two distinct elements: a physical LED diffuser to soften the light and an electrical dimmer switch to control the brightness. Installing this system successfully involves a clear division of labor between physical mounting and precise electrical wiring. If these components are mismatched or wired incorrectly, you risk experiencing persistent flickering, audible buzzing, or even permanent damage to your lighting components.
To complete this project safely and effectively, you must approach it in structured phases. First, you will verify that your electrical components are fully compatible with one another. Next, you will prepare a safe workspace, wire the dimmer switch to the LED driver, mount the physical channel, and finally snap the diffuser cover into place. Following this systematic process ensures your installation looks professional, functions reliably, and operates safely within your home’s electrical limits.
Verify Component Compatibility Before Installation
Before handling any tools, it is essential to understand the distinct roles of the physical and electrical components in your setup. The “LED diffuser” refers strictly to the physical, optical cover—typically made of extruded acrylic or polycarbonate—that sits inside an aluminum profile to scatter light and eliminate visible hotspots. This physical cover has no electrical function. The actual control of the light output is managed entirely by the dimmer switch, which regulates the electrical current flowing through the LED driver (the power supply) to the LED light source itself.
Products mentioned in this guide
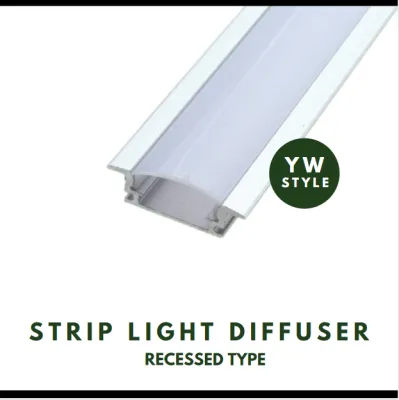
![[Local Seller] LED Strip Light Aluminium Profile Diffuser Corner With Milky Diffuser Light Housing](https://img.lazcdn.com/g/p/c4dcac9dc69ca1857fcdfc77852219a6.jpg_400x400q80.jpg_.webp)
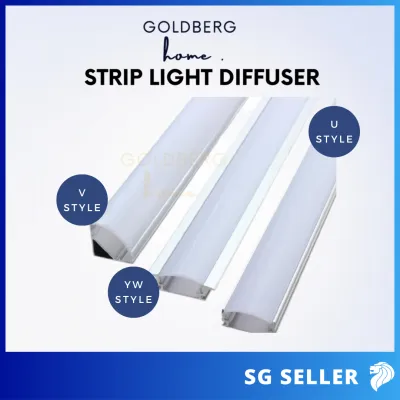
Prices are valid at publication and may change. Please refer to the product page for the latest price.
To ensure these electrical parts work in harmony, you must verify their compatibility before starting the installation. Begin by checking the product labels and packaging of your LED light source. The packaging must explicitly state that the light source is “dimmable.” Attempting to dim a non-dimmable LED will lead to rapid component failure or severe flickering.
Next, cross-reference the technical specifications of both your dimmer switch and your LED driver. Dimming technologies vary significantly; common residential methods include leading-edge (often called TRIAC) dimming, trailing-edge (often called electronic low-voltage or ELV) dimming, and 0-10V control systems. The dimmer switch you select must use the exact same dimming protocol as the input side of your LED driver. For instance, if your LED driver requires a trailing-edge input, pairing it with a leading-edge dimmer will likely cause poor performance and electrical stress.
Finally, calculate the total electrical load of your lighting circuit. Sum the wattage of all the LED strips or modules you plan to connect to the driver. This total wattage must fall comfortably within the dimmer switch’s specified minimum and maximum load limits. LED loads behave differently than legacy incandescent loads, often exhibiting high inrush currents, so ensuring your total wattage sits well within the manufacturer’s rated LED capacity is crucial for long-term reliability.
Prepare Your Tools and Ensure Electrical Safety
Working with residential electrical wiring requires strict adherence to safety protocols to prevent electrical shock or fire hazards. Before touching any electrical boxes or wires, locate your home’s main consumer unit (breaker box) and switch off the circuit breaker dedicated to the lighting circuit you will be working on. Do not rely solely on the wall switch to isolate the power. Once the breaker is off, use a high-quality, non-contact voltage tester at the wall switch box to confirm that no electrical current is present in any of the wires.

With the power safely isolated, gather all the necessary tools and materials for both the electrical and physical phases of the installation. You will need insulated screwdrivers, wire strippers, a non-contact voltage tester, approved wire connectors (such as terminal blocks or lever-style connectors), and the mounting hardware supplied with your LED diffuser channel. Having these tools organized and within reach prevents unnecessary delays and ensures you do not resort to improper tools that could damage the components.
In Singapore, residential wiring configurations can vary depending on the age of the property. Modern smart dimmers and certain specialized LED dimmers require a neutral wire to power their internal electronics. If you open your wall switch box and find that it lacks a neutral wire, or if the existing wiring configuration is complex, non-standard, or unclear, stop the installation immediately. In such cases, you must consult a licensed electrician in Singapore to assess your wiring and complete the electrical connections safely.
To protect the physical appearance of your installation, keep the plastic diffuser cover in its protective packaging during the electrical rough-in and channel mounting phases. The acrylic or polycarbonate material is highly susceptible to scratches, drywall dust, and oily fingerprints. Keeping it covered until the final step ensures a pristine, professional finish once the lights are turned on.
Wire the Dimmer Switch to the LED Driver
Once safety measures are established, you can proceed to wire the dimmer switch to the LED driver. This step establishes the control link between your home’s mains power and the power supply that feeds the LEDs. Always refer to the exact wiring diagrams provided in the instruction manuals for both your specific dimmer switch and the LED driver, as terminal configurations can vary between brands.
Identify the primary wires in your wall box: the line wire (incoming hot power from the breaker), the load wire (carrying switched and dimmed power to the LED driver), the neutral wire (if required), and the ground wire. Carefully strip approximately 10 millimeters of insulation from the ends of the wires using your wire strippers, taking care not to nick the copper conductors. Insert the wires into the appropriate terminals on the dimmer switch and secure them tightly. If you are using wire nuts or lever connectors, ensure they are rated for the wire gauge in your wall box and that no bare copper is exposed outside the connector body.
After securing the connections, gently fold the wires back into the wall box. Avoid forcing or pinching the wires against the sharp metal edges of the box, as this can damage the insulation over time. Align the dimmer switch chassis with the mounting holes of the wall box, insert the mounting screws, and tighten them until the switch is secure. Avoid over-tightening the screws, which can warp the switch frame or crack the decorative faceplate. Finally, snap or screw the faceplate onto the dimmer.
Never attempt to guess wire functions based on insulation color alone. Wiring standards have evolved, and older installations in Singapore may use red and black for line and neutral, while newer installations use brown and blue. If the terminal markings on your dimmer do not align with your existing wiring, or if you encounter unexpected wire colors, pause the installation and seek professional assistance to prevent hazardous wiring errors.
Mount the LEDs and Attach the Diffuser Cover
With the electrical controls wired, you can focus on the physical assembly of the LED channel and the diffuser cover. The aluminum channel acts as both a protective housing and a heat sink for the LED strip, which is critical for maintaining the lifespan of the light source. Begin by mounting the aluminum channel securely to your mounting surface using the provided clips, screws, or high-bond adhesive tape, ensuring the channel is perfectly straight and flat.
Next, prepare the LED strip or module. Clean the inside of the aluminum channel with a dry cloth to remove any dust or grease that might prevent the adhesive backing of the LED strip from bonding. Peel the protective backing from the LED strip and press it firmly into the bottom of the channel, working your way from one end to the other. Ensure the strip sits completely flat without any twists or buckles, as uneven contact with the aluminum can cause localized overheating.
Connect the output wires of the LED driver to the input terminals of the LED strip. Double-check the polarity of these connections; the positive (+) wire from the driver must connect to the positive (+) terminal on the strip, and the negative (-) wire must connect to the negative (-) terminal. Misaligning the polarity will prevent the LEDs from illuminating and can, in some cases, damage the driver or the strip.
Before installing the diffuser cover, wipe both sides of the plastic profile with a clean, dry microfiber cloth to remove any dust. Depending on the design of your channel, the diffuser cover will either slide into the side tracks of the channel or snap directly onto the top. Align the cover carefully at one end and gently press or slide it into place. Never apply excessive force or use hard tools to force a stubborn diffuser into the channel, as this can easily crack the plastic or dislodge the LED strip underneath.
Test the System and Troubleshoot Flickering or Buzzing
With both the electrical wiring and physical assembly complete, you are ready to restore power and test the system. Return to your main consumer unit and switch the lighting circuit breaker back on. Turn on the wall dimmer switch and slowly rotate or slide the control across its entire range, observing the light output for smooth transitions and consistent brightness levels.
If you notice the LEDs flickering, pulsing, or dropping out—particularly at very low dimming levels—this is often a sign of a minimum load issue. Many dimmer switches require a minimum wattage load to operate stably. If your highly efficient LED strip does not draw enough power to meet this threshold, the dimmer cannot regulate the current smoothly. Alternatively, low-level flickering can indicate a fundamental incompatibility between the dimming curve of the switch and the control circuitry of the LED driver.
Audible buzzing or humming coming from either the dimmer switch or the LED driver is another common issue. This noise is typically caused by rapid electrical switching (harmonic distortion) and usually occurs when a legacy dimmer designed for incandescent bulbs is paired with modern LED electronics. To resolve this, verify that your dimmer switch is specifically rated and certified for LED loads.
If you need to make any adjustments to resolve these issues—whether that involves tightening a loose wire connector, adjusting the low-end trim potentiometer on the dimmer switch, or swapping out a component—always turn the power back off at the main circuit breaker first. Never attempt to adjust live electrical connections, as doing so poses a severe risk of electrical shock and can permanently damage your sensitive LED components.
Frequently Asked Questions (FAQ)
Can I use a standard incandescent dimmer for my LED setup?
No, using a standard incandescent dimmer with an LED setup is highly discouraged. Legacy dimmers are designed for high-wattage resistive loads and operate by cutting the voltage wave in a way that modern, low-wattage LED drivers cannot process cleanly. Using an incompatible dimmer typically results in severe flickering, limited dimming range, audible buzzing, or premature failure of both the driver and the LEDs. Always check the dimmer’s packaging or technical specification sheet to ensure it is explicitly rated for LED compatibility.
What should I do if the diffuser cover does not snap into the channel?
If the diffuser cover resists snapping into the aluminum channel, do not force it. First, inspect the channel for any debris, metal burrs, or bent edges that might be obstructing the track. Ensure that the mounting screws inside the channel are driven completely flush, as protruding screw heads can block the diffuser from seating properly. If the channel is clear, try gently flexing the sides of the aluminum profile outward slightly, or use a soft rubber mallet over a protective cloth to tap the cover gently into place, following the manufacturer’s specific handling guidelines.
Community discussion
Share your experience or ask a question. Comments are reviewed before publication.