
Installing outdoor LED Christmas light strips transforms your home into a festive landmark, but doing so safely and durably requires careful planning. To achieve a professional, weather-resistant installation, you must systematically map your layout, select the correct ingress protection (IP) rated hardware, secure the strips using non-destructive mounting accessories, and seal all electrical connections against moisture. In Singapore’s tropical climate, where sudden downpours and high humidity are constant factors, skipping these preparation steps can lead to short circuits, damaged paint, or electrical hazards. Following a methodical approach ensures your holiday display remains brilliant and safe throughout the festive season.
Planning Your Exterior Lighting Layout and Power Source
Before purchasing any lighting equipment, you must accurately measure the physical dimensions of your home’s exterior features. Use a heavy-duty measuring tape to record the straight runs of your rooflines, window frames, and balcony railings. For curved architectural features, columns, or irregular garden pathways, lay a piece of non-stretchable string along the exact installation path, mark the end point, and then measure the straightened string with your tape. This physical measurement forms the baseline of your entire project and prevents costly under-ordering.
Always add a 10% to 15% length buffer to your final measurements. This extra margin is essential for navigating tight corners, executing vertical drops to reach power points, and preventing physical tension on the strip’s internal copper circuitry. If you plan to wrap pillars or trees, calculate the spiraling path carefully, as spiral wraps require significantly more length than straight vertical runs. Having excess strip length is easily manageable, whereas a strip that ends a meter short of your target is difficult to correct safely.
Products mentioned in this guide
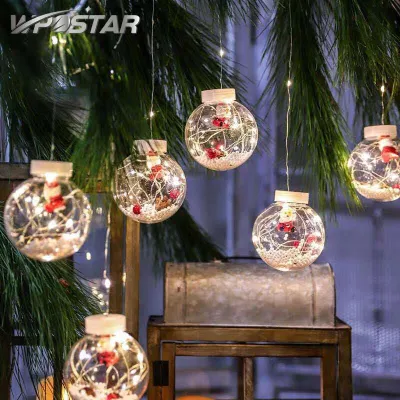
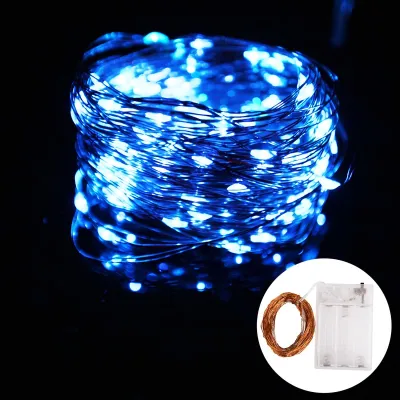
Prices are valid at publication and may change. Please refer to the product page for the latest price.
Next, locate your outdoor-rated power outlets and plan the routing of your cables. Outdoor outlets should feature weatherproof, spring-loaded covers that remain sealed even when a plug is inserted. Route all extension cords along walls or under eaves to keep them clear of walkways, lawns, and active driveways. Never stretch cords tightly across open spaces or leave them dangling loose, as this creates immediate trip hazards and subjects the cables to mechanical wear. If a cable must cross a pedestrian path, cover it with a heavy-duty, rubberized cable protector ramp.
In Singapore, you must check your local estate management rules before mounting any exterior holiday decorations. Housing & Development Board (HDB) flats, executive condominiums, and private strata-titled properties have specific bylaws regarding the alteration of building facades, common property usage, and safety. Ensure your lighting display does not obstruct common corridors, pose a falling hazard from high-rise balconies, or cause light pollution that shines directly into your neighbors’ bedrooms. Adhering to these local guidelines prevents forced removals and maintains community harmony.
Essential Tools and Materials for Outdoor Installation
Executing a secure and durable installation requires a specific set of tools and specialized, non-destructive hardware. Using the wrong materials can damage your home’s exterior or ruin your lighting equipment. Gather these items before you begin:

- Outdoor-Rated LED Christmas Light Strips: Select strips with a minimum rating of IP65 (water-resistant against jets) or IP67 (completely waterproof against temporary immersion). Ensure the power adapter carries recognized electrical safety certifications, such as Singapore's Safety Mark, to verify it has been tested for safe local operation.
- Plastic Gutter Clips and Shingle Clips: These specialized plastic hangers grip the outer lip of your gutters or slide under roof tiles without piercing or damaging the roofing material.
- Outdoor Adhesive Clips and Suction Cups: Use these UV-resistant, removable fasteners for securing strips to smooth surfaces like glass windows, aluminum frames, or polished stone.
- UV-Resistant Zip Ties: Heavy-duty nylon zip ties are ideal for securing light strips to balcony balustrades, railings, and metal pillars.
- Outdoor-Rated Extension Cords: Use heavy-duty, grounded extension cords specifically labeled for outdoor use, matching the voltage requirements of your lighting system.
- Fiberglass Ladder: A sturdy, non-conductive ladder is essential for reaching rooflines safely.
- Non-Contact Voltage Tester: This safety tool allows you to verify that electrical lines and outlets are completely dead before you handle connections or perform mounting tasks.
Never use metal nails, staples, or tacks to secure LED light strips. Metal fasteners can easily pierce the protective silicone sleeve of the strip, slicing through the internal copper busbars. This damage not only ruins the light strip permanently but also exposes live wires to rain, creating an immediate risk of short circuits, electrical fires, and severe electrical shocks.
Step-by-Step Guide to Mounting LED Christmas Light Strips
Securing Lights Along Rooflines and Gutters
Always begin your physical installation at the power source and work outward toward the far end of the roofline. This ensures that the primary plug and transformer reach the outdoor outlet comfortably without any tension or stretching. Keep the heavy transformer and controller unit housed in a weatherproof enclosure close to the ground or securely mounted to the wall, rather than letting them hang freely from the roofline under their own weight.
To mount the lights, attach plastic gutter clips to the front lip of your gutters at regular intervals of 30 to 45 centimeters. Spacing the clips closely prevents the LED strips from sagging over time due to wind, rain, or gravity. If you are mounting along roof shingles, slide shingle clips carefully under the bottom edge of the tiles, ensuring they grip tightly without cracking or lifting the roofing material. Snap the LED strip into the clip’s integrated holder, keeping the light-emitting side facing outward toward the street.
Working at heights requires strict adherence to ladder safety protocols. Position your fiberglass ladder on firm, level ground, and use a plywood base if placing it on soft soil or grass. Maintain three points of contact at all times—either two feet and one hand, or two hands and one foot—and never overreach to place a clip; instead, climb down and reposition the ladder. Whenever possible, have a spotter stand at the base of the ladder to stabilize it and assist with handing up tools.
Never lean your ladder directly against aluminum or plastic gutters. The concentrated weight of a person can easily bend, crack, or completely dislodge the guttering system from the fascia board. Use a specialized ladder standoff stabilizer attachment that mounts to the top of the ladder, distributing the weight safely against the solid exterior wall of your home rather than the fragile gutter lip.
Framing Windows, Doors, and Balconies
For framing glass window panes, glazed doors, or smooth aluminum frames, use high-quality suction cups or removable outdoor adhesive clips. These mounting solutions provide strong adhesion against wind and rain while ensuring you do not peel off exterior paint, damage powder-coated finishes, or leave stubborn adhesive residue behind when the holiday season ends. Clean the mounting surface thoroughly with rubbing alcohol and let it dry completely before applying any adhesive backing.
Position the LED strip so that the plug end remains easily accessible for routine maintenance, troubleshooting, or manual power cycling. Route the cabling carefully to ensure that no part of the strip or its power cord obstructs the normal opening, closing, or sealing of your doors and windows. A pinched cable can sever internal copper wires, compromise the waterproof silicone jacket, and create a dangerous electrical short.
Before finalizing the placement of your adhesive clips or suction cups, temporarily plug in and power on the LED strip to test its light orientation. LED strips typically feature a directional beam angle of 120 degrees. Verifying the orientation ensures the light casts outward toward the street or reflects evenly against your home’s facade, rather than shining inward through the windows or casting awkward, uneven shadows on your architectural features.
Wrapping Railings, Pillars, and Trees
To secure LED strips to balcony balustrades, metal railings, or structural pillars, use UV-stabilized nylon zip ties. Standard zip ties degrade quickly under intense tropical sunlight, becoming brittle and snapping within weeks. Loop the zip ties around the railing and the strip, pulling them snug but not excessively tight. Snip off the excess tail of each zip tie with wire cutters to maintain a clean, professional appearance.
Always leave a slight amount of slack in the LED strip between your mounting points. Extreme temperature swings between hot, sunny afternoons and cool, rainy nights cause building materials and the plastic components of the strip to expand and contract. Allowing a small amount of play prevents physical tension from straining the delicate soldered joints and copper connections inside the flexible printed circuit board.
Avoid wrapping LED strips tightly around sharp metallic corners, rough brick edges, or growing tree trunks. Excessive friction and sharp bends can easily tear the protective waterproof silicone coating, allowing moisture to penetrate the light diodes. When wrapping trees, wind the strip spirally around the trunk or branches with wide, gentle turns, ensuring the strip does not rub against rough bark when the wind blows.
Electrical Safety and Weatherproofing Your Outdoor Connections
Every electrical component in your holiday display—including the LED strips, power adapters, controllers, connectors, and extension cords—must be explicitly rated for outdoor use. Indoor-rated electronics lack the necessary sealing to withstand Singapore’s high humidity and sudden, heavy downpours. Using non-rated equipment outdoors poses an immediate risk of electrical failure, short circuits, and fire.
Keep all electrical plug connections elevated off the ground. Avoid laying plugs on lawns, patios, balconies, or in gutters where rainwater can pool during a storm. Use plastic cable ties, outdoor hooks, or mounting brackets to suspend plug joints safely above ground level, ensuring they remain dry even during heavy rain.
| Connection Component | Weatherproofing Method | Purpose |
|---|---|---|
| Plug-to-Cord Joints | Outdoor connection boxes (drip boxes) | Prevents water ingress at the connection point |
| Metal Prongs | Dielectric grease | Repels moisture and prevents corrosion |
| Exposed End Caps | Waterproof silicone sealant | Seals cut ends of LED strips from humidity |
| Unused Connectors | Weatherproof rubber caps | Protects open ports from rain and dust |
Prevent electrical circuit overloads by calculating the total wattage of your connected light strips. Multiply the wattage per meter of your specific LED strip by the total length installed. Ensure this combined wattage does not exceed 80% of the rated capacity of your transformer, extension cord, or home outlet circuit. For example, if your outdoor power adapter is rated for 100 watts, keep the total connected lighting load under 80 watts to prevent overheating and tripped circuit breakers.
Always isolate the power at your main distribution board before performing any electrical work or adjusting connections. If your home lacks dedicated outdoor outlets, do not attempt to install new external sockets or splice wires yourself. Altering fixed electrical wiring is highly hazardous and must only be carried out by an Energy Market Authority (EMA) licensed electrician in Singapore to ensure compliance with local safety standards (SS 638).
Taking Down, Storing, and Troubleshooting Your Lights
When the festive season concludes, take down your LED light strips with care to preserve their functionality for future years. Carefully unclip the strips or snip the zip ties one by one using wire cutters. Never pull, yank, or rip the LED strips from their mounts, as this mechanical stress can tear the flexible copper PCB inside, break the delicate solder joints connecting the individual diodes, or damage your home’s exterior paint.
Coil your LED strips loosely in a clean figure-eight pattern or wrap them around a sturdy cardboard spool or dedicated light reel. Avoid folding, folding sharply, or coiling the strips too tightly, as this causes permanent kinks and fractures the internal wiring. Secure the coiled strips with reusable hook-and-loop straps rather than tight wire ties.
Store your organized holiday lights in a cool, dry, and dark storage container, such as a sealed plastic bin. High temperatures, humidity, and direct sunlight during storage can degrade plastic mounting clips, dry out silicone jackets, and cause adhesives to become brittle or gummy. Keeping the container in an air-conditioned space or a dry utility closet extends the lifespan of the waterproof coatings.
If a section of your LED strip fails to illuminate, follow a systematic troubleshooting process. First, verify that the power outlet is active and the controller is receiving power. Inspect the plug head for a blown fuse, and if necessary, replace it with a fuse of the exact same amperage and voltage rating. Visually examine the entire length of the strip for physical damage, such as cuts, punctures, or severe kinks; a damaged section must be cut out and repaired using compatible waterproof splice connectors, or the entire strip must be replaced.
Frequently Asked Questions (FAQ)
Can I use indoor LED light strips outside for Christmas?
No, you must never use indoor-rated LED light strips outdoors. Indoor strips lack the necessary Ingress Protection (IP) rating to withstand rain, wind, and high humidity. Exposing indoor light strips to outdoor moisture poses severe electrical shock and fire hazards, and the lack of UV protection will cause the plastic casing to degrade and fail rapidly.
How do I connect multiple LED strips without overloading the outlet?
To connect multiple LED strips safely, check the manufacturer’s specifications for the maximum wattage and the maximum number of strips that can be daisy-chained together. If your layout requires more length than the manufacturer’s limit, run separate outdoor-rated extension cords back to a heavy-duty outdoor power strip equipped with built-in surge protection, ensuring the total load remains below 80% of the outlet’s capacity.
Are adhesive-backed LED strips safe for exterior paint?
Standard adhesive backings on LED strips can easily peel off exterior paint, damage wood finishes, or leave a stubborn, sticky residue when exposed to heat and moisture. For painted surfaces, it is highly recommended to use removable plastic clips secured with outdoor-rated painter’s tape, suction cups, or non-destructive mechanical clips instead of direct adhesive backing.
Community discussion
Share your experience or ask a question. Comments are reviewed before publication.