
Installing LED light connectors properly is the key to achieving seamless, flicker-free illumination throughout your home. Whether you are setting up ambient cove lighting in your living room or retrofitting a classic pendant lamp with modern LED bulbs, the installation process depends entirely on matching the correct connector type to your specific lighting fixture. Making secure physical connections, maintaining correct electrical polarity, and verifying compatibility are the fundamental steps to ensuring a safe, long-lasting setup.
While low-voltage LED strip lights (typically 12V or 24V DC) are highly accessible for DIY projects, mains-voltage socket fittings (230V AC) require a much stricter approach to safety. Understanding the mechanical differences between snap-on connectors, screw terminals, and socket adapters allows you to execute your lighting design with confidence. By following systematic procedures, you can avoid common pitfalls such as voltage drops, loose contacts, and electrical hazards.
Pre-Installation Checks and Electrical Safety
Before handling any electrical components, prioritizing safety and verifying system compatibility is non-negotiable. For any project involving mains-voltage socket fittings, ceiling roses, or direct connections to your home’s electrical grid, you must turn off the main power supply at the circuit breaker or consumer unit first. Never rely solely on a wall switch to isolate the power, as some switches may only cut the neutral line, leaving the live wire fully energized. Use a high-quality non-contact voltage tester at the fixture to confirm that the circuit is completely dead before touching any wires.
Products mentioned in this guide
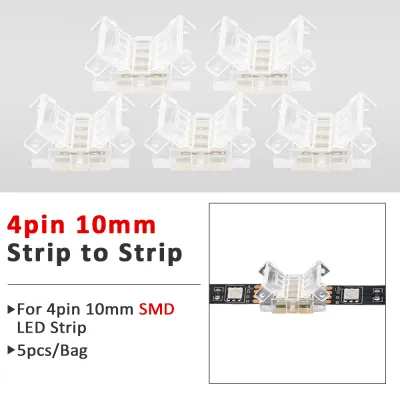
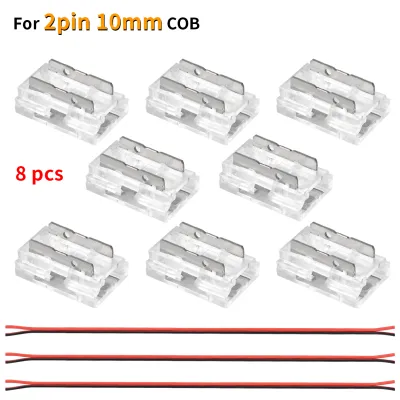
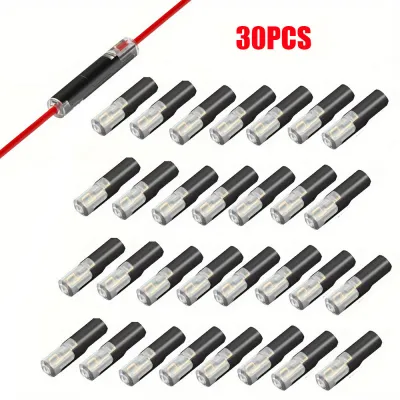
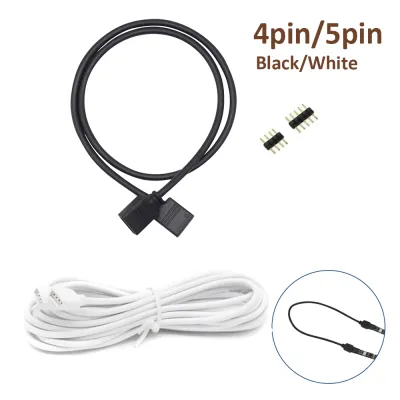
Prices are valid at publication and may change. Please refer to the product page for the latest price.
Verifying voltage compatibility is the next critical step. In Singapore, standard household mains electricity operates at 230V AC at a frequency of 50Hz. LED strip lights, however, typically operate on low-voltage direct current, usually 12V DC or 24V DC. Connecting a low-voltage LED strip directly to a 230V AC mains socket will instantly destroy the LED chips and create an immediate risk of fire or electrical shock. Always ensure that a compatible LED driver or transformer is placed between the mains supply and your low-voltage LED strips to step down the voltage safely.
Environmental conditions dictate the type of hardware you must use. If you plan to install LED connectors in damp or wet environments, such as bathrooms, kitchens, or semi-outdoor balconies and patios, you must check the Ingress Protection (IP) rating of both the strips and the connectors. Standard indoor connectors are usually rated IP20, which offers no protection against moisture. For damp indoor areas, look for at least IP44-rated components, while fully exposed outdoor areas require IP65 or IP67 weatherproofing, complete with silicone seals or gel-filled connector housings to prevent water ingress.
Finally, you must physically measure your LED components to ensure a perfect mechanical fit. LED strip lights come in various widths, with 8mm and 10mm being the most common for residential use. A connector designed for a 10mm strip will not hold an 8mm strip securely, leading to loose connections. Additionally, verify the pin configuration of your strip and connector:
- 2-Pin Connectors: Used exclusively for single-color LED strips (positive and negative).
- 3-Pin Connectors: Designed for tunable white (CCT) strips that adjust from warm to cool white.
- 4-Pin Connectors: Standard for multi-color RGB LED strips.
- 5-Pin or 6-Pin Connectors: Required for advanced RGBW or RGBCCT strips that combine multi-color and dedicated white chips.
Essential Tools and Materials for LED Connections
Having the correct tools on hand before you begin ensures a clean installation and prevents damage to delicate copper contacts. A well-prepared workspace reduces the risk of errors and keeps the installation moving smoothly.

Gather the following essential hand tools:
- Wire Strippers: An adjustable wire stripper is crucial for removing insulation without cutting the internal copper strands of your wires.
- Precision Screwdrivers: A set of small flathead and Phillips screwdrivers is necessary for tightening the tiny terminals found on screw-type connectors and socket fittings.
- Non-Contact Voltage Tester: This tool is vital for verifying that mains power is fully isolated before you begin any wiring work.
- Wire Cutters and Utility Knife: Essential for cutting LED strips cleanly along their designated cut lines and trimming wires to length.
Prepare these consumable materials to secure and insulate your connections:
- Electrical Tape: Useful for basic insulation and temporary holding.
- Heat Shrink Tubing: Provides a professional, durable, and moisture-resistant seal over wire joints when heated with a heat gun.
- Lever-Lock Connectors: Excellent for joining mains-voltage wires securely without soldering.
Acquire the correct hardware components:
- LED Light Connectors: Ensure you have the exact snap-on, screw-terminal, or socket adapters required for your layout.
- LED Strips or Bulbs: Verify that these match the specifications of your power supply and connectors.
- LED Driver (Transformer): Must have sufficient wattage capacity to power the total length of your LED strips.
How to Connect LED Strip Lights
Low-voltage LED strip lights offer incredible design flexibility, but their thin, flexible printed circuit boards (PCBs) require careful handling. Making a secure connection is essential to prevent voltage drops, which cause the lights to dim gradually toward the end of a long run.
Installing Quick-Splice (Snap-On) Connectors
Quick-splice, or snap-on, connectors provide a convenient, tool-free method for joining two LED strip segments or connecting a strip to a power supply wire. To begin, locate the designated cut lines on your LED strip, which are marked with copper pads and a scissor icon. Cut the strip cleanly along these lines using sharp scissors or wire cutters. Cutting outside these lines will permanently damage the internal circuitry of that segment.
Once cut, prepare the connection point by peeling back approximately 5mm to 10mm of the double-sided adhesive backing tape from the underside of the strip. This step is critical because leaving the adhesive tape on can prevent the connector’s metal teeth from making direct contact with the copper pads. If the copper pads look dull or dusty, gently wipe them with a dry microfiber cloth to ensure optimal conductivity.
Next, align the polarity of the strip with the connector. Look closely at the markings on the LED strip, which will indicate positive (+) and negative (-) terminals, or specific color channels (such as R, G, B, and V+). Ensure these match the corresponding markings on the snap-on connector. Swapping the polarity will prevent the LEDs from lighting up, and in some cases, can damage the controller.
Slide the prepared end of the LED strip into the guide channels of the snap-on connector. Push the strip forward until the copper contact pads sit directly underneath the connector’s metal contact pins. Once aligned, press the plastic clamp of the connector down firmly until you hear a distinct snap or click. This action forces the metal teeth to pierce the copper pads, establishing a secure electrical and mechanical bond.
Securing Solderless Screw-Terminal Connectors
For heavy-duty installations, longer runs, or when connecting raw power wires to an LED strip, solderless screw-terminal connectors offer a more robust and vibration-resistant connection. Start by preparing the connecting wires. Use your wire strippers to remove approximately 5mm of the outer plastic insulation from the wire ends, exposing the bare copper. Be extremely careful not to nick or sever any of the fine copper strands, as this reduces the wire’s current-carrying capacity.
Twist the exposed stranded copper wire tightly between your fingers to prevent individual strands from fraying. Loosen the small screws on the terminal block of the connector using a precision screwdriver. Insert the twisted wire end fully into the terminal slot, ensuring that no bare copper remains exposed outside the connector housing. Tighten the terminal screw firmly to clamp the wire in place, but do not overtighten, as this can strip the threads or crush the wire.
With the wires secured, open the physical clasp or cover on the opposite side of the connector housing. Slide the LED strip end into the slot, aligning the copper pads with the internal metal plates. Close and lock the physical clasp to secure the strip in place.
Before applying power, perform a thorough visual inspection of the screw terminals. Check closely for any stray, loose copper wire strands protruding from the slots. A single loose strand touching an adjacent terminal can bridge the circuit, causing a short circuit that can instantly destroy your LED driver or trigger your home’s circuit breaker.
How to Wire Socket Fittings and Adapters
Working with mains-voltage socket fittings, such as E27 screw-type or B22 bayonet-type holders, requires absolute adherence to electrical standards to prevent severe shock and fire hazards.
In Singapore, household electrical wiring follows a standardized color-coding system compliant with the SS 638 electrical safety standard. When wiring a socket fitting, you must identify and connect each wire to its designated terminal:
- Live Wire (Brown): Connects to the terminal marked 'L'. This wire carries the active electrical current from the source.
- Neutral Wire (Blue): Connects to the terminal marked 'N'. This wire completes the electrical circuit.
- Earth Wire (Green-and-Yellow): Connects to the terminal marked 'E' or the ground symbol. This wire provides a safe path for electrical current in the event of a fault. Note that some double-insulated plastic socket fittings may not require an earth wire, but if an earth terminal is present, it must be connected.
When installing socket adapters—such as converting an older B22 bayonet fixture to accept a modern E27 screw-type LED bulb—always inspect the adapter for physical integrity first. Screw the adapter firmly into the existing socket, ensuring it is mechanically locked and does not wobble. Loose adapters can cause electrical arcing, which generates intense heat and poses a serious fire risk. Only use high-quality, certified adapters and avoid stacking multiple adapters together.
A critical rule of lighting safety is to never exceed the maximum wattage rating printed on the socket fitting or adapter. While modern LED bulbs consume very little power (typically between 5W and 15W), older socket fittings may have been designed for incandescent bulbs and have specific heat-tolerance limits. Always verify that the total wattage of your installed bulb is well below the maximum limit marked on the socket (e.g., “Max 40W” or “Max 60W”) to prevent overheating and melting of the socket housing.
Any modifications to fixed wall wiring, ceiling roses, or the installation of new light switches must strictly comply with local electrical safety regulations. If your existing wiring looks degraded, or if you are unsure of how to identify the wires in an older building, do not attempt to wire the socket yourself.
Testing Your Setup and Troubleshooting Common Issues
Once all connections are physically secure and insulated, you can proceed to test your new lighting setup.
Begin the testing process by turning the main power supply back on at your circuit breaker. Switch on the wall switch or plug in your LED driver. Observe the initial startup of the lights. They should turn on instantly, emit a steady glow, and show no signs of delay or instability.
If your lights do not perform as expected, use these troubleshooting steps to identify and resolve the issue:
- Flickering Lights: This is almost always caused by a loose physical connection. Check the snap-on connectors to ensure the clamp is fully shut, or re-tighten the screws on your terminal blocks.
- Half-Lit or Unlit LED Strips: If only a portion of your LED strip lights up, or if the colors are incorrect, check for reversed polarity. Ensure the positive and negative markers align perfectly across all connectors. Alternatively, a copper pad may have been damaged during cutting, requiring you to trim the strip back to the next designated cut line.
- Dead Sockets or Fixtures: If a bulb fails to light up, verify that the circuit breaker has not tripped. Ensure the bulb is fully seated in the socket and making contact with the internal tab. If the breaker tripped immediately upon switching the light on, there is a short circuit in your wiring that must be resolved before turning the power back on.
Establish a strict stop-condition for your testing: if you detect any burning smell, feel unusual heat radiating from a connector, or observe sparking or smoke, immediately turn the power off at the main circuit breaker. Do not attempt to touch or adjust the wiring while the system is energized.
When to Hire a Licensed Electrician in Singapore
While connecting low-voltage LED strips is a highly manageable DIY task, fixed mains-voltage electrical work carries strict legal and safety boundaries in Singapore.
Under the Electricity Act of Singapore, installing new fixed electrical wiring, adding new wall sockets, or modifying your home’s main consumer unit (DB box) must be performed by a Licensed Electrical Worker (LEW) registered with the Energy Market Authority (EMA). Attempting to modify fixed wiring without a license is illegal and highly dangerous.
Improper mains wiring, particularly in wet zones like bathrooms, kitchens, or outdoor balconies, poses severe risks of electrocution and electrical fires. Furthermore, using uncertified components or performing unauthorized DIY electrical work can completely void your home insurance policy, leaving you personally liable for any damages in the event of an electrical fire.
If you inspect your existing socket fittings and notice any signs of scorching, melting, discoloration, or brittle insulation on the wires, do not attempt a simple replacement. These symptoms indicate underlying electrical issues, such as overloading or loose connections, that require immediate professional diagnosis. Always consult a licensed electrician to ensure your home’s electrical system remains safe, compliant, and reliable.
Community discussion
Share your experience or ask a question. Comments are reviewed before publication.