
Achieving seamless, dot-free lighting in a home setup requires more than just high-quality LED strips. When installing flexible LED strips in highly visible areas—such as under kitchen cabinets, along shelving, or within ceiling coves—the individual light-emitting diodes (LEDs) often produce harsh, specular glare that reflects off polished countertops and tiled floors. Applying led light diffuser tape directly over your LED strips is an elegant, cost-effective method to soften these harsh glares and blend the individual points of light into a continuous, smooth glow. However, when integrating these strips with dimmers and remote-controlled receivers, the installation process requires careful planning to preserve both the electronics and the optical quality of your lighting design.
To successfully install diffuser tape on dimmable and remote-controlled LED setups, you must systematically address surface preparation, physical tape application, and electrical integration. Because dimming systems and wireless receivers introduce extra components into your circuit, verifying compatibility and managing heat dissipation are vital steps for a safe, long-lasting installation. This guide walks you through the entire process, helping you achieve a professional-grade lighting effect while ensuring your control systems operate flawlessly.
Preparation: Tools and Compatibility Checks
Before beginning the physical installation, gather the necessary tools and perform essential compatibility checks. Having the correct materials on hand ensures a clean application and prevents damage to sensitive electronic components. For this project, you will need a microfiber cleaning cloth, high-purity isopropyl alcohol (at least 70% to 90% concentration), sharp scissors or a utility knife, and a flexible measuring tape. The isopropyl alcohol is particularly crucial in humid climates like Singapore, where airborne moisture and invisible oils can quickly degrade adhesive backings if the surface is not meticulously prepped.
Products mentioned in this guide
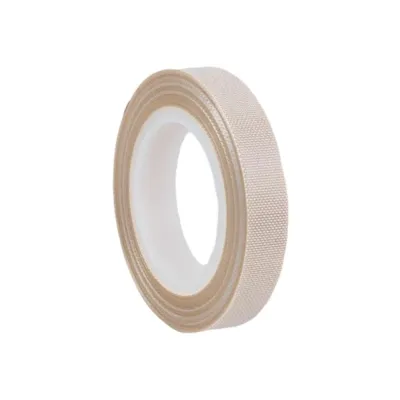
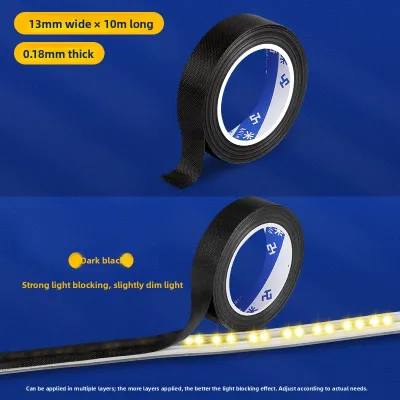
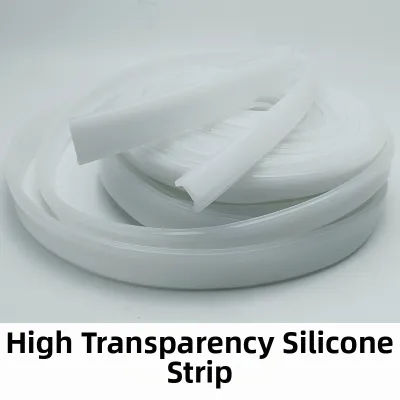
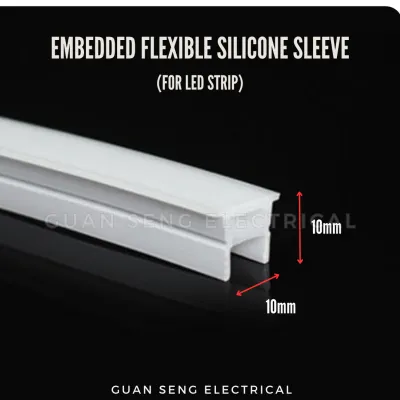
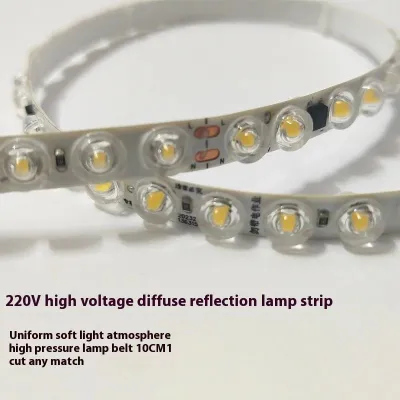
Prices are valid at publication and may change. Please refer to the product page for the latest price.
Electrical safety and component compatibility must be your first priorities. Before purchasing or mounting any parts, verify the voltage and power ratings across your entire system. Your LED strip, power supply (driver), dimmer, and remote receiver must all share matching electrical specifications. For example, if you are using a 12V DC LED strip, your power supply and remote receiver must also be rated for 12V DC. Mixing a 24V power supply with a 12V LED strip will instantly destroy the diodes, while a 12V power supply will fail to adequately power a 24V strip. Additionally, calculate the total wattage of your LED strip run to ensure it does not exceed the maximum load capacity of your dimmer, receiver, or power supply. A safe rule of thumb is the “80% rule,” where the continuous electrical load does not exceed 80% of the power supply’s rated maximum capacity.
Before handling any wiring, connections, or physical components, always turn off the power at the main switch or unplug the power adapter from the wall outlet. Working on live low-voltage DC circuits can still cause short circuits that damage delicate remote-control chips.
Finally, refer to the manufacturer’s specifications for both the LED strip and the diffuser tape. Check if the LED strip is rated for direct tape application. Some high-output or high-density LED strips generate substantial heat during operation. Verify the maximum operating temperature limits of the strip and ensure the diffuser tape you select can withstand these temperatures without melting, yellowing, or releasing harmful fumes.
Step-by-Step Installation Guide
Preparing the Surface and LED Strip
The longevity of your diffuser tape depends entirely on how well it adheres to the LED strip. Begin by dampening your microfiber cloth with isopropyl alcohol and gently wiping down the top surface of the LED strip, focusing on the spaces between the diodes where the tape’s adhesive will bond. Do not use household glass cleaners or harsh chemical solvents, as they often leave behind thin, oily residues that prevent proper adhesion. Allow the alcohol to evaporate completely, which typically takes only a few minutes.

Before applying the tape permanently, perform a complete dry run of your electrical setup. Connect the LED strip to the remote receiver, dimmer, and power supply on a clean, flat work surface. Plug in the power supply and use your remote control to test every function. Cycle through the entire dimming range from 1% to 100%, test any color changes or dynamic modes, and verify the responsive on/off controls. Testing your components at this stage ensures that you do not waste time applying diffuser tape to a defective LED strip or a faulty remote receiver.
Applying the LED Light Diffuser Tape
Once you have confirmed that all electronic components are working perfectly, disconnect the power supply again to begin the tape application. Carefully peel back a small portion of the protective backing from the diffuser tape, taking care not to touch the exposed adhesive with your fingers, as skin oils will weaken the bond. Align the tape precisely with the start of the LED strip.
Gently lay the diffuser tape over the LED diodes, working in short sections of 10 to 15 centimeters. Use your thumb or a soft plastic squeegee to press down lightly along the edges of the tape, securing it to the PCB (printed circuit board) of the LED strip. Your goal is to eliminate air bubbles and gaps, which can cause uneven light refraction and create visible “hotspots” or dark patches.
It is critical to avoid stretching the tape as you apply it. Diffuser tape is often made of flexible elastomeric or silicone-based materials that can stretch under tension. If you pull the tape tightly during application, it will slowly contract over time, causing the adhesive to shear and peel away from the LED strip, especially when exposed to the heat generated by the diodes.
If your installation requires cutting the LED strip to a specific length or making sharp turns around corners, pay close attention to the strip’s designated cut marks. Leave a small, precise gap in the diffuser tape directly over these cut lines or solder pads. This allows you to trim the strip or solder jumper wires later without melting or tearing the diffuser tape.
Wiring the Dimmer and Remote Receiver
With the diffuser tape securely applied, you can proceed to integrate the control components into your circuit. Start by connecting the DC output wires of your power supply to the input terminals of your dimmer or remote receiver. Double-check the polarity: the positive wire (usually red or marked with a plus sign) must connect to the positive input terminal, and the negative wire (usually black or marked with a minus sign) must connect to the negative input terminal. Reversing the polarity can permanently damage the receiver’s internal circuitry.
Next, connect the output terminals of the receiver to the corresponding input wires of your LED strip. If you are using a single-color strip, you will only have positive and negative connections. For tunable white or RGB/RGBW strips, ensure that each color channel wire is securely fastened to its matching terminal on the receiver. Use high-quality lever-lock connectors, terminal blocks, or solder and heat-shrink tubing to secure these connections. Never leave bare wires exposed, as they pose a short-circuit risk.
While low-voltage DC wiring (typically 12V or 24V) is safe for DIY installation, connecting the system to your home’s main electrical grid is a different matter. If your project involves fixed wiring, mounting a driver inside a wall cavity, connecting to a 230V AC mains supply, or integrating the driver into an existing wall switch panel, you must prioritize safety. Stop immediately and consult a licensed electrical worker or a qualified professional to handle any high-voltage connections. This ensures compliance with local electrical safety regulations and prevents fire hazards.
Managing Heat and Maintaining Brightness
Adding any layer over an LED diode acts as an insulator, and diffuser tape is no exception. While LEDs are highly efficient, they still generate heat, which is normally dissipated into the surrounding air. When you apply diffuser tape directly to the surface of the strip, it traps a small amount of thermal energy. For standard, low-power decorative LED strips, this heat accumulation is negligible. However, for high-density strips (such as those with 120 or more LEDs per meter) or high-power architectural strips, the trapped heat can raise the operating temperature of the diodes, potentially accelerating lumen depreciation and shortening the overall lifespan of the system.
To mitigate this risk, monitor the physical temperature of your LED strip during its first few hours of continuous operation. If the strip feels excessively hot to the touch—meaning you cannot comfortably hold your finger on it for more than a few seconds—you should take steps to reduce the thermal load. The easiest way to do this is by using your remote-controlled dimmer to lower the brightness slightly. Reducing the output to 80% or 90% significantly lowers the operating temperature while causing an almost imperceptible change in perceived brightness.
If your design requires maximum brightness and continuous runtime, direct-apply diffuser tape may not be the best solution. Instead, consider installing your LED strips inside aluminum extrusion channels equipped with snap-on PMMA or polycarbonate diffuser covers. The aluminum channel acts as a highly effective heatsink, drawing warmth away from the diodes and dissipating it safely into the air, while the physical air gap between the LEDs and the plastic cover provides excellent diffusion without trapping heat directly on the silicon chips.
Additionally, be aware that all diffusion materials naturally absorb a portion of the light output, a phenomenon known as transmission loss. Depending on the density and opacity of your diffuser tape, you may experience a 10% to 30% reduction in overall brightness. You can use your dimmer to compensate for this loss by running the strip at a slightly higher power level, provided you have verified that the thermal dissipation is adequate and the system remains within safe temperature limits.
Testing and Troubleshooting Your Setup
Once the physical and electrical installation is complete, restore power to the system at the mains switch and prepare to test your configuration. Use the remote control to run the system through its paces. Check that the dimming transitions are smooth and linear, with no sudden jumps in brightness. If your setup features color-temperature tuning or RGB spectrums, verify that the colors blend evenly beneath the diffuser tape without showing separated red, green, or blue dots.
Flickering is one of the most common issues encountered in dimmable LED installations. If your lights begin to flicker, strobing rapidly at certain dimming levels, this is usually a sign of an electrical mismatch or a weak connection. Verify that your dimmer is fully compatible with the dimming method of your LED driver (for example, Pulse Width Modulation or Triac dimming). Additionally, check that your power supply is not overloaded; if the total wattage of the LED strip is too close to or exceeds the power supply’s maximum output, the driver may enter an overload protection loop, causing the lights to pulse. Inspect all terminal blocks and wire connectors to ensure they are tight and making clean contact.
If your remote control is unresponsive, begin with the simplest checks. Ensure the batteries in the remote are fresh and installed with the correct polarity. For infrared (IR) remotes, verify that there is a clear, unobstructed line of sight between the remote transmitter and the receiver’s sensor node. If you are using a radio frequency (RF) or smart Wi-Fi controller, refer to the manufacturer’s manual to re-initiate the pairing sequence between the hand-held transmitter and the receiver unit.
Frequently Asked Questions (FAQ)
Can I apply diffuser tape over waterproof LED strips?
Applying adhesive diffuser tape directly to waterproof LED strips presents significant adhesion challenges. Waterproof strips are typically encased in a thick sleeve of silicone or coated in a smooth epoxy resin. These materials have very low surface energy, which means standard acrylic adhesives—like those found on the back of diffuser tape—cannot form a strong, permanent bond and will quickly peel off. If you must diffuse a waterproof LED strip, check the tape manufacturer’s technical data sheet to see if the adhesive is specifically rated for silicone bonding. Alternatively, a more reliable solution is to mount the waterproof strip inside an aluminum channel with a mechanical snap-on diffuser cover, which bypasses the need for adhesive tape entirely.
Will the diffuser tape affect the remote control signal?
No, the diffuser tape will not interfere with your remote control signal, provided you install the components correctly. Diffuser tape is designed exclusively to cover the physical LED diodes on the strip to soften the light output. It does not block or absorb the infrared (IR) or radio frequency (RF) signals used by modern remote controls. However, you must ensure that you do not accidentally cover the remote receiver’s sensor eye, antenna, or the receiver module itself with the diffuser tape. Keep the control hardware completely clear of any tape or covering to maintain a strong, uninterrupted wireless connection.
Community discussion
Share your experience or ask a question. Comments are reviewed before publication.