
Installing led lights can instantly transform a room, providing modern accent lighting under kitchen cabinets, behind television screens, or along ceiling coves. While the process is highly accessible to beginners, achieving a professional, long-lasting installation requires more than just peeling off the adhesive backing and sticking the strip to a wall. A successful DIY setup relies on systematic planning, precise measurements, and a clear understanding of electrical compatibility.
By following a structured step-by-step approach, you can avoid common pitfalls such as peeling strips, flickering lights, or damaged circuits. This guide walks you through the entire process, from selecting the right tools and preparing your surfaces to making safe electrical connections and troubleshooting common issues.
Preparation: Tools and Compatibility Checks
Before unrolling your light strips, gather the necessary tools and verify that all electrical components are fully compatible. Having your materials ready prevents mid-project delays and minimizes the risk of damaging sensitive electronic parts.
Products mentioned in this guide
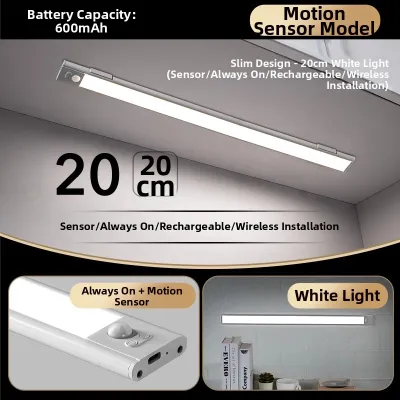
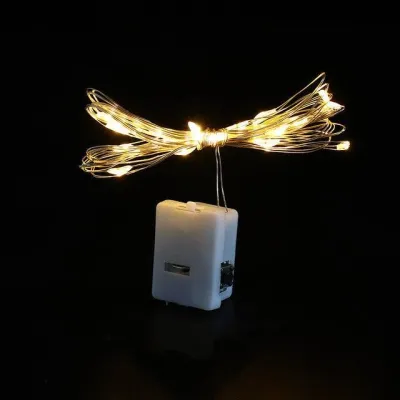
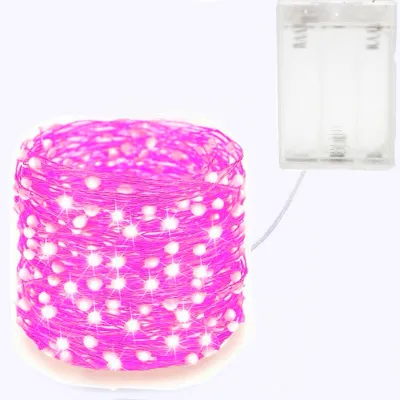
Prices are valid at publication and may change. Please refer to the product page for the latest price.
You will need a basic toolkit consisting of:
- Measuring tape: To determine the exact length of the installation area and the required strip run.
- 70% Isopropyl rubbing alcohol and a microfiber cloth: For deep-cleaning the mounting surface to ensure maximum adhesive contact.
- Sharp scissors or shears: To make clean, precise cuts through the designated copper points on the strip.
- Clear mounting clips or mounting brackets: To provide mechanical support, especially in high-humidity environments or on vertical surfaces.
- Screwdriver and wire strippers: Only necessary if you are using screw-terminal connectors or custom jumper wires.
Next, examine the product labels on your LED strip and power adapter. You must verify that the output voltage of the adapter matches the input voltage of the strip (typically 12V or 24V). Connecting a 12V strip to a 24V power supply will immediately burn out the LEDs, while a 24V strip connected to a 12V supply will be extremely dim or fail to light up entirely. Additionally, check the maximum wattage rating of the power adapter to ensure it can support the total wattage draw of your strip length.
When verifying electrical certifications, look for recognized regulatory marks on the power adapter, such as the Safety Mark in Singapore, which ensures the device has been tested and approved for safe household use. Confirm the dimming method of your setup; some strips are dimmed via inline low-voltage controllers, while others require mains-dimmable power supplies connected to wall dimmers. Mixing these methods can cause persistent flickering or humming.
You must also match your controller type with the physical pin configuration of the strip. Single-color strips typically use a simple 2-pin connection (positive and negative), while RGB (Red, Green, Blue) strips require a 4-pin setup. Advanced addressable or RGBW (RGB + White) strips may require 5-pin or 6-pin controllers. Attempting to force incompatible components together can cause short circuits or erratic lighting behavior.
Finally, establish a clear safety boundary for your project. This guide focuses on plug-and-play installations using standard power adapters plugged into existing wall outlets. If your project requires hardwiring the power supply directly into your home’s mains electrical system (such as a 230V circuit), stop immediately. You must consult a licensed electrical worker or qualified professional to handle any direct mains wiring to comply with local building regulations and prevent severe shock or fire hazards.
Step 1: Measure, Plan, and Prepare the Surface
The key to a clean, professional-looking installation is meticulous planning and surface preparation. LED strip adhesives are designed for single-use application, meaning that repositioning a strip after sticking it down will severely degrade its adhesive strength and cause it to peel off over time.

Begin by measuring the exact length of the area where you intend to install the led lights. Whether you are running the lights under kitchen cabinets, behind a TV, or inside a recessed ceiling cove, map out the path of the strip from start to finish. Identify where the power adapter will plug into the wall and ensure the controller and power cable can comfortably reach the starting point of the strip without being stretched taut. Plan your layout to minimize cuts, keeping in mind that you can only cut the strip at specific intervals.
Consider the specific installation environment when planning your layout. For under-cabinet kitchen lighting, position the strip behind the front lip of the cabinet facing straight down to provide direct task lighting on the countertop while hiding the LEDs from direct line of sight. Avoid placing strips directly above stoves or kettles where rising steam and high heat can degrade the adhesive and damage the electronics. For behind-the-TV bias lighting, mounting the strip roughly 2 to 4 inches from the outer edge of the screen provides the most balanced glow against the back wall, reducing eye strain without creating distracting halos.
Once your layout is planned, focus on surface preparation. Accumulations of dust, grease, and moisture are the primary reasons LED strips fall down. Dampen a clean microfiber cloth with isopropyl rubbing alcohol and thoroughly wipe down the entire mounting surface. Avoid using standard household glass cleaners or multi-surface sprays, as these often leave behind a microscopic chemical residue that prevents the adhesive from bonding. Allow the surface to dry completely for at least ten to fifteen minutes before proceeding.
Be aware of unsuitable or challenging surfaces that require extra attention. Porous materials like bare concrete, unsealed brick, textured plaster, and raw wood do not provide enough flat surface area for the adhesive backing to grip. Similarly, freshly painted walls should be left to cure for at least three to four weeks before applying adhesive strips. If you must install lights on these surfaces, plan to use supplemental mounting clips, plastic channels, or heavy-duty double-sided mounting tape designed for textured materials to secure the strip physically.
Step 2: Cut, Peel, and Mount Your LED Lights
With your surface prepared and your plan in place, you can now begin the physical installation. Handling the flexible printed circuit board (FPCB) gently during this step is crucial to avoid breaking the delicate internal copper traces that carry electricity to each LED.
Unroll the LED strip slowly from its plastic spool. Avoid stretching or pulling the strip forcefully, as this can snap the internal connections. Before making any cuts, locate the designated cut lines on the strip. These are clearly marked at regular intervals with a scissor icon or a set of exposed copper pads. You must only cut directly down the center of these copper pads. Cutting anywhere else along the strip will permanently sever the electrical circuit, rendering the entire section between that cut and the next mark completely non-functional.
If you are using waterproof strips (typically rated IP65 or IP67 with a thick silicone coating) for damp areas like bathrooms or outdoor balconies, cutting them requires an extra step. You must carefully peel back or scrape away a small portion of the protective silicone sleeve to expose the copper pads before sliding them into a solderless connector. Always seal any cut ends of waterproof strips with silicone sealant and end caps to prevent moisture ingress, which can cause short circuits. For standard indoor installations (IP20), no silicone removal is necessary.
When you are ready to mount the strip, peel away only a small portion of the protective backing—about 12 inches (30 centimeters) at a time. This prevents the exposed adhesive from gathering dust or accidentally sticking to itself. Align the start of the strip with your planned starting point, then press down firmly with your thumb or fingers along the top of the strip. Apply steady, direct pressure for at least ten seconds over each section to activate the pressure-sensitive adhesive. Continue this peel-and-press process incrementally until the entire run is mounted.
Navigating Corners and Angles
When your installation path requires a 90-degree turn, such as wrapping around the back of a television or navigating under-cabinet corners, you must plan your transitions carefully. Bending the LED strip flat against a corner will crease the flexible circuit board, which almost always snaps the internal copper traces and causes the downstream lights to fail.
To navigate corners safely, you have two primary options:
- Solderless corner connectors: This is the most reliable method for beginners. You cut the strip at a designated cut mark, slide the cut ends into a 90-degree solderless gapless connector or a flexible jumper wire connector, and snap the plastic clips shut. This creates a clean, secure physical and electrical bridge around the corner.
- The fold-and-crease method: While possible, this method is highly risky for beginners. It involves creating a small loop or a 45-degree fold (often called a ribbon bend) to redirect the strip without creasing the copper traces directly over a solder joint. If you choose this method, ensure you do not apply sharp pressure directly to the LEDs or resistors on the fold.
For a long-lasting and reliable setup, cutting the strip and utilizing a flexible jumper connector is highly recommended, as it eliminates mechanical stress on the circuit board.
Step 3: Connect the Power Supply and Controller
Once the LED strip is physically mounted, you can proceed to establish the electrical connections. Following the correct assembly sequence is essential to prevent electrical surges from damaging the controller or the LEDs.
Always assemble the entire system before plugging the power adapter into the wall outlet. The correct connection sequence is:
- Connect the output end of the LED strip to the receiver pins of the controller.
- Connect the input cable of the controller to the DC jack of the power adapter.
- Plug the power adapter into the wall outlet.
When connecting the strip to the controller, pay close attention to the alignment of the pins. Most connectors feature a small arrow or a color-coded label indicating the positive terminal (typically marked as +12V, +24V, or V+). You must align the arrow on the strip’s connector directly with the corresponding arrow on the controller’s plug. Reversing this connection results in reversed polarity; while this generally will not destroy modern strips immediately, it will prevent the lights from turning on or cause them to display incorrect colors.
Consider the placement of your controller based on its transmission technology. Infrared (IR) controllers require a direct line of sight between the remote control and the small receiver bulb, meaning you cannot hide the receiver completely inside a cabinet. Radio frequency (RF), Bluetooth, and Wi-Fi smart controllers do not require line of sight, allowing you to conceal the receiver box entirely behind walls or furniture. However, if you are using smart Wi-Fi controllers, ensure your installation site has a strong, stable 2.4GHz wireless signal, as metal cabinets or concrete walls can block the signal and cause your smart lights to go offline.
Before powering on the system, perform a quick safety calculation to verify the 80% power rule. To prevent overheating, voltage instability, and premature failure, the total wattage consumption of your connected LED strips must not exceed 80% of your power supply’s maximum rated output. For example, if your power adapter is rated for 60 watts, the total wattage of your installed LED strips should not exceed 48 watts. If your strips draw more than this limit, you must upgrade to a higher-capacity power supply or split the run using an additional power injector or amplifier.
Step 4: Test, Troubleshoot, and Secure
With everything connected, plug in the power supply and turn on the system to verify that the installation is fully functional. Testing your setup now, before finalizing your cable management, makes it much easier to identify and correct any issues.
Use your remote control or smart home app to cycle through all available colors, adjust the dimming levels from lowest to highest, and test any dynamic modes or smart integrations. If you notice any issues, use these basic troubleshooting steps to diagnose the problem:
- The entire strip does not light up: Check that the power adapter is securely plugged into a live wall outlet and that all cable connections between the adapter, controller, and strip are tight. Verify that the pin alignment is correct and not reversed.
- A section of the strip is dark: This typically indicates a physical break in the circuit. Inspect the cut marks immediately preceding the dark section. If you used a solderless connector, open the clip and ensure the copper pads on the strip are making direct contact with the metal teeth inside the connector.
- The colors are incorrect or mismatched: This is almost always caused by misaligned pins at a connector junction. Double-check that the positive terminal arrows align perfectly across every connection point.
Once you have confirmed that the system is operating perfectly, secure the installation against gravity and heat. Over time, the heat generated by the LEDs can soften the adhesive backing, causing the strip to sag, especially on vertical surfaces or ceiling runs. Apply clear plastic mounting clips or small strips of heavy-duty double-sided tape at both ends of the run and at regular 12-inch intervals. This mechanical support ensures your lights remain securely in place for years to come.
For high-up installations, such as along ceiling coves, working at height poses safety risks. Always use a stable stepladder, ensure the power is isolated at the source during the physical mounting process, and have a second person nearby to assist. Do not attempt to pull or hang heavy objects from the light strips; they are designed solely as lightweight decorative accents and cannot support suspended loads.
Upgrading Your Setup: Diffusers and Cable Management
To elevate your installation from a basic DIY project to a seamless, professional architectural feature, consider incorporating aluminum channels and neat cable management. These additions not only improve the visual appeal of your lighting but also protect your investment.
Using aluminum mounting channels with frosted plastic diffusers offers several distinct advantages:
- Eliminating hot spots: Raw LED strips project bright, individual points of light (known as the "dotting" effect) that can reflect harshly off polished countertops or glossy floors. A frosted diffuser scatters the light, creating a smooth, continuous glow.
- Heat dissipation: LEDs generate heat during operation. Aluminum is an excellent thermal conductor, drawing heat away from the flexible circuit board and extending the overall lifespan of the light strip.
- Physical protection: The rigid channel shields the delicate strip from physical impacts, moisture, and dust accumulation, making it much easier to wipe clean during regular household maintenance.
Finally, address the visible wiring to keep your space looking tidy. Use adhesive-backed plastic cable raceways (trunking) along walls or baseboards to conceal dangling power cords. You can mount the bulky power adapter brick and the controller box out of sight using heavy-duty hook-and-loop fasteners or mounting tape. Common hidden locations include the underside of cabinets, behind a wall-mounted television, or tucked neatly inside a nearby storage unit.
Frequently Asked Questions (FAQ)
Can I connect multiple LED light strips to one power supply?
Yes, you can connect multiple LED strips to a single power supply, provided that the total wattage of all connected strips combined remains safely below 80% of the power supply’s maximum wattage capacity. However, be aware of voltage drop on long continuous runs. As electricity travels down a long strip, resistance causes the voltage to decrease, resulting in the LEDs at the far end appearing noticeably dimmer or shifting in color. To prevent this, avoid connecting too many strips end-to-end (daisy-chaining). Instead, run separate power cables from the controller to each individual strip (parallel wiring) or feed power to both ends of a long run.
Will removing LED strips peel off my wall paint?
The high-tack adhesive backing on many LED strips can easily peel off drywall paint, tear wallpaper, or damage delicate wood veneers during removal. To minimize the risk of damage, do not pull the strip off forcefully. Instead, use a handheld hairdryer set to medium heat to gently warm the adhesive backing. The heat will soften the acrylic glue, allowing you to slowly and carefully peel the strip away from the wall at a sharp, low angle. Any remaining sticky residue can be wiped away gently with a cloth dampened with soapy water or a dedicated adhesive remover.
Why is only half of my LED strip lighting up?
If only the first portion of your light strip is illuminated, the issue is typically a broken circuit or an inadequate power supply. Check the exact point where the lights stop working; this is usually where a cut was made or a connector was installed. A loose pin inside a solderless connector or a micro-tear in the flexible circuit board at that junction will prevent electricity from flowing downstream. Alternatively, if the power supply does not have enough wattage capacity to power the entire length, the system may drop voltage dramatically or trigger an internal safety shutoff, leaving the end of the strip dark.
Community discussion
Share your experience or ask a question. Comments are reviewed before publication.