
Installing LED light strips is one of the most accessible ways to transform your home’s atmosphere, whether you want to add functional under-cabinet lighting in your kitchen or create a dramatic cove lighting effect in your living room. The process involves planning your layout, preparing the mounting surface, cutting the strips to size, securing them in place, and connecting them to a compatible power source and controller. By taking a systematic approach, you can achieve a seamless, professional-looking installation that enhances your interior decor and provides customizable illumination.
In typical Singapore apartments, such as HDB flats and condominiums, unique architectural features like concrete walls, false ceilings, and recessed coves present specific installation conditions. Addressing these local factors—such as managing high humidity levels that can degrade standard adhesives—ensures your lighting setup remains secure and functional for years to come. This guide walks you through every stage of the DIY process, helping you navigate the technical requirements and practical steps for a successful home installation.
What You Need Before Starting
Before unrolling your LED strips, gathering the correct tools and verifying the technical specifications of your equipment will prevent installation delays and safety hazards. You will need a reliable measuring tape, sharp scissors or a utility knife (if your strip is cuttable), a clean microfiber cloth, and a suitable cleaning agent. Depending on your mounting surface, you might also require mounting clips, double-sided acrylic foam tape, or aluminum profiles with diffusers to house the strips.
Products mentioned in this guide
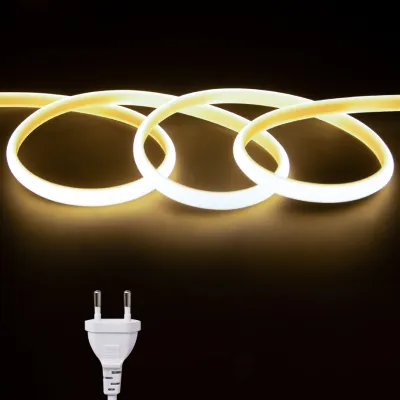
Prices are valid at publication and may change. Please refer to the product page for the latest price.
Electrical compatibility is the most critical factor to verify before beginning. Check the manufacturer’s specifications on your LED strip package to confirm the operating voltage, which is typically 12V or 24V DC. Ensure that the included power adapter matches this voltage and is rated for the total wattage of the strip length you plan to install. In Singapore, look for power adapters that carry the local Safety Mark certification, which indicates the device has been tested and approved for safe domestic use with standard 230V mains electricity.
Safety must remain your top priority throughout the installation. Always isolate the power supply by turning off the circuit breaker or unplugging the adapter before handling any exposed wires or making connections. If your project involves hardwiring the power supply directly into your home’s electrical mains, modifying fixed wiring behind walls, or installing fixtures in wet zones like bathrooms or outdoor balconies, stop immediately and consult a licensed, qualified electrician. Working at heights to install cove lighting also requires a stable ladder and proper safety precautions to prevent falls.
Step 1: Plan the Layout and Prepare the Surface
A successful installation relies heavily on precise planning and meticulous surface preparation. Begin by measuring the exact length of the area where you intend to mount the LED strips, taking into account any corners, bends, or architectural obstacles. If you are installing cove lighting in an HDB living room, measure the interior perimeter of the false ceiling recess and locate the nearest electrical outlet to plan your cable routing. Remember to account for the distance between the start of the LED strip and the power outlet, ensuring the power adapter cable can reach without being stretched taut.

Once you have your measurements, focus on preparing the mounting surface. Typical painted walls, concrete surfaces, and wooden cabinetry in local homes accumulate invisible layers of dust, grease, and moisture over time. To ensure optimal adhesive bonding, clean the surface thoroughly using isopropyl alcohol and a clean cloth. Avoid using household glass cleaners or multi-purpose sprays, as these often leave behind a thin residue that prevents the adhesive from sticking properly. Allow the cleaned area to dry completely before proceeding.
Standard adhesive backing on LED strips often struggles to adhere to certain surfaces, such as textured plaster, porous concrete, or matte-painted walls in highly humid environments. In these conditions, relying solely on the pre-applied tape can lead to the strip sagging or peeling off over time. To prevent this, consider using alternative mounting options like slim aluminum channels, which provide a flat, clean surface for the adhesive while acting as a heat sink to prolong the lifespan of the LEDs. Alternatively, you can secure the strip at regular intervals using small plastic mounting clips or high-bond double-sided acrylic foam tape.
Step 2: Cut, Peel, and Mount the LED Strips
With your surface prepared, you can now prepare the LED strips for mounting. If your measured layout requires a shorter length than the full spool, you must locate the designated cut lines on the strip. These lines are clearly marked at regular intervals with a scissor icon or exposed copper solder pads. Cutting anywhere else along the strip will sever the internal circuitry, rendering that entire section inoperable. Use a sharp pair of scissors to make a clean, straight cut directly through the center of the copper pads.
When you are ready to mount the strip, do not peel off the entire adhesive backing at once. Instead, peel back a small section of the protective liner—about 30 to 50 centimeters—at the beginning of the strip. Align the starting point carefully with your planned layout, then press the strip firmly onto the surface. Use your thumb or a soft cloth to apply steady, even pressure along the center of the strip, moving slowly as you peel away more of the backing liner. Avoid pressing directly on the delicate LED diodes or resistors, as excessive force can damage the components.
Navigating corners requires careful technique to avoid creasing or damaging the flexible printed circuit board. Bending the strip at a sharp 90-degree angle can crack the internal copper traces, causing the sections beyond the bend to fail. To safely navigate corners, you can use solderless corner connectors, which require you to cut the strip at the designated marks and slide the ends into a clip that bridges the gap. If you prefer a continuous run without connectors, create a loose, rounded loop at the corner, ensuring the strip does not crease or fold flat against itself.
Step 3: Connect the Power Supply and Controller
Once the strips are securely mounted, the next step is to establish the electrical connections. Start by matching the connector types on your LED strip to your controller or power adapter. For single-color strips, this usually involves a simple 2-pin connector, while multi-color RGB or addressable strips utilize 4-pin, 5-pin, or specialized smart connectors. When joining these components, pay close attention to the polarity markings; the positive terminal (often marked with a ‘+’ or a small arrow) on the strip must align perfectly with the corresponding positive terminal on the connector and controller.
After securing the connections between the strip and the controller, connect the controller to the power adapter. Route the power cables neatly along the wall or cabinet edges, using adhesive cable clips or cable sleeves to keep them organized and out of sight. This not only creates a clean, professional aesthetic but also prevents tripping hazards and protects the cables from being accidentally pulled or damaged. Ensure the power adapter is placed in a well-ventilated area where heat can dissipate safely, away from soft furnishings or enclosed, unventilated spaces.
If you are using a smart LED strip system, you will need to pair the controller with its dedicated mobile application or remote control. Plug the power adapter into the wall outlet and turn on the power. Follow the manufacturer’s specific pairing instructions, which typically involve holding down a button on the controller or power-cycling the device a set number of times until the strip begins to flash. Ensure your smartphone is connected to a compatible Wi-Fi network (usually 2.4 GHz for smart home devices) and follow the on-screen prompts in the app to complete the setup.
Step 4: Test the Setup and Make Final Adjustments
Before finalizing your installation and hiding any remaining cables, conduct a comprehensive test of the entire system. Turn on the power and observe the light strip closely. Check that every single LED diode lights up and that there are no dark spots, flickering sections, or sudden drops in brightness along the length of the run. If you are using an RGB or color-tunable strip, cycle through different colors and color temperatures to ensure the output is consistent and uniform from the beginning of the strip to the very end.
Once you verify that the hardware is functioning correctly, use your mobile app or remote control to adjust the settings to match your preferences. You can experiment with different brightness levels, set up automated schedules, or configure smart scenes that complement your daily routines. Keep in mind that perceived color temperature and spatial effects are highly subjective; a cool white light might enhance productivity in a workspace, while a warm white glow is often preferred for creating a relaxing ambiance in living areas or bedrooms.
The final step is to tidy up the installation site and secure any loose components. Use cable management clips to fasten any excess wiring to the underside of cabinets or the inner lip of your cove ceiling. If your power adapter is heavy, secure it to a wall or cabinet surface using mounting tape or brackets to prevent it from hanging by its cord and straining the connections. Double-check that all connectors are firmly seated and that no wires are pinched or exposed to potential wear and tear.
Troubleshooting Common Installation Challenges
Even with careful planning, you may encounter minor issues during or after your installation. If a section of your LED strip fails to light up, the most common culprit is a loose connection or incorrect polarity alignment at a joint. Inspect any solderless connectors you used, ensuring the metal teeth make firm contact with the copper pads on the strip and that the positive and negative lines are not reversed. If the entire strip fails to turn on, verify that the power outlet is active and that the power adapter is securely plugged into both the wall and the controller.
If you notice the adhesive backing beginning to peel or sag, especially in humid areas or on textured surfaces, do not attempt to re-stick the failed tape. Instead, gently pull back the loose section, clean the surface again, and apply a fresh piece of high-bond double-sided mounting tape or install a plastic mounting clip to hold the strip in place. For a permanent solution, mounting the strip inside an aluminum channel provides excellent structural support and prevents the adhesive from being exposed to dust and ambient moisture.
Connectivity issues with smart controllers are usually related to network settings or signal strength. If your smart strip refuses to pair with your mobile app, double-check that your phone is connected to a 2.4 GHz Wi-Fi band, as many smart home controllers do not support 5 GHz networks. If the connection drops frequently, the controller may be positioned too far from your home router or obstructed by thick concrete walls; relocating your router or adding a Wi-Fi range extender can help stabilize the connection.
Frequently Asked Questions (FAQ)
Can I install LED light strips in high-humidity areas like bathrooms?
Yes, but you must select LED strips with the appropriate Ingress Protection (IP) rating to ensure safety and durability. For damp environments like bathrooms or covered balconies, look for strips rated at least IP65, which feature a protective silicone coating that shields the electronics from moisture and dust. Never install non-waterproof (IP20) strips near water sources, and avoid placing any light strips directly inside shower enclosures or areas where they could be submerged. For bathroom installations, always consult a qualified electrician to ensure compliance with local electrical safety standards and to safely route power lines away from wet zones.
How do I extend my LED light strips if they are too short?
To extend your setup, you can connect multiple strip segments using compatible quick connectors or extension cables designed for your specific strip model. Before adding extra length, you must check the wattage capacity of your power supply to ensure it can handle the additional electrical load without overheating or failing. Keep in mind that running very long continuous lengths of LED strips can lead to voltage drop, where the light becomes noticeably dimmer or changes color toward the end of the run. To prevent this, you may need to use a higher-capacity power adapter or introduce additional power injection points along the installation.
Community discussion
Share your experience or ask a question. Comments are reviewed before publication.