
Installing LED light strips is one of the most effective ways to transform the ambiance of any room. Whether you want to highlight architectural features, add depth behind a television, or create soft under-cabinet illumination, these flexible strips offer an energy-efficient solution. Achieving a flawless, durable setup requires careful planning, precise surface preparation, and correct electrical execution. This guide walks you through the entire process of installing your chosen decoration light safely and professionally.
What You Need Before Installing Your LED Decoration Light
Before beginning, check the applied product’s label and the treated item’s manufacturer instructions. If the instructions conflict, the installation surface is unidentified, or your specific use case is not covered in the manual, stop and consult the manufacturer or a qualified professional. Gathering all necessary tools and materials beforehand ensures a smooth, uninterrupted workflow. You will need a reliable measuring tape, sharp scissors or a utility knife, a clean microfiber cloth, and high-quality isopropyl alcohol (at least 70% concentration) to clean the mounting area. For surfaces that are textured or prone to moisture, keep physical mounting clips, double-sided mounting tape, or aluminum mounting channels nearby.
Equally important is verifying the technical specifications of your LED light strips. Check the product label to confirm the operating voltage, which is typically 12V or 24V. Ensure that the power supply adapter matches this voltage exactly; connecting a 12V strip to a 24V power supply will permanently damage the LEDs, while the reverse will result in extremely dim light. Additionally, inspect the ingress protection (IP) rating. Strips rated IP20 are strictly for dry indoor areas, whereas IP65 or IP67 ratings are required for damp environments like bathrooms or outdoor balconies.
Products mentioned in this guide
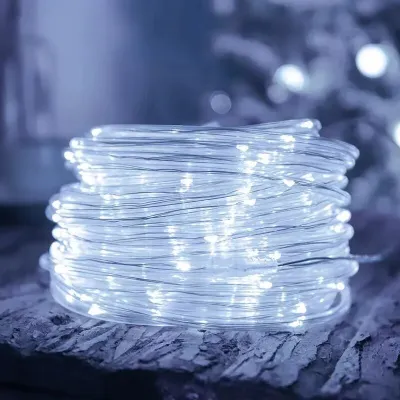
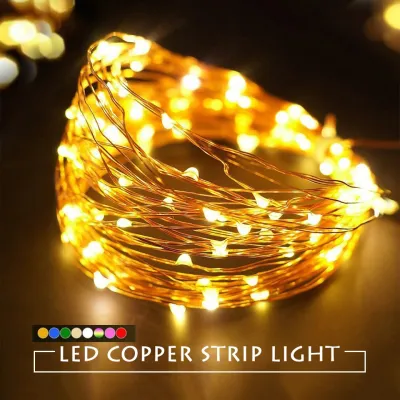
Prices are valid at publication and may change. Please refer to the product page for the latest price.
Safety must remain your top priority throughout this project. Always read the manufacturer’s manual thoroughly before handling any components. Before making any physical connections, cutting the strips, or plugging in power adapters, ensure the main power source at the wall outlet is switched off. If your project involves any fixed electrical wiring or connecting directly to your home’s mains power, you must halt and hire a licensed electrician. In Singapore, performing DIY fixed electrical wiring is illegal and poses severe fire and shock hazards.
Step-by-Step Guide to Installing LED Light Strips
A successful installation relies on a methodical approach. By breaking the process down into logical phases, you can avoid common pitfalls such as uneven lighting, loose adhesive, or short circuits. Follow these four steps to plan, mount, and power your decorative lighting system safely.

Step 1: Plan the Layout and Measure the Space
Begin by mapping out exactly where the light strips will go. Use a measuring tape to determine the precise length of the installation path, whether you are outlining a ceiling cove, highlighting a bed headboard, or running strips behind a desk. Accurate measurements prevent the frustration of running out of strips mid-project or purchasing excess material.
Next, identify the nearest power outlet and plan the routing of the power adapter and controller. The power supply should be situated in a well-ventilated, accessible location that allows you to easily hide the bulky adapter and excess cabling behind furniture or inside valances. Ensure the distance from the start of the LED strip to the outlet does not exceed the length of the lead wire provided with your power supply.
When planning your cuts, inspect the LED strip closely to locate the designated cut lines. These are clearly marked at regular intervals with copper pads, often accompanied by a small scissor icon. Cutting anywhere else along the strip will sever the internal copper circuitry, rendering that entire section inoperable. Always measure twice before making any cuts to ensure your segments fit perfectly.
Step 2: Prepare the Mounting Surface
The primary reason LED light strips fall down over time is poor surface preparation. Dust, grease, skin oils, and moisture form a barrier that prevents the pressure-sensitive adhesive backing from bonding securely. To prevent this, thoroughly clean the entire mounting path using a microfiber cloth dampened with isopropyl alcohol.
Avoid using household glass cleaners or soapy water, as these often leave behind a thin chemical residue that degrades the adhesive over time. After wiping down the surface, allow it to dry completely. Even a small amount of residual moisture can ruin the adhesive backing during application.
Be aware of the surface material you are working with. While smooth surfaces like glass, metal, and polished laminate bond exceptionally well, textured walls, peeling paint, or raw concrete pose a challenge. If you are installing strips on these difficult surfaces, do not rely solely on the adhesive backing. Instead, plan to use physical mounting clips or rigid aluminum channels screwed into the wall to secure the installation.
Step 3: Mount and Connect the Light Strips
Once the surface is clean and dry, you can begin mounting the strips. Peel away a small section of the adhesive backing—about 30 to 50 centimeters at a time—and press the strip firmly onto the surface. Apply steady, firm pressure with your thumb or fingers along the length of the strip to ensure maximum contact and eliminate any air bubbles.
Navigating corners requires careful handling to avoid damaging the delicate circuit board inside the strip. Never bend or fold an LED strip sharply around a 90-degree corner, as this can crack the internal copper traces and cause a partial or complete failure. Instead, use manufacturer-approved flexible corner connectors or solderless L-shaped gap connectors to bridge the turn smoothly.
If your layout requires joining multiple strip segments together, utilize compatible quick-connectors. Slide the cut end of the strip into the connector, ensuring the metal contacts on the strip align perfectly with the pins inside the connector. Pay strict attention to polarity; the positive (+) and negative (-) markings on the strip must match the corresponding markings on the connector and the subsequent strip segment to function.
Step 4: Wire the Power Supply and Test the Setup
With the strips securely mounted, connect the starting segment to the LED controller, and then connect the controller to the power adapter. Plug the adapter into a standard wall socket or a smart plug. Using a smart plug is an excellent way to integrate basic on/off automation without needing a fully native smart LED strip.
Before finalizing your cable management, turn on the power to test the entire setup. Cycle through all available color variations, test the dimming range, and verify that any smart features or remote controls respond correctly. Inspect the entire length of the run to ensure there are no dark spots, flickering sections, or loose connections.
If you discover any issues, turn off the power at the outlet before adjusting any connections. Remember that while plug-and-play installations using pre-assembled adapters are safe for DIY, any modification to your home’s permanent electrical infrastructure is not. If you want to hardwire the power supply behind a wall or directly into a ceiling rose, you must engage a licensed electrician to complete the work safely and legally.
Common Installation Mistakes and How to Avoid Them
One of the most frequent errors in DIY lighting projects is overloading the power supply. Every LED strip consumes a specific amount of power per meter, usually detailed in the manufacturer’s specifications. Calculate the total wattage of your installation by multiplying the wattage per meter by the total length of the strips. Ensure this total does not exceed 80% of your power adapter’s maximum rated capacity; leaving a 20% safety margin prevents the adapter from overheating and extends its operational lifespan.
Another critical mistake is ignoring the ingress protection (IP) rating of the strips. Standard indoor LED strips are highly susceptible to moisture damage. If you install an IP20-rated strip in a high-humidity zone like a bathroom or near a kitchen sink, moisture will eventually corrode the copper contacts, leading to short circuits or premature failure. Always check the product label and use strips with an IP65 rating or higher for any area exposed to steam or water splashes.
Cutting the strip outside of the designated cut lines is an irreversible mistake that immediately ruins the affected segment. If you make an incorrect cut, the circuit within that specific block is broken, and those LEDs will no longer light up. Always locate the copper solder pads and cut precisely down the center of those pads using sharp, clean scissors.
Finally, visible, messy wiring can ruin the aesthetic of an otherwise beautiful installation. Avoid leaving dangling cords or loose controller boxes in plain sight. Use adhesive-backed cable clips to secure loose wires along corners or behind furniture. For a truly professional finish, run the power cables through paintable plastic cord covers that blend seamlessly into your walls.
Advanced Tips for a Professional Decorative Finish
To elevate your project from a basic DIY job to a high-end architectural feature, consider installing your LED strips inside aluminum diffuser channels. These channels feature a milky, semi-translucent cover that scatters the light, effectively eliminating the harsh “dotting” effect of individual LED chips. The result is a smooth, continuous bar of light that mimics expensive neon installations while protecting the strips from dust and physical damage.
Integrating your lighting into a smart home ecosystem adds both convenience and modern appeal. Look for LED controllers compatible with Wi-Fi or Zigbee protocols, allowing you to link the lights to platforms like Google Home, Apple Home, or Amazon Alexa. This enables you to set automated schedules, create custom lighting scenes for different times of day, and control the ambiance using simple voice commands.
To maximize the visual impact of your decoration light, employ the concept of layered lighting. Avoid relying on a single, bright light source; instead, combine indirect cove lighting on the ceiling with subtle accent lighting under cabinets or behind floating shelves. This technique adds depth, warmth, and a sense of luxury to the room by highlighting different planes and textures.
Frequently Asked Questions (FAQ)
Can I leave LED light strips on all night?
High-quality LED strips generate very little heat compared to traditional incandescent bulbs, making them generally safe to leave on overnight as a nightlight. However, this safety depends entirely on using a properly rated, certified power supply and ensuring the strips are installed in a well-ventilated area where heat can dissipate. To maximize energy efficiency and prolong the lifespan of the LEDs, check the manufacturer’s thermal guidelines and use a timer or smart plug to automate a shut-off schedule.
How do I remove LED light strips without damaging the paint?
To remove adhesive-backed LED strips without tearing the paint or drywall underneath, use a hairdryer on a low-to-medium heat setting to gently warm the strip. The heat softens the adhesive backing, making it pliable and easier to release. Slowly peel the strip away from the wall at a shallow angle, applying heat just ahead of where you are pulling. If any sticky residue remains on the wall, apply a small amount of mild, wall-safe adhesive remover to a cloth and gently wipe it away, making sure to test the remover on a hidden area first to verify it does not discolor the paint.
Community discussion
Share your experience or ask a question. Comments are reviewed before publication.